Living on the Ej is not only the title of the up-and-coming instalment of the annual Pride of The Shires tournament in the suitably green and leafy county of Oxford, it’s also how I’m feeling about getting the rats ready, possibly even finised.
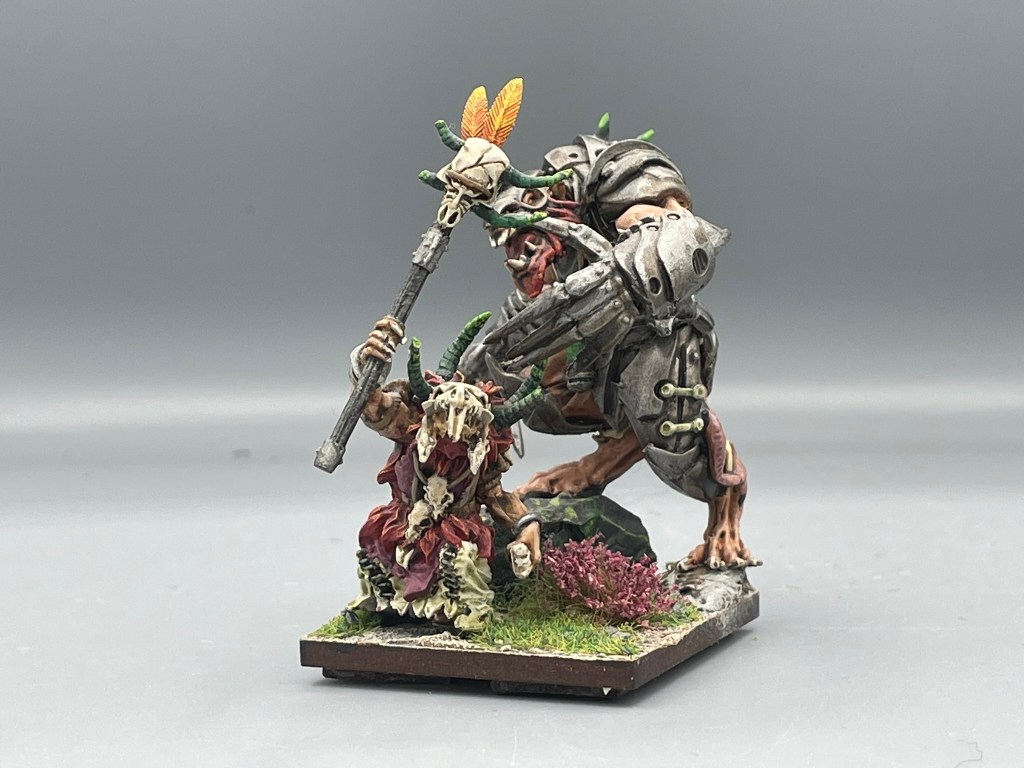
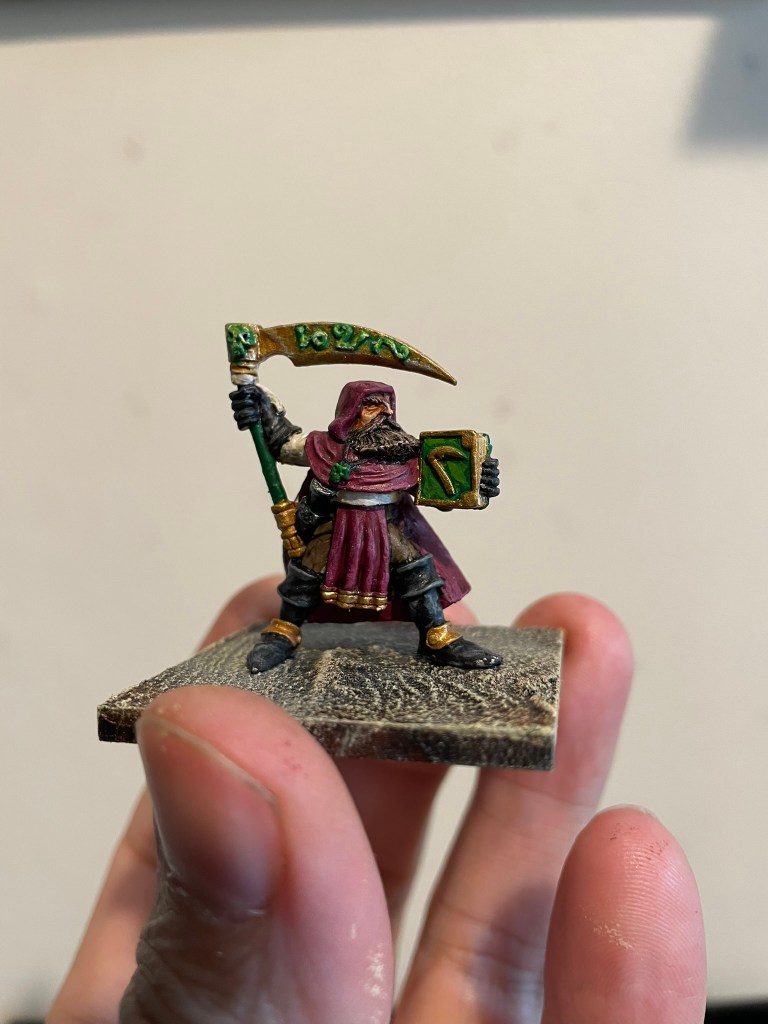
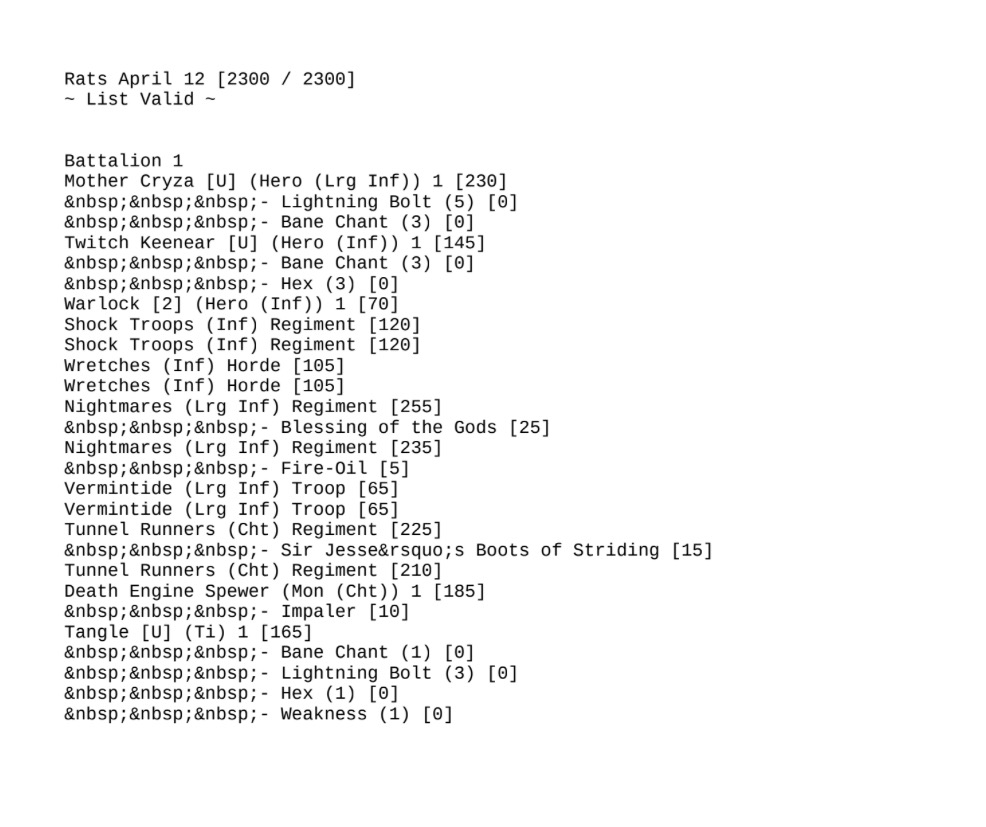
My take on The Mother… I’m not a fan of the Firefight stuff
Progress has been made, a list has been written (and tested – kind of, well most of it has) and more and more units are getting their bases upgraded. I’m amazed at how much life the new aesthetic is breathing into the old collection. I’ve always enjoyed getting my rats on the table, but there’s nothing like the feeling of putting a brand-new army on the table for the first time, and I’m getting that vibe at the moment.
Cryza is back, Scud will be making an appearance and there are a couple of new units to add, a warrior regiment and a vermintide troop. I’m currently working on the bases for the rest of the infantry. At the moment it all seems pretty much in control, so because we can’t have that sort of behaviour I’ve decided to paint up a band new scurrier regiment. Obviously, this is a necessary use of time as I already have a regiment painted, and a troop. Long story short, whilst messing around with warrior paint schemes I came up with a bit of a ninja look which is frankly cool, so I figured doing a few more would be the best way to put unnecessary pressure on myself.
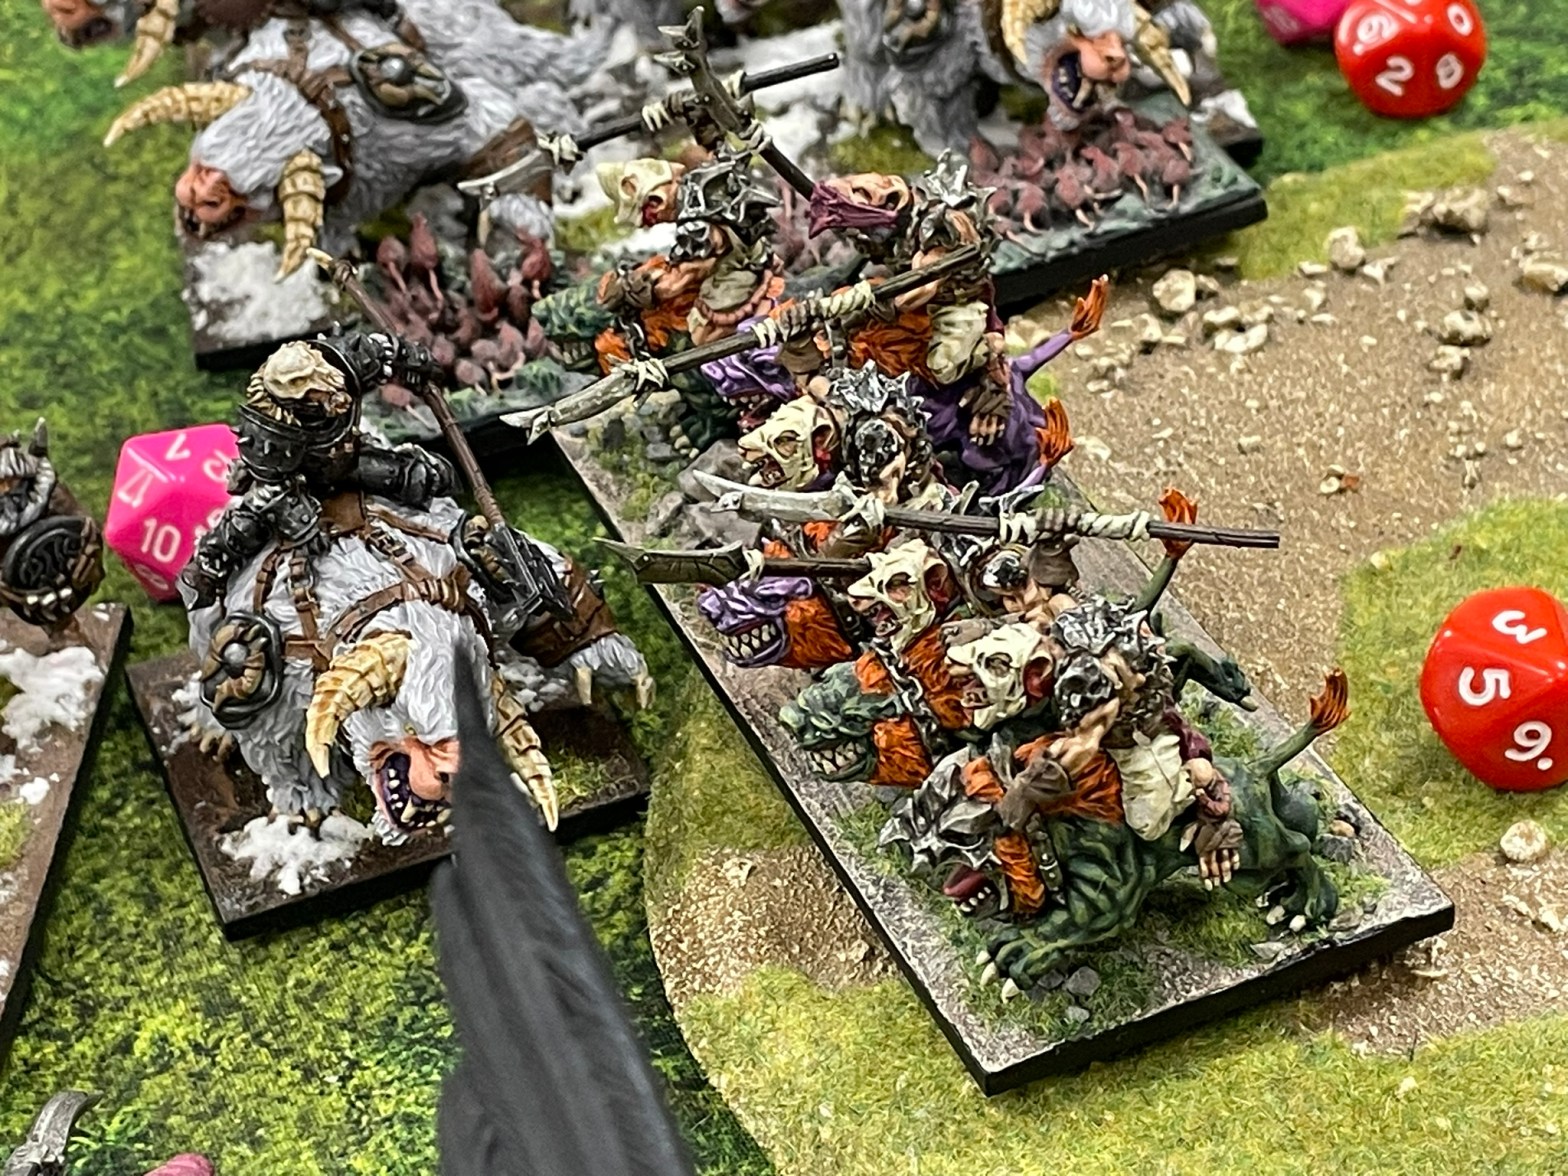
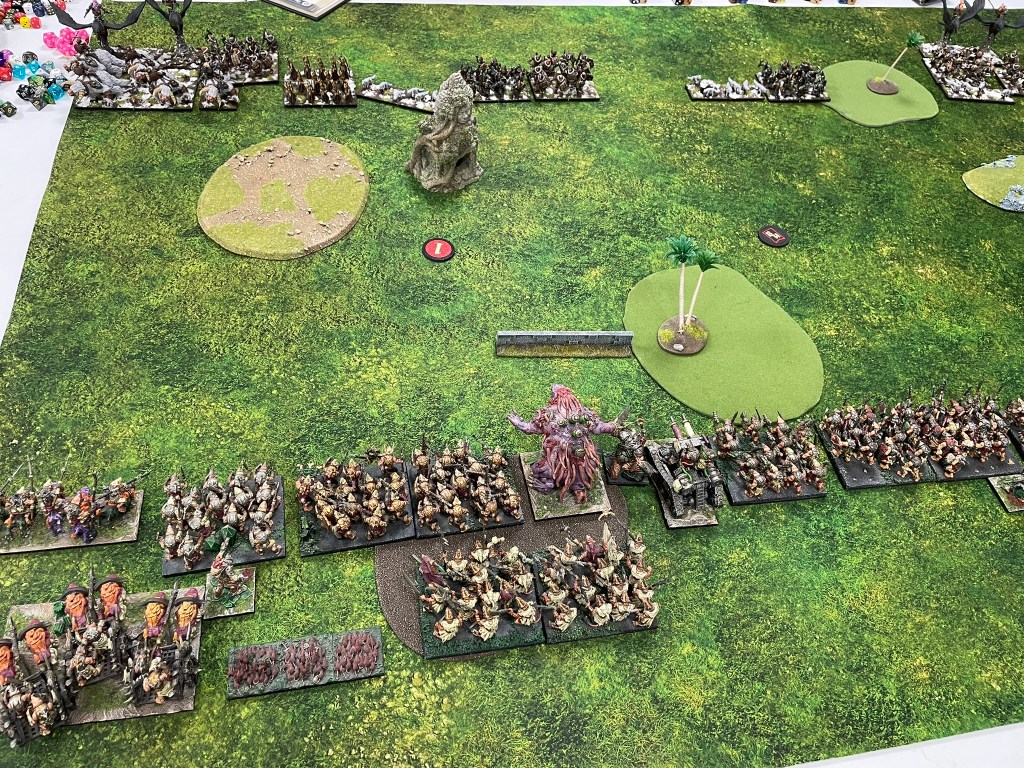
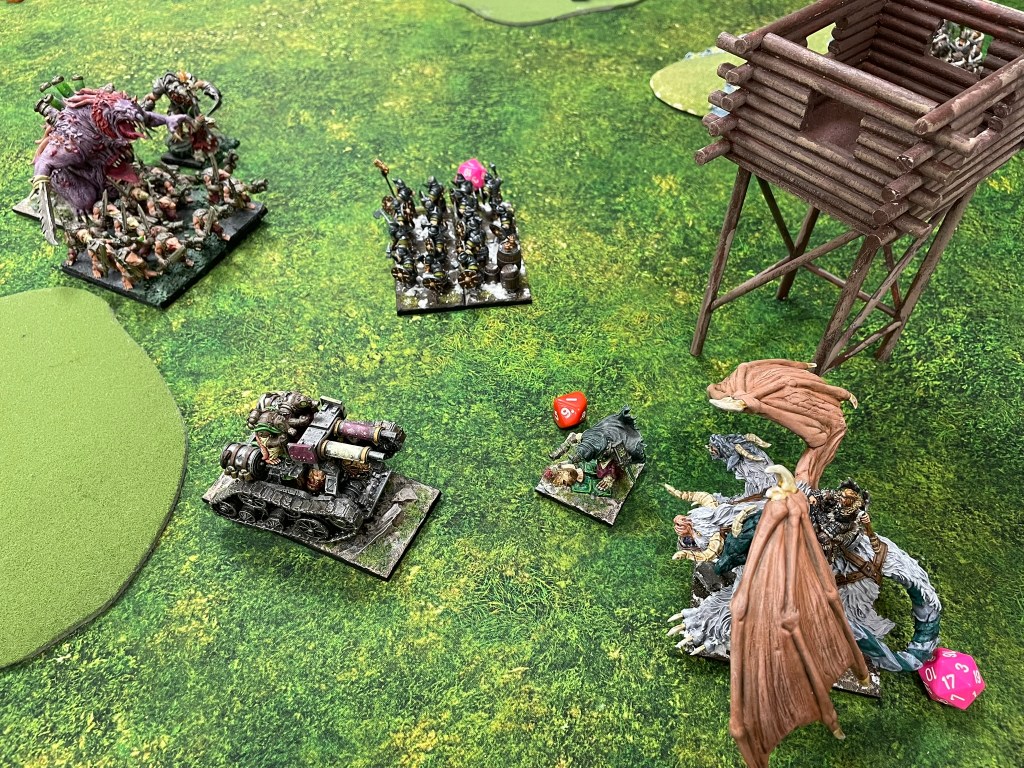
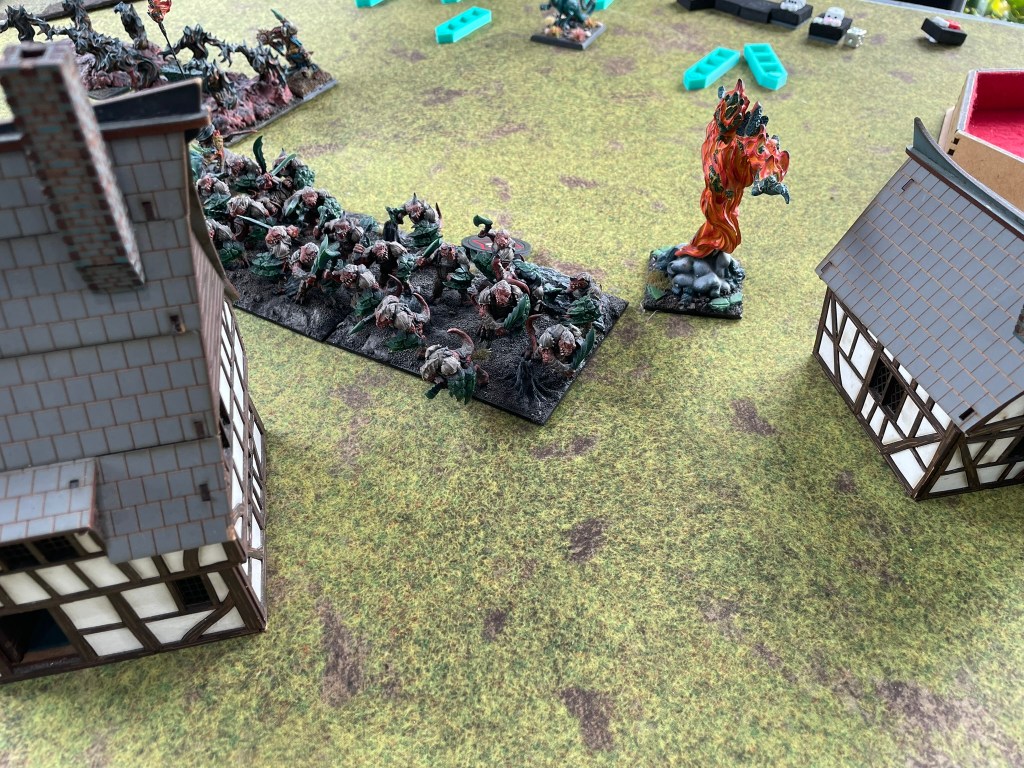
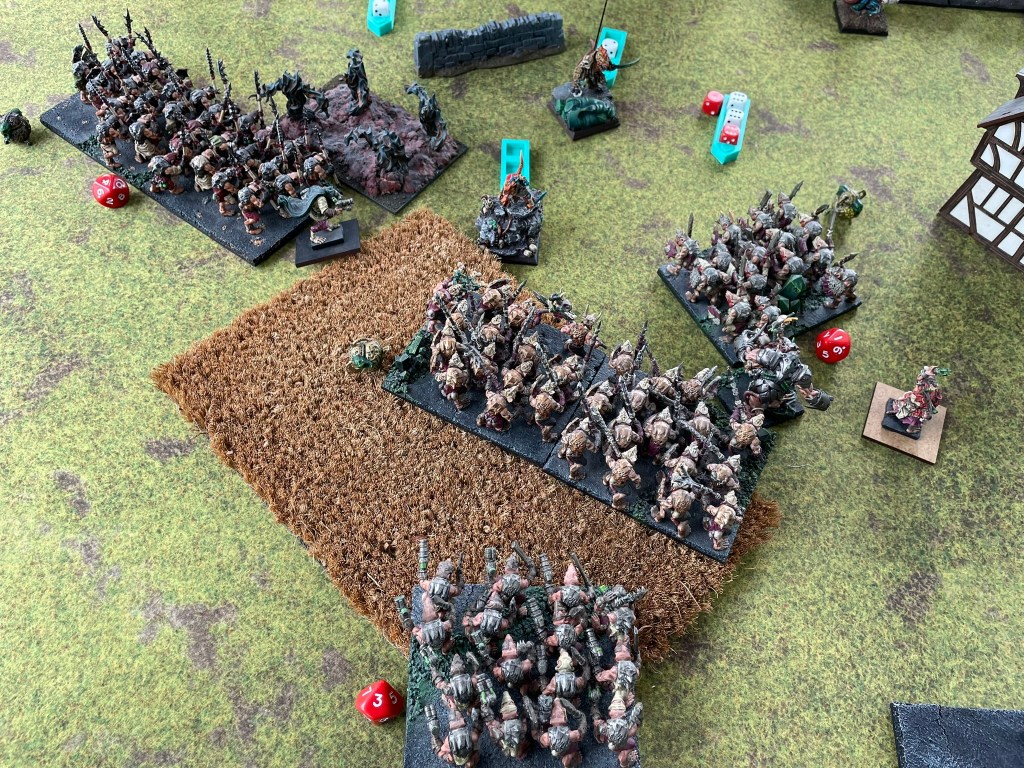
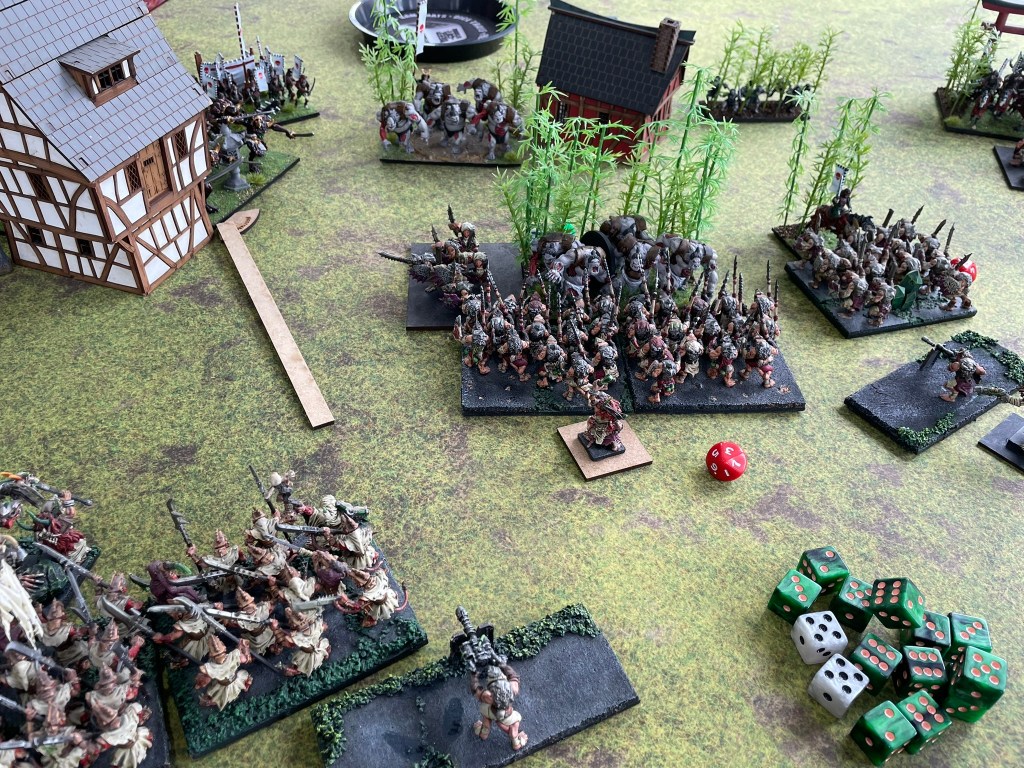
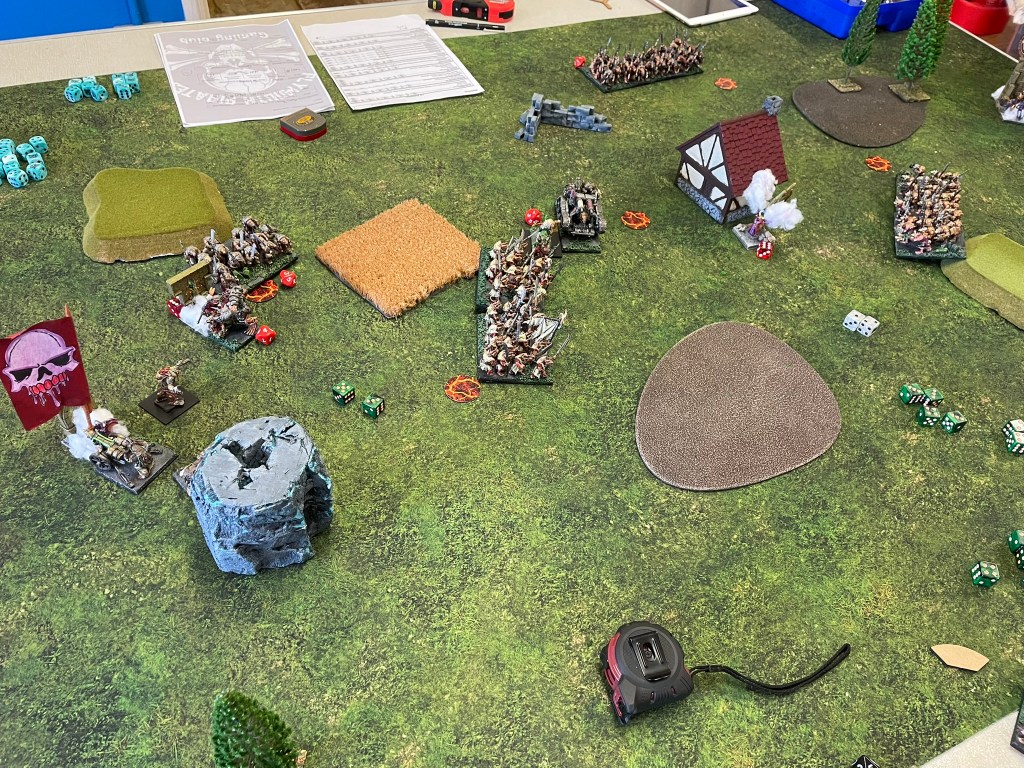
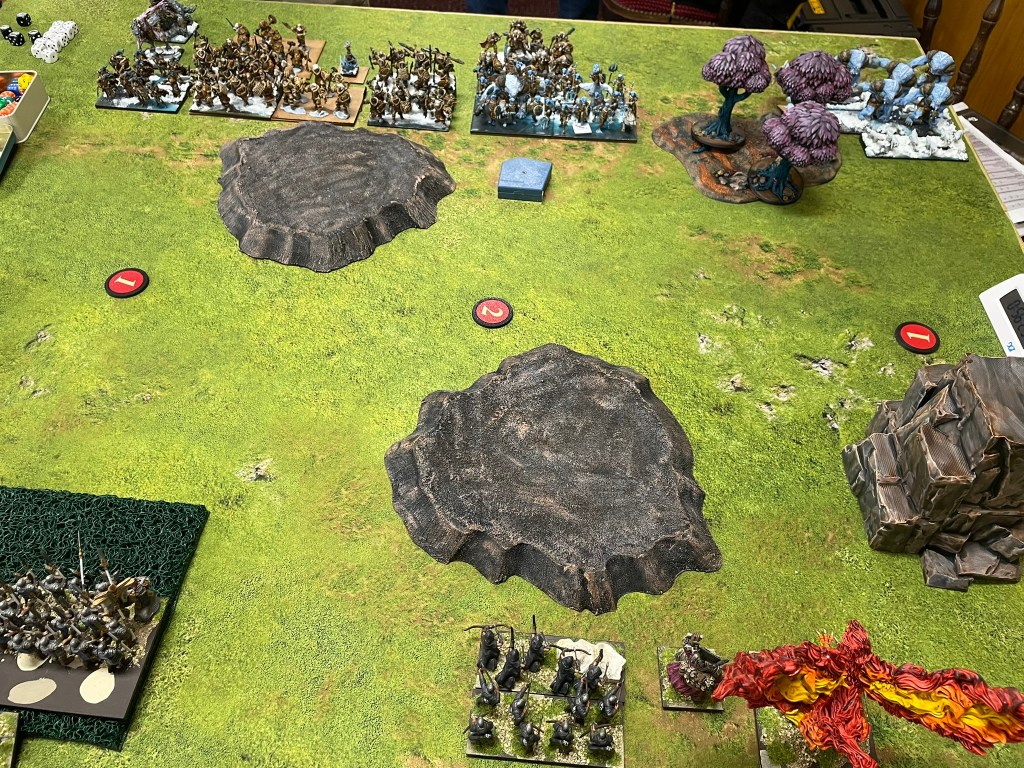
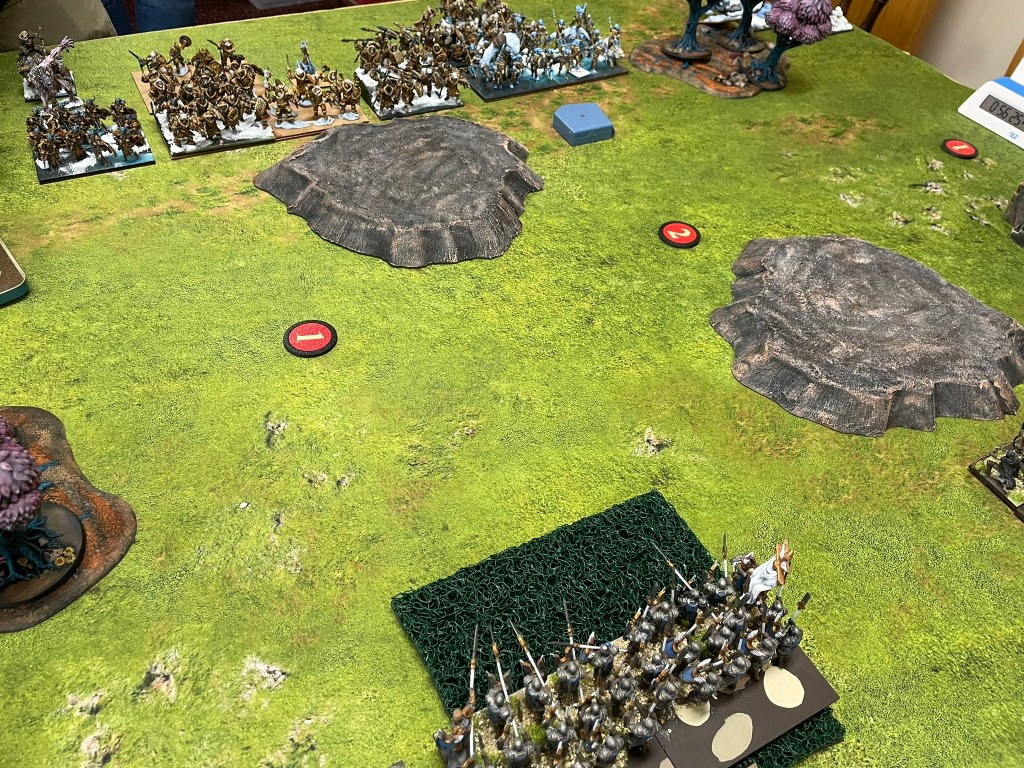
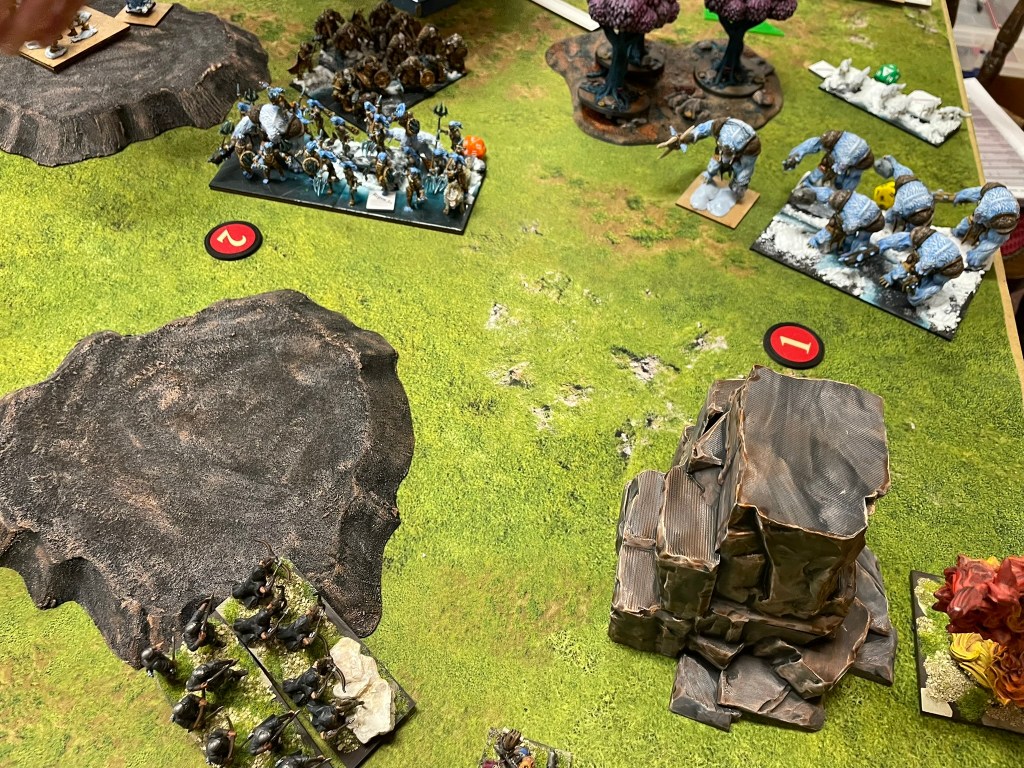
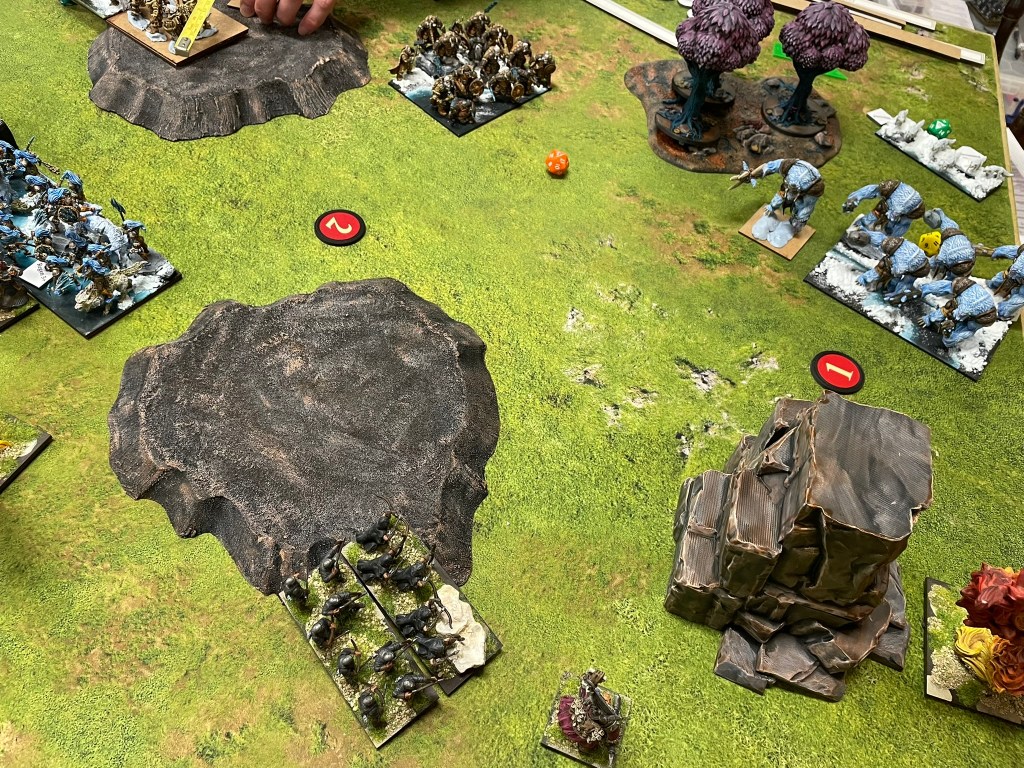
Last Sunday I took the rats out against the Northern Alliance and was really happy with their performance. We played Wrack and Ruin, arguably one of the more predictable scenarios to play (a 4:3 win to someone), and the rats managed to pull off the 4!
Over the past few games, where I’ve been messing around with weapons teams and clawshots, my lists have felt pretty underwhelming, without sufficient punch. With the new list I think I’m starting to hit the right balance between shooty stuff, hitty stuff and trash. I’ve also been avoiding taking Cryza because a new edition deserves at least a momentary departure from leaning too heavily into the same old stuff. My one concession is that I’ve not taken any wretch hordes, which have apparently become the scourge of the States, so at least I’m not jumping too heavily onto that particular bandwagon. I actually think warrior regiments are great chaff in an army that still requires big based units like shock troop hordes and tunnel runners to do the bulk of the fighting.
Of course, I’m sure you’re all wanting to hear how well the scurriers did? Well, they scouted forward before the game started, wavered some snow foxes in the first turn, put some wounds onto a tribal warrior regiment next, which enabled the mutant rat fiend to one shot them the next turn. They then finished the previously wavered foxes off in combat before lending their shooting to the death spewer tank to waver and then kill a frostclaw troop, all whilst holding onto the centre scoring point. Not bad for a couple of hours work.
All in all, things are looking pretty positive, and I’m looking forward to the next run out (this time of the full list) this coming Sunday.
To keep up with what’s going on you can follow @wizards_bookshelf on Instagram and Threads or drop you’re email below to subscribe.
I’d love to be one of those organised hobbyists (I’m certain they exist, if only to be the exceptions that prove the rule), the ones that can stick to a plan and see things through to the end regardless of everything going on around them. Since the start of the year, I don’t think I’ve played a game of Kings of War with a completed army (excepting the third edition tournament on the third of Jan).
Part of me thinks it would be nice to have stuck to one faction and now have a nice shiny army finished to march off to tournaments with and not leave me under any painting pressure ahead of Clash of Kings. I sometimes wonder if that self-applied pressure was to disappear if I’d enjoy it all quite as much? I don’t think I’d get any more painting done, which would probably see me move into negative painting territory, whatever that looks like.
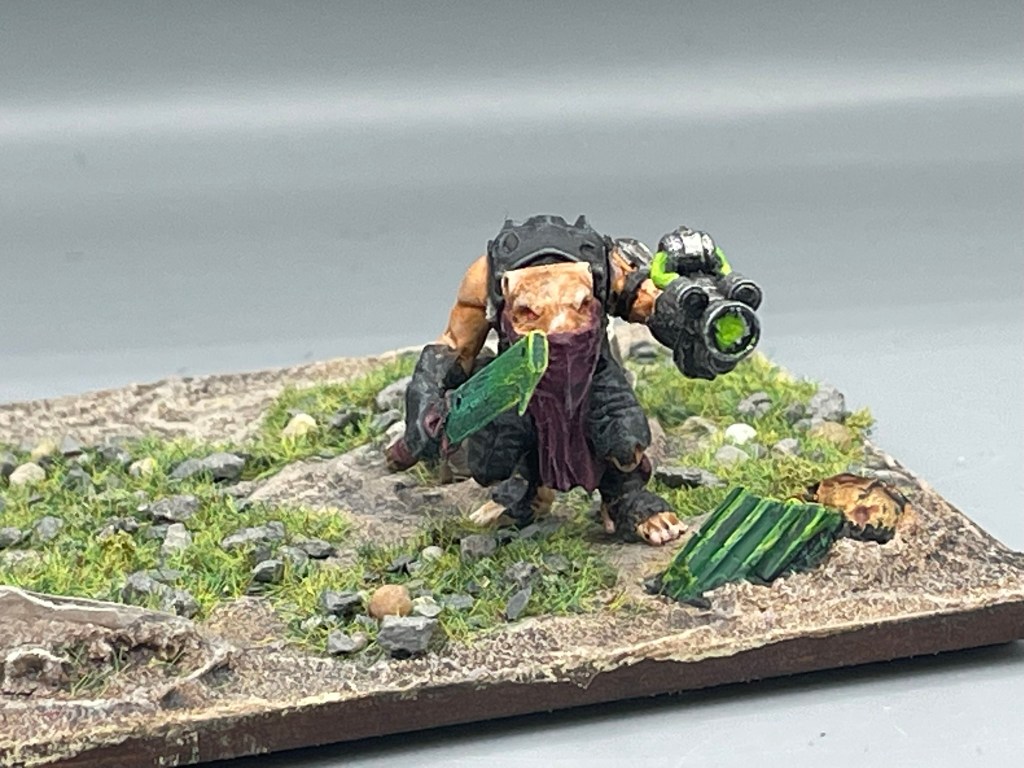
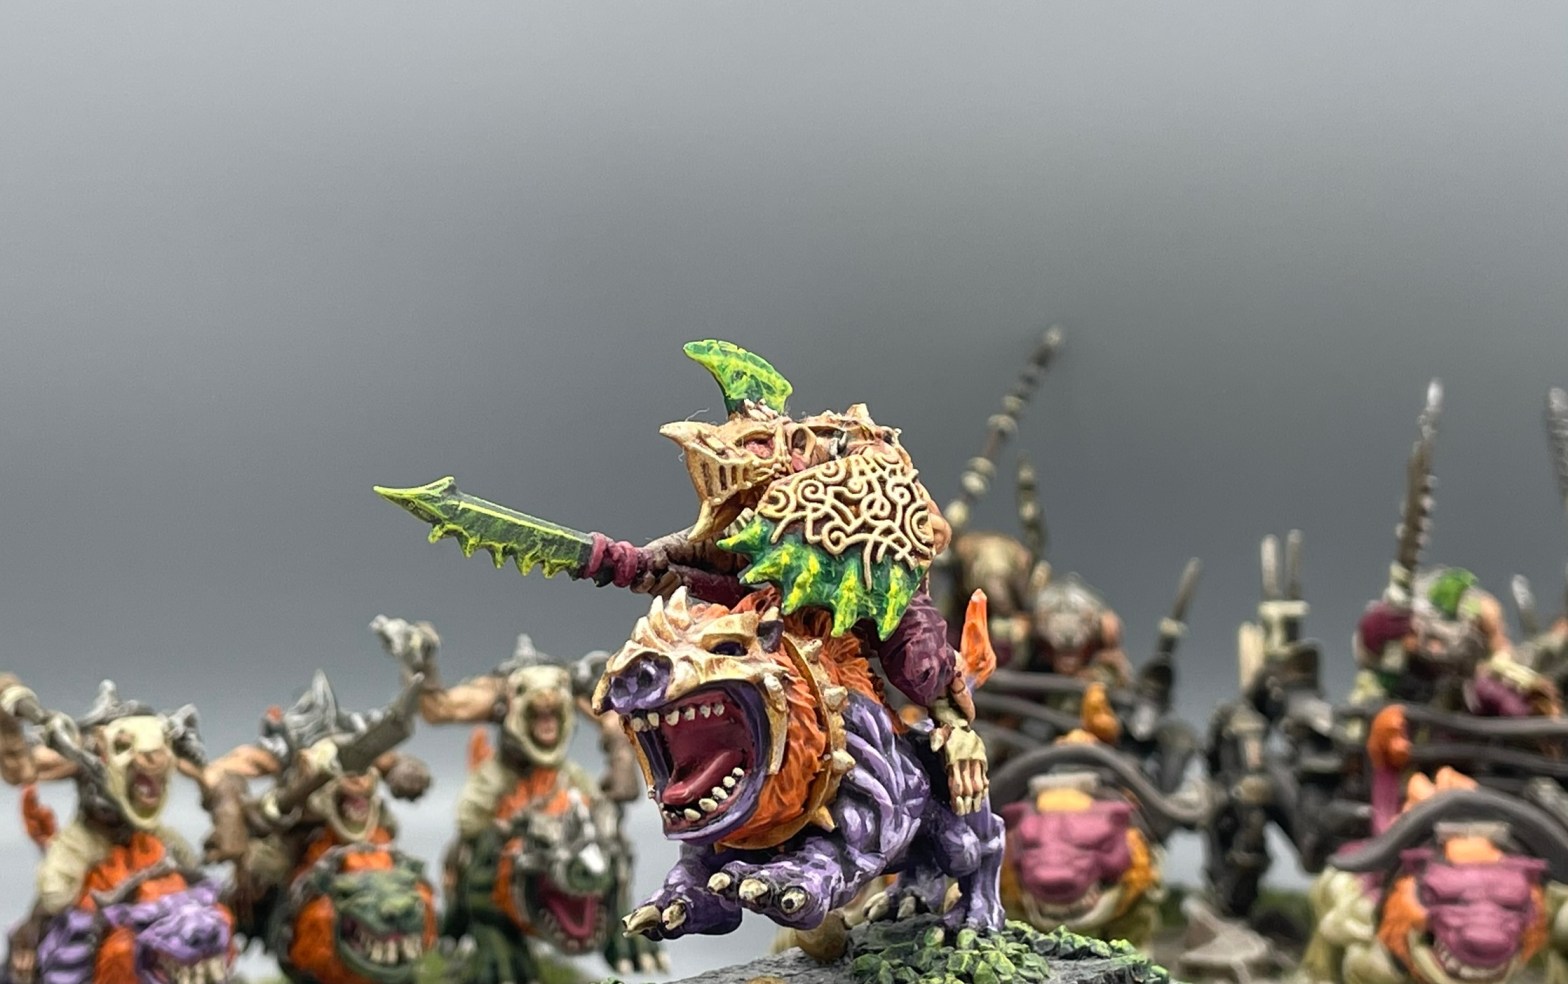
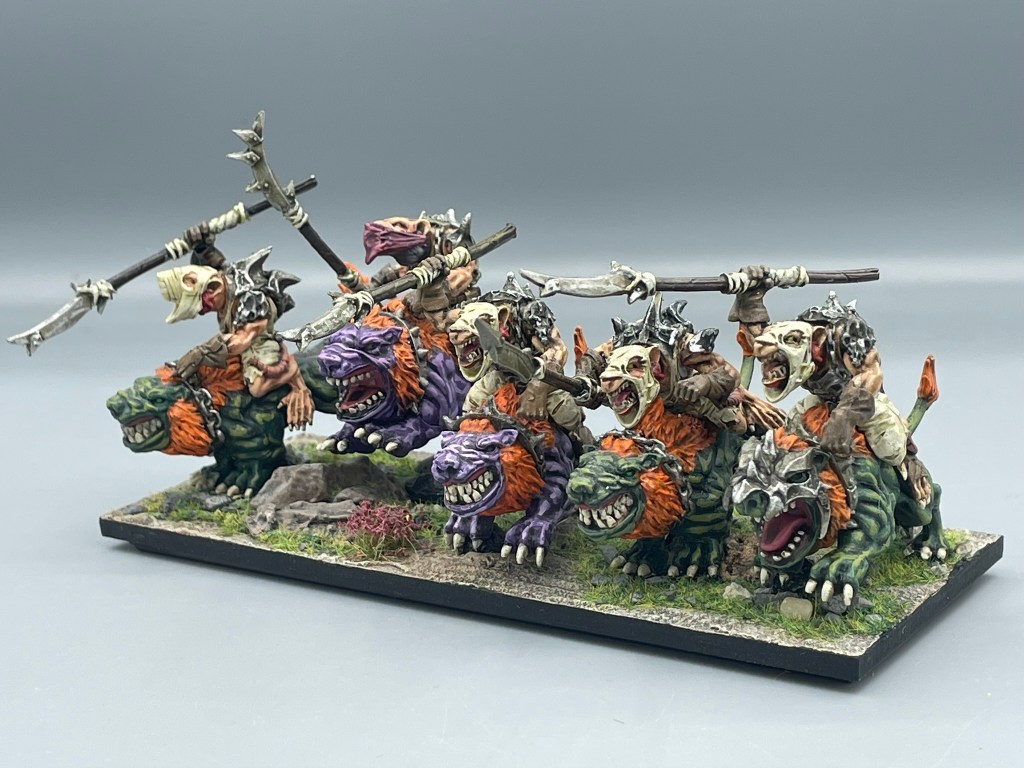
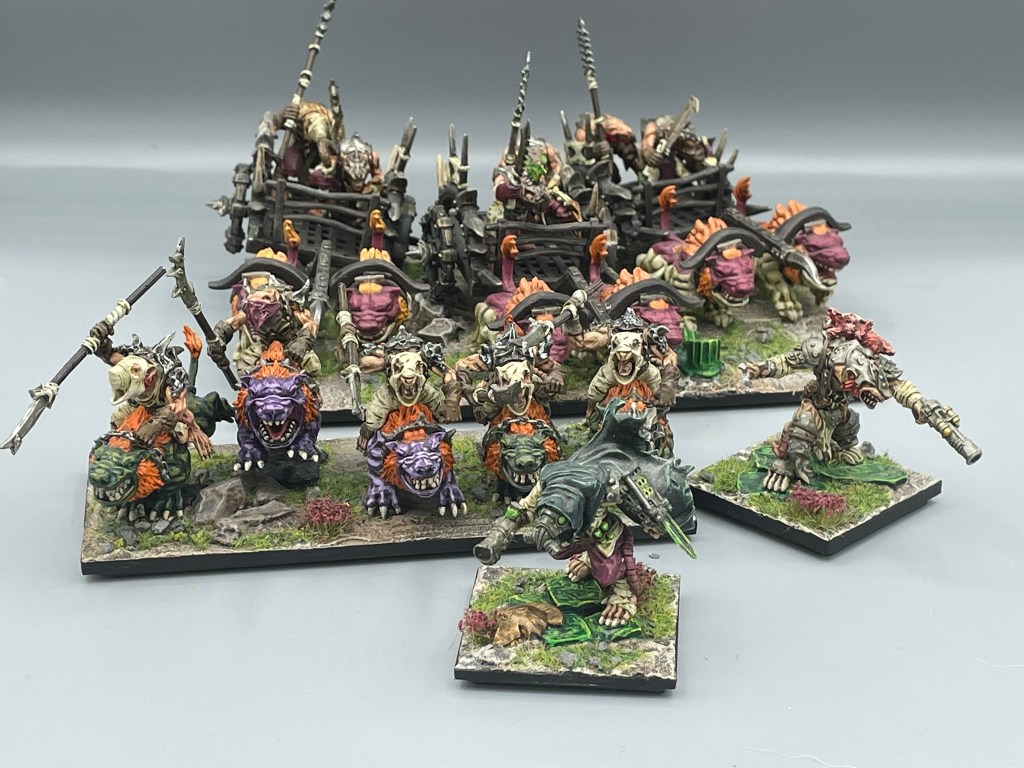
Hackpaws are looking fine…
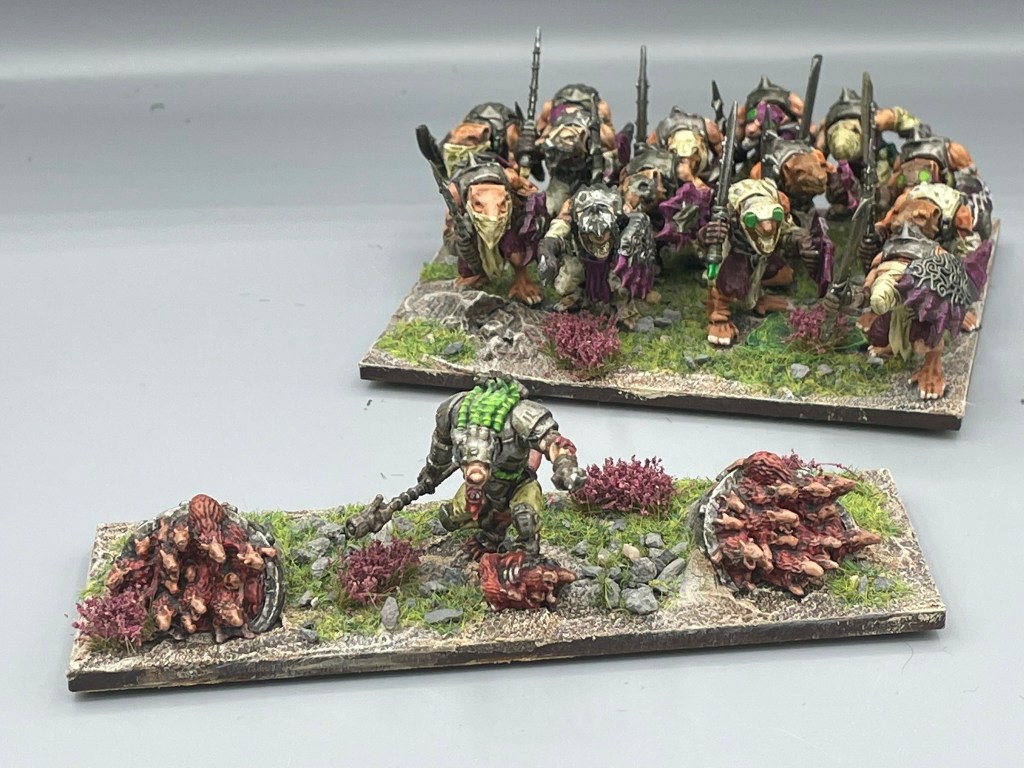
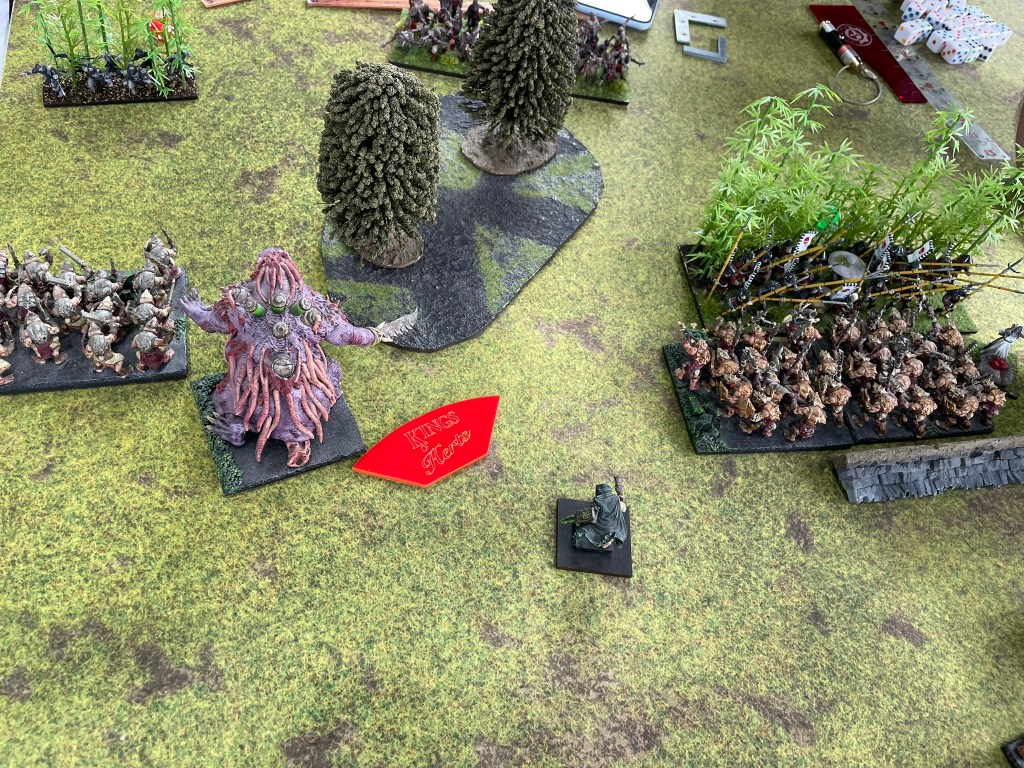
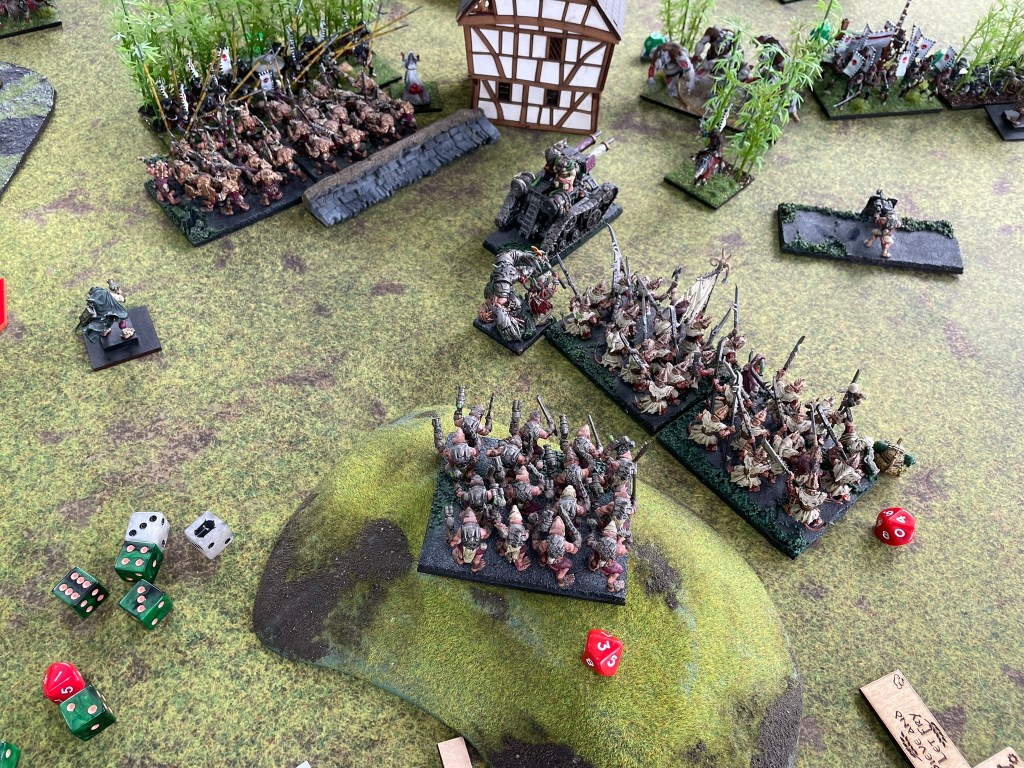
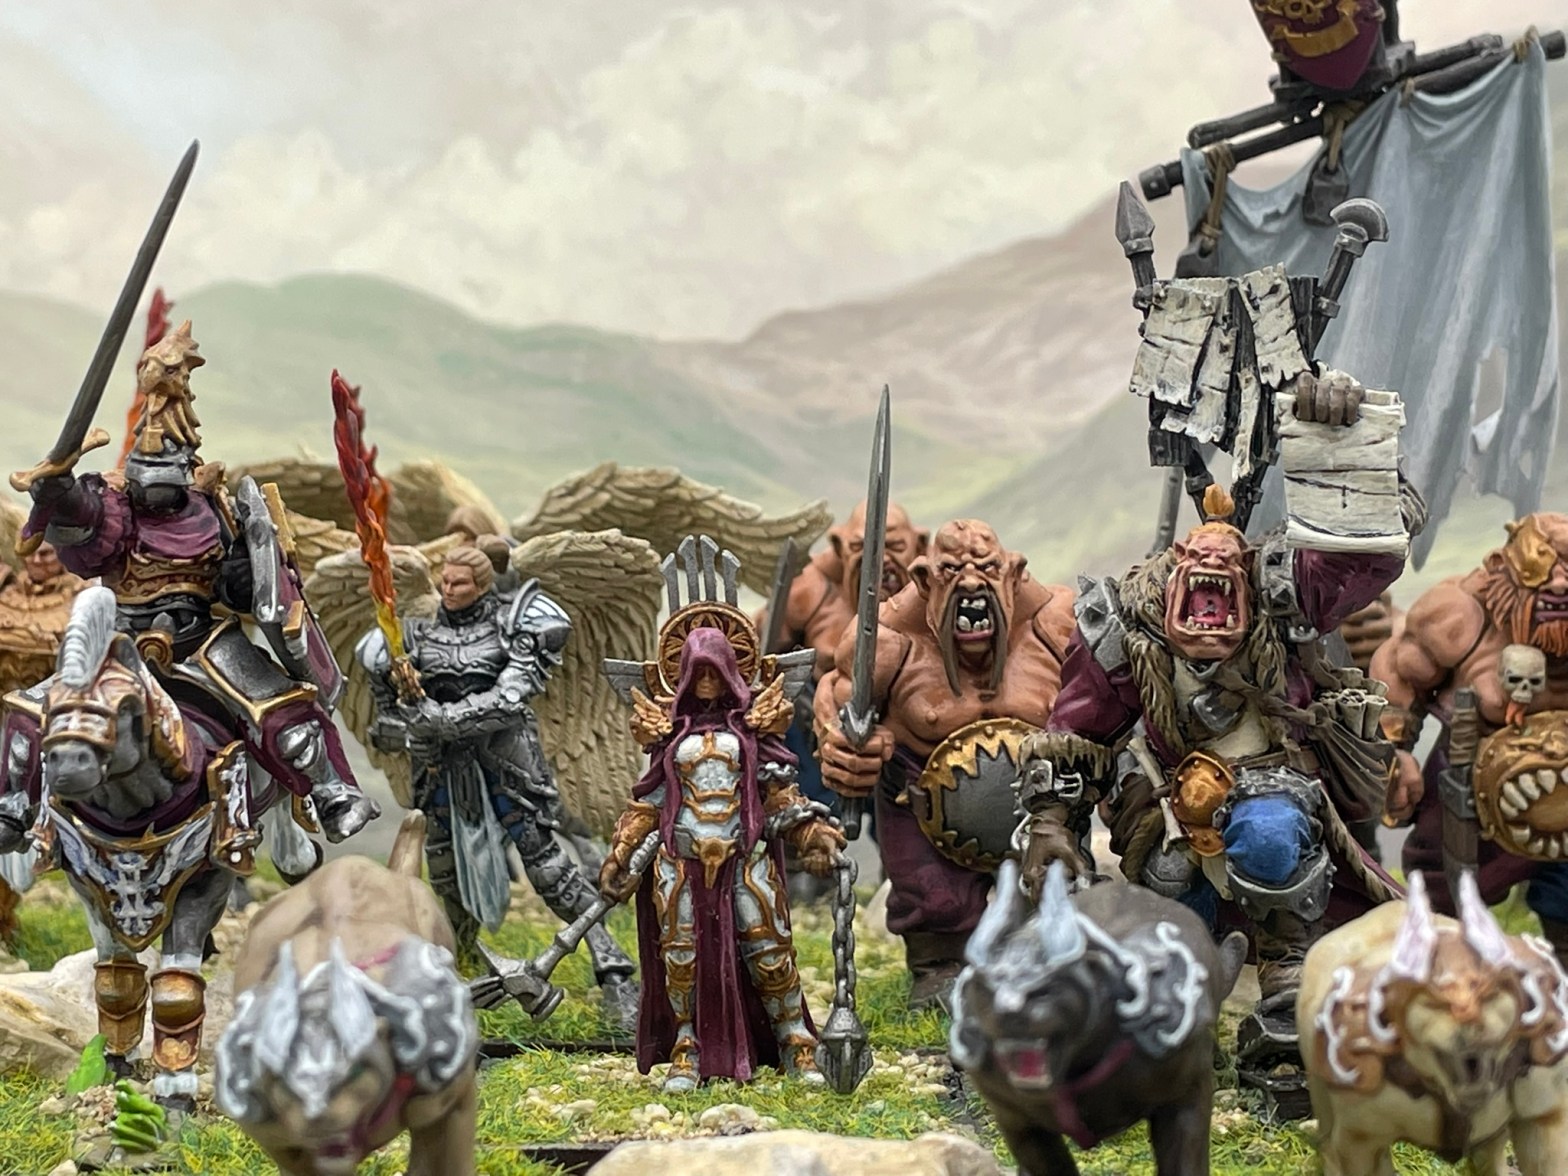
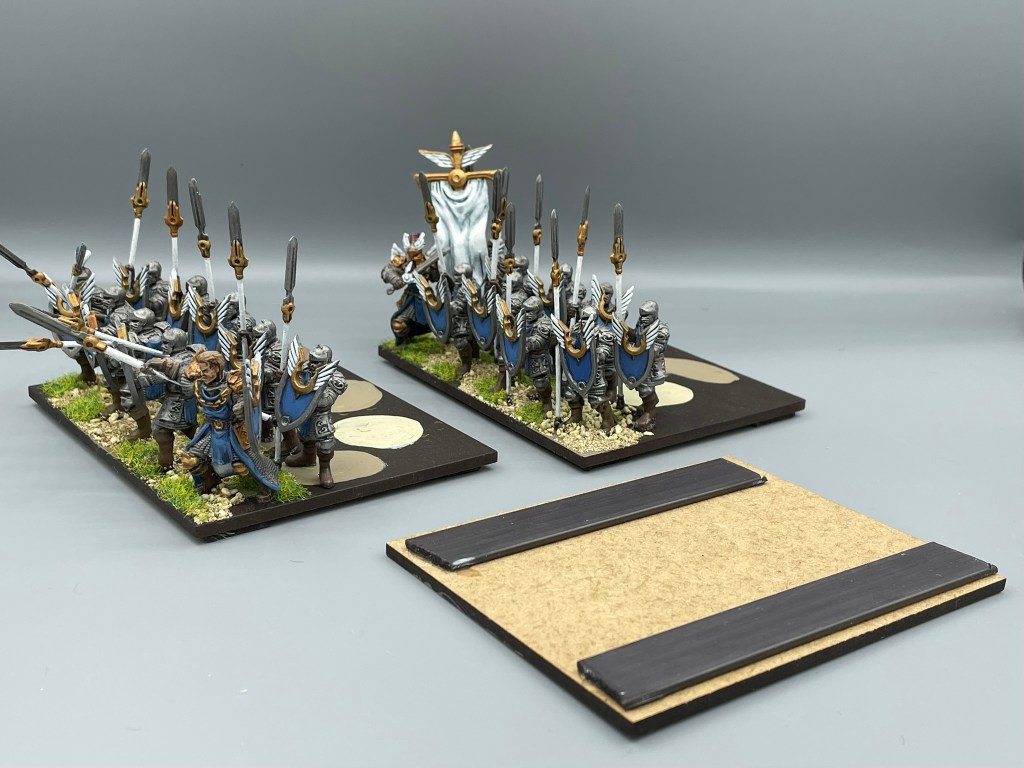
Having dropped focus on the Kingdoms of Men for a bit, I’ve been doing a bit of rebasing on my rats, ahead of The Pride of The Shires in Banbury next month. Rats are going for two reasons, the first is that it’s 2,400 point (up from the traditional 2,300) and they have the extra units to play around with, secondly, I think I’m getting close enough to a reasonably fun build and want to try it out. I’m really chuffed with the way this is going, swapping out the darker bases for light ones seems to make the units pop a bit more. The new basing is also far easier to put together which will make me more enthusiastic about expanding the force! I’m particularly proud of the Hackpaws, they’re a great looking set of models and should be interesting on the table.
This month we’ve got some info about the new Fracture book. Obviously, the nature release is the big thing, but there’s sufficient Basilean news to make me excited about trying to get the forces of the Hegemony to the table as quickly as possible. I’m intrigued by an order that will supposedly help Basilea grab objectives, I genuinely hope that this is suitably reliable (activates on a 4+) to be a characterful component of the army. The far bigger question is which of the new warlord models I’m going to be taking out onto the table first. I really like the new Gneaus model and would love to build an army around him, so I can’t wait to see what he brings to the table.
How will the happy lion fit into this mob?
The final thing to mention is the survey, and what a survey it is! I’m really glad Mantic has chosen to ask the community to have their say. I quite like the design of it as it focuses on faction depth, inviting us to contribute ideas for new commands and new units, and finally gives a nice big free text section to give warts and all feedback. As someone who is really invested in my armies it was great to focus on them through the first set of questions. Mantic have done a great job with their Ratkin range (specifically the fantasy units, I’m not a fan of the Firefight models, but I can largely avoid using them), but the feel of the army has taken a massive step backwards moving into fourth edition so I’ve suggested a few commands that might help, and I made some suggestions on how Scurriers could find their place (something I spend far too much thinking about).
Whilst I’m enjoying the games I play, I’m not convinced fourth edition has anywhere near the depth of third edition because of changes to movement, line of sight and shooting. I think it’s one of those counter intuitive things where we might be able to do more, or see more, but the easing of restrictions reduces the challenges in the game. It would be fantastic to see the results of the survey published in some form as I’d love to have an indication of the direction of travel as Mantic see it. Has the feedback said that the vast majority of people love the game as is and they just need to tinker around with commands and points values, or is there some other areas they’ll be focusing on?
That’s it for now, as it’s back to basing.
To keep up with what’s going on you can follow @wizards_bookshelf on Instagram and Threads or drop you’re email below to subscribe.
Occasionally Serendipity visits my hobby den, and even more occasionally I acknowledge she may have a great idea. Over the past couple of months, I’ve been trying to get my head around what I should take to Clash of Kings. I was hoping to take Basileans, but the timing of the new book landing is probably going to leave me with too little time to settle on what I want to do and get it all painted.
So, after a bit of back and forth between rats and Halflings, I’ve decided the time has arrived to give Kings of Men a whirl. I’m not aiming for any trophies, but I do want an army I’m going to feel comfortable playing for six games across two days. At the moment I’m not convinced I’m comfortable enough with the new edition to get an army on the table I’m both excited about and won’t get me tabled in most games, from my existing factions.
Clearly there is a way to go, but they’re ready for their first game.
Kingdoms of Men, or at least some sort of human faction that isn’t Basilea, has really appealed throughout third edition. The problem was the various different lists just didn’t seem to offer the right combinations of units to support the sort of army I really want to play. However, the new list hits all the right notes, what’s more the games I’ve played against Kingdoms of Men have convinced me that they have a really solid selection of units.
An old fav, looking good on a big base.
Excitingly this army is going to give me the opportunity to resurrect the first army I ever played, when I started rank and flank gaming, namely The Empire, all the way back in the fourth edition of Warhammer Fantasy Battle (is that a sign of some sort?). Sadly, I don’t have the army to simply rebase. Happily, I have been picking up a few of my favourite models from back in the day, and the return of The Old World means it’s much easier to come by the rank-and-file troops. The cherry on top of all this is that since those days there have been a range of other cool Empire models which I can also add into the army, creating an aesthetic best of all world’s force.
Over the next couple of months I’m going to be sharing progress as I get ready for Clash and spend absolutely no time at all wondering if I shouldn’t be working on a completely different faction.
To keep up with what’s going on you can follow @wizards_bookshelf on Instagram and Threads or drop you’re email below to subscribe.
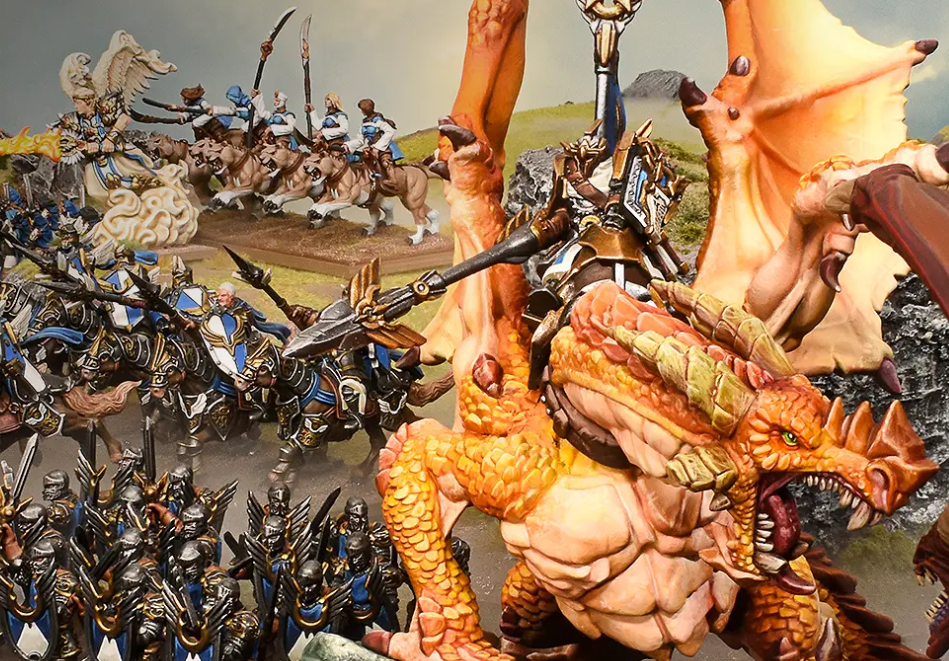
With Fracture now confirmed for launch in the coming months and the Basileans confirmed alongside Ogres, the Forces of the Abyss and Nature, new models were expected. The cover photograph for this blog came from Mantic’s website and is frankly brilliant, showing the Basileans in a vibrant light with a real sense of drama.
The new models are now live and up for pre order, so let’s have a look. Basilea has a pretty full range of models currently and Nature is the big launch for the new book, so I wasn’t expecting a massive overhaul. That being said, a handful of the kits currently available are pretty old and not great to work with, so I was hoping at least one of the regimental kits would be refreshed.
Image from the Mantic website.
The biggest thing I wanted from new models were Elohi, the angels of the army. These are a solid in most Basilean forces, the current kit is not fab, and the extent to which Mantic have improved their sculpts over the past few years means I think they could do a great job of reimaging them. The other unit I’d like to have seen with a new kit for are the Foot Paladins. With the new direction fourth edition is taking by putting infantry at the heart of the army building process, and the great job Mantic did with their mounted cousins, I think this could have been a real treat. Whilst they aren’t at the top of my list I know there are people out there that would love to see a Halfling style sisterhood kit (which I wouldn’t object to) and then there is the new cannon in the list.
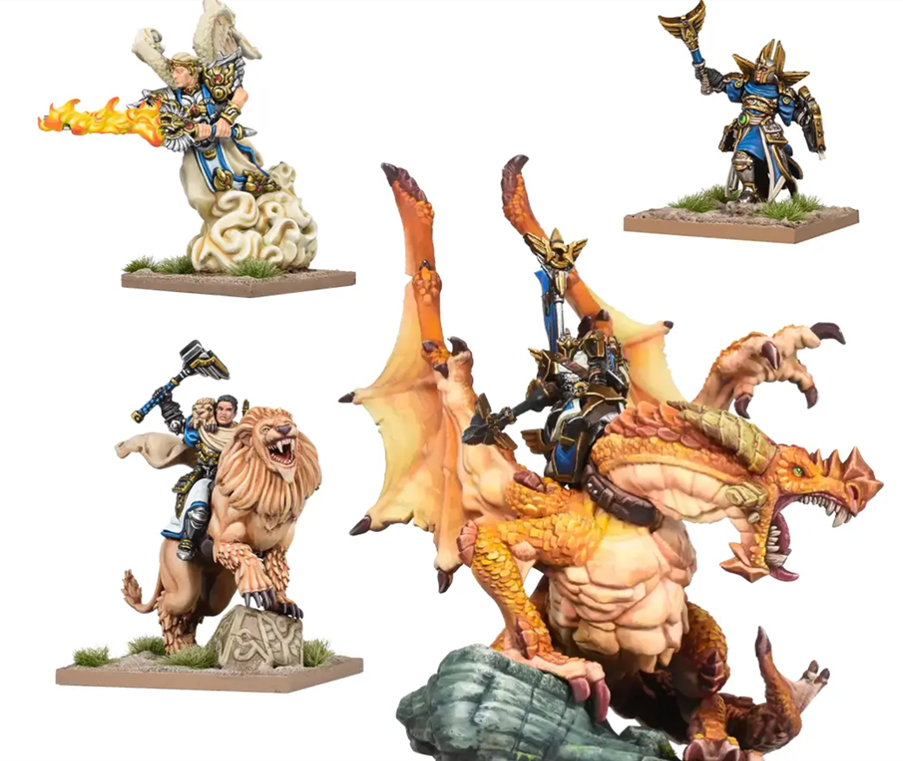
This release though focuses on characters, and in particular warlords. We see the return of Gnaeus Sallustis (dude on the lion), an absolute beast of a unit in third edition and regular in many tournament lists, the Ur-Elohi finally gets a model and then the High Paladins (on foot and on dragon) get a glow up.
I was surprised to see Gnaeus appear. He wasn’t in the starter army list, which wasn’t the greatest surprise given the Pannithor timeline has moved on about fifty years, and I’m sure someone mentioned somewhere he was dead (I might be very wrong on this, so apologies if so). That being said, it’s great to see him revived and a bit beefier, whatever he’s been up to its clearly working for him!
The Ur-Elohi is an interesting model, and I think it might not be everyone’s cup of tea due to the cloud around the feet. It’s an interesting design element which I don’t think is replicated anywhere else in the army. Personally, I find it a bit Monty Pythonesque, in a good way, and I’m a fan. It would be great if he had some like-clouded Elohi to hang out with, but I’m more than happy with leading my forces.
Clouds – the ultimate accessory
The high paladins are both improvements on their current models and I’m looking forward to adding them to my collection. The dragon in particular is both imposing and dynamic and the £42.50 price point makes it a justifiable addition to any number of fantasy human armies. This release does raise an interesting question about the new army list structures. All these models (except Gneaus who currently isn’t in the lists) are warlord choices, which makes it difficult to fit more than a couple into an army. I’d love to be able to put the dragon, Ur-Elohi and Gneaus (which I think is reasonable to expect he will be a warlord) on the table, currently though the starting point for doing this means ten sword regiments!
Regardless of the rule stuff, I think this is a great release, and I’m looking forward to them arriving in July.
To keep up with what’s going on you can follow @wizards_bookshelf on Instagram and Threads or drop you’re email below to subscribe.
The rats haven’t been to Cardiff since the 2021 Clash of Kings, my first Clash of Kings. It was a memorable weekend, not least because I got to play the fabulous Steve of Youtube Channel Death by Dragons for the first time. That game has since been immortalised on the aforementioned channel and is well worth a watch (it’s highly amusing and I sometimes give it a watch if I’m feeling a little down).
I decided to take my Ratkin, because with everything that’s going on it’s increasingly looking like I’m going to be using them for Clash of Kings this year. I’d been hoping to take Basileans, but with the timing of the new book, not to mention any new releases that might need painting, I don’t think I’ll have time to work out what I want in the army and get it all painted. That means it’s a toss up between rats and halflings, and we all know where my priorities are.
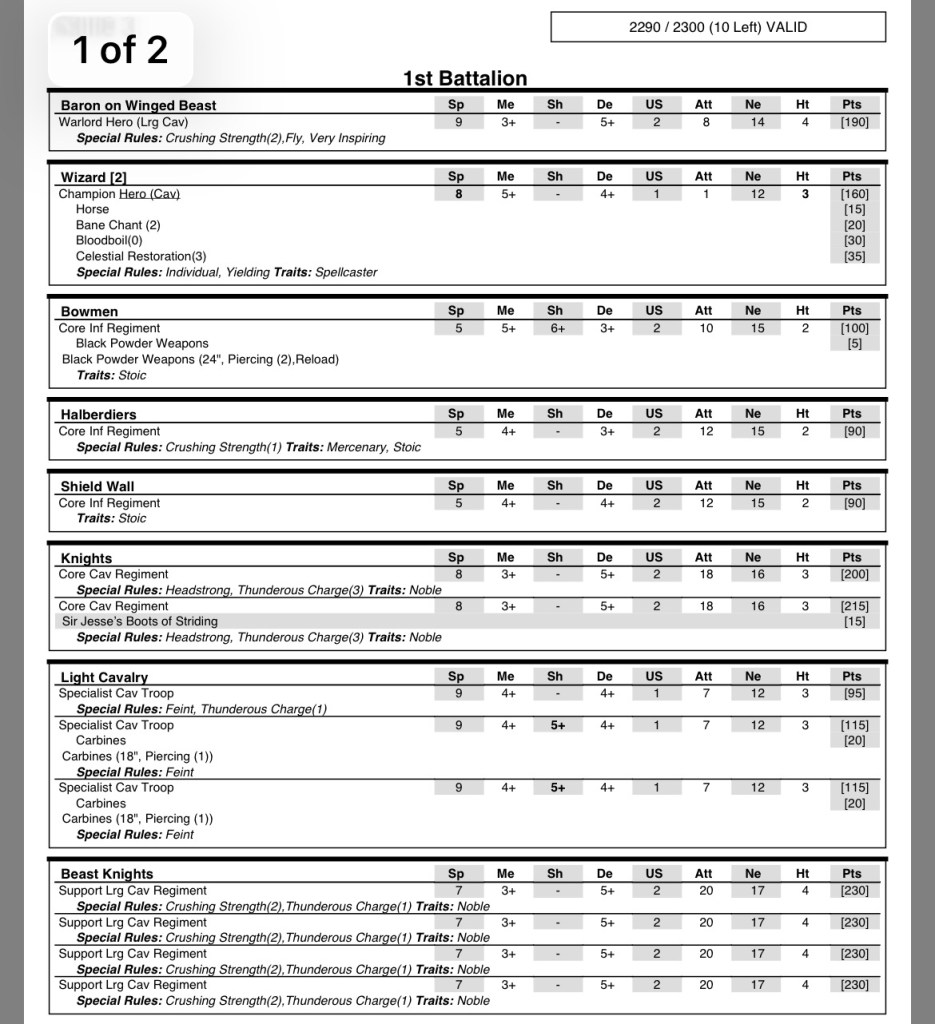
I’ve been finding it hard to adapt to the new edition in terms of army selection. I’m a heart over head gamer and fourth is a different edition that needs a different approach. I’ve been trying a close approximation of my old list, which relied on short range shooting, but the changes to shooting means it just doesn’t work. For this reason, I decided to give long-range shooting a try, bringing along some clawshots, adding in the ever-fabulous Blizzard Wizard and upping the scurriers from a troop to a regiment (because they have performed pretty well so far). The list looked like this:
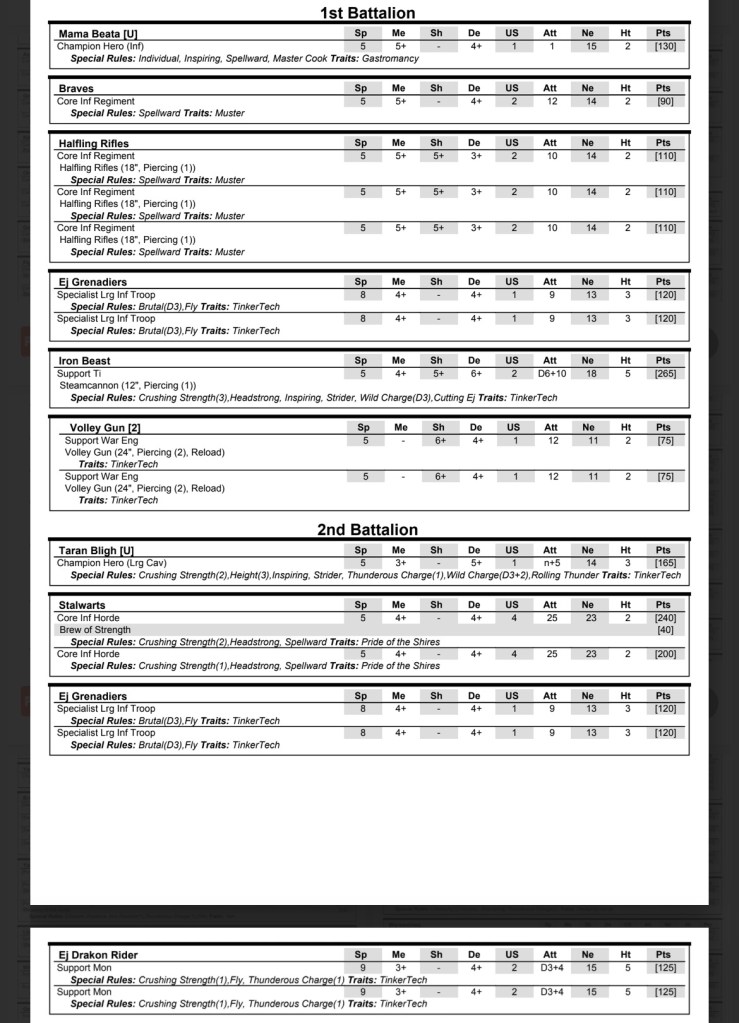
Screenshot
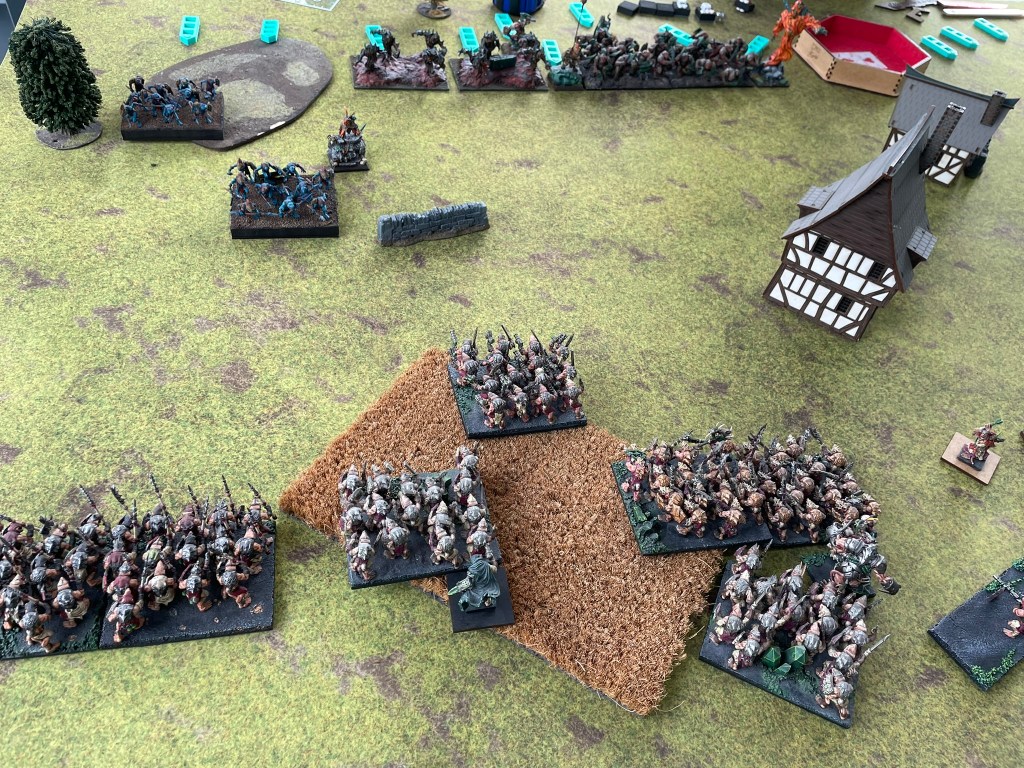
The first game was against Salamanders, and the scenario was Loot. I’ve played this scenario three times in the last few weeks, and I have yet to go first. So, for the third time in a few weeks, I watched my opponent scoot up the board and grab the objectives in the first turn, and that was pretty much the last I saw of them for the rest of the game! However, this did not stop me from having a really enjoyable first game.
As a list writer, I’m pretty bad, regularly creating passion projects that aren’t killy and get killed far too easily. So, I focused on seeing what the rats could do damage wise, and I was pretty damn impressed. In the first couple of turns my combined shooting managed to get a fire elemental regiment up to devastated (unfortunately rolling a double one and allowing it to block up a warrior regiment and Shock Troop horde that I thought was never going to make it into the game).
Screenshot
The Scurriers played an absolute blinder, contributing heavily to the downfall of both fire elemental regiments and using feint to clear the path for my Shock Troops to join the fighting. I was really glad to have them on the roster for this game.
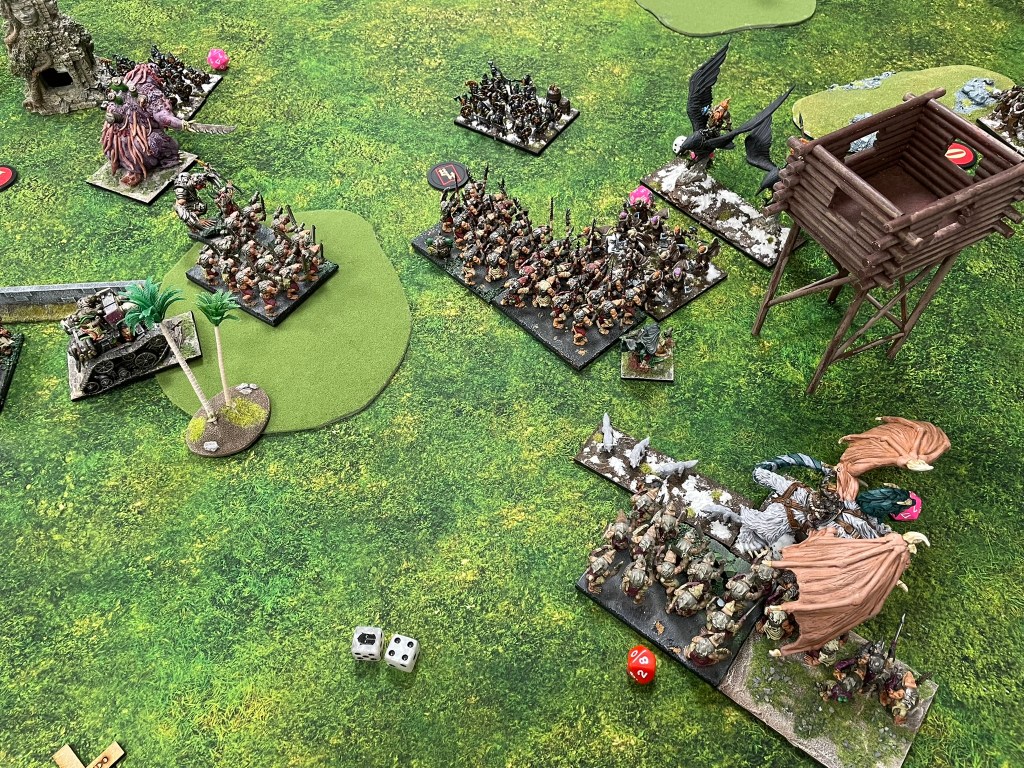
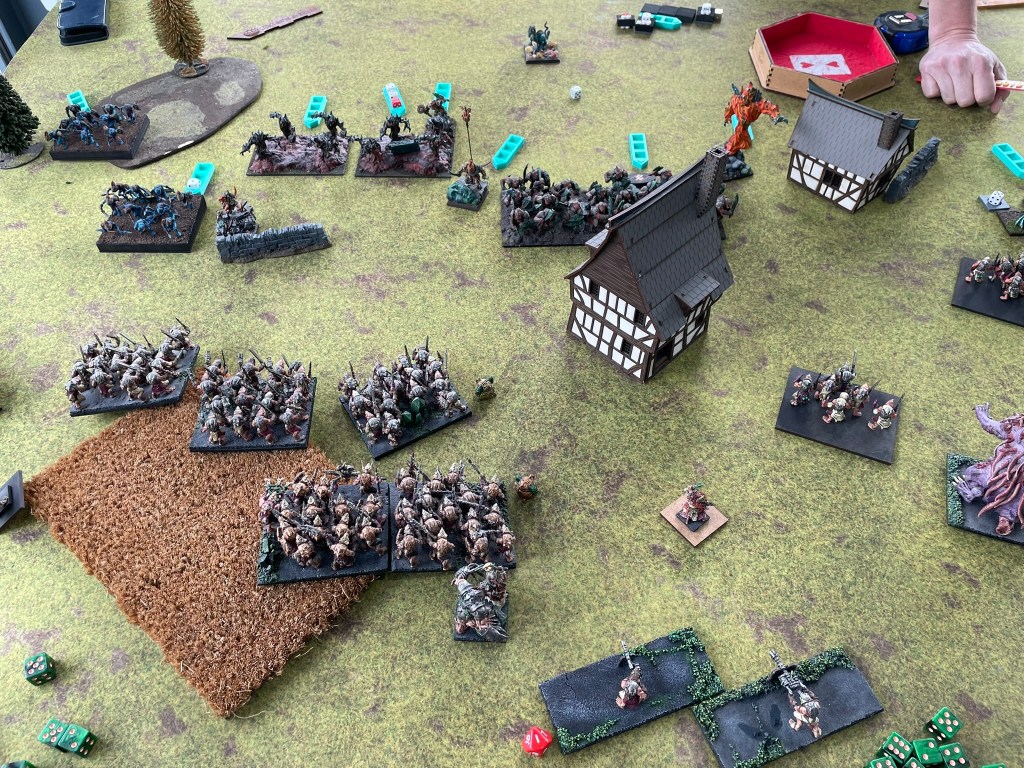
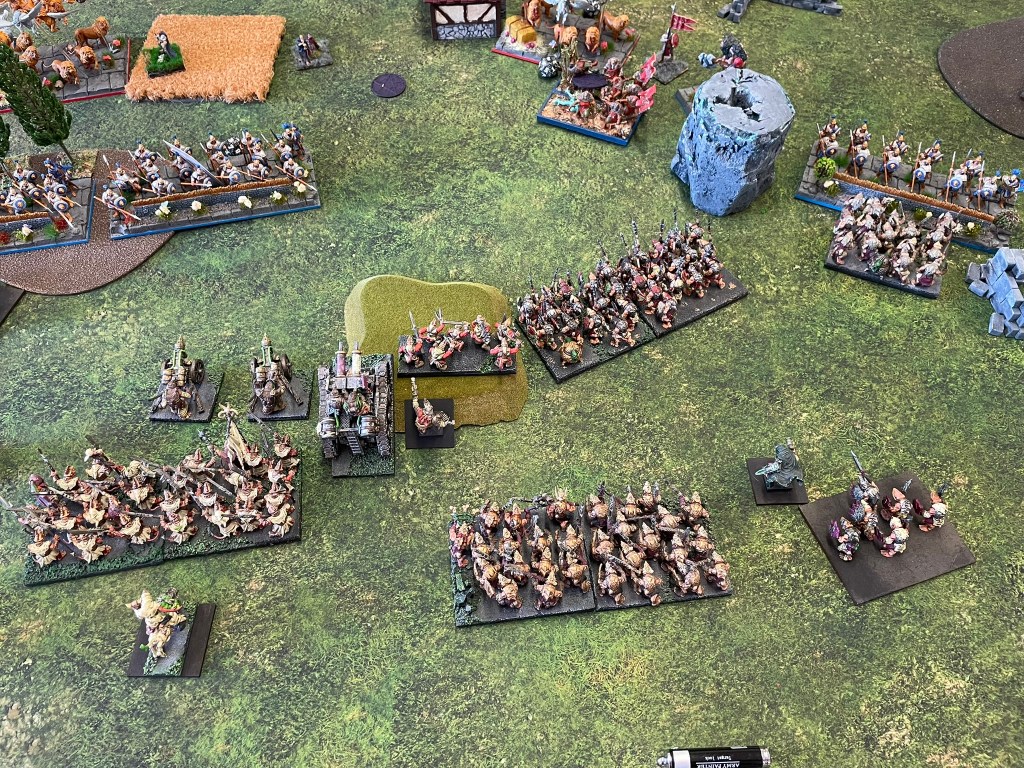
The fighting on both flanks was pretty ferocious, with the rats tearing through most of the units thrown at them on the left side. The middle of the board was difficult to navigate with two buildings creating a pinch point that the Salamanders made good use of to shelter from my shooting. On the right things didn’t go quite as well. Another devastated unit (this time the Rhinosaur Captain) prevented my Mutant Rat Fiend and Shock Troops from getting at the regiment of Tyrants. This felt a bit more impactful than the double one on the Fire Elements. However, despite the scenario outcome and the double ones I chalked this game up as a massive success. We both managed to make the same number of kills which gave me the confidence, that at the very least, I’d found an army that can take things down.
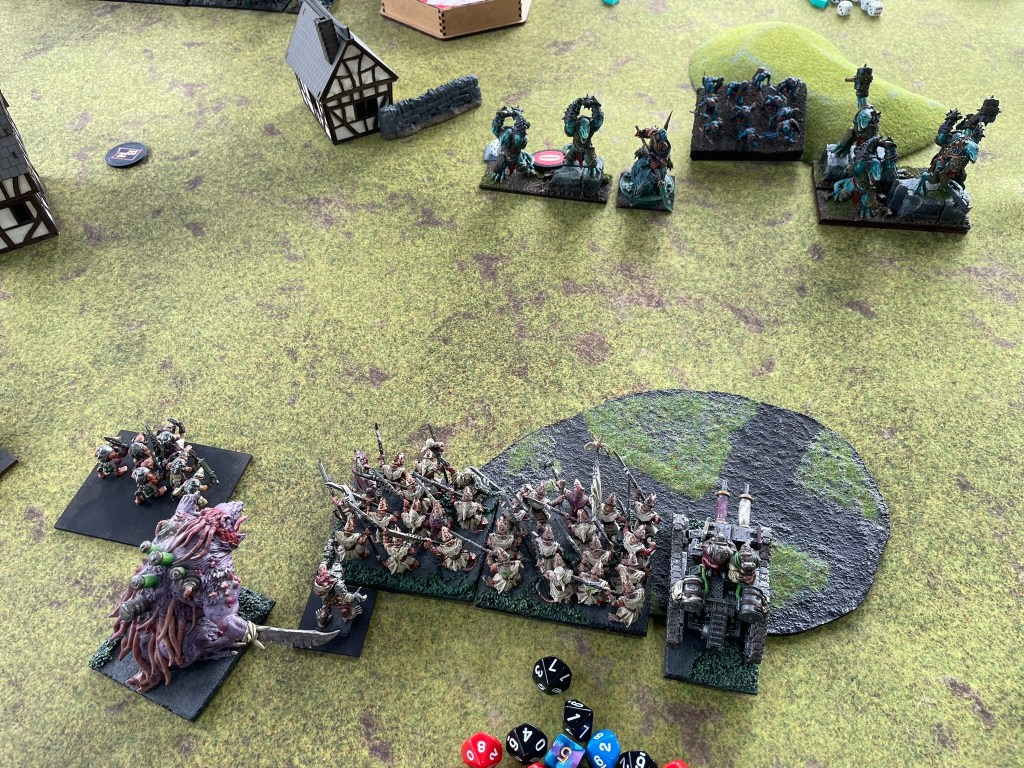
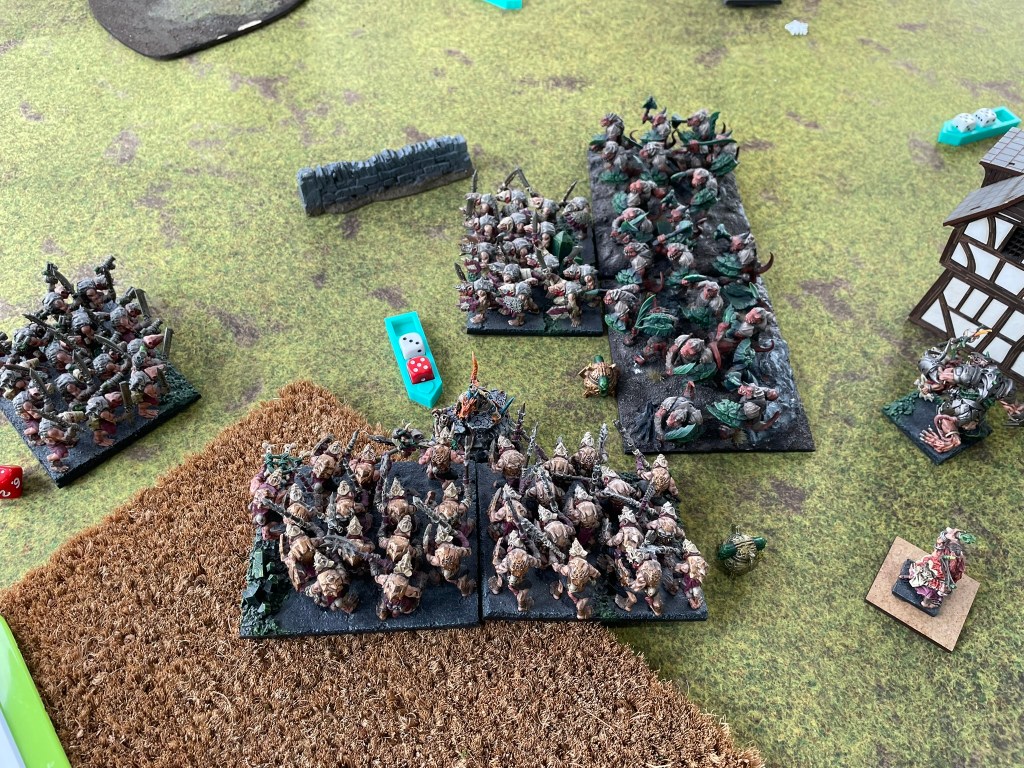
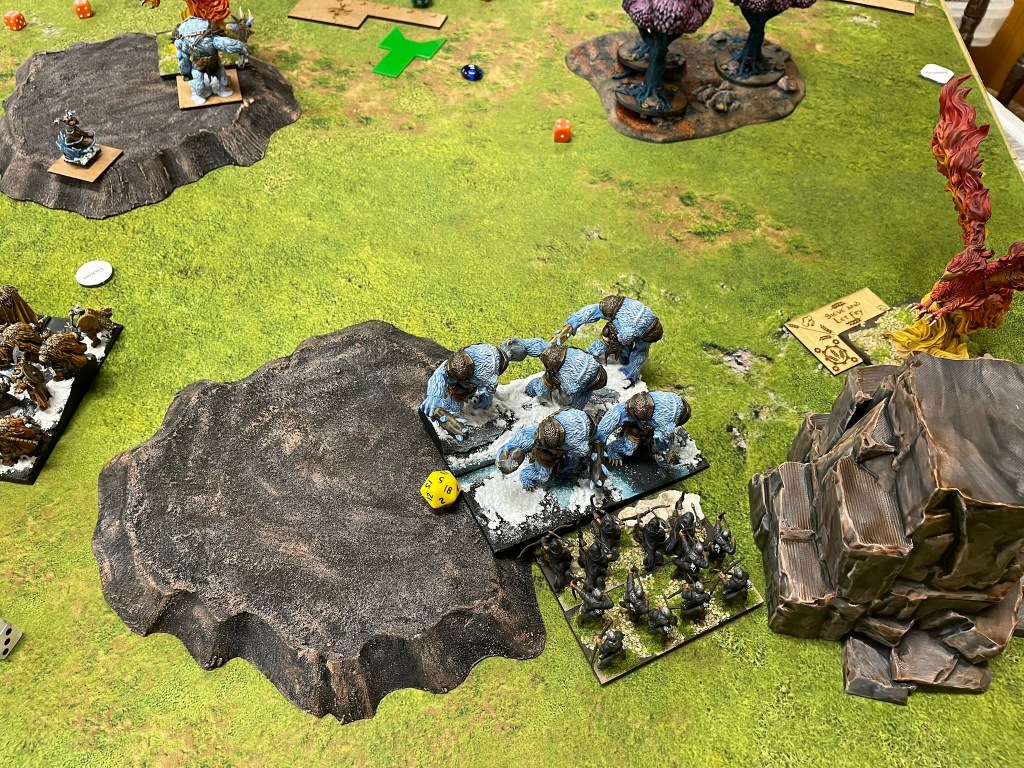
Game two saw the rats face Undead with the Control scenario. The undead army is an absolutely fantastic piece of conversion work built entirely from Mantic models. It’s always brilliant to see work like this on the table.
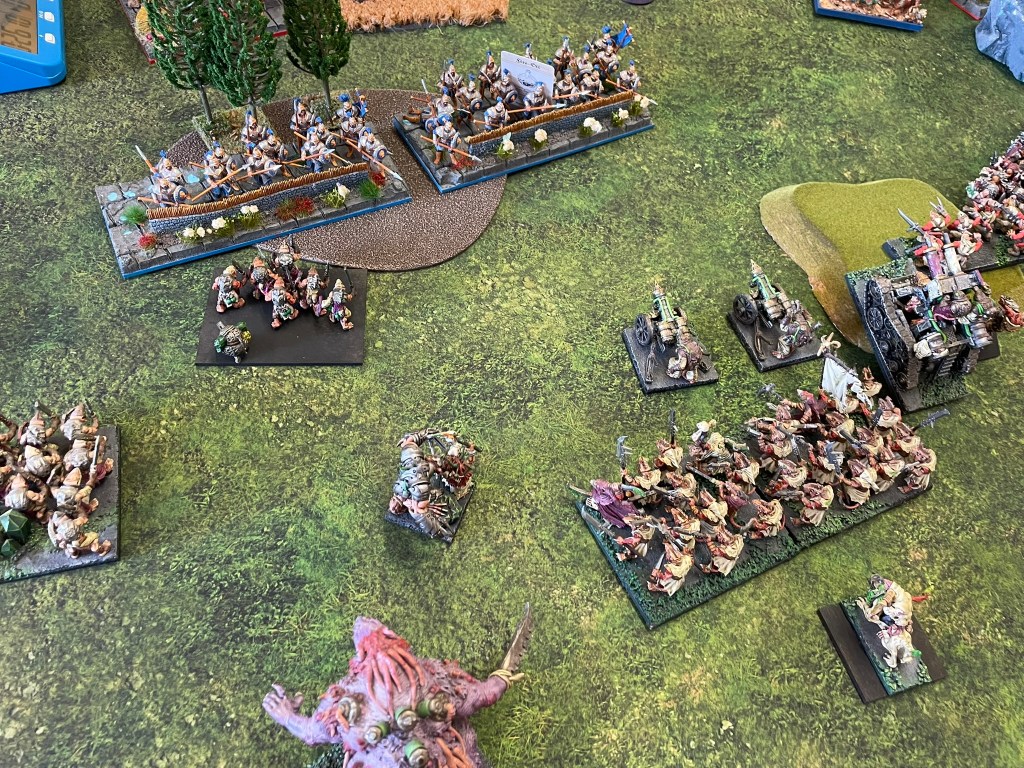
As we set up, I was starting to get a feel for how my army should work. As with the previous table there were two buildings in the middle of the table creating a pinch point (I would find in game three that this approach had been replicated on that table as well!). I set up with my long-range shooting aiming between the buildings whilst the shorter ranged units were further over on the left flank. The plan was to try and do as much damage to the undead emerging through the buildings, hold them up in the centre whilst my right flank swept round the back.
Screenshot
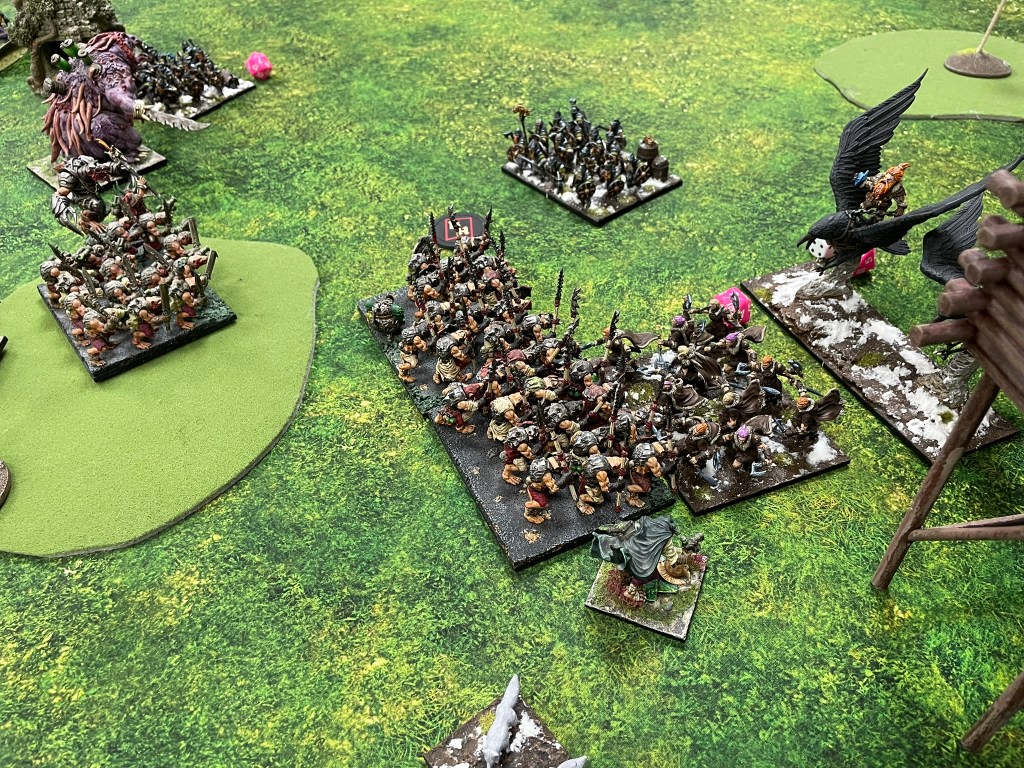
The first couple of turns things went according to plan. Vampires were shot up and a troop of ghouls was removed. Then the undead were upon us in the centre. Zombie trolls ploughed into spears whilst the wraiths took on the Shock Troops. Over the course of the next two turns rats overcame corpses thanks to some sneaky flank charges and it looked like the troops that had pushed forward through the gates were starting to run out.
On the left flank, things had gotten off to a slower start as the rats held back to stop a wight troop from getting into combat and blocking things up. I think my opponent would have been quite happy for my troops to sit where they were taking pot shots at the defence six unit, but after a couple of rounds even the resilient spirits were starting to fade. They launched a final desperate charge at the Scurriers who survived, before returning them to their rest. This then let my left flank move forward. Warriors and the Mutant Rat Fiend destroyed more ghouls whilst Shock Troops took on the Revenants. Zombies joined the combat, but the veteran rats held their ground, allowing the Fiend to get a flank charge on the brain munchers which wiped them out.
By this stage the rats had secured the whole of the left flank and were starting to rally in their central zone, until a fresh charge from the vampires (all of them) began a wave of slaughter that drove the rats back, denying them any chance of a win, but still leaving them with two areas secured.
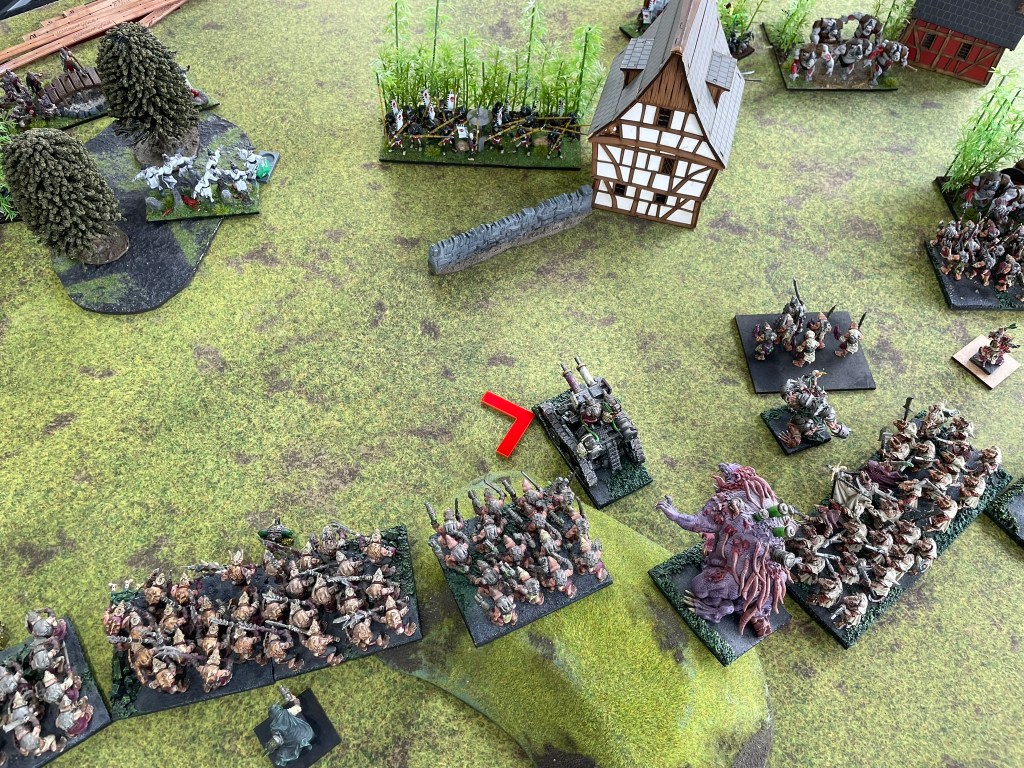
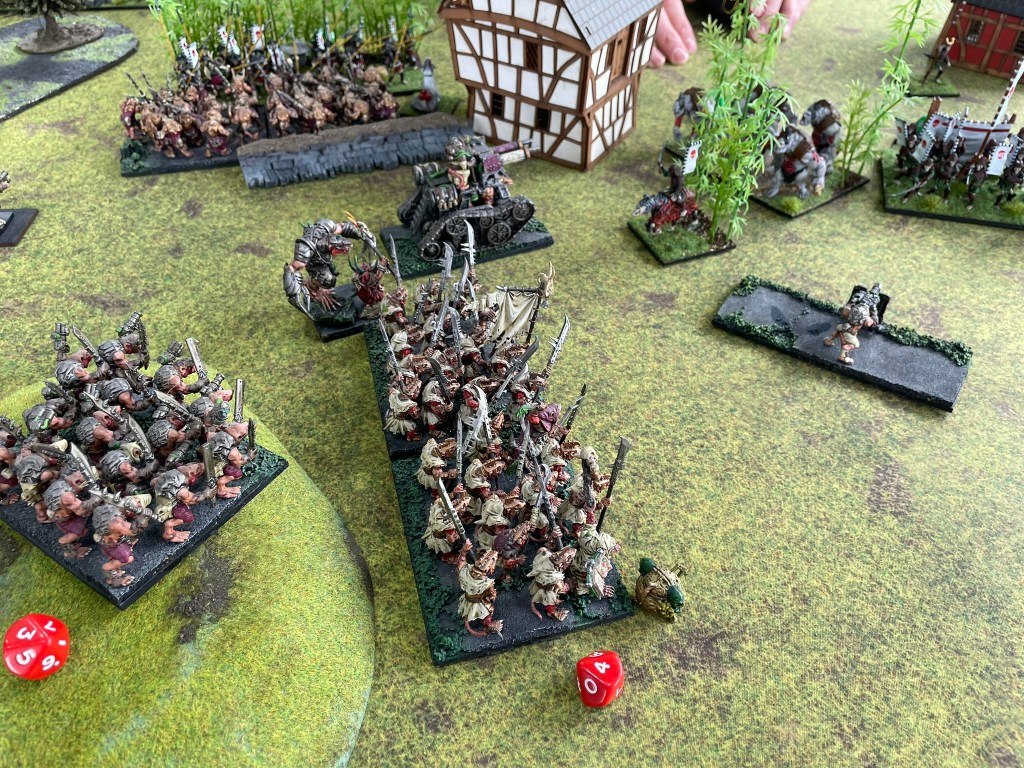
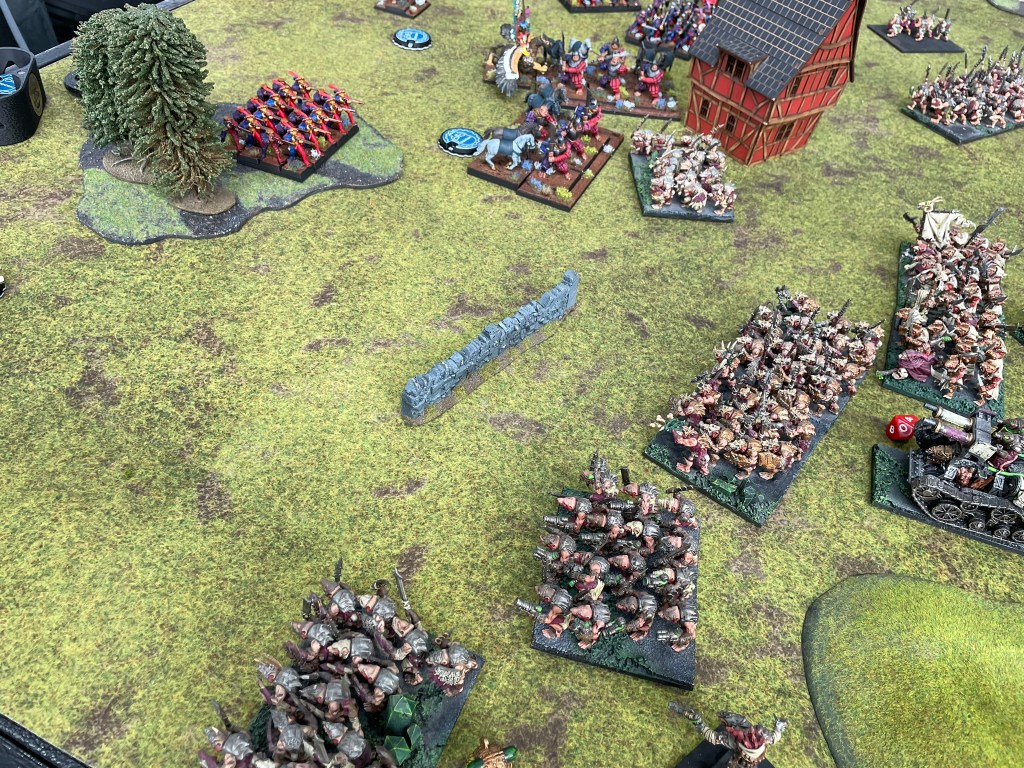
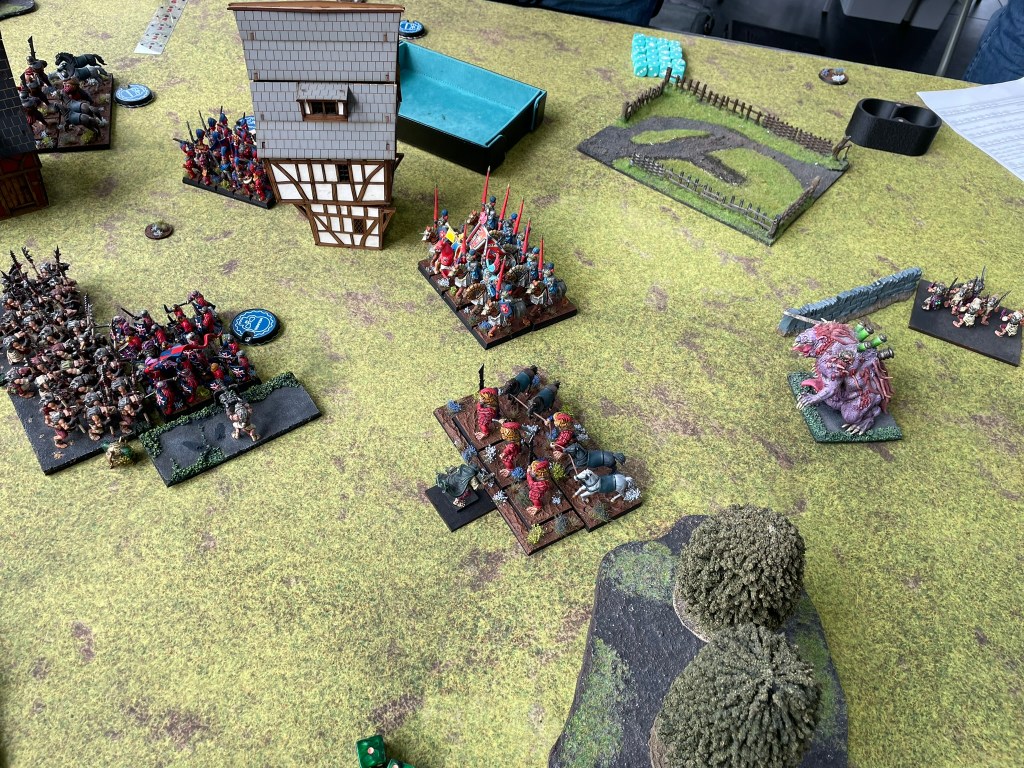
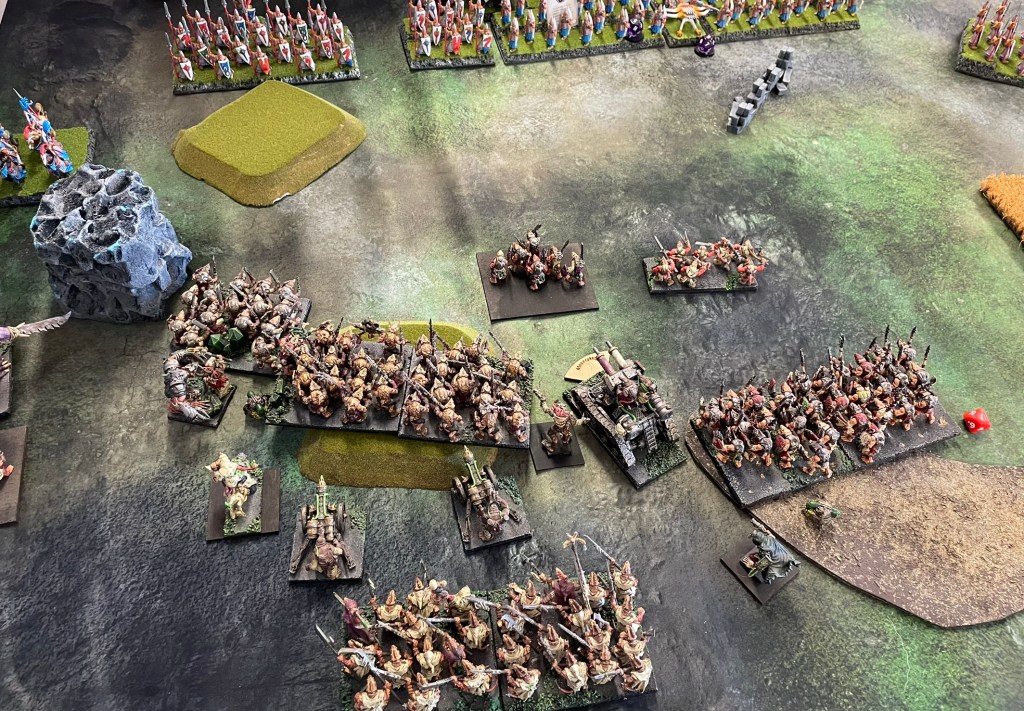
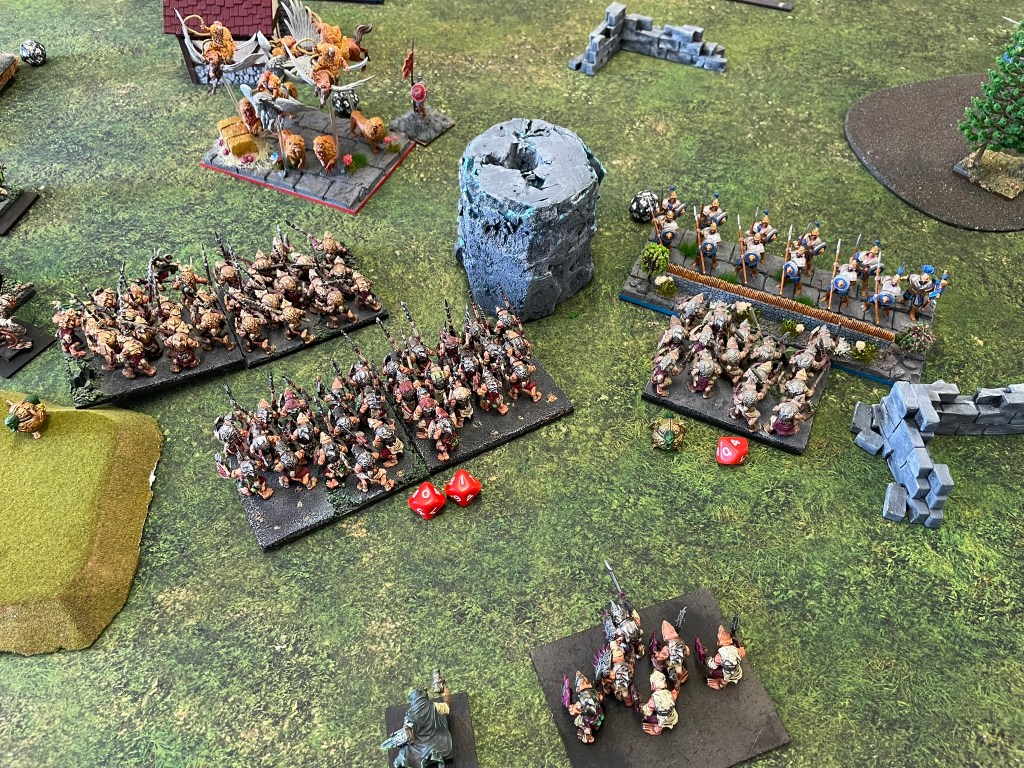
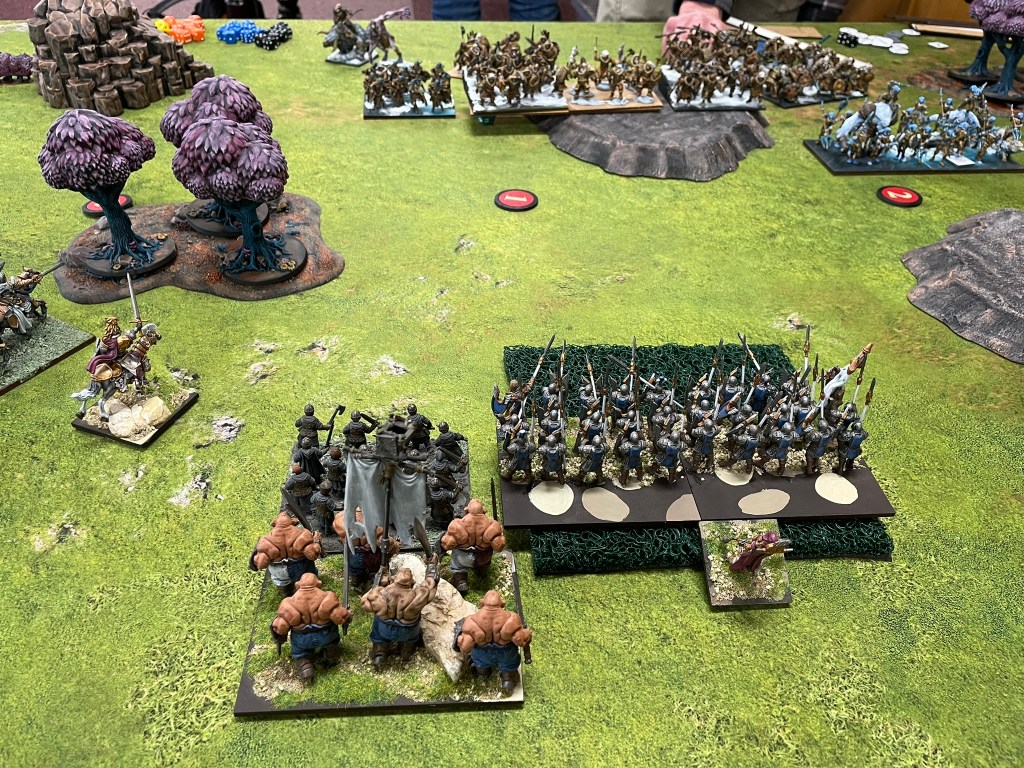
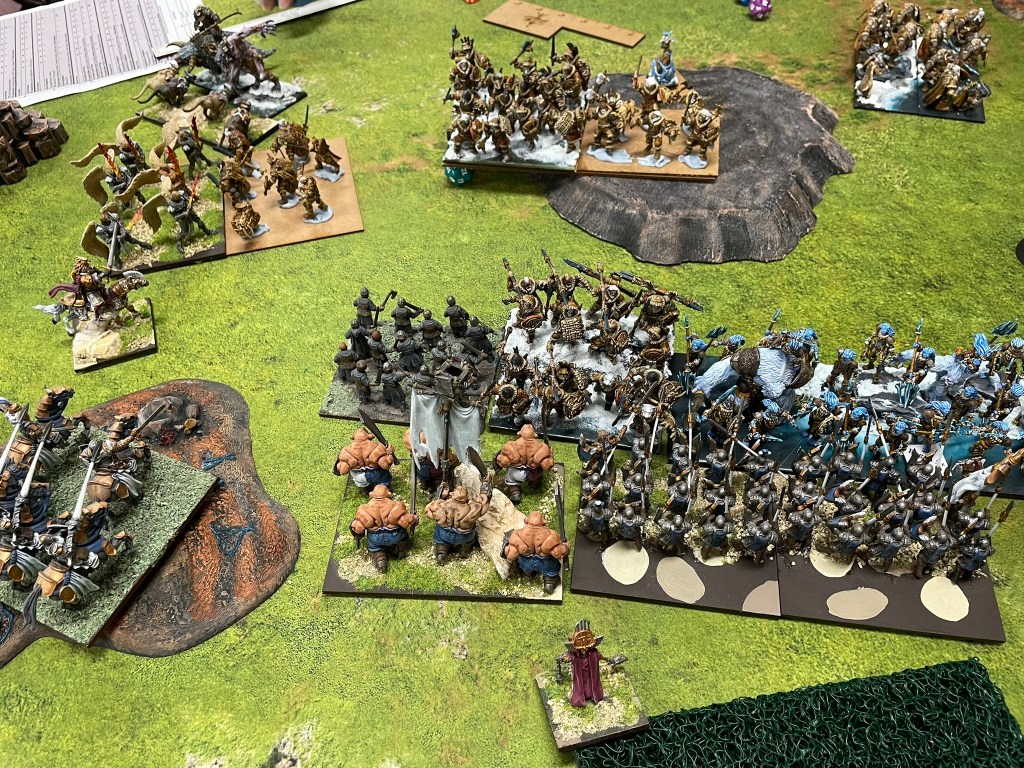
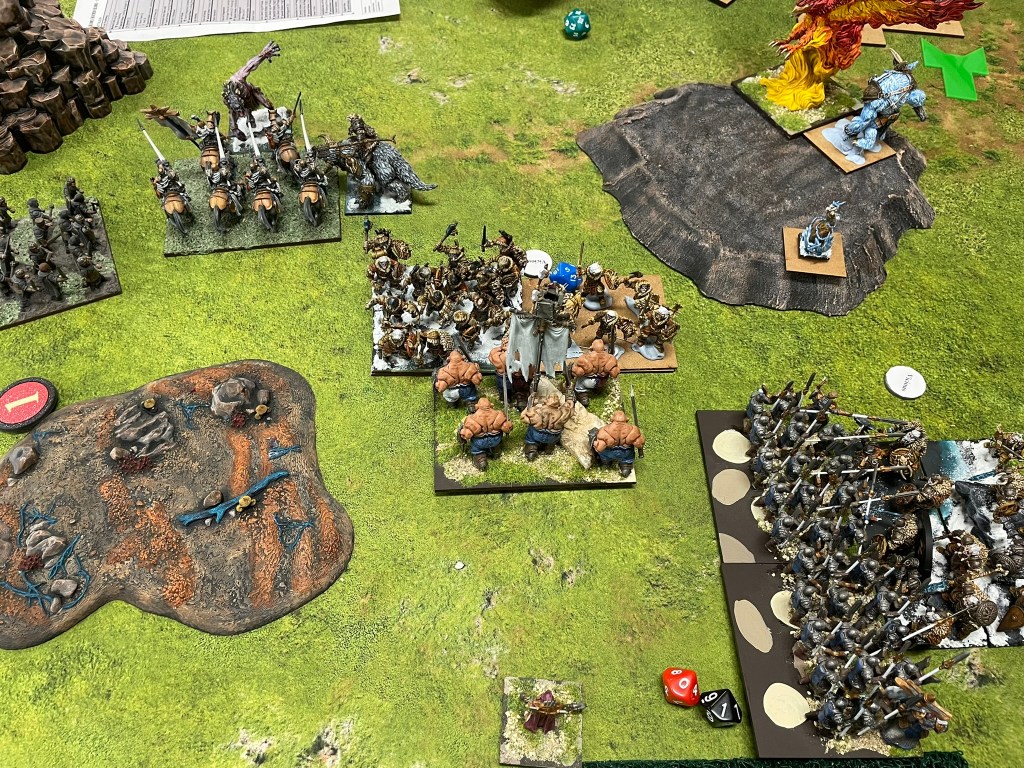
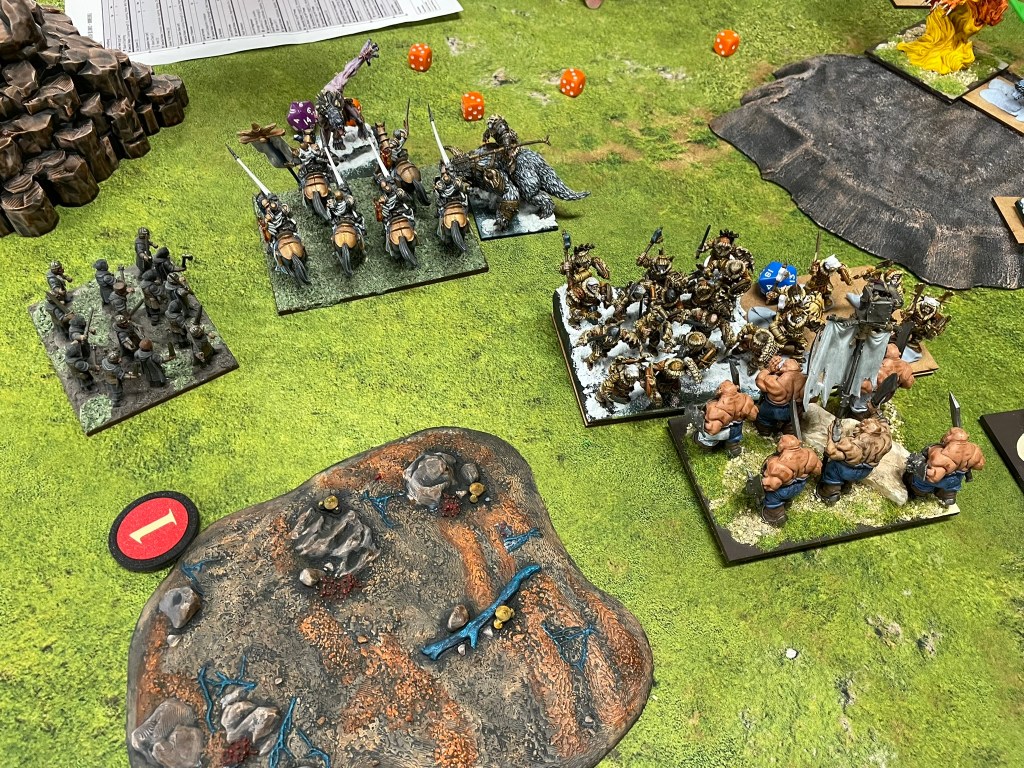
Finally, the rats faced off against the Kings of Men, with a list that absolutely terrified me and a scenario (Raze) which felt so far out of my comfort zone I began considering whether I had any space left at home for another wooden spoon! With so many fast, hard-hitting units I was worried that my opponent would simply bulldozer his way into my half and burn through his objectives.
Ratkin shooting rang out for the third time that day routing some light cavalry and putting some wounds on the infantry regiments that would seek to hold the centre scoring token. I decided the best approach was to try and break up the army, so I wouldn’t have to deal with it all at once. In order to do this, I put a warrior regiment and the Mutant Rat Fiend on the far right of the table, to distract my opponent and give me a chance of grabbing an objective on the opposite side of the table. The monstrosity and its little cousins made their way up the side of the table, forcing their way through a troop of light cavalry and regiment of knights to grab some points.
Screenshot
On the left flank the Scurriers and another warrior regiment kept a regiment of beast cavalry penned in, whilst the rest of the army focused on dealing with the bulk of the humans in the middle of the table. Fortunately for me the buildings in the centre of the table forced the enemy to break their forces up into smaller groups, as they attempted to move around them. This gave me plenty of opportunities to hold them up with chaff before bringing in the big hitters to break down the beast cavalry. By the fourth turn the spear horde had secured the central objective and hope rose through the ranks of the rats.
From this point on the rats focused on holding the humans back. The Fiend charged to certain death amongst regiments of knights, whilst the clawshots abandoned their sniper positions and threw themselves at any enemy that presented itself, no matter how briefly. Their bravery stopped the Kingdoms of Men from reaching their objectives, or recapturing the central objective, giving them their first win.
Final thoughts
Overall, it was a massively enjoyable day. Despite finding challenges with list building, I’m really starting to enjoy fourth edition. I’m convinced I’m on the right track with rats, although there’s still a little way to go. Some people will be surprised to find out that I think the Scurriers are doing a pretty good job. They are absolutely owning the Jack of All Trades role. They might not have the best stat line, but they contributed in just about every turn in each game, so I’m looking forward to seeing them in action again.
I’m not convinced that either short- or long-range support shooting is as effective as it could be, so that will be where I make my next changes. I think I need a bit of speed to help with scenario play, and fortunately there are quite a few great options in the army list that I’m looking forward to testing out over the next couple of weeks in time for the next event. In fact, I already have the next iteration of my list in mind and at least a couple of games lined up to give it a try. So, all that remains is for me to thank the TO for a great day out in Wales and my opponents for some really fun games.
To keep up with what’s going on you can follow @wizards_bookshelf on Instagram and Threads or drop you’re email below to subscribe.
In February I optimistically said we were going to try to play and review one of the many Carcassonne expansion packs every month. I was, of course, hopelessly optimistic. Whilst I managed to secure a pack in March, finding time to sit down and play it was the usual kerfuffle… but we managed it last week, and now you’re reading the results.
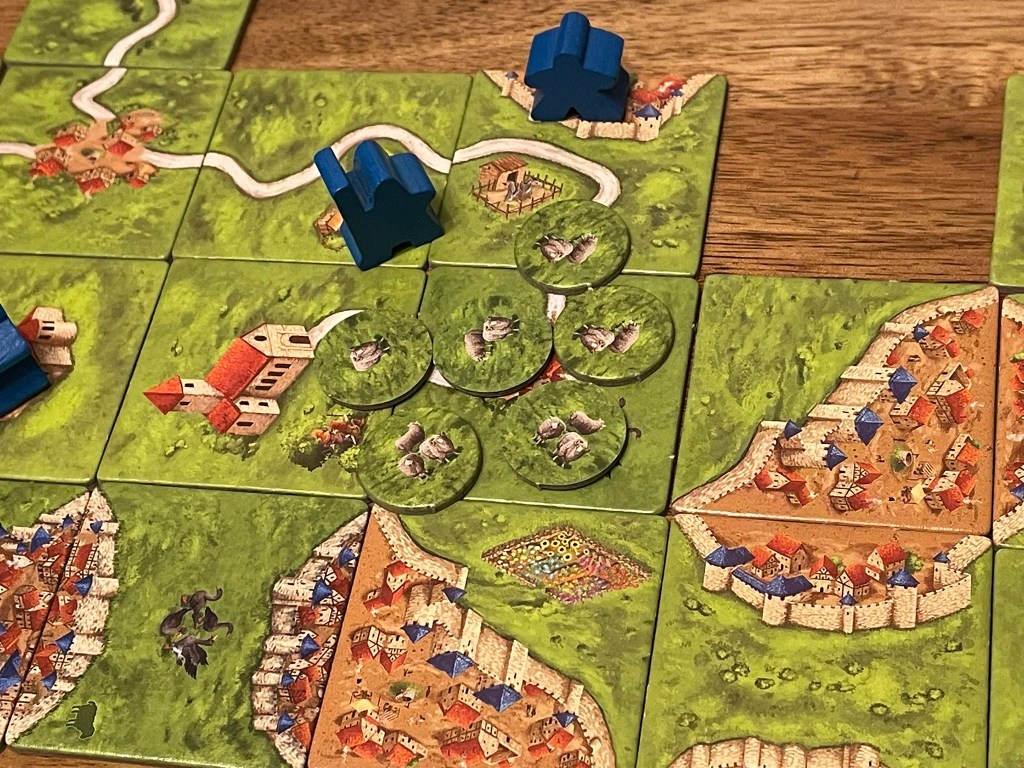
Sheep and Shepherds adds a new game mechanic, in the form of a lovely lucky dip bag, and a new meeple, which is the Shepherd (although one of the team took to calling him Gandalf, and I will concede there is more than a passing likeness).
Gandalf and his many sheep
Not surprisingly Shepherds work in the fields and they herd sheep. The premise is simple, place your Shepherd and as you grow your field you can increase the size of your flock by drawing sheep counters from the lucky dip bag. Beware though, there are wolves in the bag, and if they get amongst the flock the sheep are lost. In addition to the sheep, there are also some Vineyard tiles which can increase scoring for Bishops and Monks, and geese that help the Shepherds up their points.
The team were a little despondent upon the first reading of the rules because this expansion requires players to use fields. For some reason fields have never really gone down particularly well, so we don’t play them very often. Personally, I find them harder to keep track of through the game and the thing I like most about Carcassonne is its simplicity, so it’s a little jarring experience wise.
However, once we got into the game things actually felt reasonably straight forward, and most of all fun. Lucky dip bags are a great risk and reward mechanic and the wolves definitely showed up for some players more than others. I would say the sheep were so entertaining we had to concentrate a bit more than usual to remember that the vineyards were also in play. The geese are a really nice tactical twist for players wanting to squeeze out as many points as possible from the new meeples.
Overall, it was a hit with the team and thoroughly enjoyed. But one of the things I want to do with this series is workout a bit of a top ten of expansions (there are more than that though), so eventually the question had to be asked… what was better – dragons or sheep?
The verdict was not unanimous. For one player the lucky dip mechanic took the win, they’re a big fan of that sort of game play (absolutely loving the Quacks of Quedlingberg for that reason). For two of us though, the Dragon wins – for me it’s because the Dragon is a little more predictable and I can make dragon growls as it stomps around the board. So, for now, at least, Dragons top the chart with the Sheep in a close second.
To keep up with what’s going on you can follow @wizards_bookshelf on Instagram and Threads or drop you’re email below to subscribe.
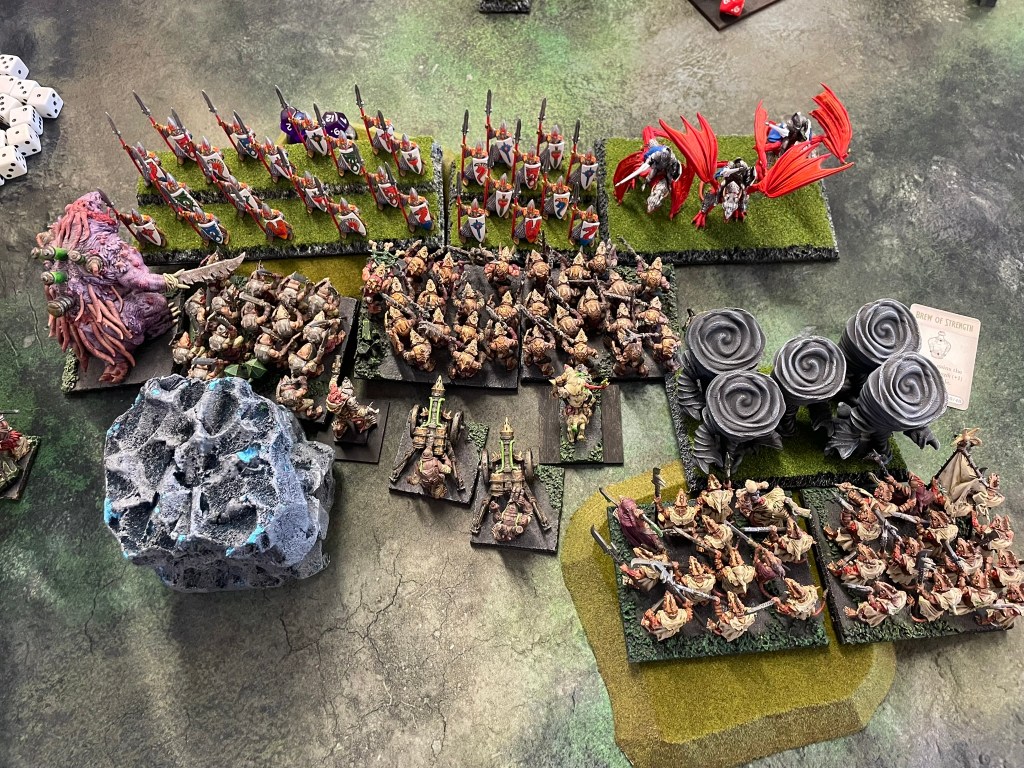
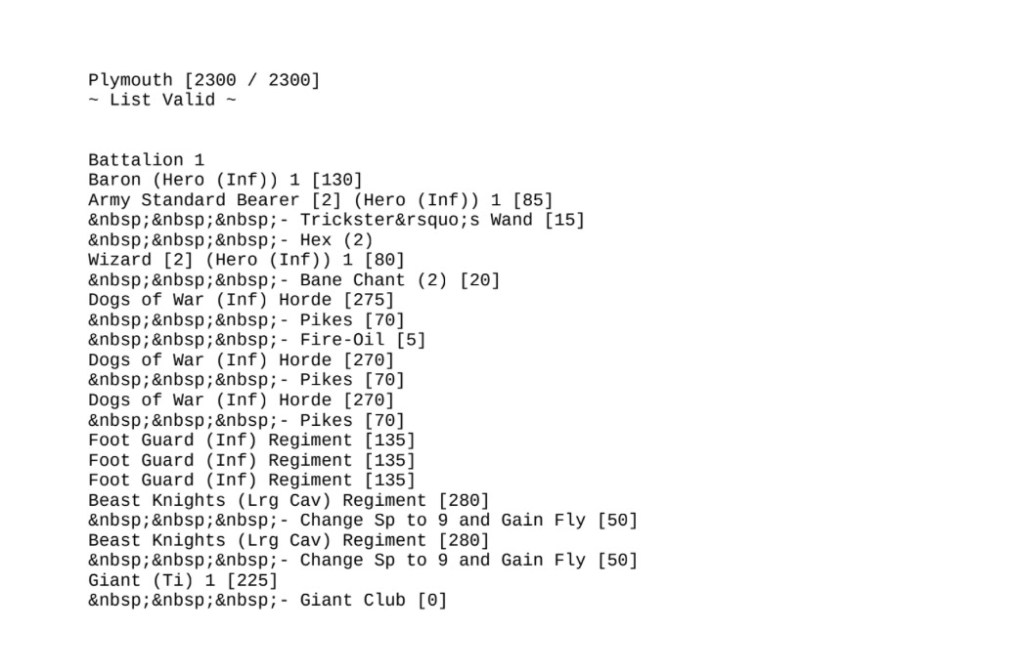
I finally made it to a tournament in Plymouth! For context I’m just a couple of hours away up the motorway so I really should have made it across the moors by now. The important thing is though I made it and the rats came with me. After some less than convincing attempts to play Basileans I’m starting to get to grips with the differences between third and fourth edition, and whilst I really want to get the Basileans up and running I think the changes I need to make would be better left until after the new list comes out, which is rumoured to be in the next few months.
In the meantime, I decided, by default, to take the rats out. The default was driven by the amount of painting required to get either the Halflings or Rats into a usable state, and the rats won (but even then, two regiments of warriors needed painting that didn’t make it anywhere near a full model count).
The list that I ended up with was a loose take on the list I was running very happily for the last year of third. I figured the core structure, based around hordes of infantry with a decent bit of shooting would translate reasonably well into the new game. I think at this point though I’ve played with rats once, and that game resulted in a very secure second place, so I wasn’t really confident the list would work, but at this stage I’m really just trying things out.
To be honest, I’ve been less than excited about the new rat list the more I’ve played around with it. I think they’ve lost a fair bit of flavour with rallying changing and so many synergies either disappearing or being restricted. I’m also aware of the change to the shooting dynamics so I’m interested to see how that impacts an army I have loved playing since second edition.
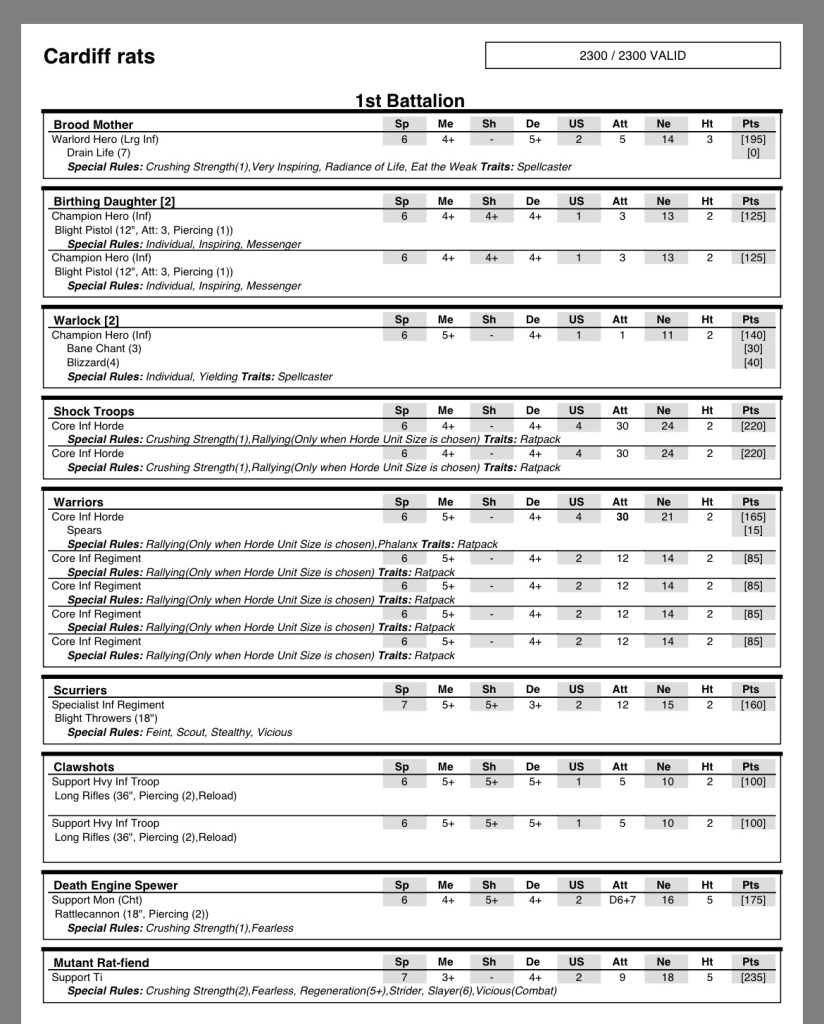
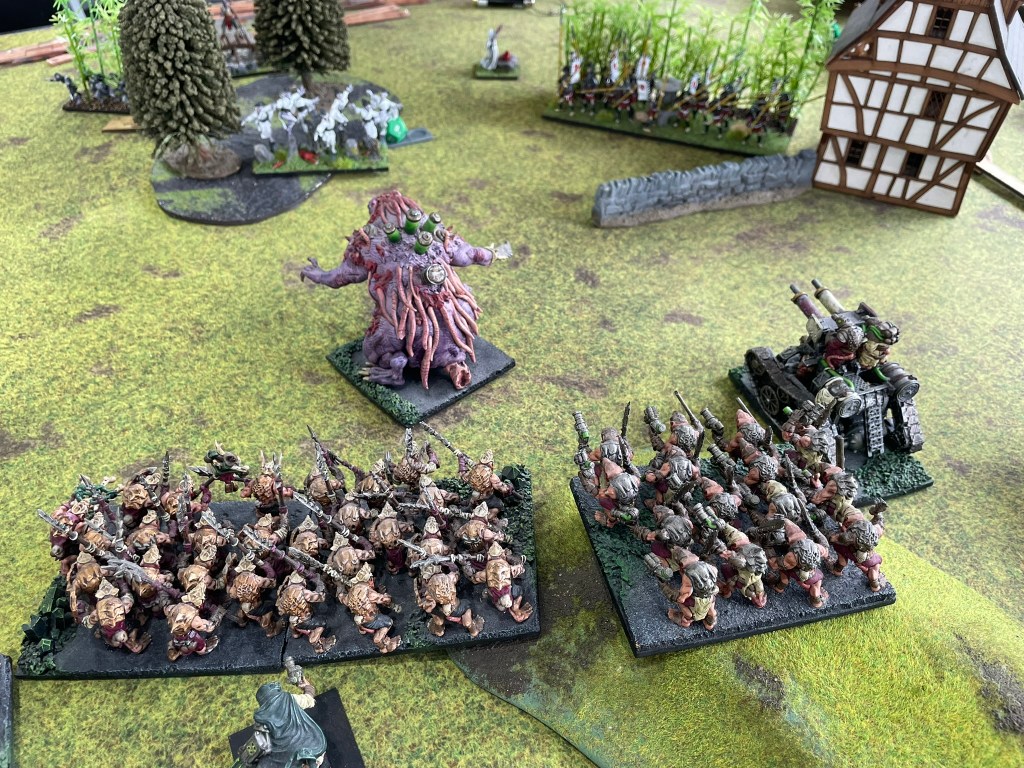
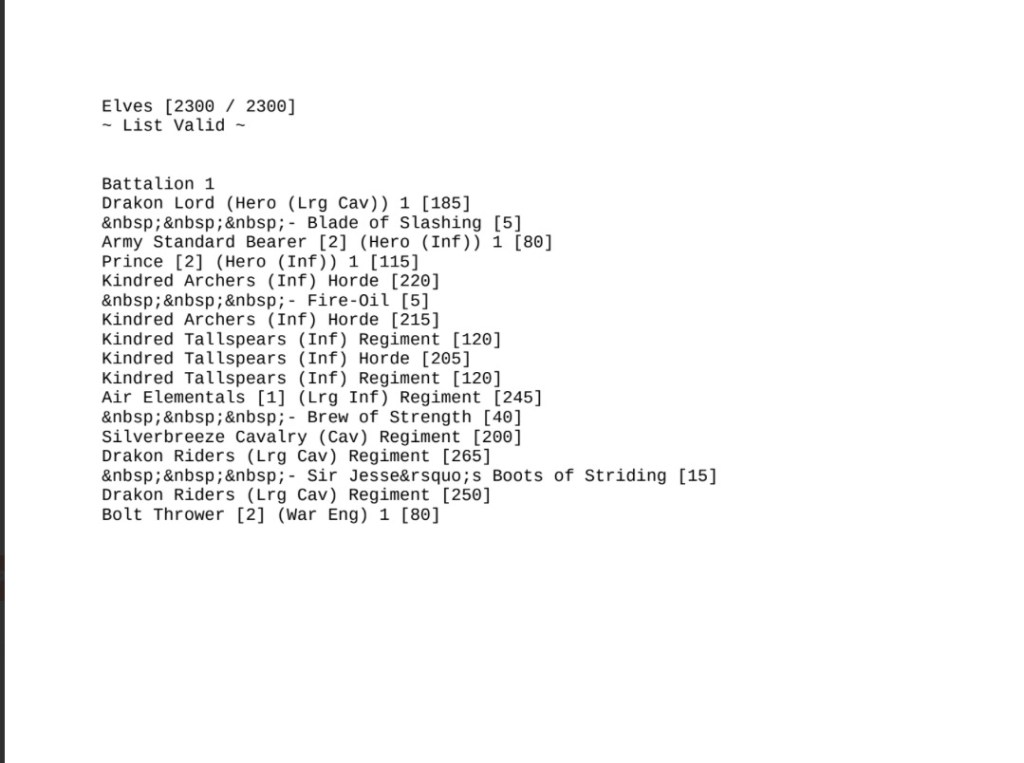
Short range shooting is the key mechanic I really want to continue playing. However, I was conscious that there would be some things I would need to work through. I can only get two blight spewers in a battalion. The former weapons teams used to be devastating in threes, and in the spirit of the new edition I decided to stick to one battalion rather than breaking into a second just to spam a particular unit. In order to make up for the drop in shooters I gave the Brood Mother Blood Boil and took a Warlock on a Fleabag with Host Shadow Beast to utilise the gamey loophole that allows yielding characters to engage without blocking shooting to the unit they are engaged with. I did not feel great about myself for that one! Ironically, whilst part of the intention of the army list structure changes was to reduce spamming of certain units the list I ended up with had far less variety than my former list, despite the same number of drops.
Screenshot
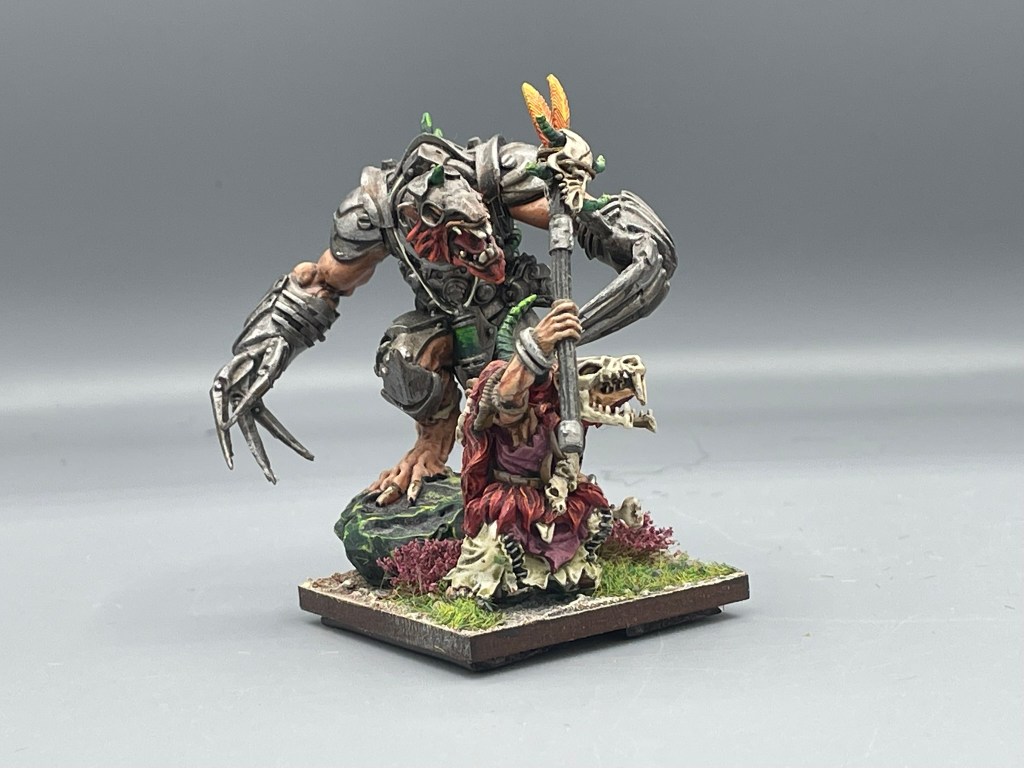
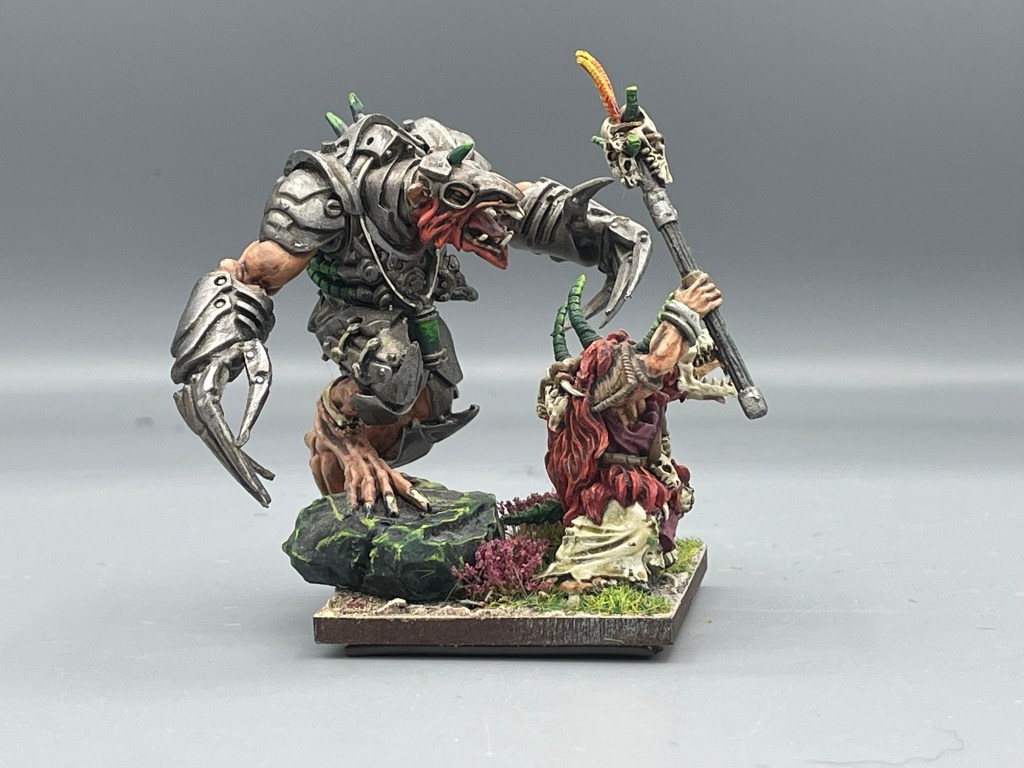
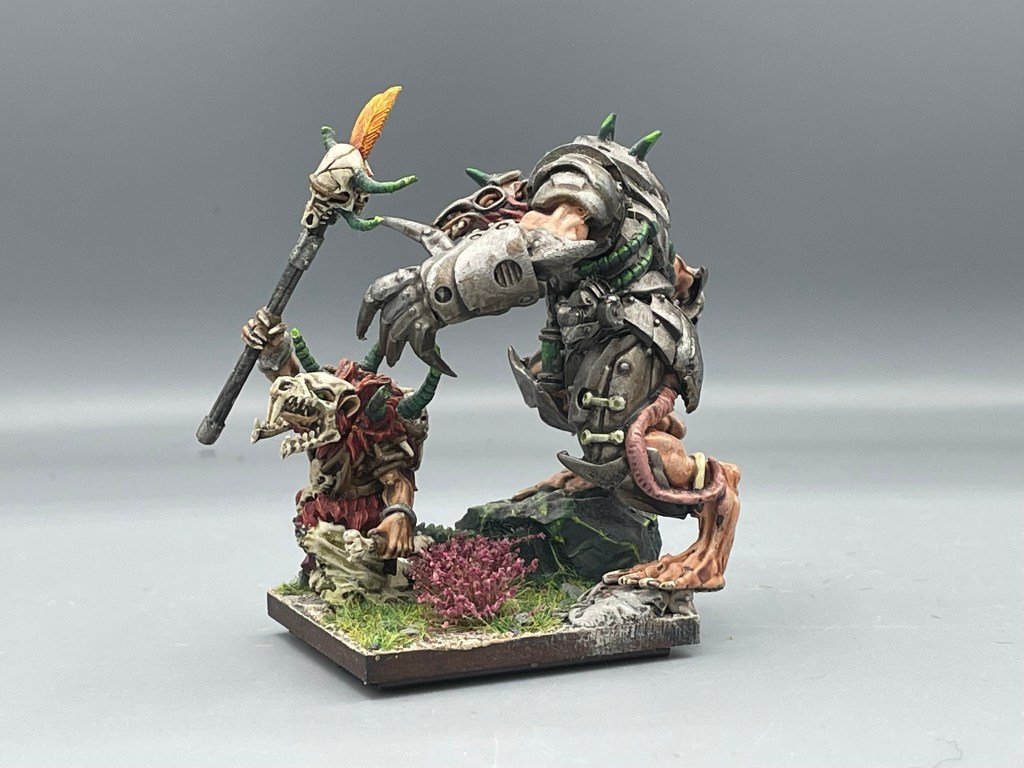
Birthing Daughters have become a must for me because Ratkin are fragile and Plague Pots are, in my experience of rolling fives for Basilean commands, unreliable, so two of them had to go in. I then wanted my favourite models in, the Death Spewer war engine and Mutant Rat Fiend. Scurriers were a must, I know, but I actually think they might do quite well under the right circumstances – time will tell. Then I set about spending the rest of my points.
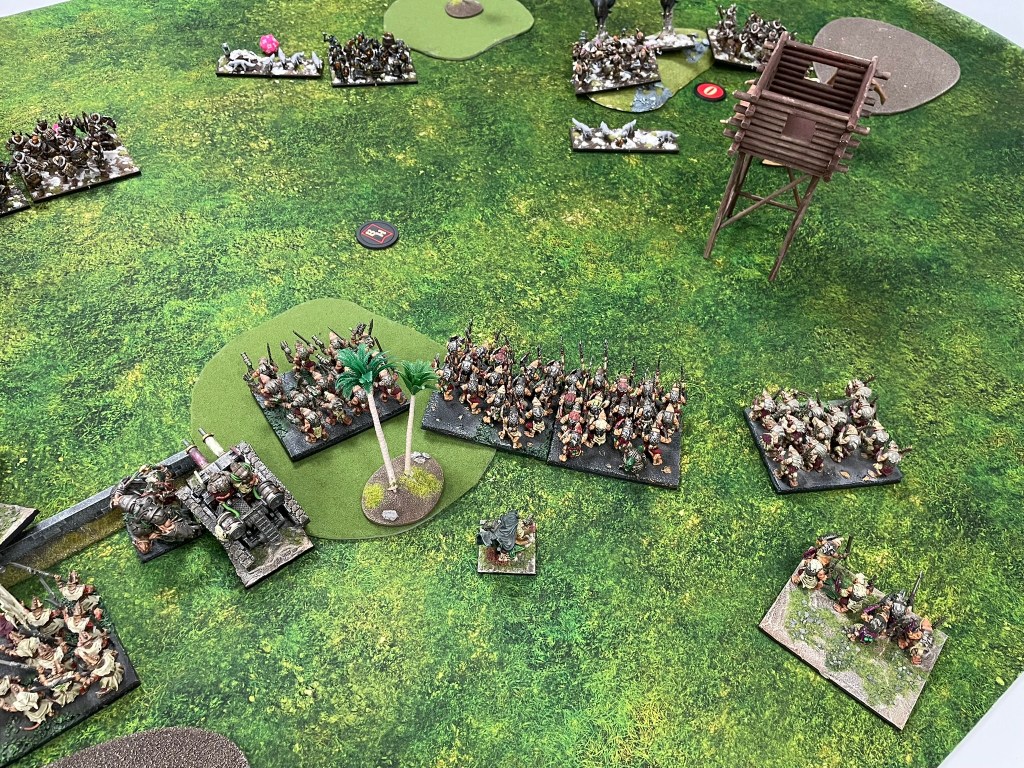
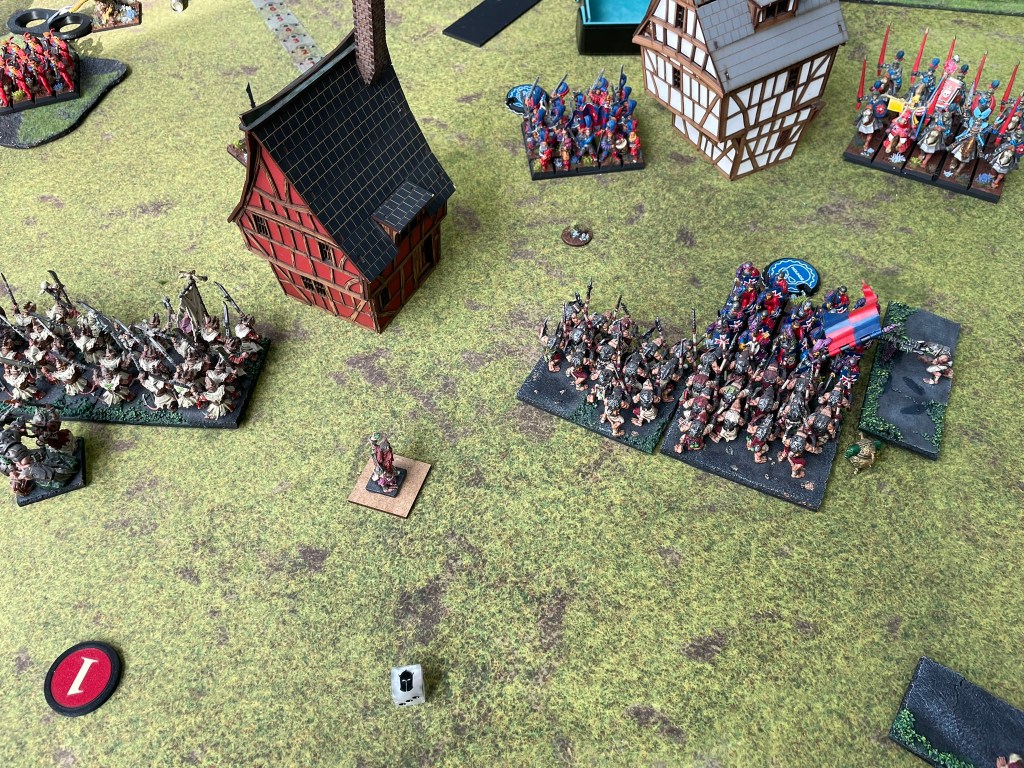
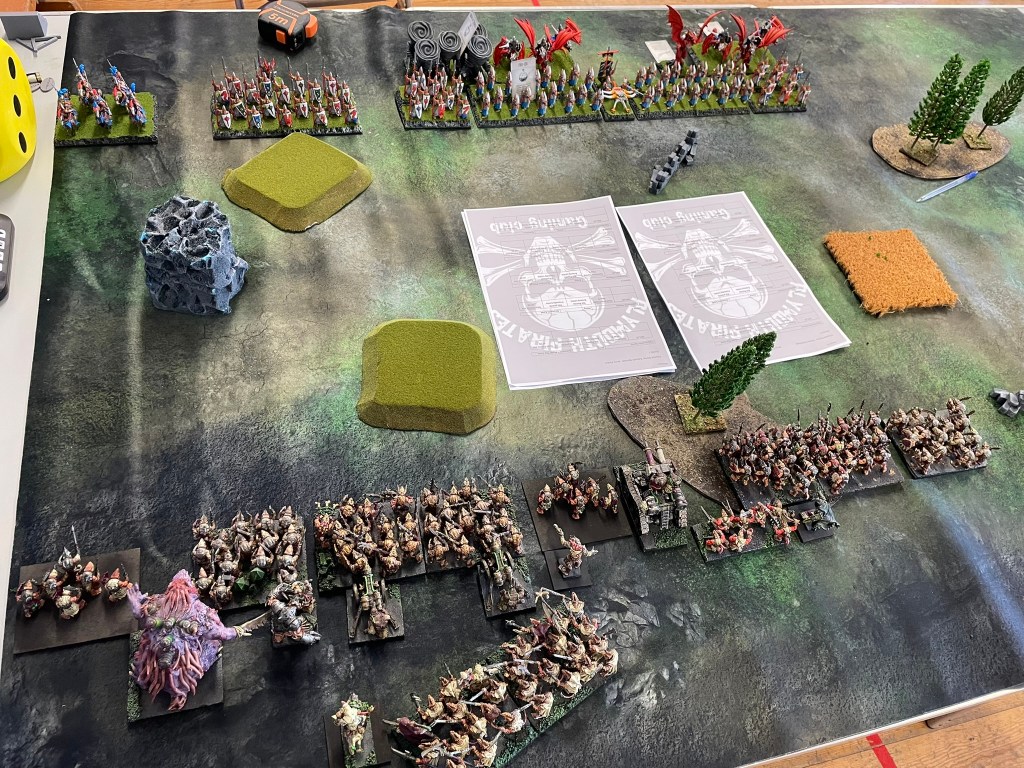
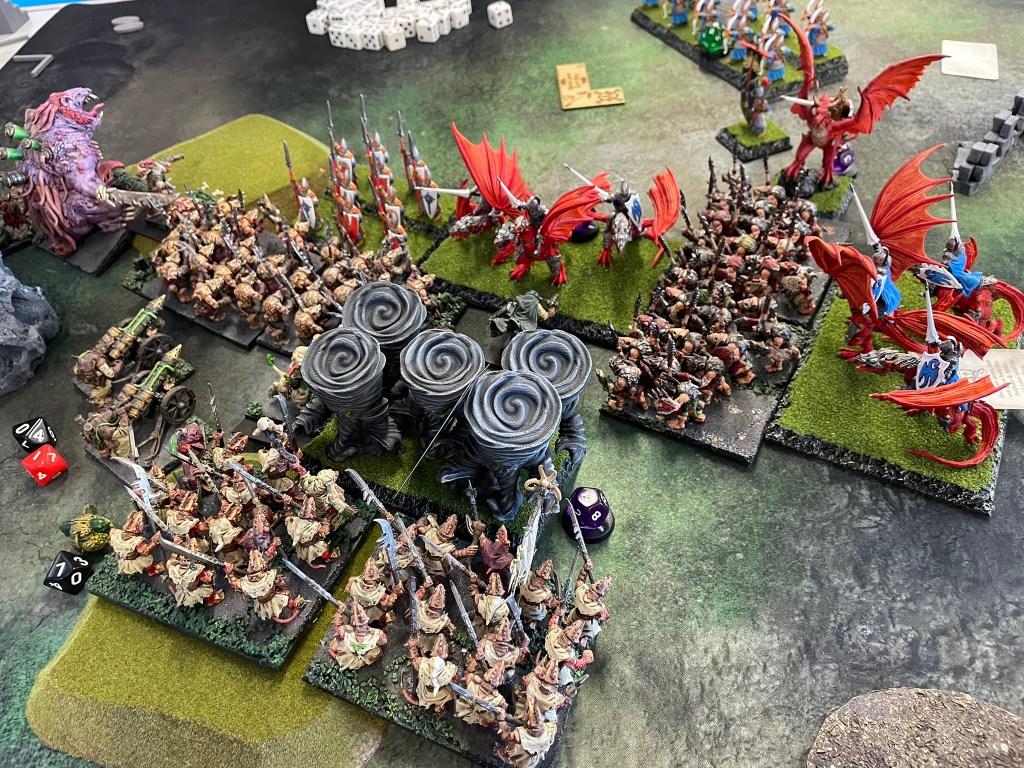
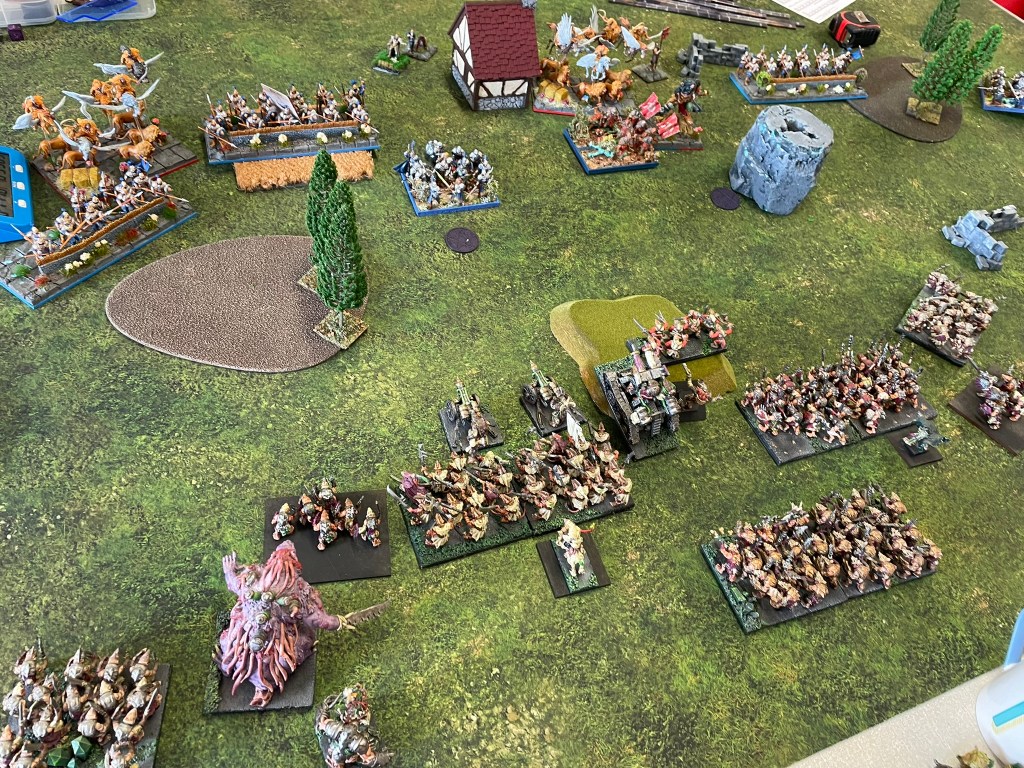
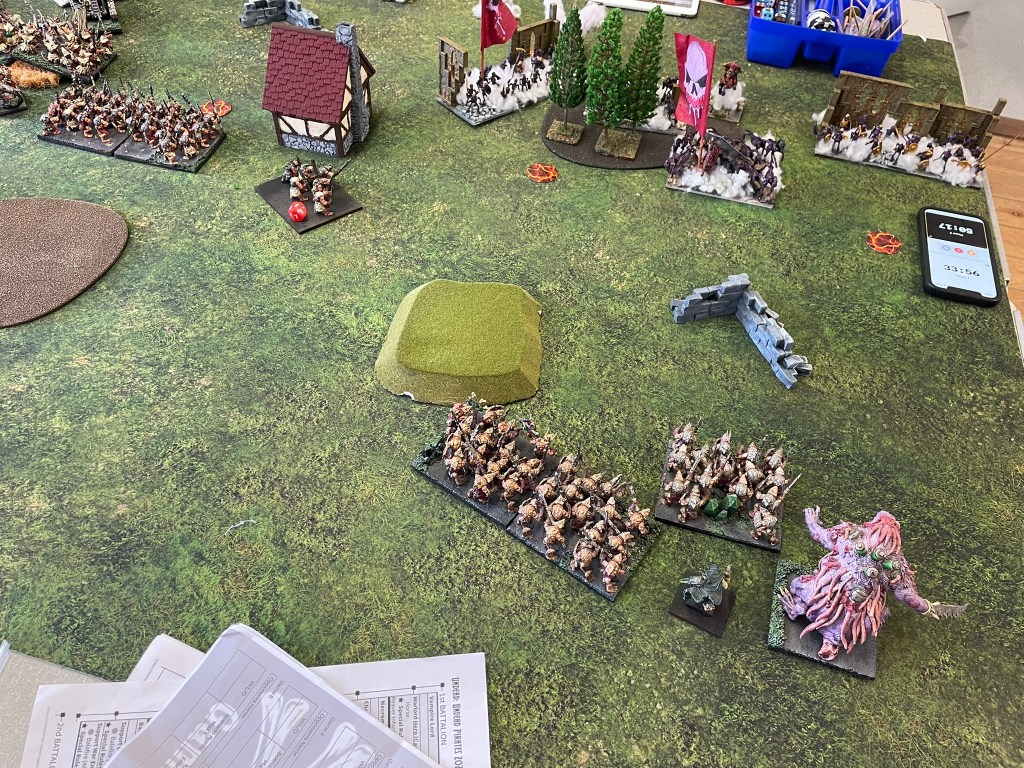
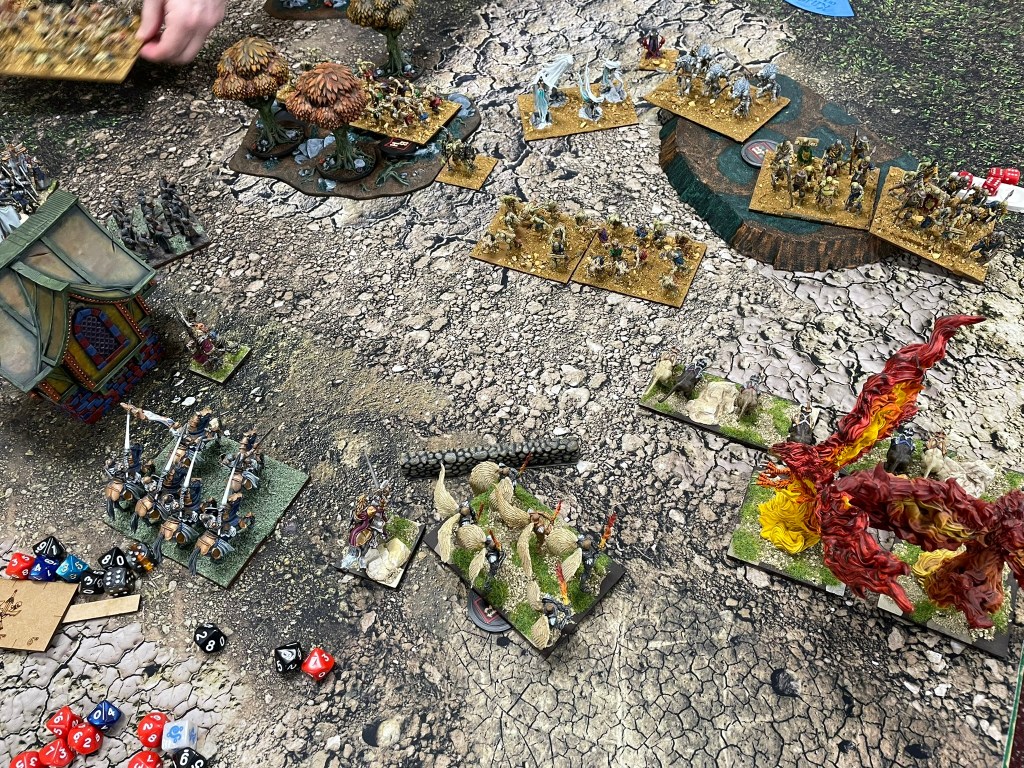
Game one was Hold the Line against a very shooty Elf list. It felt quite comforting throwing down loads of infantry to soak up the arrows. Things started well and within three turns the Mutant Rat Fiend had got hold of the Silverbreeze Cavalry and broken their bows, my own shooting had badly damaged one of the archer hordes and the mighty Scurriers had destroyed the bolt thrower and were holding down the Drakon Lord.
However, the tide started to turn as the Elves managed to shoot off the Spewer Tank in a single turn and then combat was joined in earnest. Although the plague pots were working well, I definitely felt the removal of phalanx on the Shock Troop hordes, fortunately they held against the onslaught from Drakon Riders and Air Elementals. Unfortunately, the curse of fours set in this turn and two key combats ended without either of the flying regiments being routed.
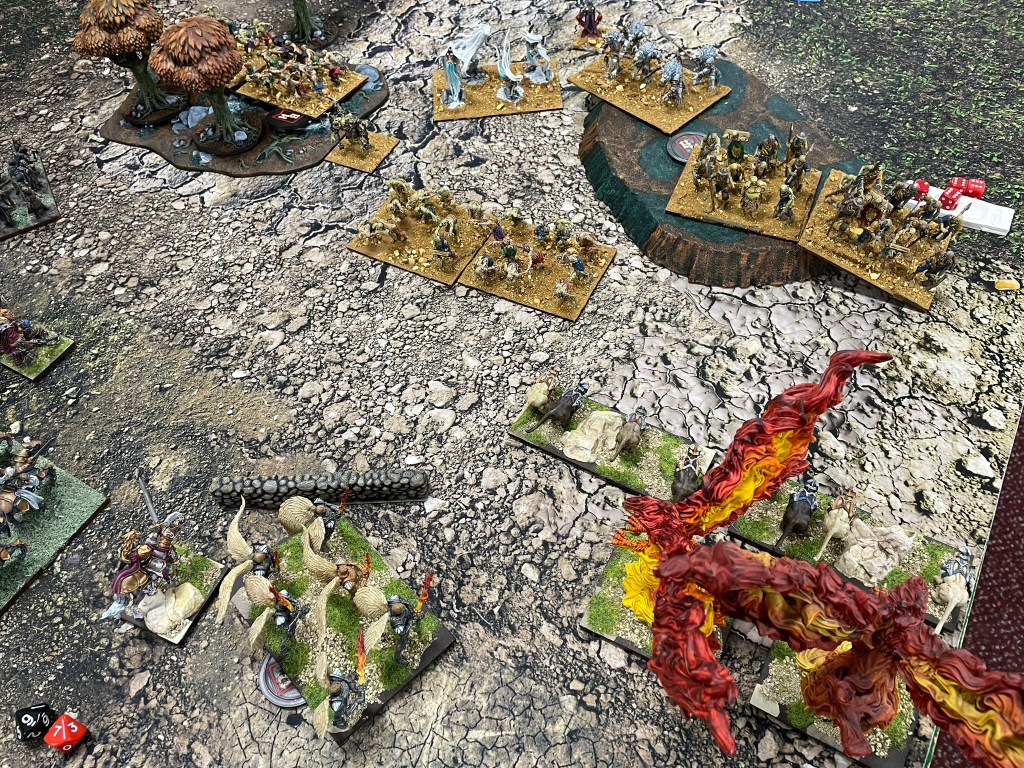
Screenshot
The Air Elementals had manged to survive a battering from elite rats and the Warlock using Host Shadow Beast in their flank. Whilst the Drakons had shrugged off Shock Troops in the front and a horde of spears in the flank. Mathhammer would suggest both of these units should have gone, but the dice ruled against it. To make matters worse, my spear horde now had a Drakon regiment staring at their backs, the next turn would see three vermin hordes, along with any real hope of carrying the game, disappear.
Whilst I did get to successfully execute my gamey shooting/Host Shadow Beast combo and successfully take the Air Elementals off, far too many Elves remained on the table and they took the win. Whilst the dice were unhelpful, even if they had gone the right way in those Shock Troop combats it would have still been a really close game with my badly beaten-up hordes needing to dodge arrows to secure scoring spaces. It was a really fun game and a great way to start the day.
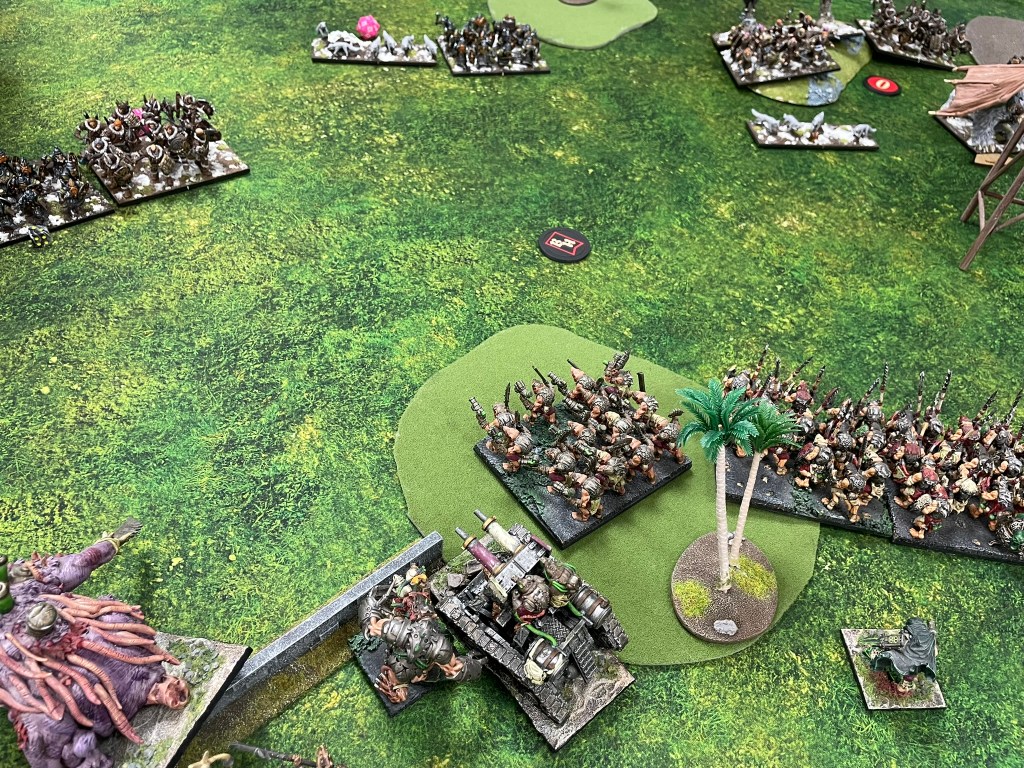
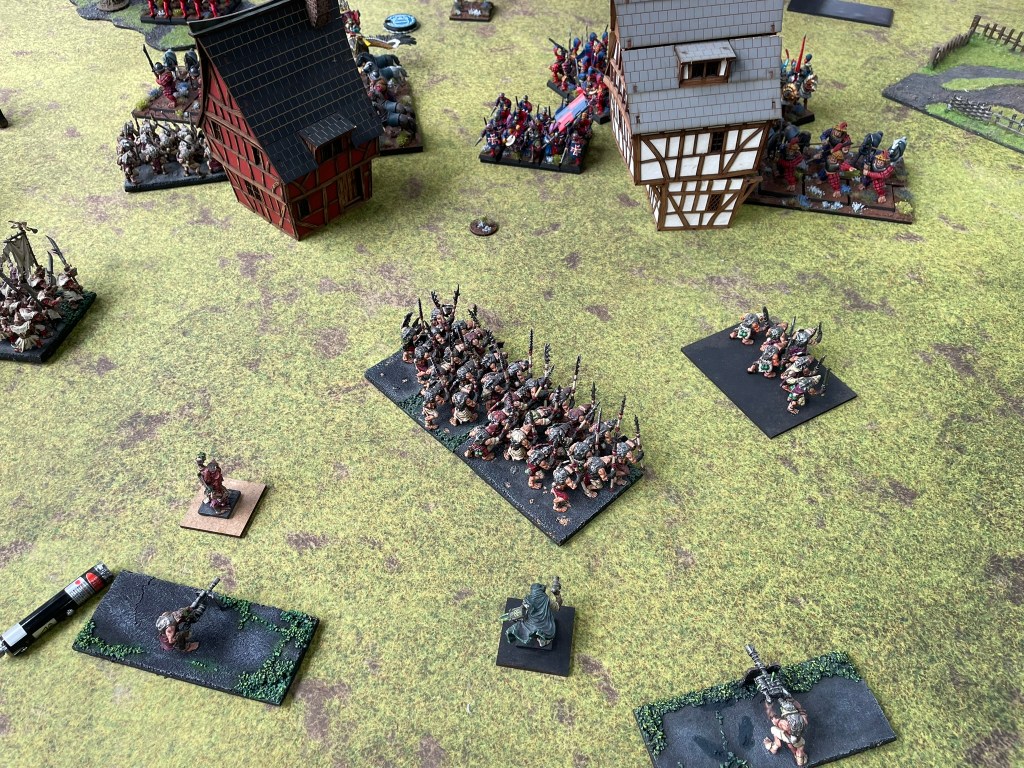
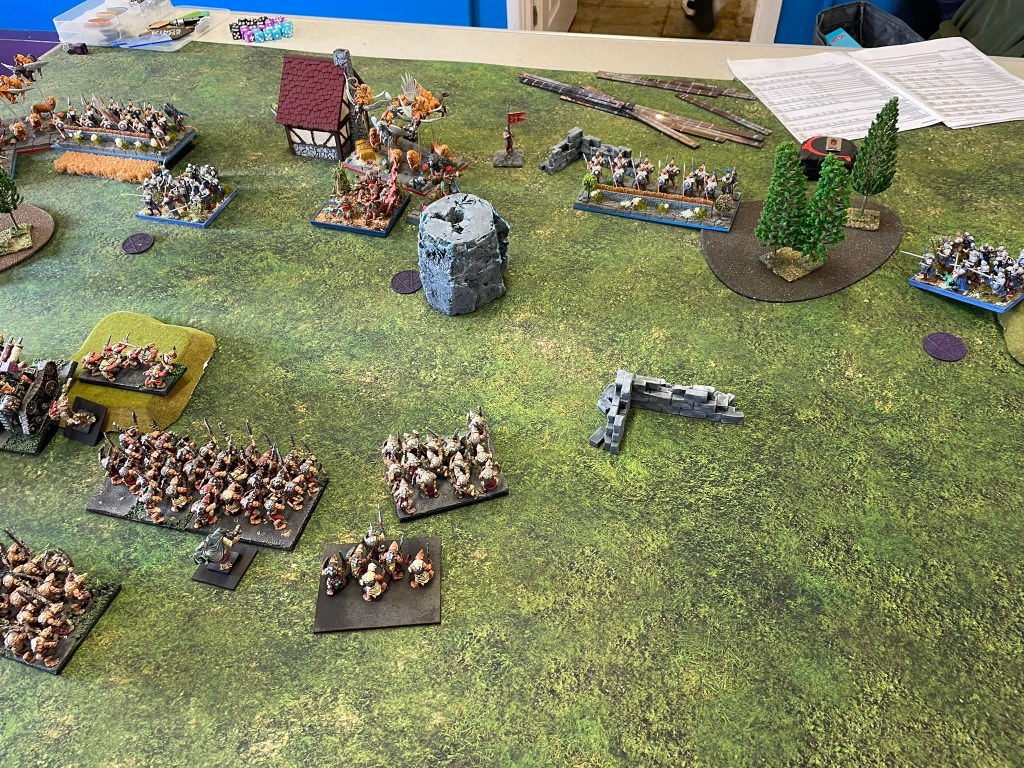
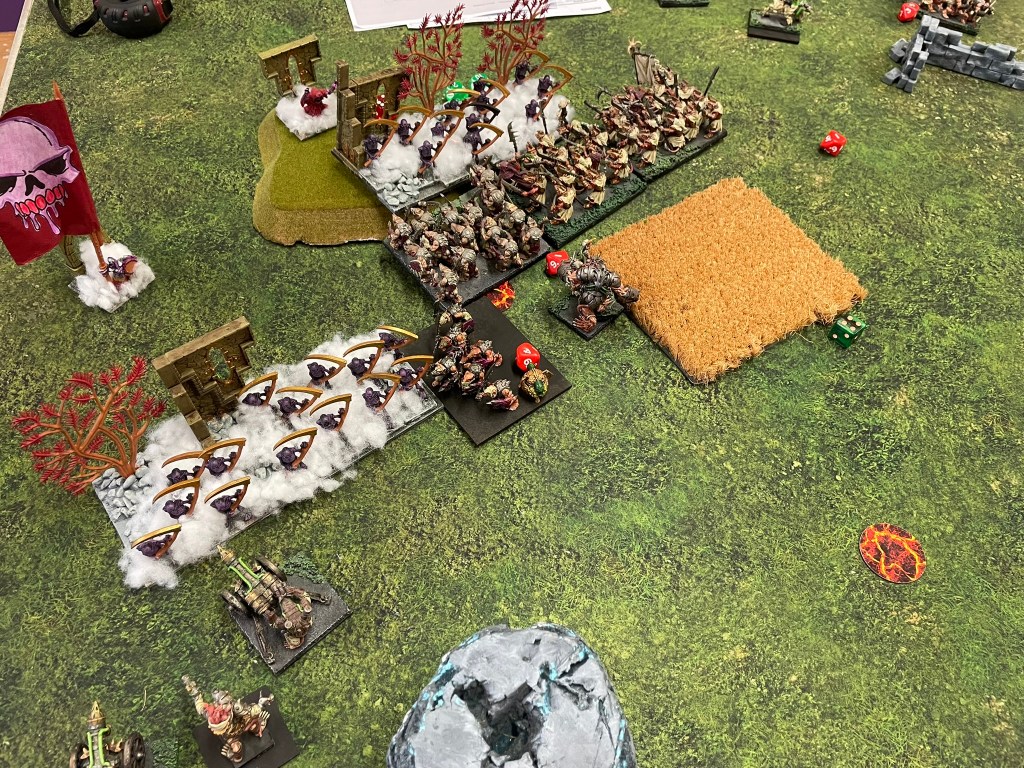
Next up was Kingdoms of Men and Loot. Of the different scenarios loot counter ones tend to me my weakest. My usual play is to let the opponent pick up the tokens, shoot them whilst they do it, then flood forward and emerge out of the melee with shiny objectives clutched in bloody claws.
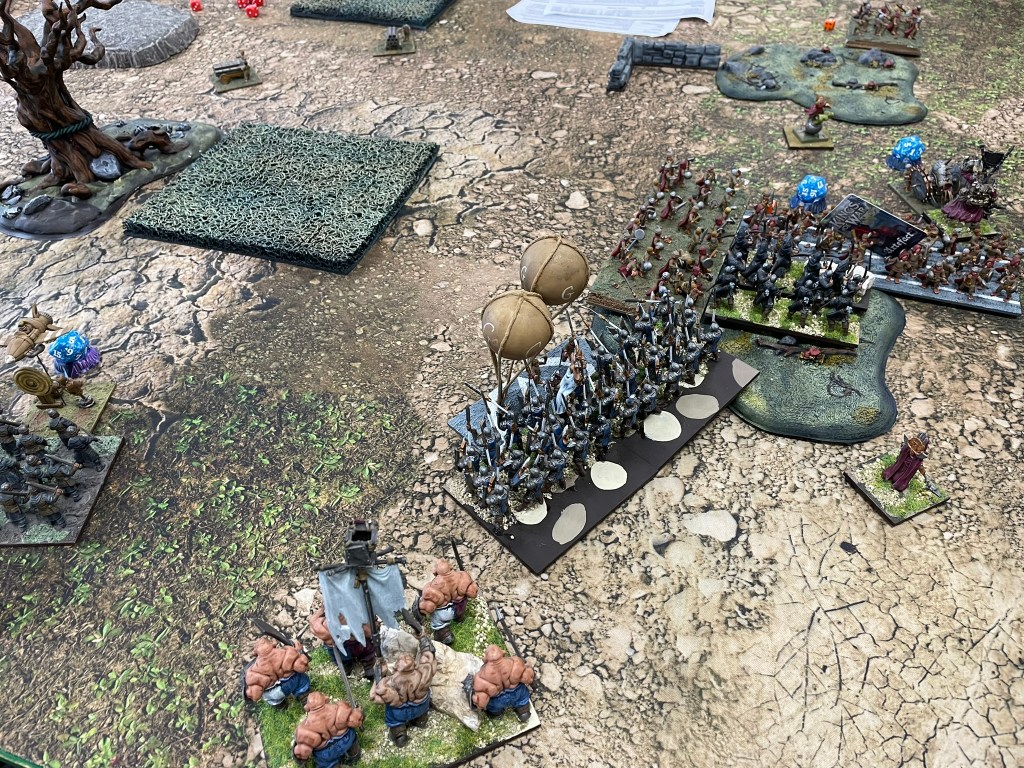
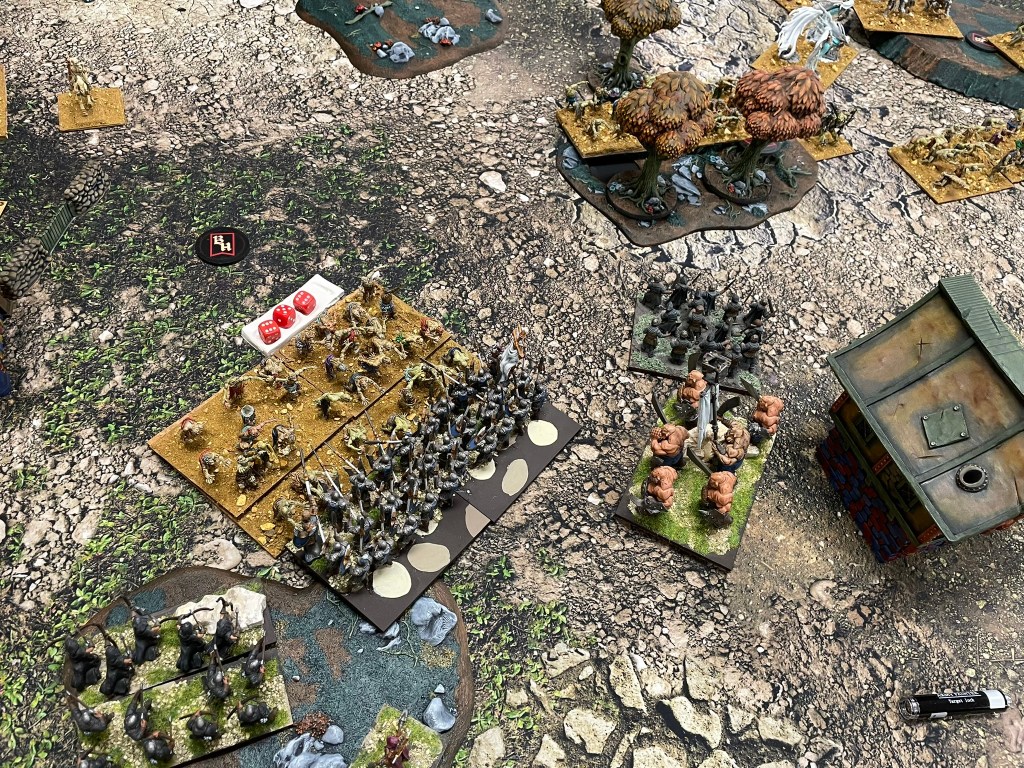
The first part of the plan worked quite well. The men sent foot knight regiments forward to pick up the tokens. The regiment on the far right of the board took the token without the rats raising a grubby little finger, however in the centre my gunline removed one of the units and wavered the second. The Scurriers turned out to be a bit of a problem (for the men), as their 14” charge range meant I would be able to get stuck into the wavered knights in the next turn and take back the two tokens they had picked up. The men responded (proportionately) by sending a horde of pikes into the flank of the Scurriers to stop their charge, of course the rat scouts perished (were you hoping this episode might end with a double one? Of course I did too).
Screenshot
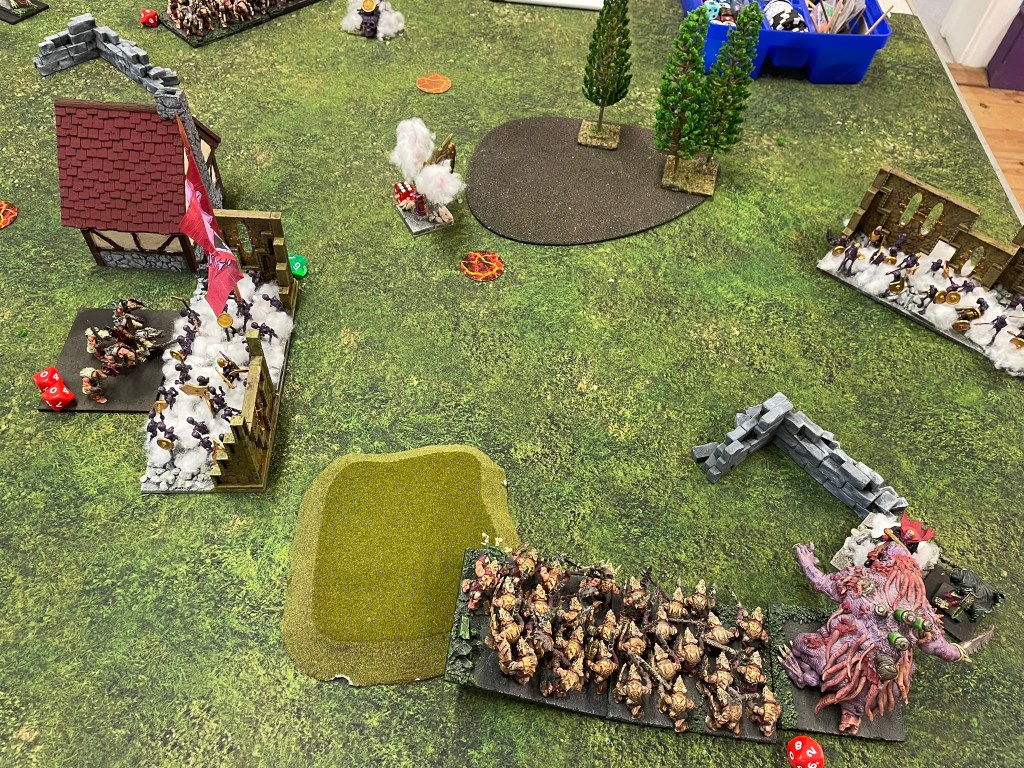
Over the next couple of turns the rats made short work of a Giant and two hordes of pikes that were sent into gum up their lines. Whilst a third pike block was held up by a lone warrior regiment (Plague Pots) for most of the game, the rest of the rats surged forward in the hope of catching the foot knights making their escape. The only real resistance were the Beast Cavalry that had been hanging about at the back of the table, taking the occasional shot. As the warlock charged forward, the only rat fast enough to catch up with the knights, the Beast Cavalry struck, tearing the lone rider to pieces, whilst the second regiment of flying beasts took out the Mutant Rat Fiend.
As the action settled it became apparent a horde of Shock Troops had managed to put themselves in charge range of the Foot Knights with two loot counters, unfortunately time had run out and whatever glimmer of hope the elite warriors were chasing was also dashed. Another loss to the rats.
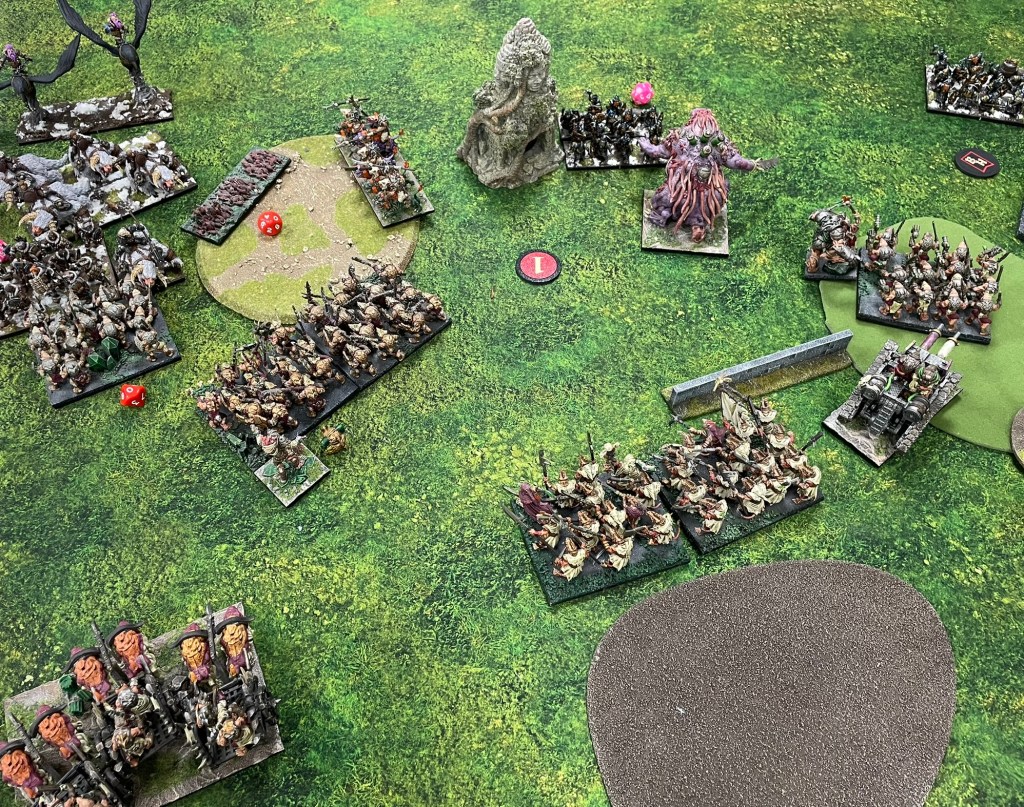
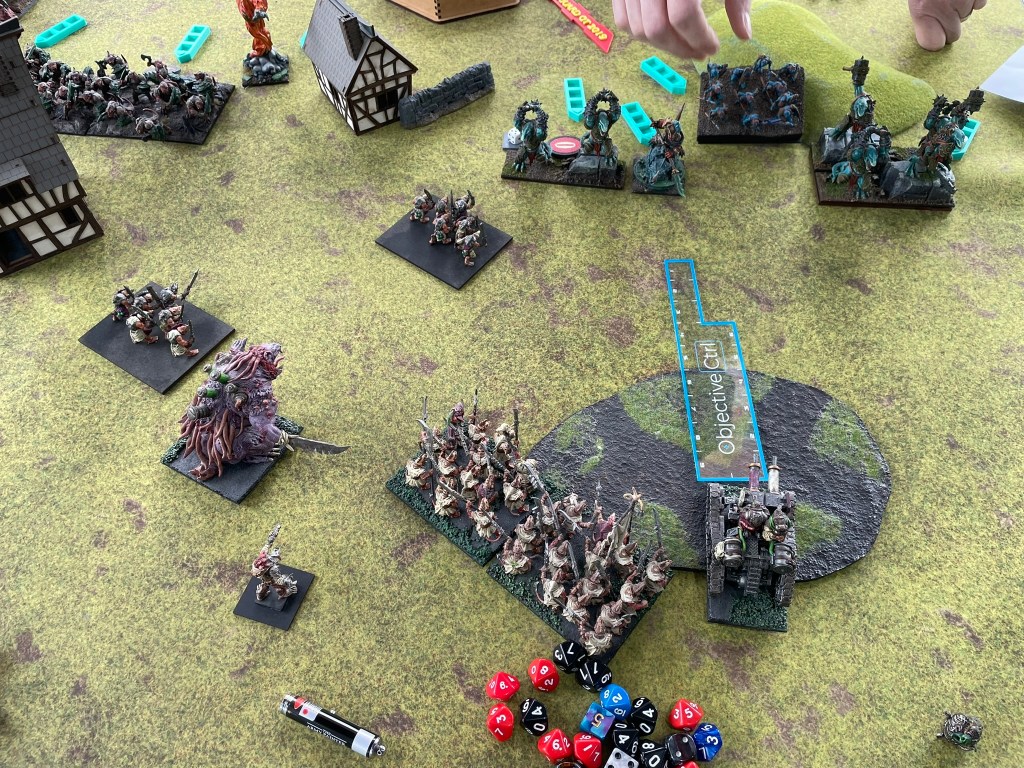
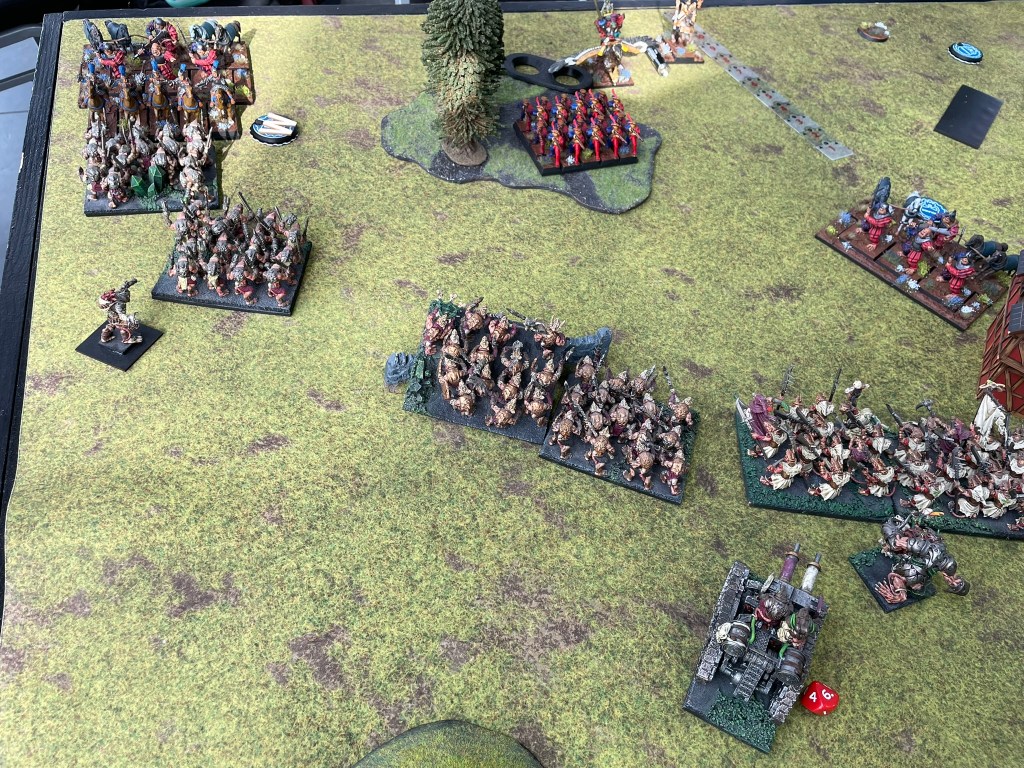
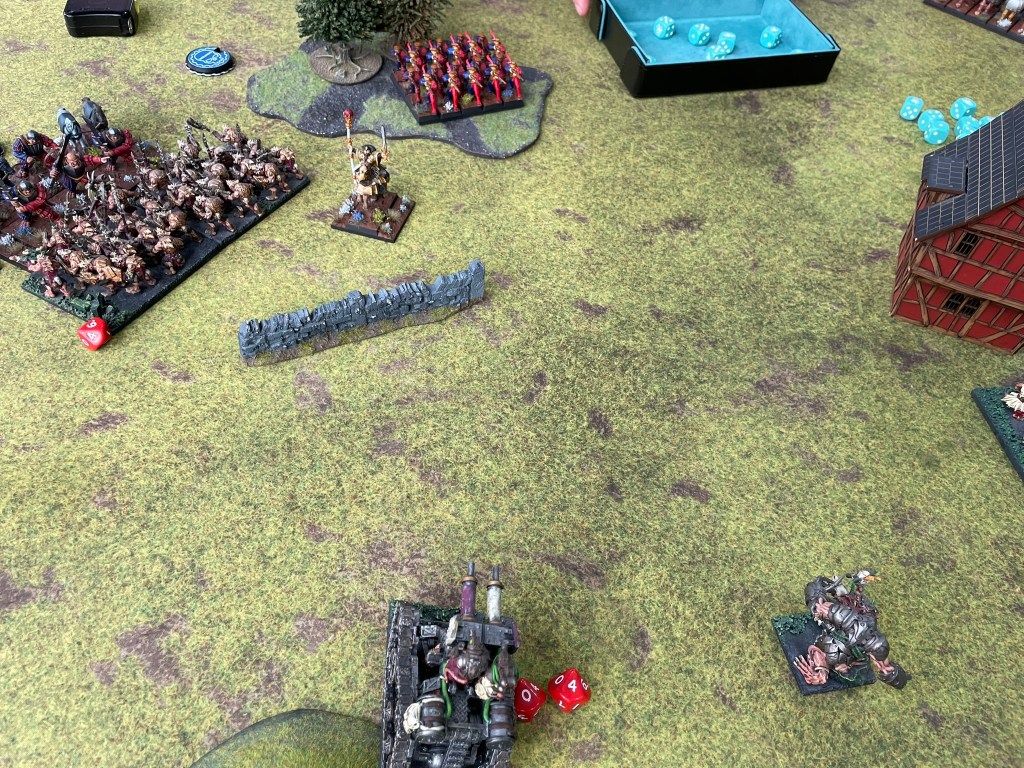
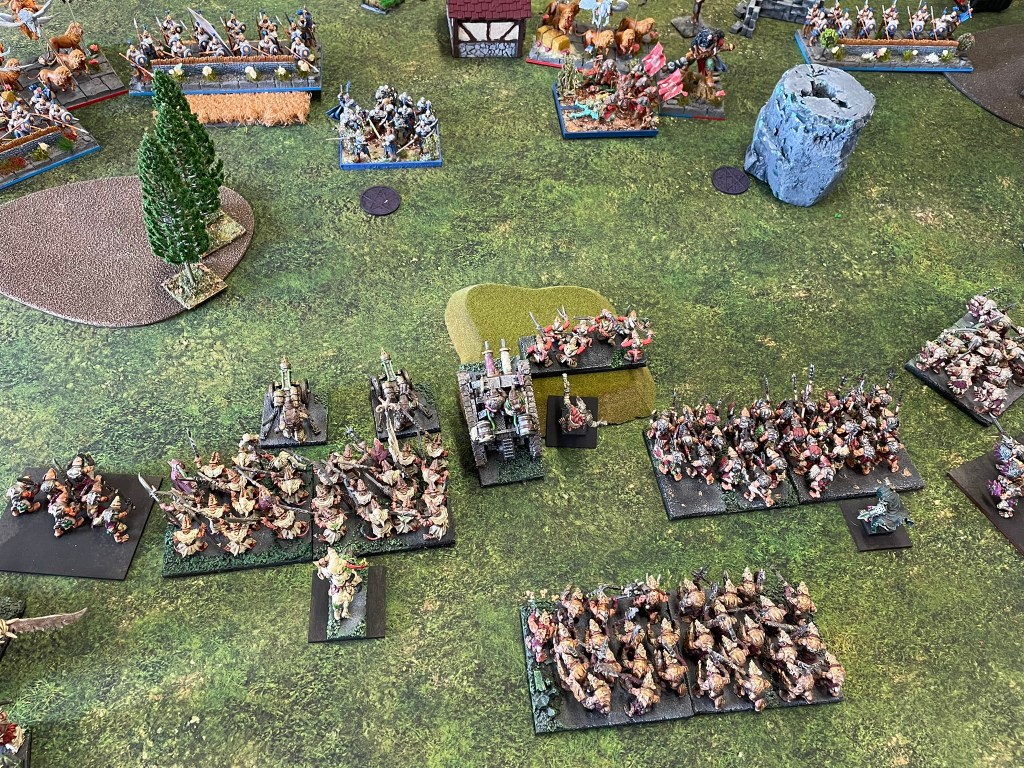
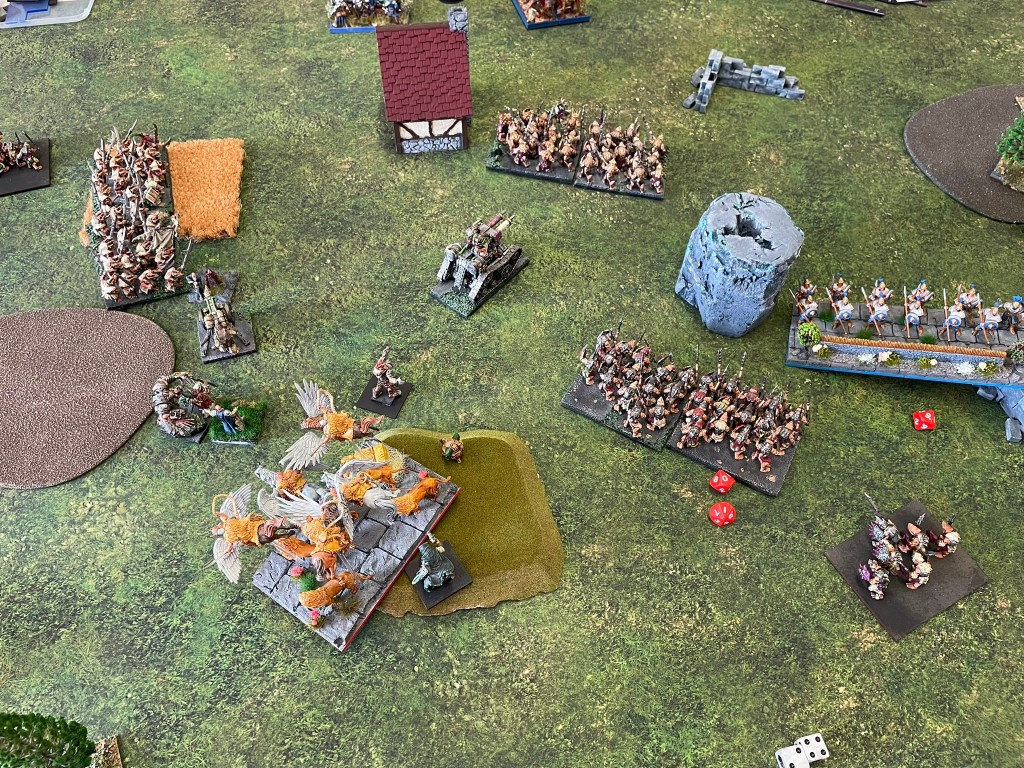
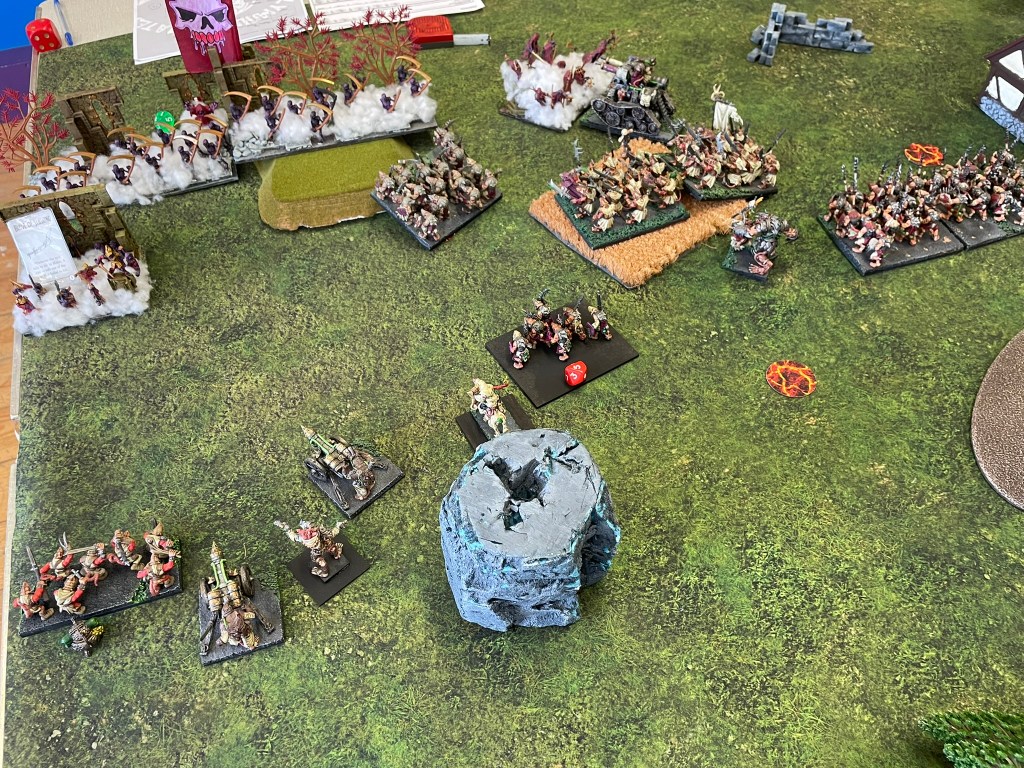
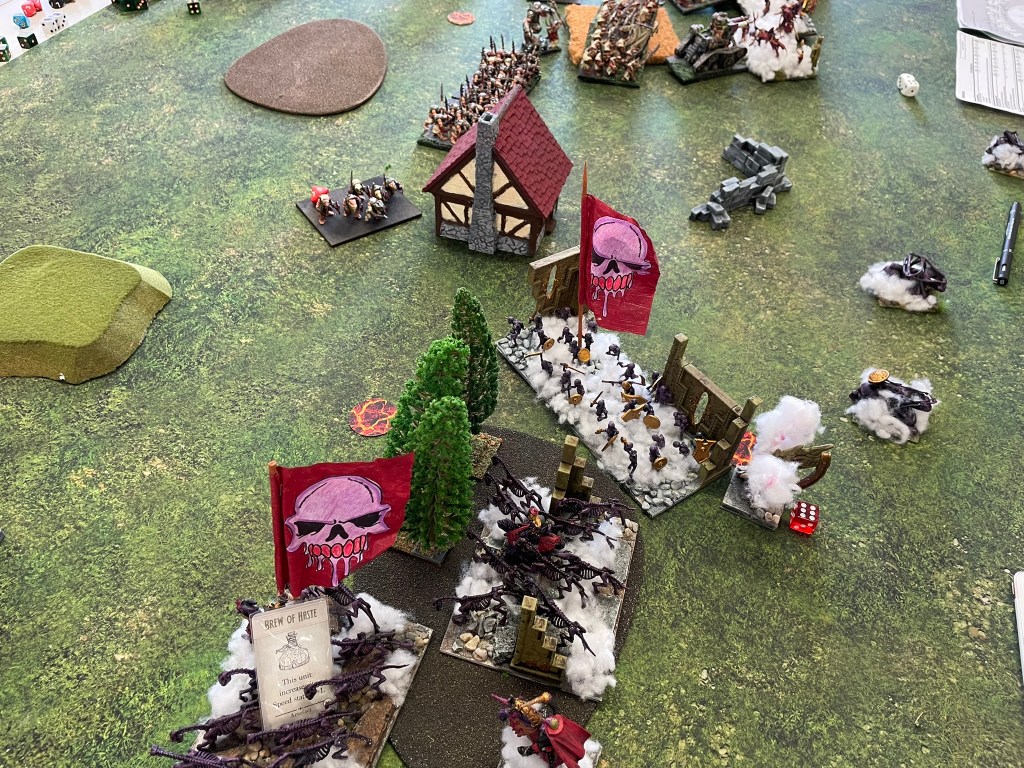
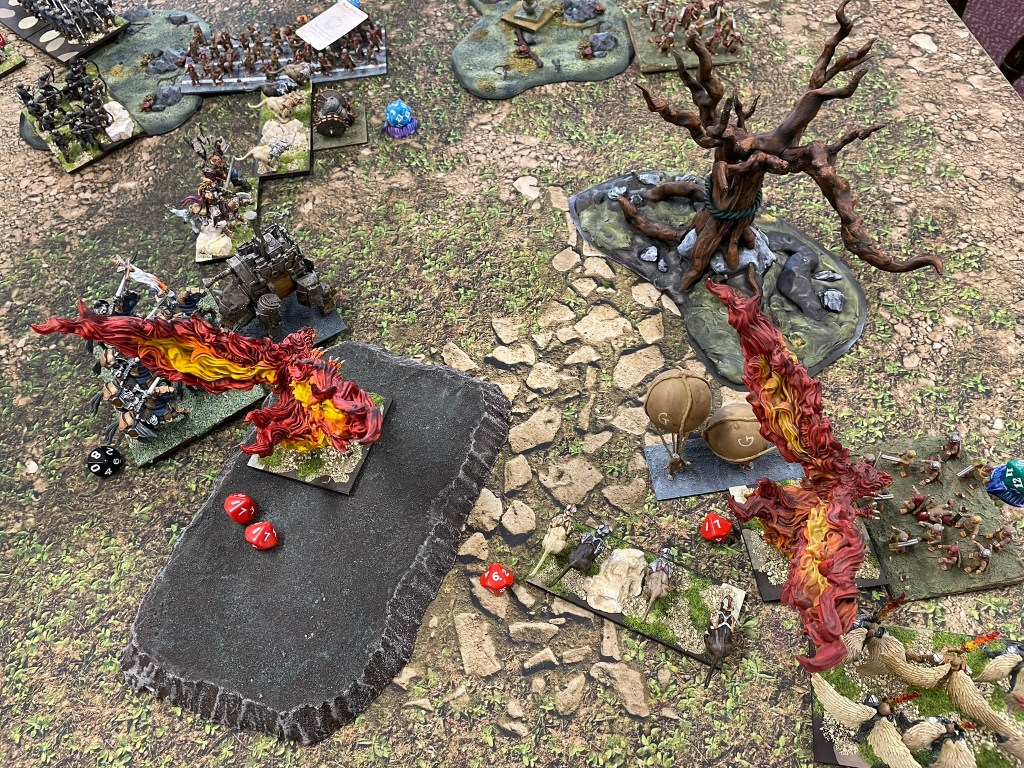
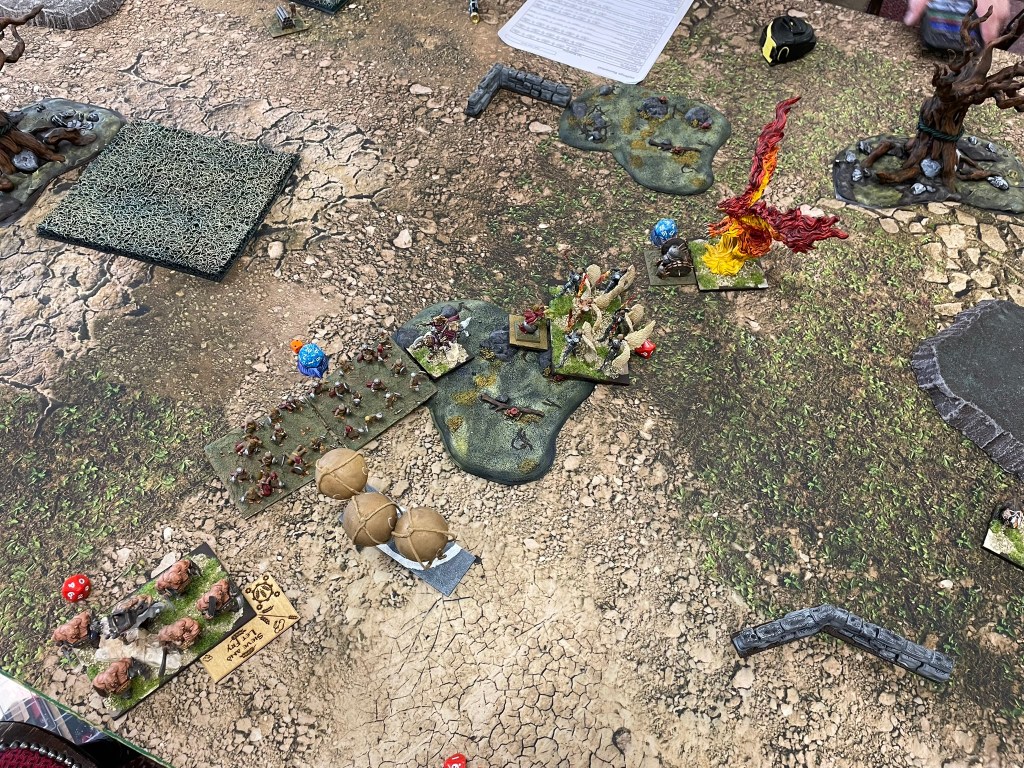
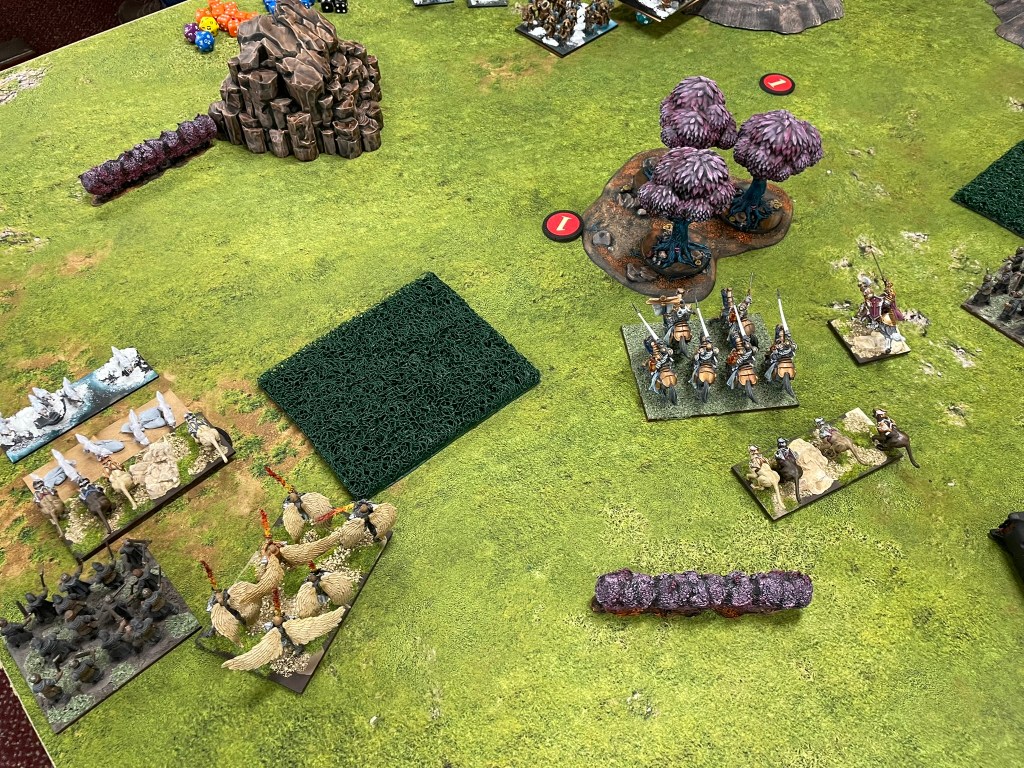
The last game was Pillage, against the Undead. I thought this would be an interesting matchup, as I’ve played Undead twice with Basileans and had two losses, so it would be good to see if the Rats could achieve something the Hegemony has yet to. With three catapults to face down and no really fast units I was concerned I was either going to have to take units out of the game to remove them or accept taking a lot of damage from shooting.
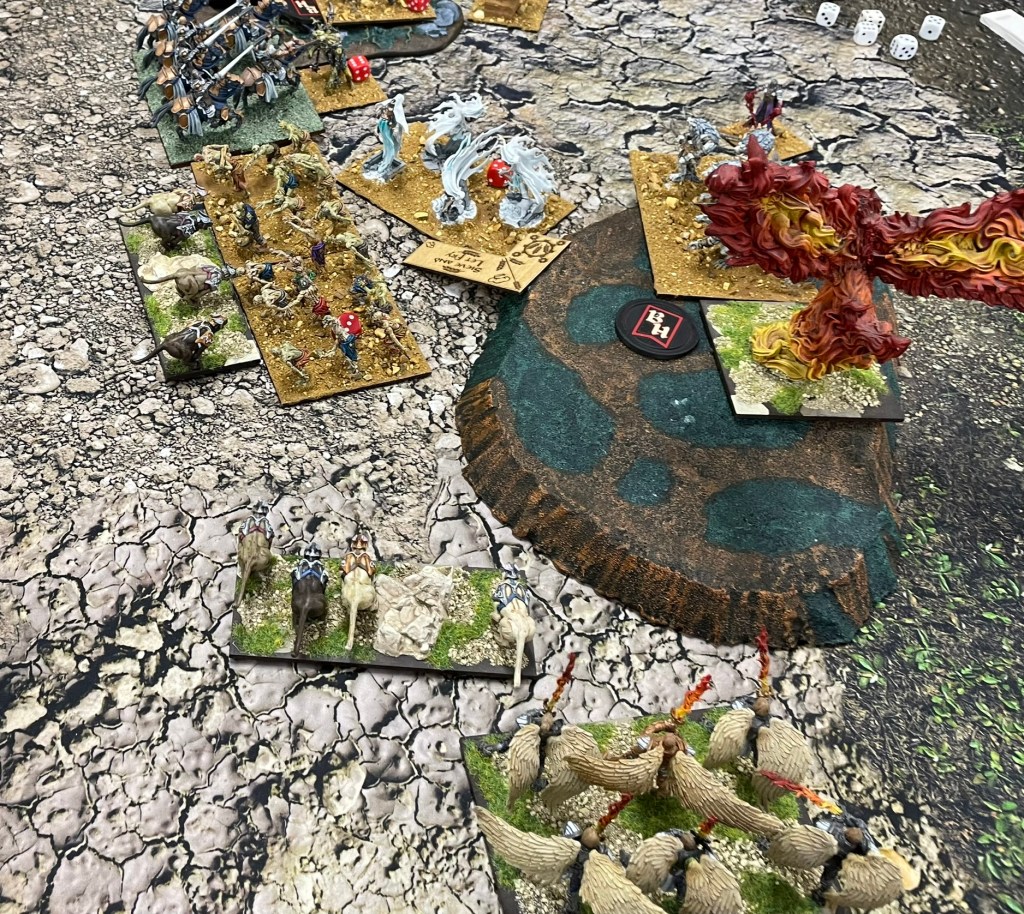
The catapults hit hard in the first turn, which I know usually mean their luck’s in and will eventually run out, but it’s still a phase to move through. The way the objectives were placed, and how my opponent had split his forces, essentially split the table into two halves. All this meant that I had to split my army, something I’m not usually excited about because it works best when it’s all together. On the left flank the Scurriers scouted forward and backed up by weapons teams and a Birthing Daughter started shooting at a Soulflayer regiment. Whilst the Scurriers got routed in the process the shooting teams manged to waver and then kill the vampires, before starting to wear down skeletons. Warriors and Shock Troops pulled apart the second vampire regiment, before over running the remainder of the flank.
Screenshot
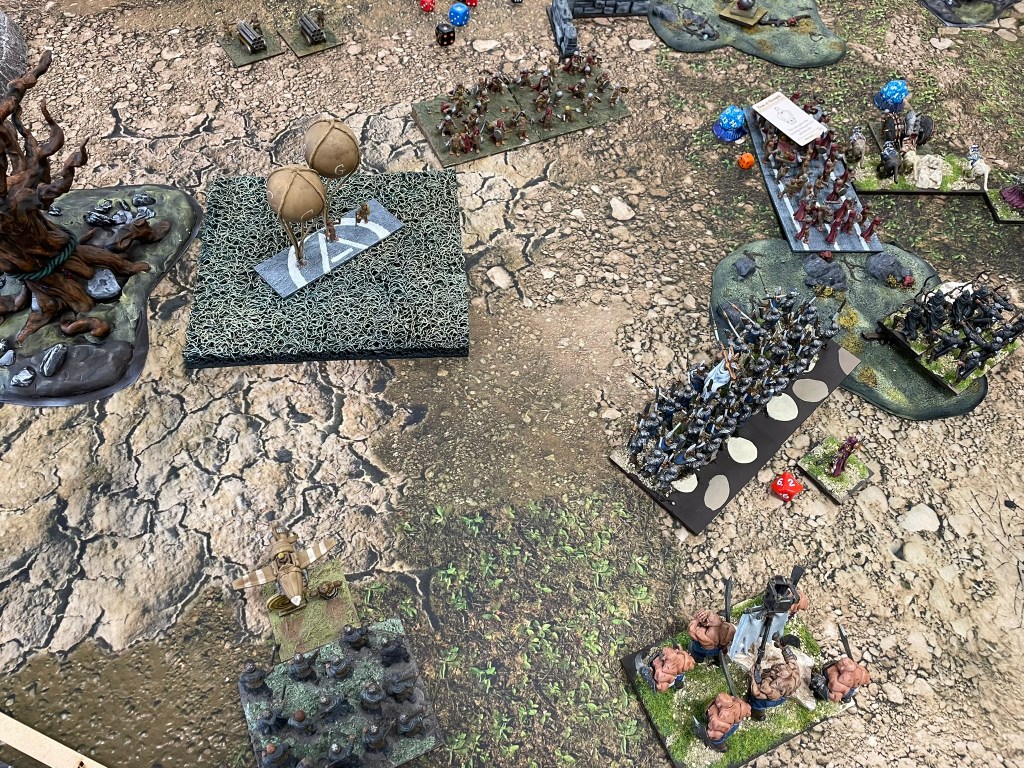
Realising that I would have to take objectives on the right hand of the board, as well as silencing the catapults, the spears and the Spewer tank managed to get clear charges onto the catapults. Whilst the spears cleared out two, before going on to grab an objective, the tank was held up with an untimely double 1, meaning it had to wait an extra turn before returning to the centre of the table. Whilst this was happening a skeleton horde had shambled from the left flank to the right flank and positioned itself between two objectives.
The right flank also had its fair share of action. Two regiments of Revenant Cavalry and the Vampire Lord rode out to stop the rats, fortunately their charges came in piece meal, allowing the rats to munch through them one after another before grabbing another objective. As expected, grinding through the hordes of skeletons kept the rats occupied, leaving little time for manoeuvring. By the sixth turn the armies were drawing, but the rats had managed to get their positioning sorted out in case a turn seven happened. Fortunately, a turn seven did arrive and the rats unleashed their charges, smashing skeletons and clearing the board to take a sizeable win.
All in all, it was another enjoyable day of fourth edition. The event was really well run, with a great lunch and as much tea and coffee as you could manage, I’ll definitely be looking out for any more one day events there.
Game wise I’m still warming up to the new edition. It is a very different ruleset with different dynamics. The games are definitely enjoyable but finding an army list I’m really excited about is proving a bit of a challenge. Despite the large amount of repeated units in this list I was surprisingly happy with how the shooting performed, and whilst I’m almost certain I’m a lone voice on this one, I actually think Scurriers are really interesting, given the right support. I’ve decided to stick with the rats for the next event in May, although the warlock will be going, it’s a fun combo but is probably a little too conditional to get value out of every game. Thanks to all my opponents and the TO for a great day.
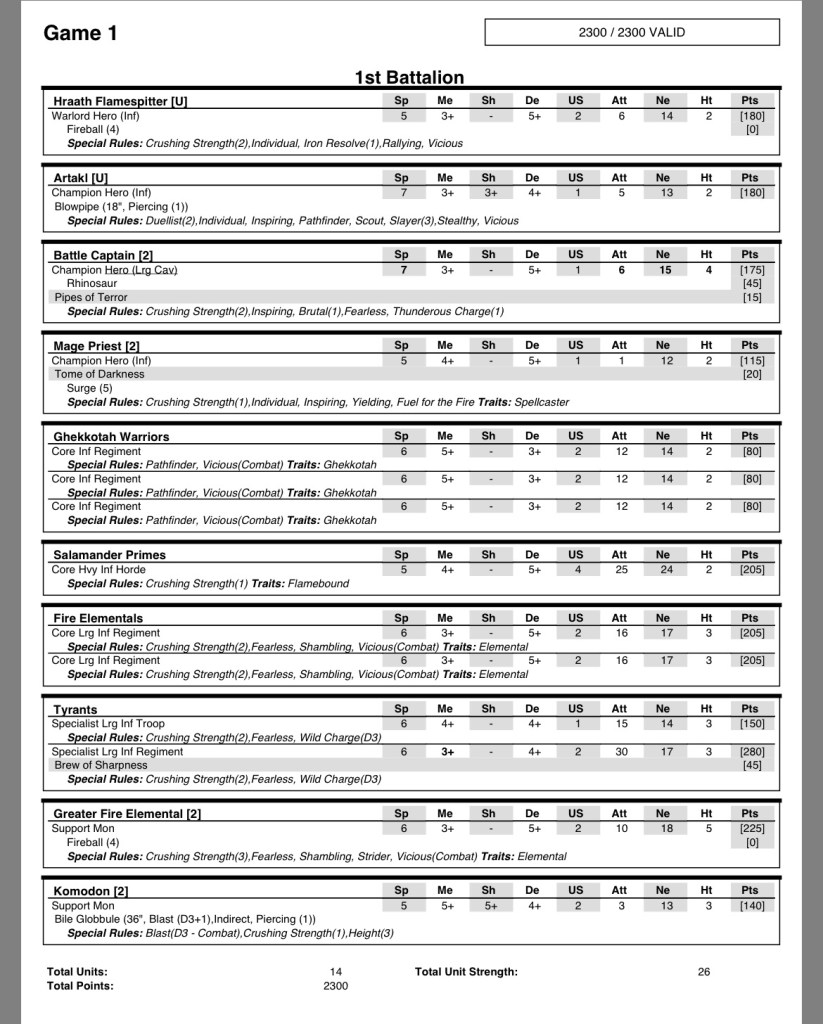
Rats not piloted came in third place so I thought I’d share the list.
To keep up with what’s going on you can follow @wizards_bookshelf on Instagram and Threads or drop you’re email below to subscribe.
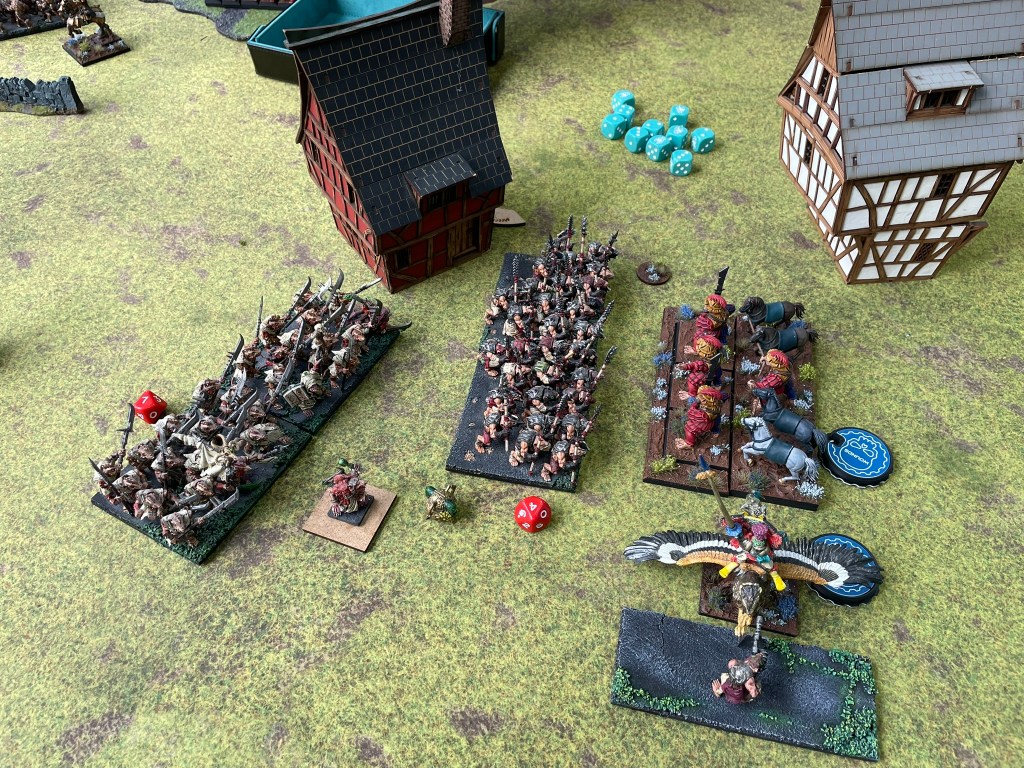
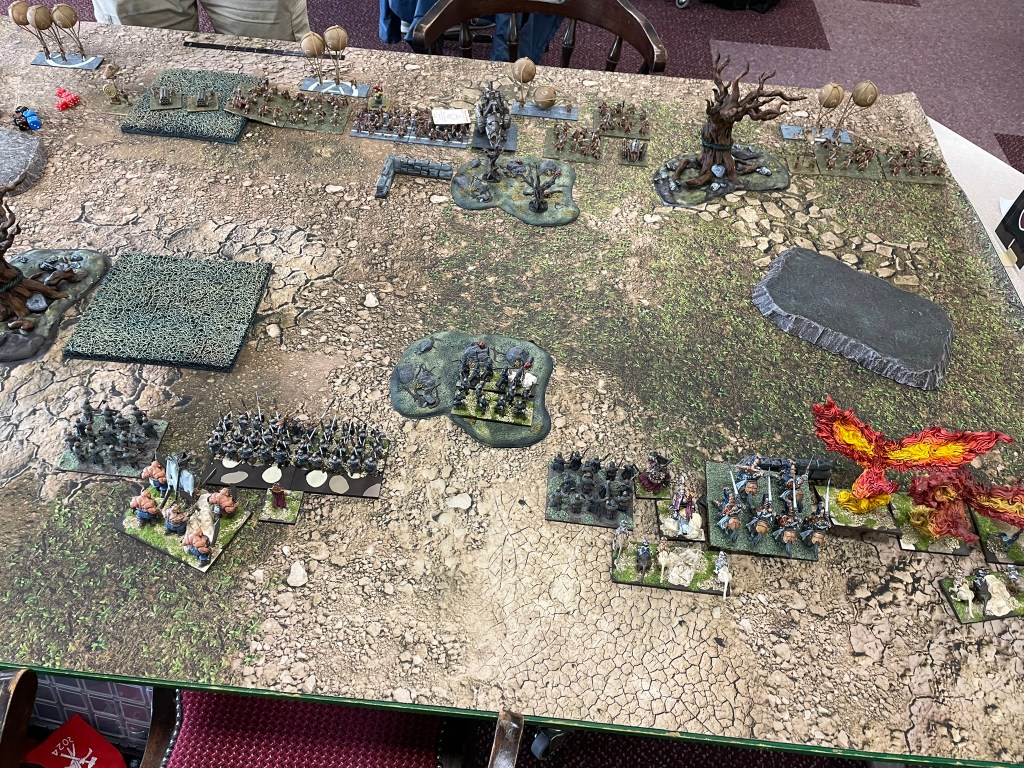
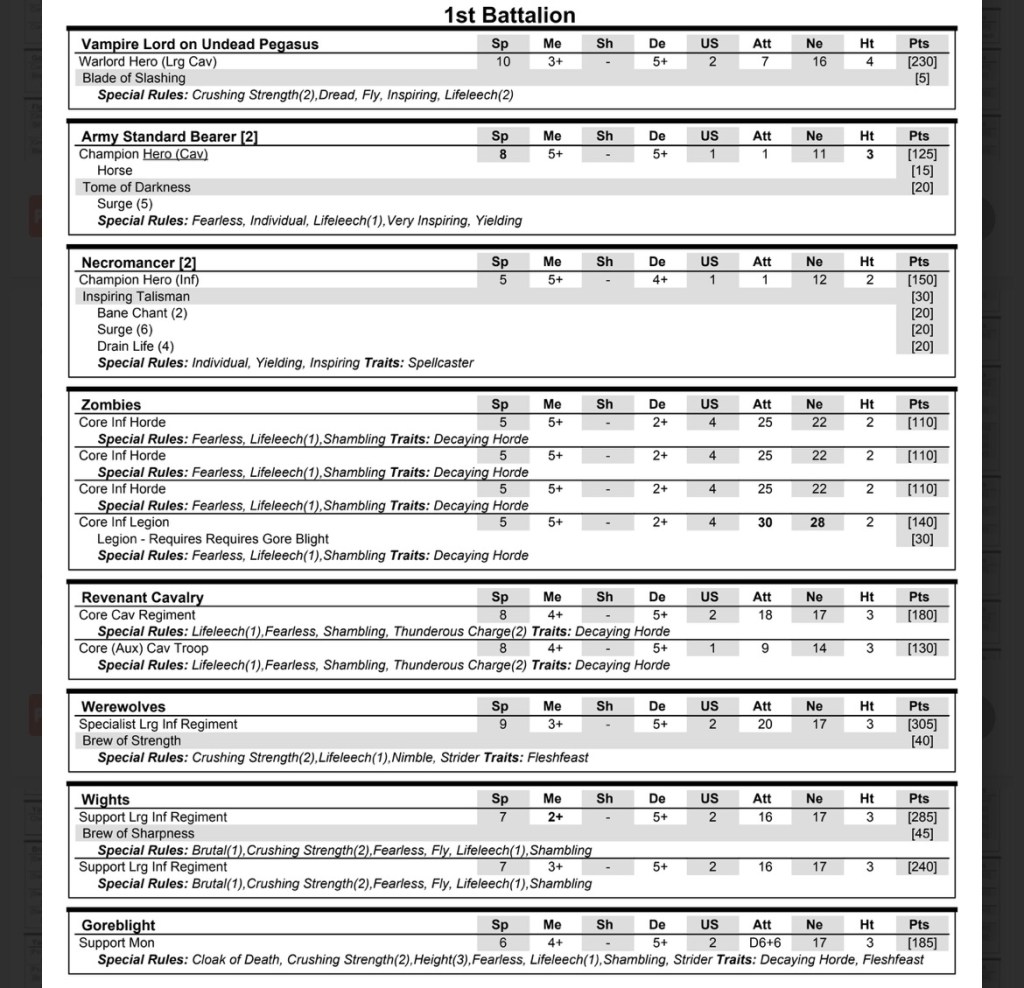
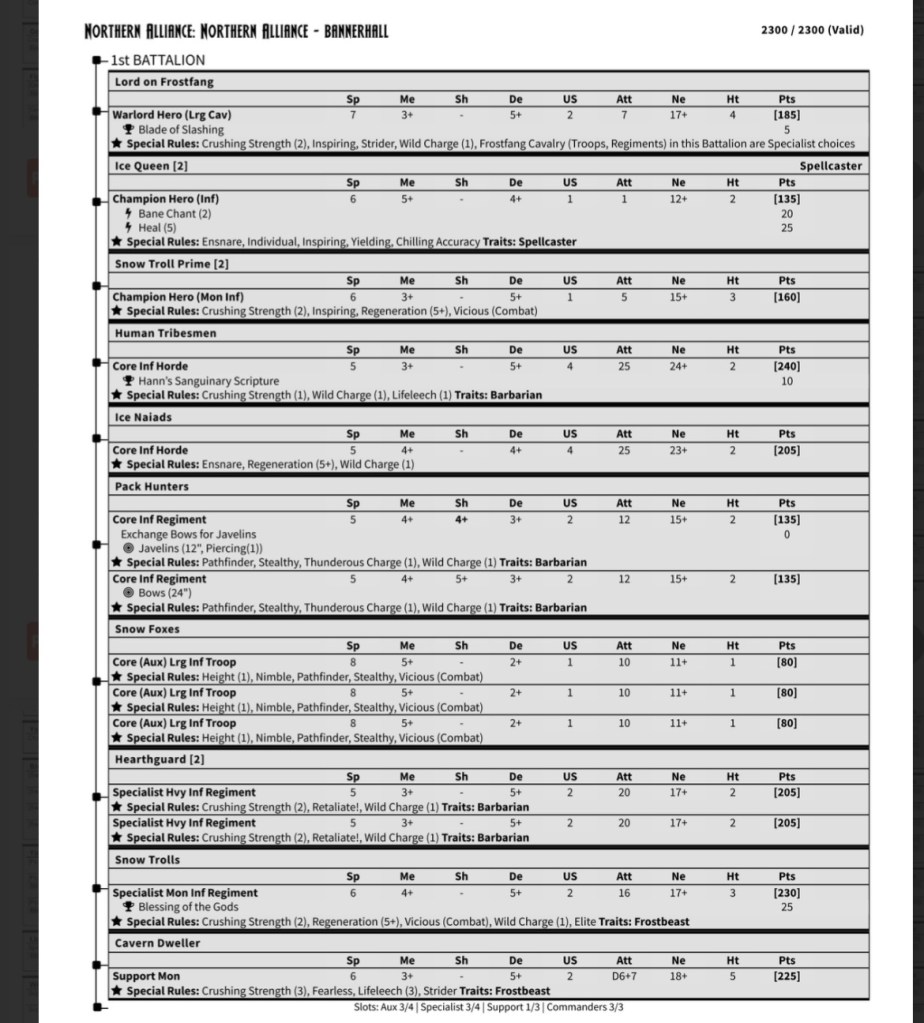
My second event of fourth edition was Bannerhall. An absolute stonker of an event in Cheltenham. Rich, the fantastic host, served up a wide range of sweet treats, and for the periods in between rounds of donuts there was the odd game.
At this point fourth edition is still very much bedding in. I think I’m there or there abouts with the rules, but when it comes to army lists, I’m still none the wiser. I do like my list, but I have no idea if it’s where I need it to be. Buoyed by going 2 wins to 1 at the last event I decided I must be onto something with my Basilean army and took pretty much the same list. The only change was to drop 30 points of items and turn the Sisterhood Scout troop into a regiment.
Screenshot
Going into the event I felt good, although I haven’t played my Basileans since the last tournament because I’ve been dabbling with the Halflings and Ratkin. Even so, I felt as though I was in a good place.
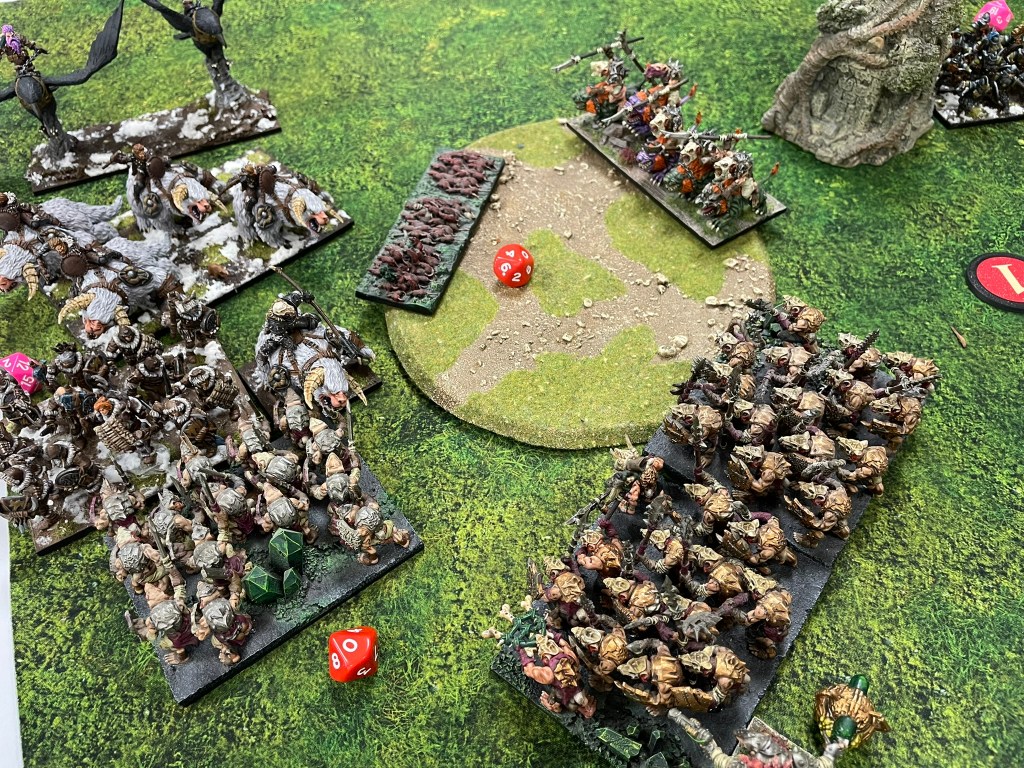
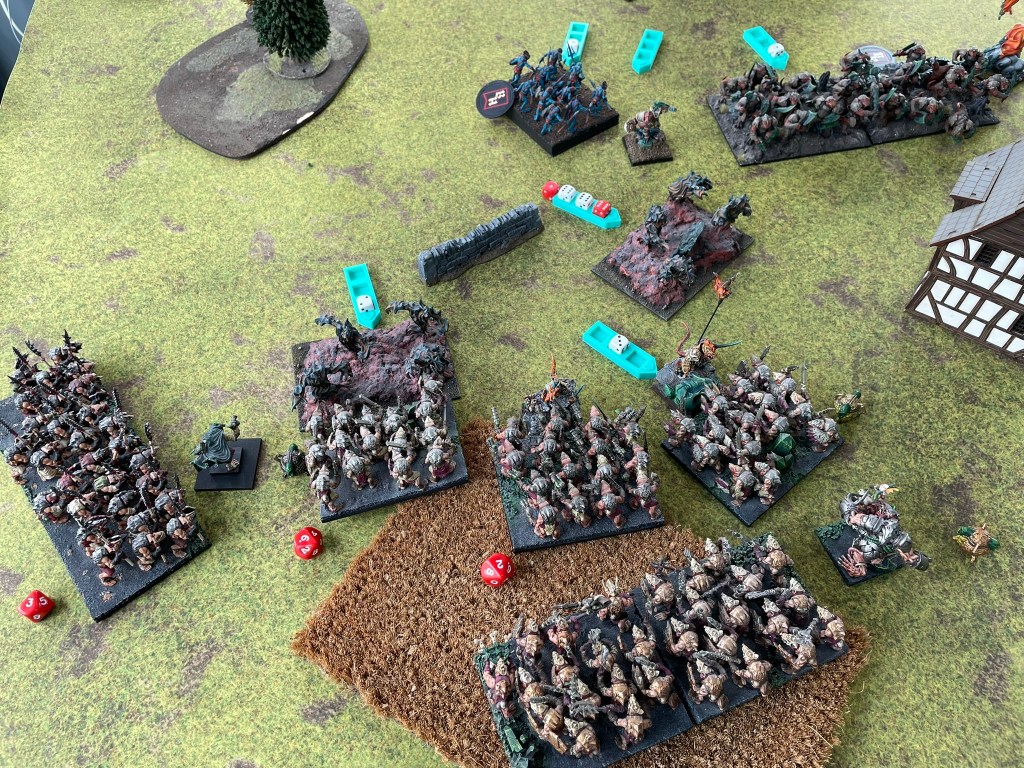
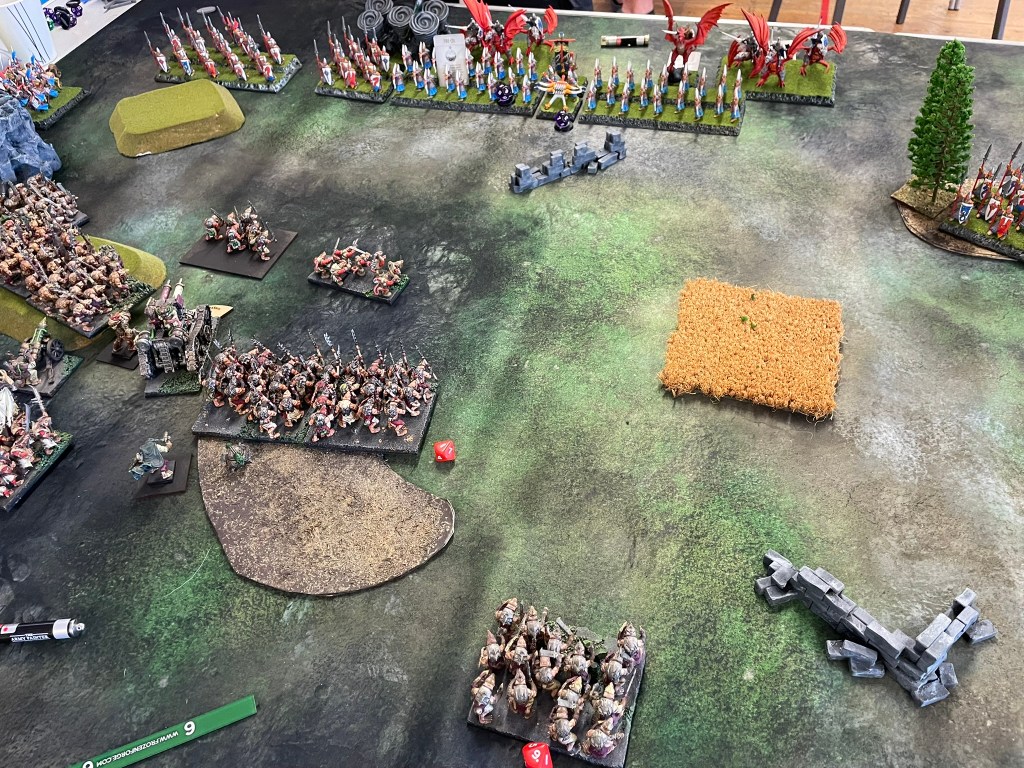
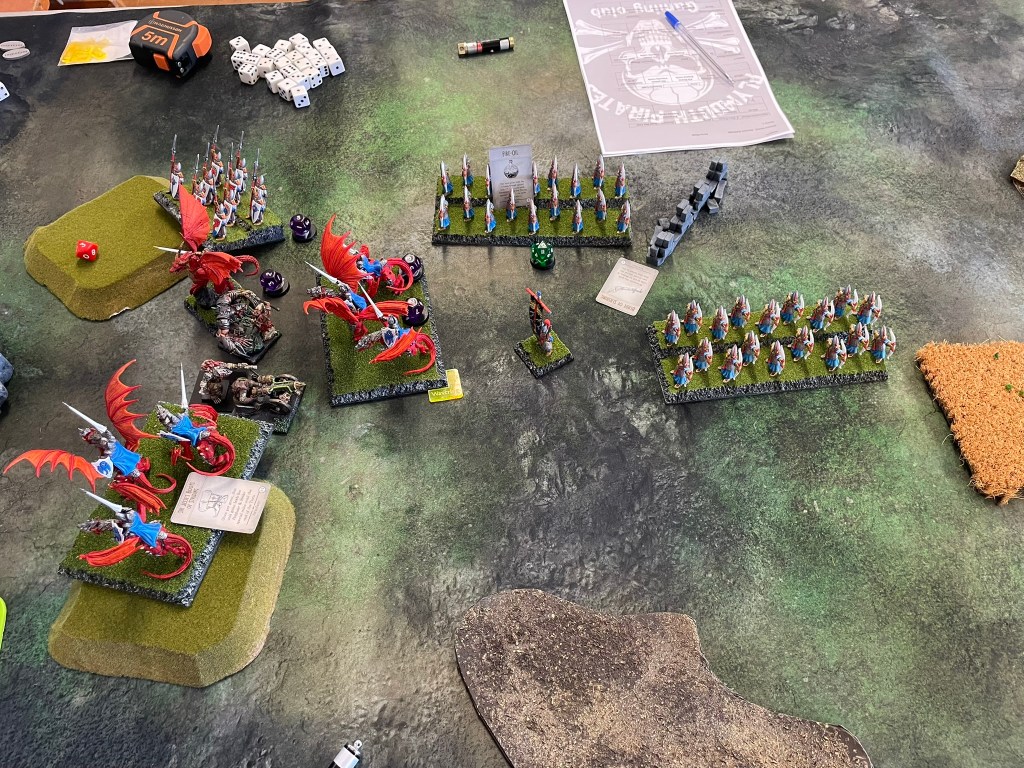
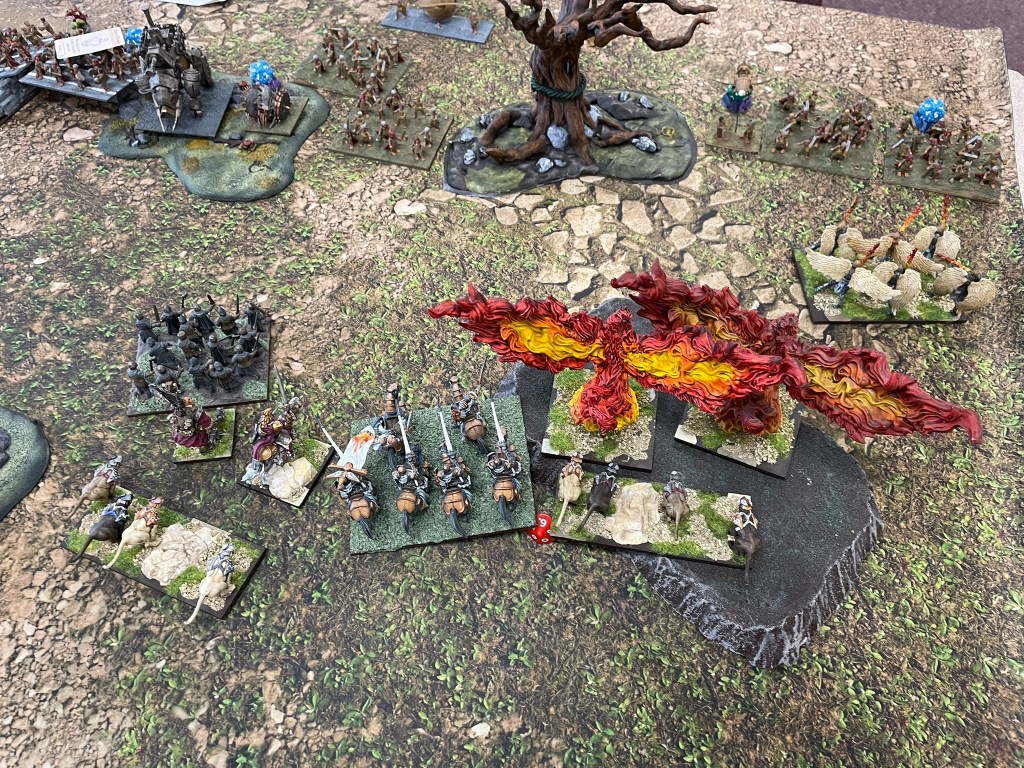
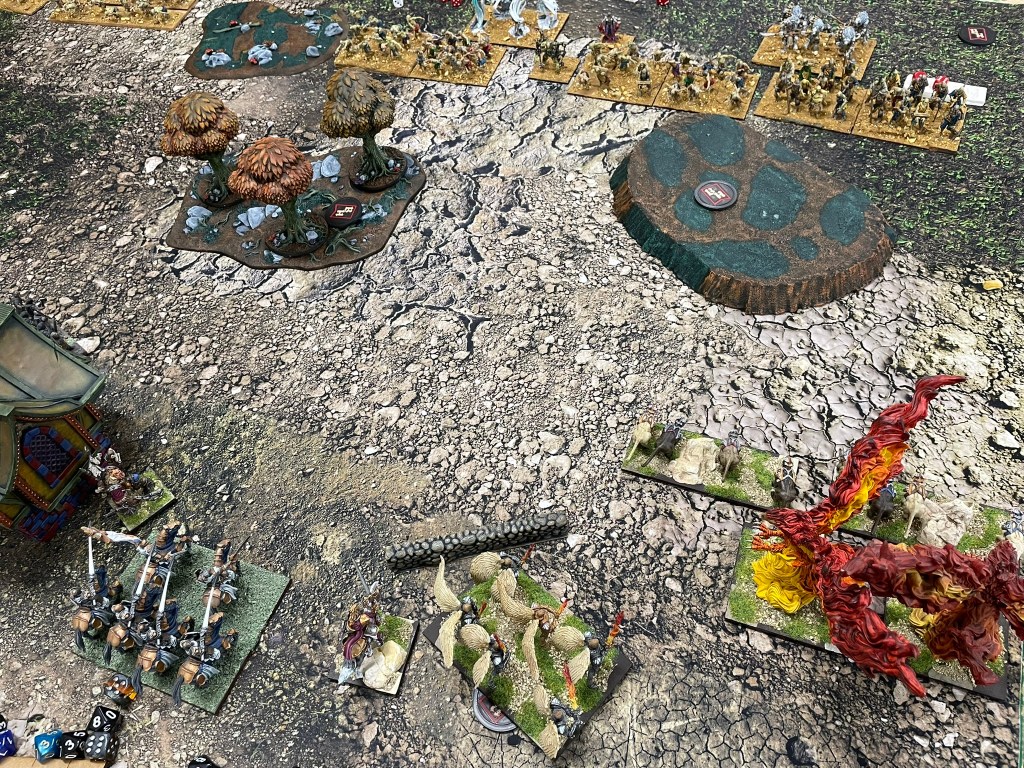
My first game was against a Halfling army, playing Control. I really love playing against armies I also play. It’s great to see how other people use them and workout if there’s any ideas I can borrow. This list had a reasonable amount of shooting, loads of drops and lots of Brutal. I thought it would be an interesting matchup because whilst I didn’t think the shooting would count for much because of my healing, and I’m not massively convinced by saucery (or any of the commands to be fair), I knew Brutal could, given the right circumstances, be a problem. What I was concerned about though was the number of drops. At 17 I suspected I would be hard pressed to keep up with all of them.
The Halfling shooting, as predicted, didn’t do huge amounts. Early on the little people tried to bag a Phoenix with the combined shooting of an Iron Beast and three rifle regiments. Despite a great volley from the pig, the rifles came up short, the Phoenix just about survived, and went on to heal back to full health by the end of the game.
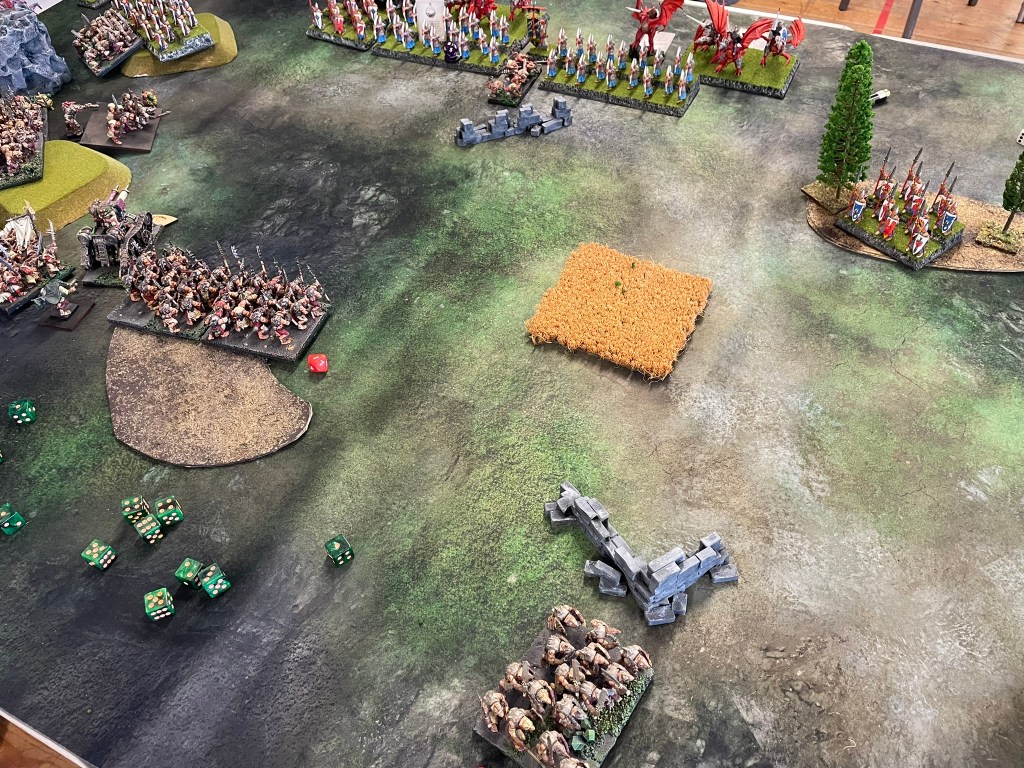
It was a fantastically close game from the start. I wanted to focus on taking the scoring areas in the centre and on the right-hand side. I figured the number of cheap mobile units my opponent had on the table meant they would easily be able to secure table segments, so I had to pick the units I wanted to hold and focus on them.
Screenshot
Things went pretty well on the right. The table sections were largely cleared out in the first half of the game by the Elohi and Phoenix, however the centre was not quite as straight forward. Whilst the Halflings died pretty easily, I just couldn’t get hold of things to kill quickly enough. My opponent masterfully piloted his various tinker contraptions and in the end I just couldn’t swat enough them in the time we had. As a result, the Halflings took the win and the Basileans headed off for their next donut break.
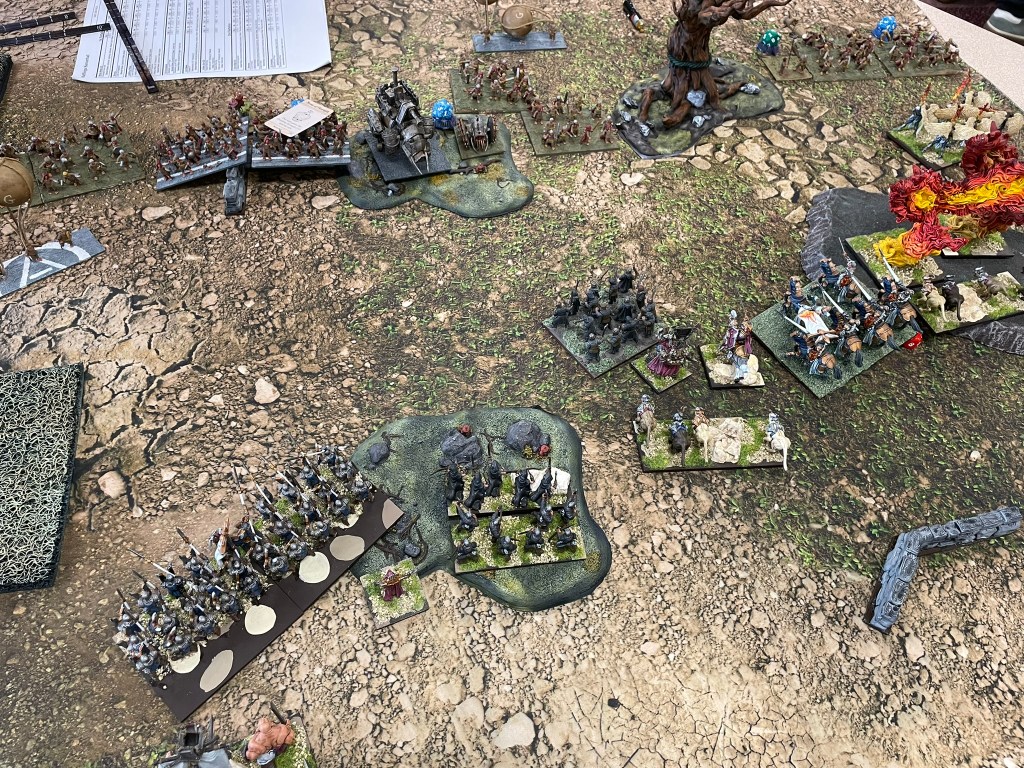
Game 2 was against the undead, playing Pieces of Eight. My last game against the undead had been something of an uphill struggle. Munching through zombies is always a challenge, and a thankless one when you have wights and werewolves for afters. Although my shooters made some decent headway into the zombies a theme was starting to develop. Although this army had less drops than mine progress was slow as 3 hordes and a legion of zombies do tend to hang around. Add to that the amount of healing the army had was just enough to keep its horrific hammers going despite some decent chip damage.
Screenshot
I definitely made an error with my Elohi, sending them into a space I thought they would be invisible in, only to then realise the new line of sight rules made them sitting ducks for wights with the Brew of Sharpness. Amazingly they survived one round of combat, but the angels fluffed their next rolls and failed to get the damaged unit off the table in one go. They didn’t get another chance.
Whilst I made a pretty decent job of clearing out the centre and securing both 2-point tokens there was still quite a lot of undead on the board. In a truly cinematic style, the accursed creatures of the night started to move, inexorably in towards me, overwhelming the righteous and dragging my brave warriors to their deaths.
The result was a win for the undead, although I did manage to hang onto three points.
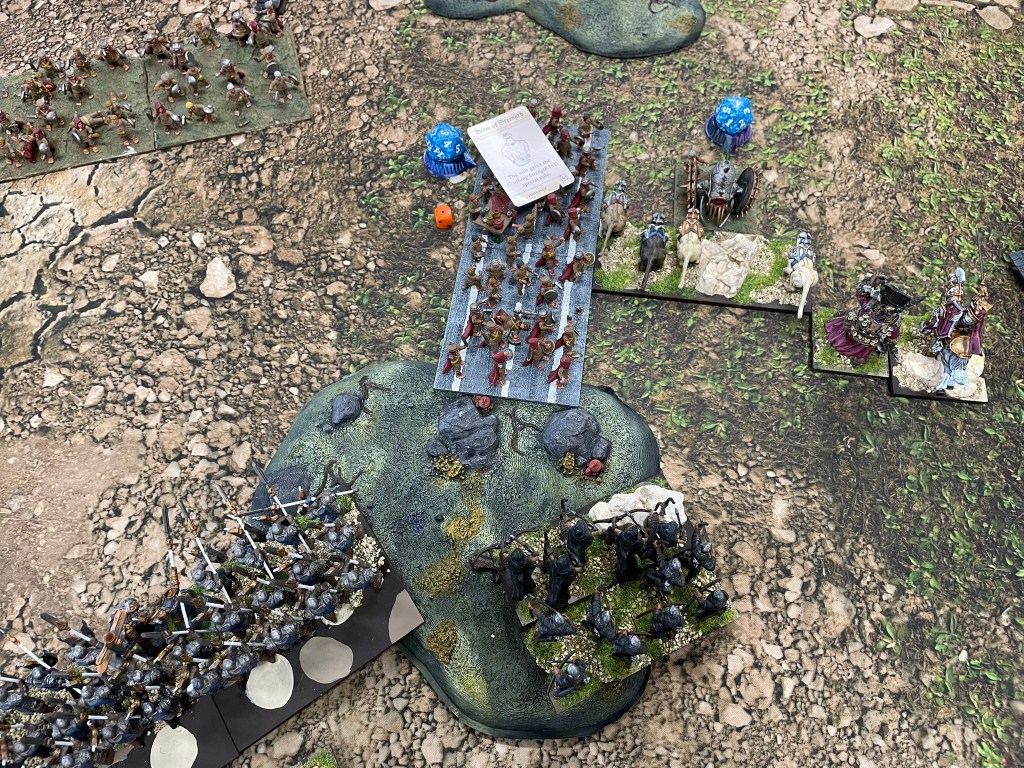
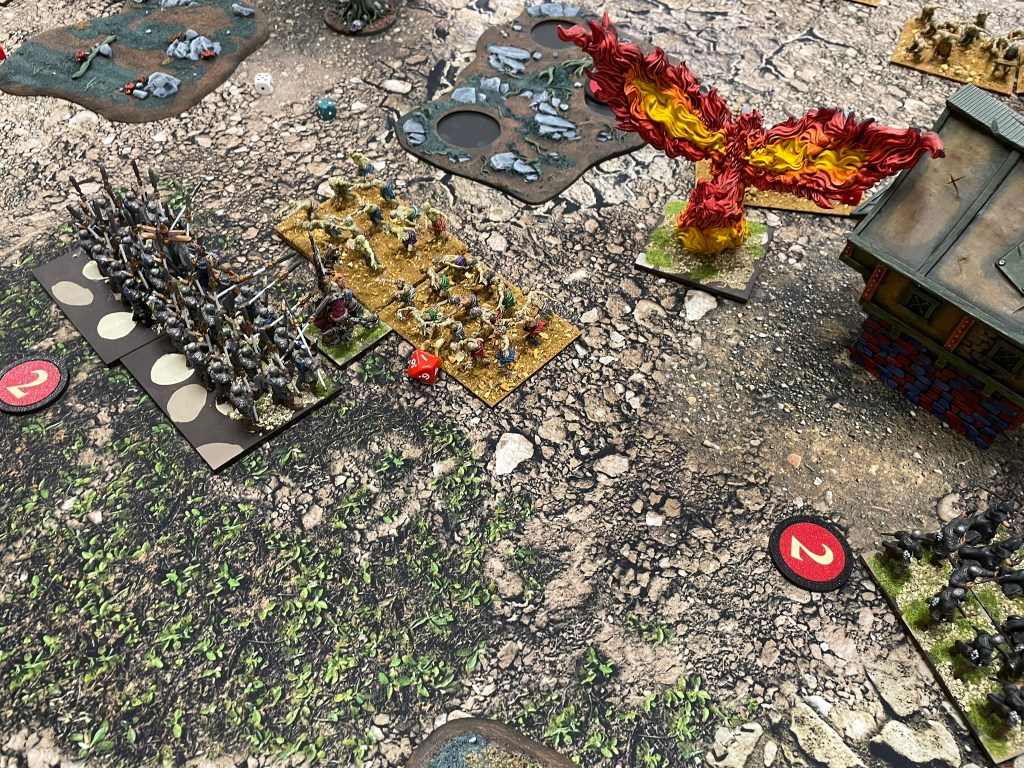
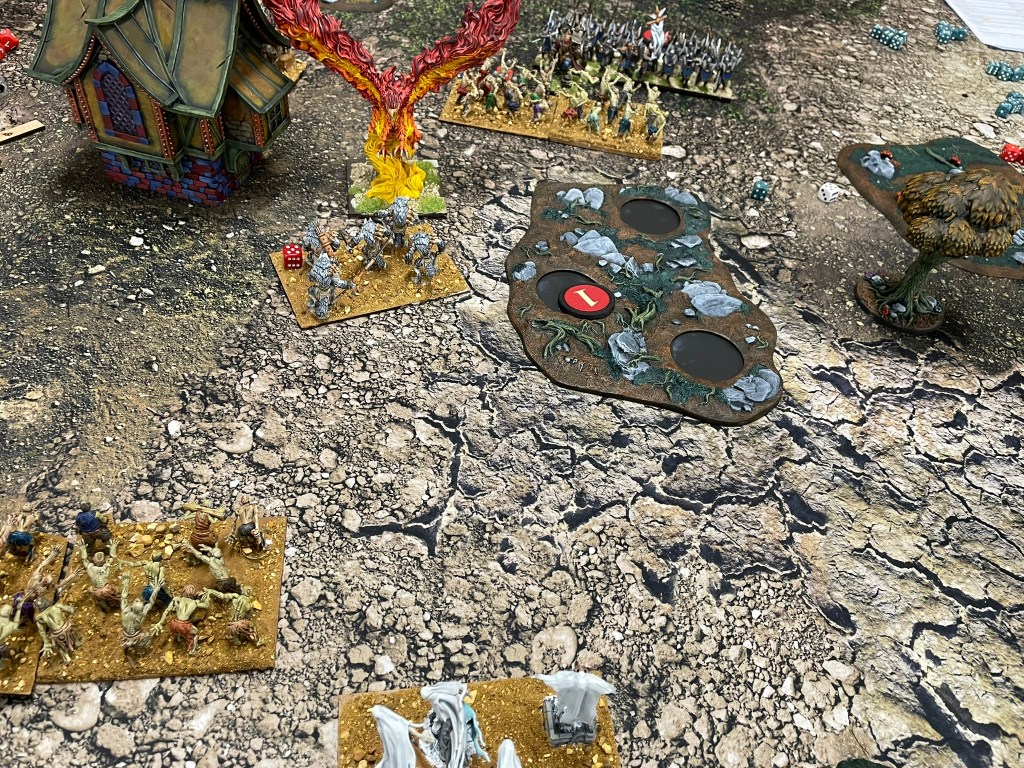
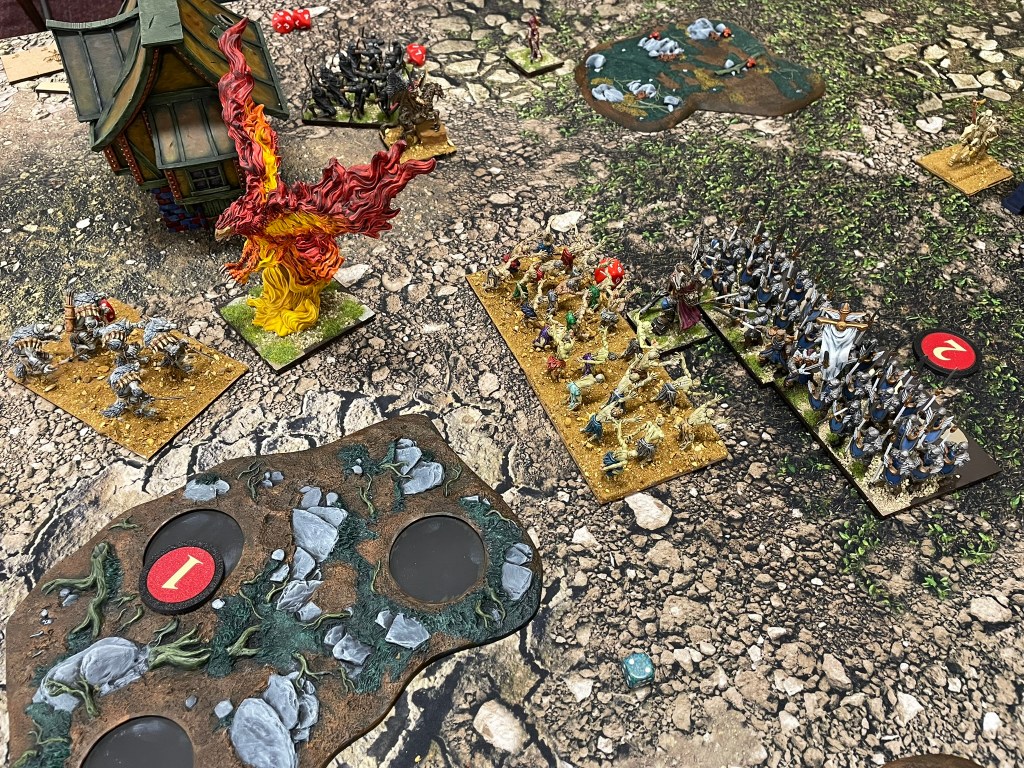
The final game was Pillage, against the Northern Alliance, and it did not go well. After a promising start clearing out my left flank and securing a loot counter the solid wall of northerners that ranged from the centre to my right refused to budge as I tried to break into the middle. With some decent layering of punchy units, it didn’t take long for the Elohi to meet their demise, swiftly followed by the Paladins and then more of my core units. For the third game in a row I felt I just didn’t have enough punch to break through the opposition, and so they wore me down quicker than I could do to them, and the result was another loss.
Screenshot
Despite the results the games, and the day itself, were brilliant fun. My opponents we’re absolutely brilliant. The cherry on the top was that I hadn’t played any of my three opponents before, which always makes for great games. I’m still on a learning curve with the new edition, and specifically with army lists. Because of this I decided to have a quick look at the top six lists to see if there were some general principles I could steal. I’m not a mathhammer type, I tend to be strictly vibes when it comes to army development.
What was interesting was that all the lists in the top six places had at least 15 drops and generally only had a couple of units worth over 200 points. Whilst I’m not saying there is a right and wrong way to build lists, the thought of having an extra unit certainly tallied back to my feeling of just not having enough in the tank. I’ve also been wondering if the Elohi are a bit of a single point of dependency. As a general point of order, it seems to be the case that the more the Elohi do, the better the game tends to turn out. So, because of this I’ve decided to rethink the army, in addition I understand that they may be in the next army book which is due in the next couple of months, all of which means I’ve decided to give the Hegemony a bit of a break and run a very different rat list at the next event in Plymouth next weekend.
To keep up with what’s going on you can follow @wizards_bookshelf on Instagram and Threads or drop you’re email below to subscribe.
I started my Basileans back at the beginning of third edition when I was just getting back into the hobby. During my twenty-year absence from toy soldiers it felt like a lot of things had changed and I definitely hadn’t kept up. Something that really attracted me to the game was the multibasing concept.
There were three reasons for that. The first was that I didn’t have to fiddle around with hundreds of individual models during games. The second was that because the unit’s footprint was more important for play than what was on it, I could start testing out army lists really quickly, and the third and final reason was that rules around minimum and preferred model counts meant I didn’t have to paint up anywhere near as many models as I once had. These things were all great for a gamer who sees painting as a bit of a necessary evil.
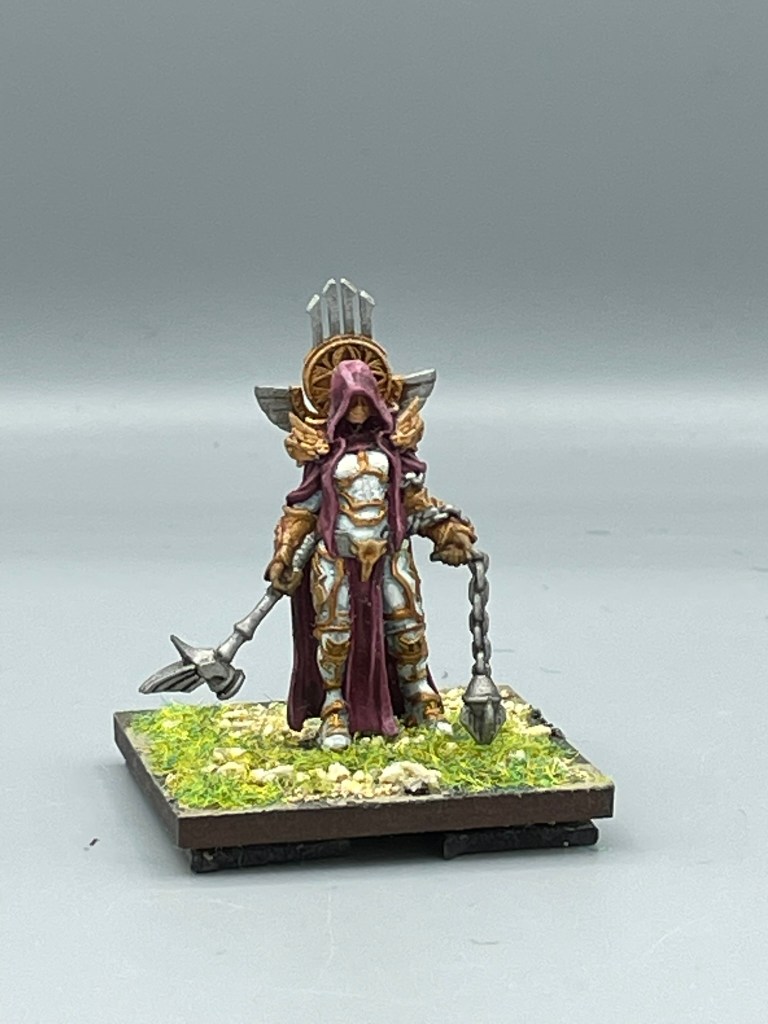
Possibly the Mantic model with the most sass?
As with most things that seem simple in life, if you willingly choose not to ask too many questions or don’t know what questions you should be asking, I engaged with it all in good faith. To the credit of both local players and tournament organisers I was genuinely impressed that everyone else did as well. It’s one of the enduring features that I really love about the tournament scene in the UK in particular is that most players turn up to most events with fully painted armies, which is great. What’s even better is that some of those armies will grow further over the course of the year as more models get painted and added to bases, which is great to see.
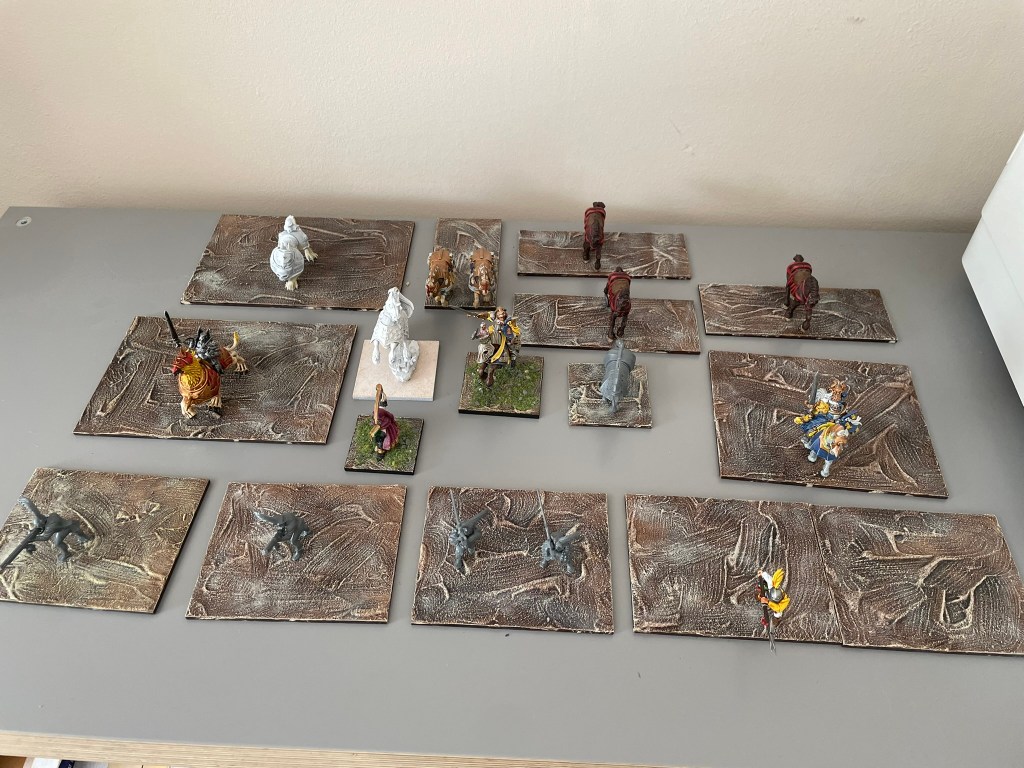
I’m definitely in that particular bracket in the moment. Working up a minimal viable army, that I’ll then top up with models and scenery as Clash of Kings approaches. I don’t need to do that, but as I’ve improved my hobbying skills I’ve increasingly wanted to field fully based, full model count armies, with a display board. Add to that a pragmatically driven desire to magnetise my bases to make them easier to transport and I’m starting to get to the unnecessary “all in” approach to Kings of War army building, which does leave me strangely satisfied. So, I thought I’d share a few updates on progress with some thoughts on how it’s going and the direction I’m headed in.
Magnetic tape and sparce bases are great for starting out
As I travel quite a lot with my armies I started dabbling with magnetic tape on bases and magnetic box bases to reduce movement of units whilst on the road. The process could not be simpler. Get magnetic tape (this is 3mm) cut strips off and stick it on the underside of the base. I like to super glue the ends and place the base on a metal surface to get everything straightened out. I’m enjoying worrying less about how my army will look after a long car journey now.
Simple basing can look really good. My original basing for this army was simple, but not great. One reason for doing this refresh is because I believe I can do better, the benefit of experience right there. I’m using three basing materials across these units. Some desert rocks and sand (with little bits of flock in it) both from Hobbycraft, and some static grass from Army Painter. Because I’m looking to do full model counts for all my units I’m generally basing them quite sparingly to ensure models can be laid out in a fairly even way.
More models don’t always capture the spirit of the unit
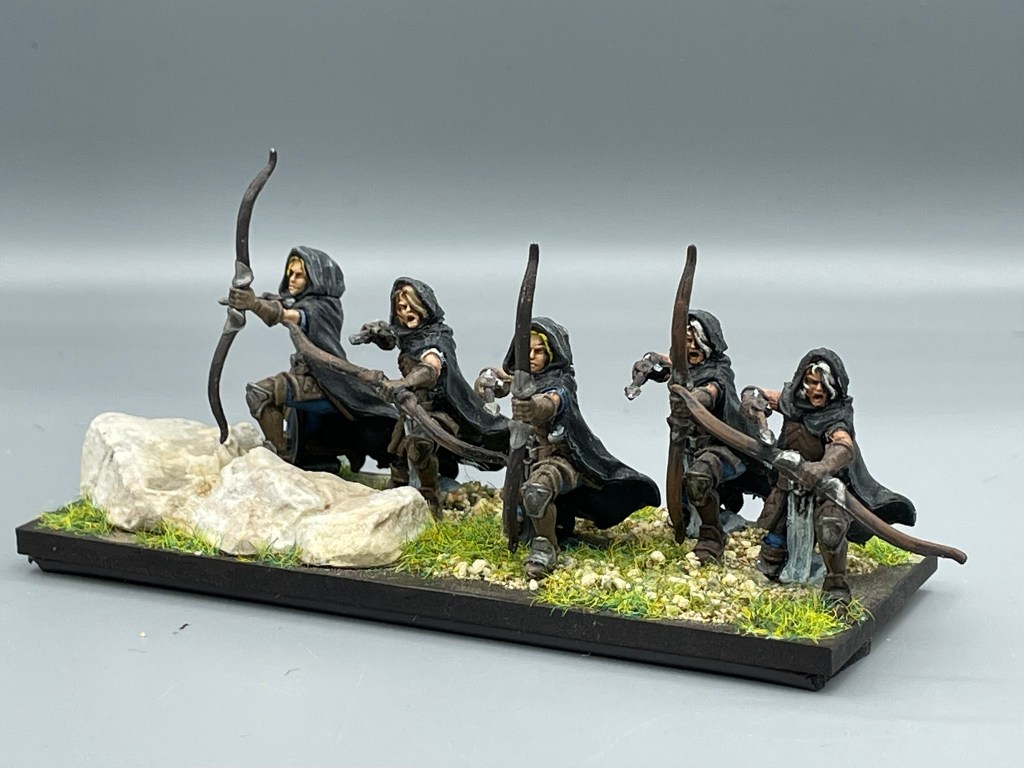
The general requirement for model counts in the UK at tournaments tends to be a busy looking base. This doesn’t mean full model count, it doesn’t even have to mean half model count, if you want to go overboard on the scenery it’s down to you. A great example of this is the troop of Sisterhood Scouts. Full model count would suggest 10 models, but given they’re intended to be skirmishers that guideline doesn’t work for me, and I know this won’t cause anyone else sleepless nights.
Growing units can be a time-consuming process, especially if you have a suitable proxy and motivation easily escapes you. However, proxies can play a number of different roles within a Kings of War army from “temporary gap filler” to “integral component of the force that there is no intention of ever changing”.
Find units that fit the narrative
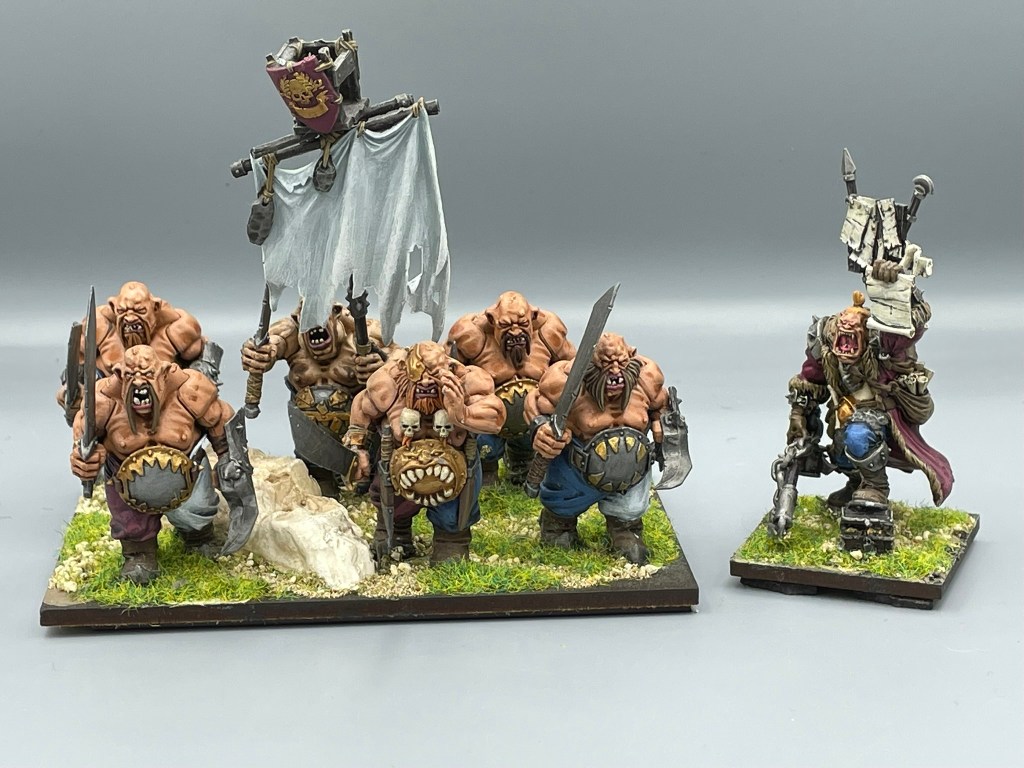
I currently have proxies in several different roles that are both Mantic and third-party models. The Basilean Abbess model is possibly my favourite Mantic model, she has a lot of sass and fills the role of a priest equally perfectly. The model has also shaped the narrative of the army and brings Sha’leis to life, so she won’t be changing ever. Similarly, the Ogre Paymaster who plays the role of the Ogre Palace Guard Captain. As well as being a cool model, there’s also a bit of a narrative decision here since the ogres that follow my priestess are members of the ships crew who rescued her as their vessel was split apart on a coral reef. The Paymaster model fits the bill perfectly, and it brings me on nicely to the ogre regiment. Rules wise these are my Palace Guard, but the GW models work better for their nautical theme. I may change them in the future if I can find a better option, but the Mantic choices don’t quite work.
Gap fillers are a nice way to give a bit of breathing space to play
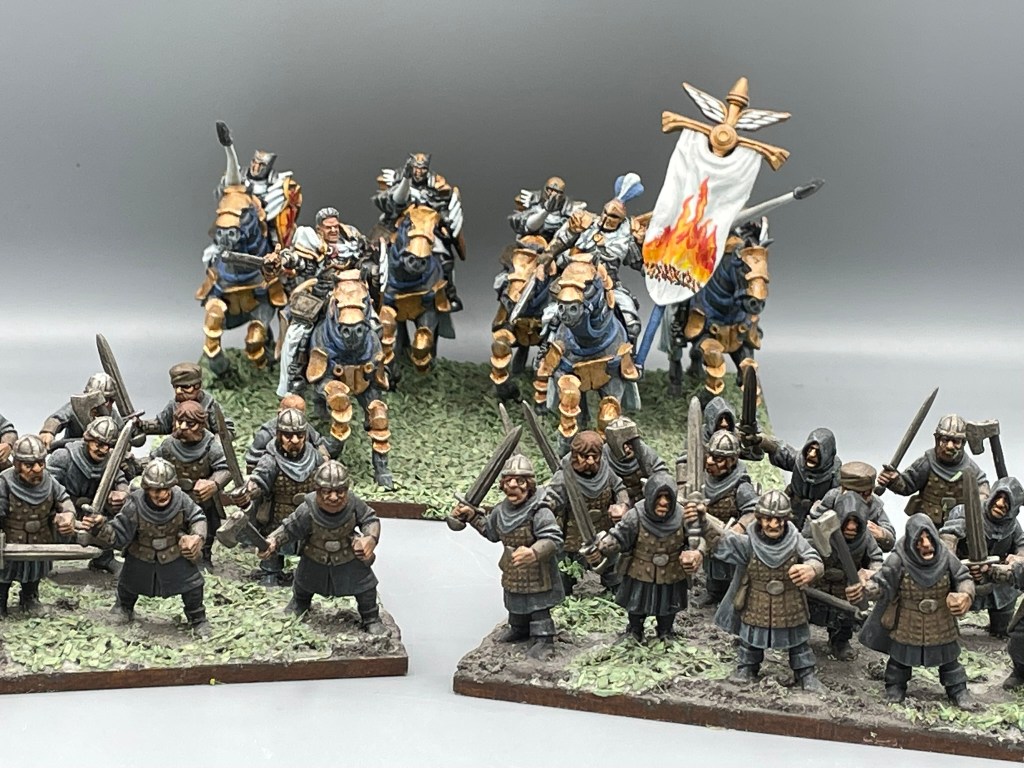
The final proxies are ones that will be going the moment I have enough of the remaining pile of potential finished. These represent my swordsmen and mounted paladins. The eagle eyed will recognise the paladins as the old Mantic ones. As the remaining empty bases start to grow, they will make it into the army, and once they’re full, I’ll then start thinking about display boards.
To keep up with what’s going on you can follow @wizards_bookshelf on Instagram and Threads or drop you’re email below to subscribe.
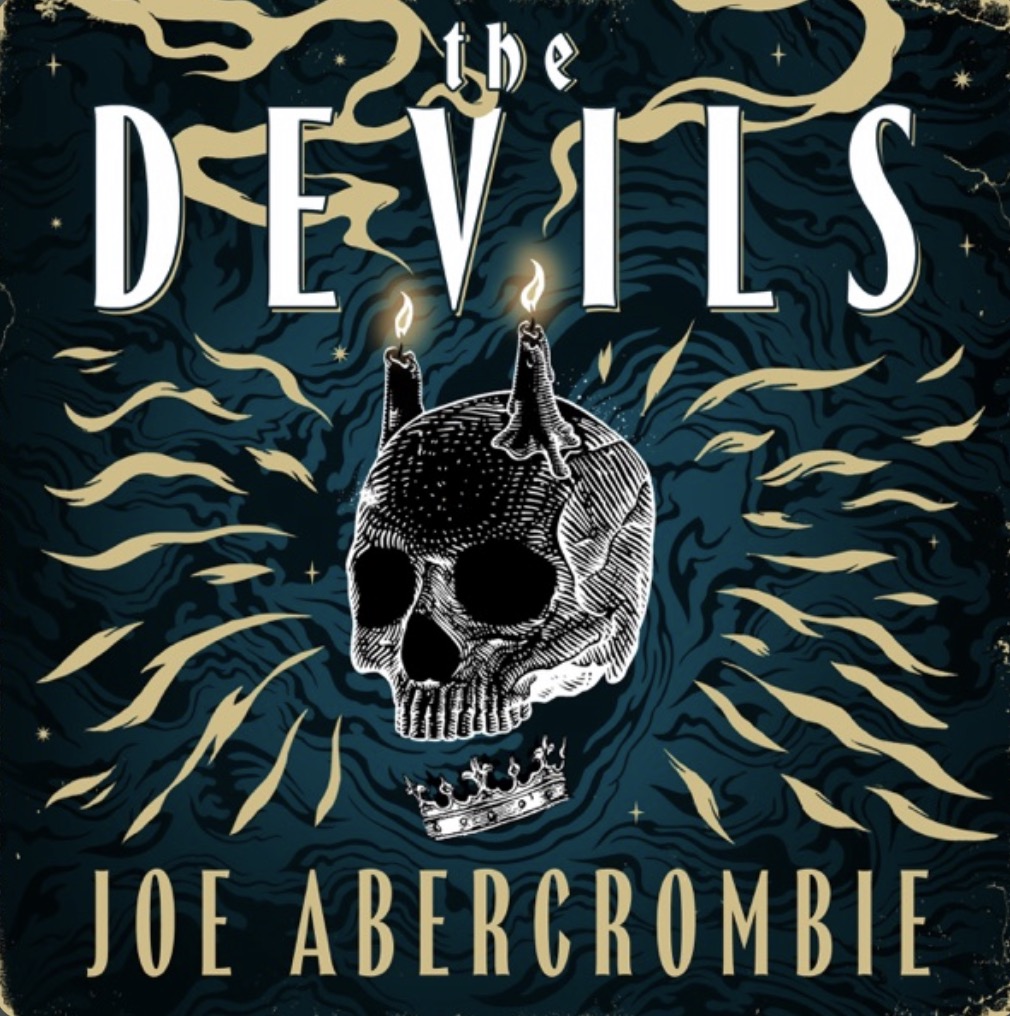
The last book I read from Mr. Abercrombie was the tantalising The Wisdom of Crowds. This was, in my opinion, Joe at his absolute best; rounding off a fantastic trilogy in his beautifully crafted fantasy world, with the promise of interesting times to come.
Of all the books I was expecting him to release next The Devils was not it. Set in a high fantasy, and I suppose expectedly grimdark, version of Earth the book tells the story of a Dirty Dozenesque collection of undesirables, retained by the Pope to resolve God’s greatest challenges. The adventurers are released to undertake the sort of do or die mission most D&D dungeon masters would be proud to lead their adventurers on.
It was a surprise because I associate Joe’s work with a more human fantasy. Yes, he brings a dark sense of humour and the occasional sex scene you wouldn’t want to read with your parents, but personal and political introspection are at the heart of his writing. The demons and dangers of fantasy exist on the peripheries to further unsettle the fundament chaos of human machinations. So, to find myself, as a reader, launched into a world of vampires, werewolves and elves was unexpected. Add to this a relatively straight forward course that the story plots from beginning to end and it all felt very different.
I’ll be honest, it took me a little while to get into, because it seemed to be less complex than his previous work. As I progressed through the book I couldn’t help but wonder if this wouldn’t have made a fantastic comic book (one of the big classy ones, like Watchmen). And it was at that point, as I enjoyed the humour and became marginally unsettled by the amount of werewolf sex that the penny dropped. Whilst the storyline was not as layered as his more recent work, the characters were incredibly well developed, and in them was the depth I’d expected.
This might not have been the book I’d expected, but it rapidly became the book I’m hoping forms the basis of his next trilogy. Simply put I’d recommend this to any fantasy fan looking for a bloody good questing tale.
To keep up with what’s going on you can follow @wizards_bookshelf on Instagram and Threads or drop you’re email below to subscribe.