It’s been a while since my last blog. Probably the most often used phrase in blogging, at least by us amateur types who generally have a million things to prioritise above writing about a few of the things we love, but don’t spend anywhere near as much time as we’d ideally want actually doing the things we enjoy.
I get quite excited about this time of year. The school holidays are almost over, and my daily routine is about to kick off once again. I feel quite blessed that I mostly enjoy my general day to day, and whilst it might feature less waterparks, laughter and enjoyment than holidays do I quite like the feeling of progressing projects a bit more predictably than is possible with a house full of people with no commitments beyond getting out of bed if only to make it possible to return to bed.
The last few months have not all been spent drifting between sangria and the sun. Much of it has been spent trying to figure out, of all the projects I have on at anyone time, what I can actually complete during the last part of this year. I now think I have something approaching a handle on that, which means not only might I start to manage a bit more of a regular flow of blogs, but I’m also hoping to get moving with the next instalment of the Rose of Amzharr, particularly after it managed to find it’s way to number 24 in Amazon’s fairy tale chart of best sellers the other day.
What I’m hoping to do is put most of my energy into the sequel, with a bit of painting and gaming as and when. That means there’s unlikely to be any major painting projects for a while, but I’m more than okay with that having recently jumped into Silver Bayonet. I’ll do a separate review of the game soon, suffice to say that I’m really enjoying it and see it very much as Frostgrave’s older brother (the one that graduated uni with a useful qualification and has the sort of steady job that his parents are proud of, not the smelly one that doesn’t leave his room before midday and whose only achievement is a highly questionable, albeit completely legal, internet search history).
Holiday time has meant a bit of reading has also been possible, and I’ve managed to add to my reading list. Whilst my book of the year is still the absolutely fabulous The Adventures of Amina al-Sirafi, by Shannon Chakraborty, a couple of other enjoyable reads are on the bedside table.
A Practical Guide to Conquering the World, by K.J.Parker, raised more than the odd smile as I leafed through its pages. A very enjoyable read that really digs into, and pokes fun at, the intriguing interactions between religion and governments, and the power of prophets. It’s the sort of fantasy book I love, that takes an idea and plays with it without breaking it.
My second book is The Ascent of the Goblin King by Rob Burman. This is a book written within the Kings of War (a tabletop wargame) universe. It is the tale of an ambitious goblin and his attempts to scramble up the rickety ladder of goblin society. It’s a debut novel and Rob does a great job with his little band of rambunctious, yet diminutive, anti-heroes. I’m halfway through so far, and really enjoying it. Returning to my post-holiday routine will cut down on the reading time, but I’ll definitely get this one finished.
So that’s it for now. Have a great week everyone, and maybe, just maybe, there’ll be another blog next week.
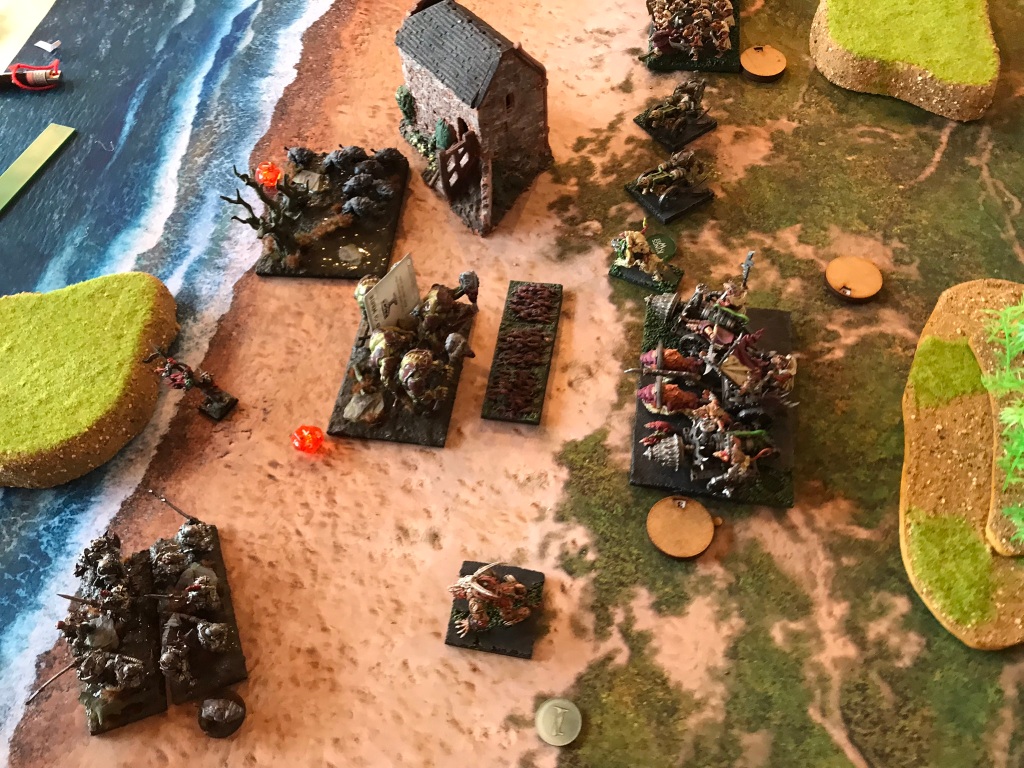
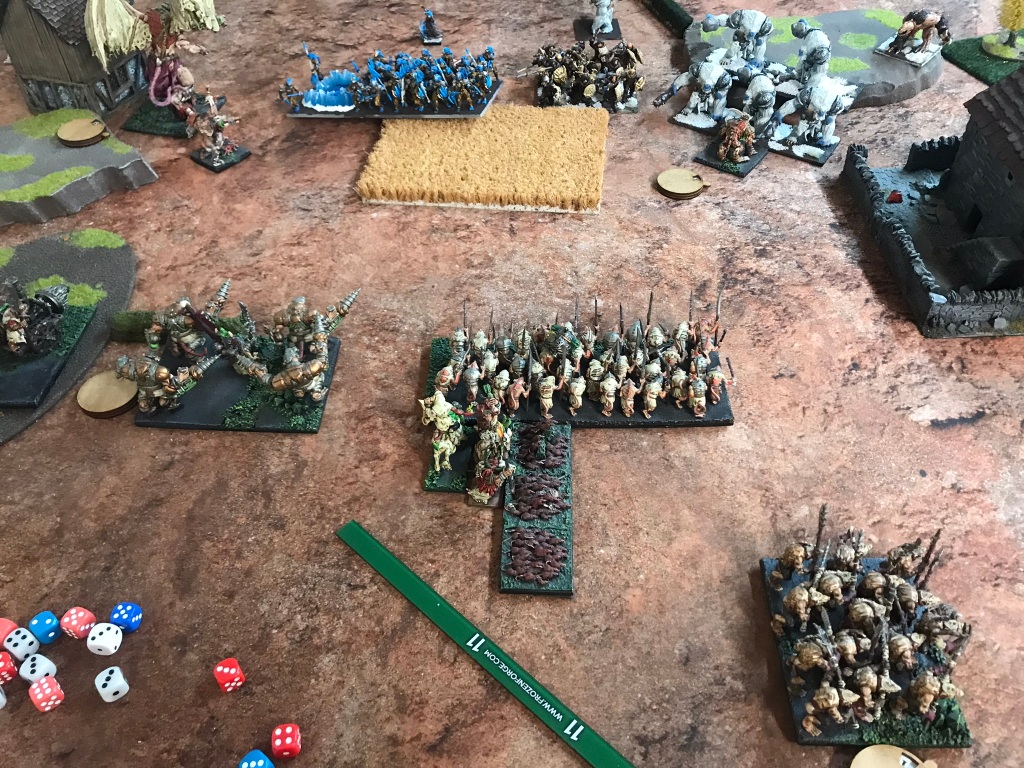
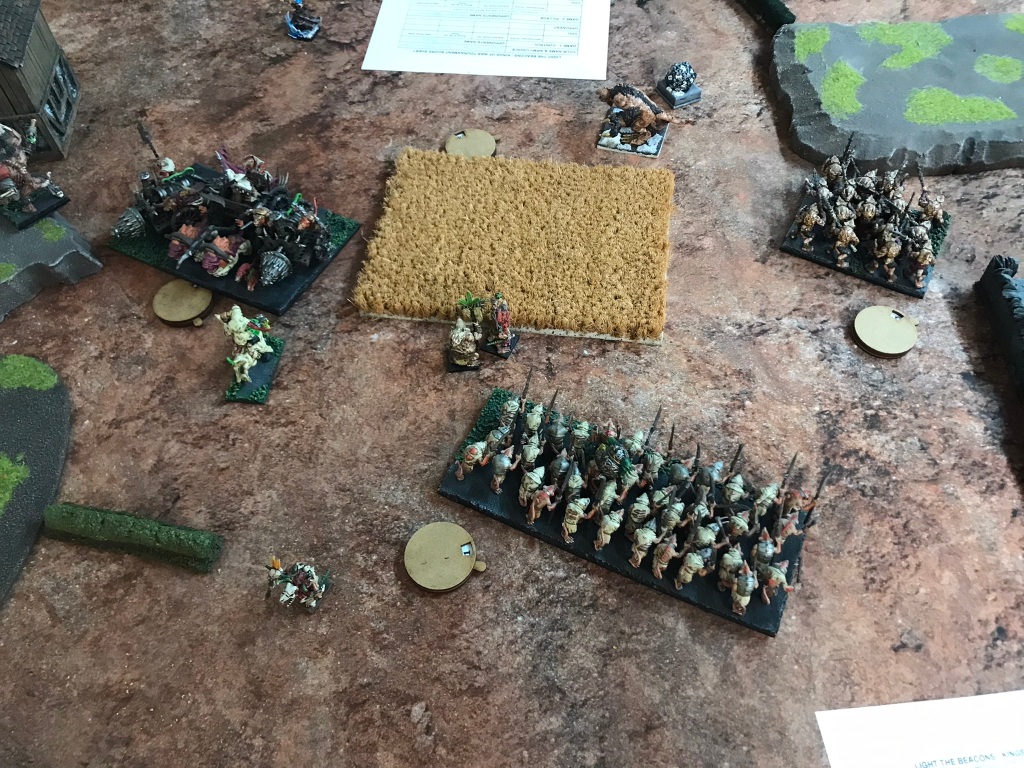
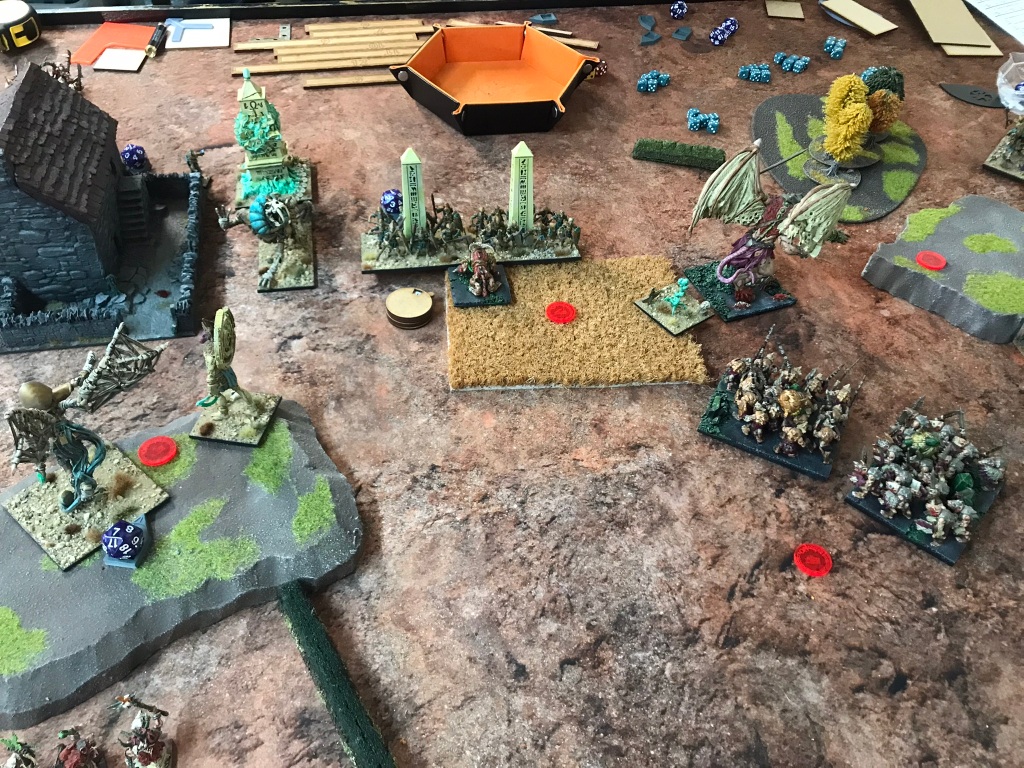
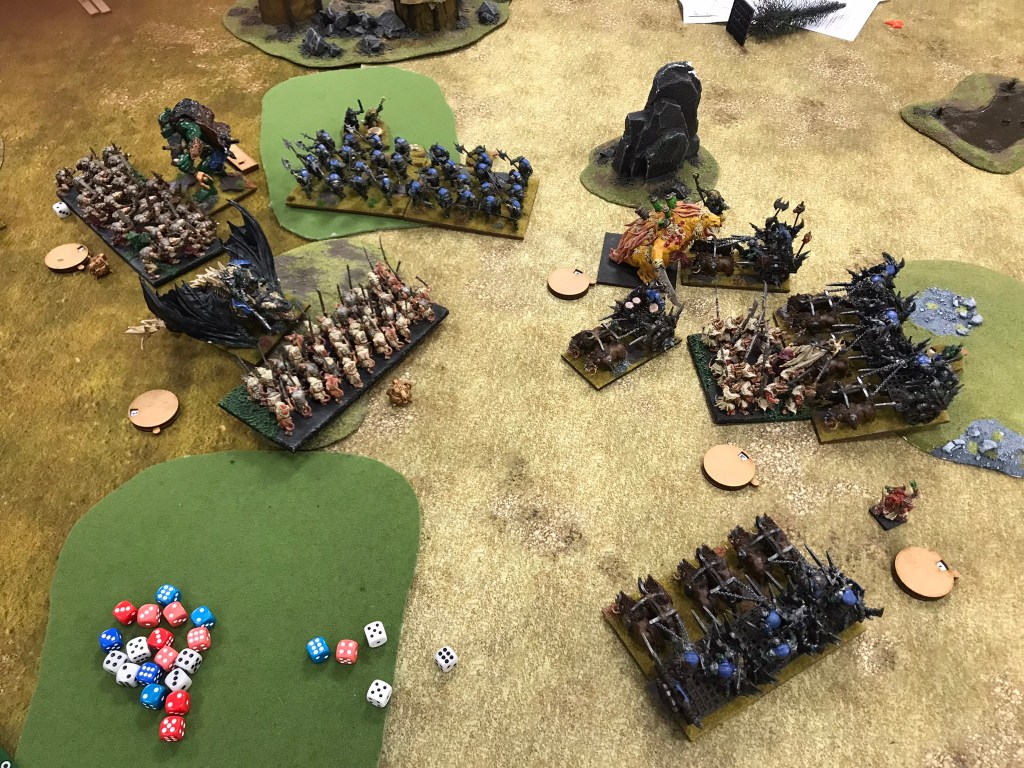
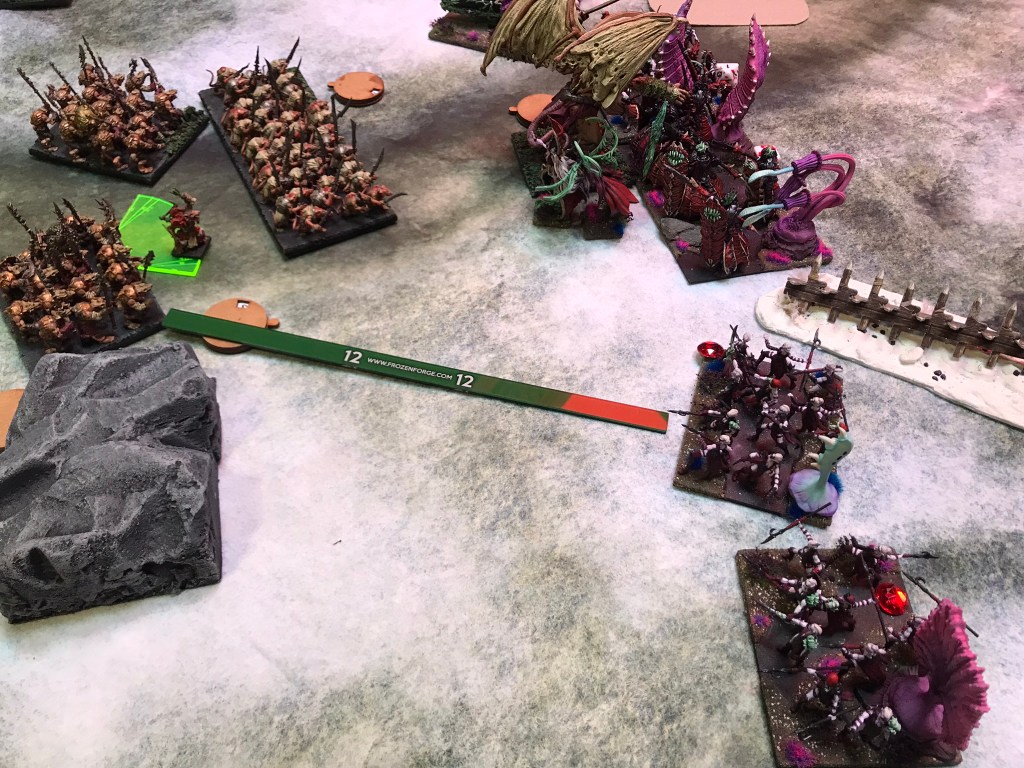
I have finally made it to a Pride of the Shire’s event, run by the inimitable Si Brand, and what an event it was. Not only was the Banbury rugby club a beautiful venue, but the view over the rugby fields (pitches, courts, rectangles?) on a sunny spring day really made for an amazingly appropriate Shire day. A perfect backdrop for playing rats.
However, this was not a normal event, far from it. In one way or another Mr. Brand managed to put together one of the most challenging events I’ve ever been to. First up, it was a four-game day, that means four lots of thinking. Next was the army size, 1800 points. Definitely not standard, and a limit I found really hard as my general feeling about Ratkin is that the lower the points value the harder it is to get a really solid feeling list together. Consequently, I spent quite a lot of time trying to come up with a something, only to decide I was over thinking it, giving up and then throwing something together last minute which I hated, didn’t test it and then managed to convince myself it was not going to work the moment I had submitted it!
Why did I feel so strongly about it? Lots of reasons, but mainly I just felt it lacked in the killiness department, also no Scud (I feel I have issues). So, what did I end up taking?
The next challenge laid at our feet was that scenarios had to be chosen by the players. Each round we were presented with a pool of three scenarios, some of which were not standard scenarios (to add to it all). Players then rolled off, the lowest got to remove one of the three, leaving the winner to choose between the remaining two. This did mean that different tables were playing different scenarios each round. My approach to this was to aim for the easiest scenario each time around, and it broadly panned out. So, the day commenced.
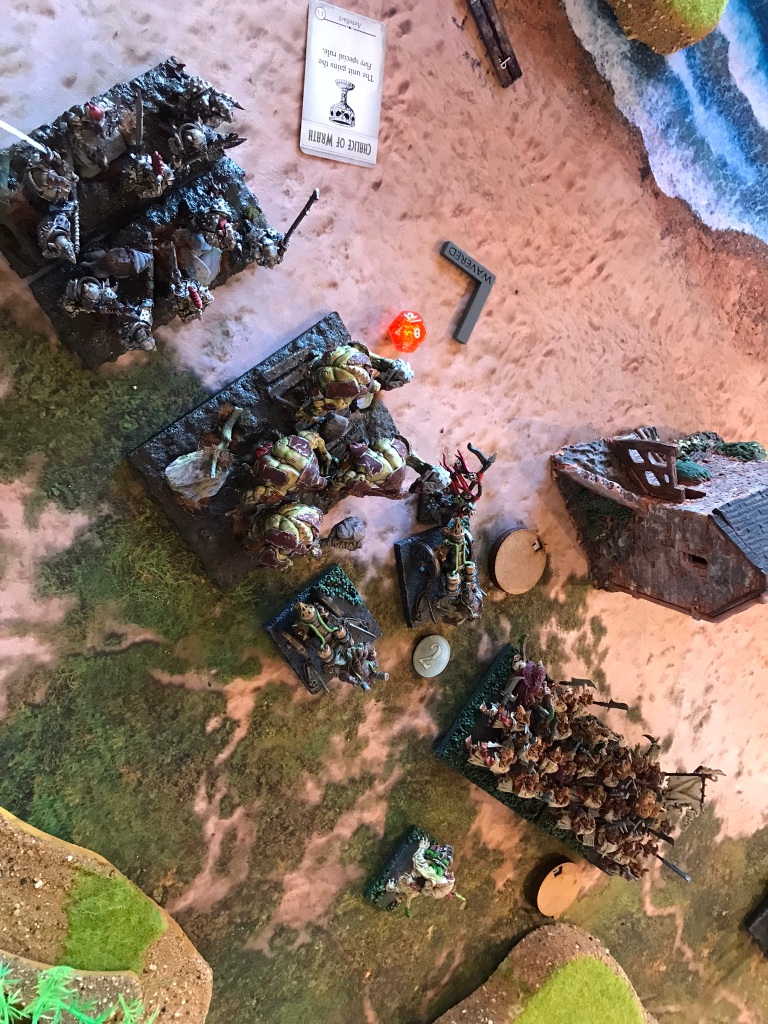
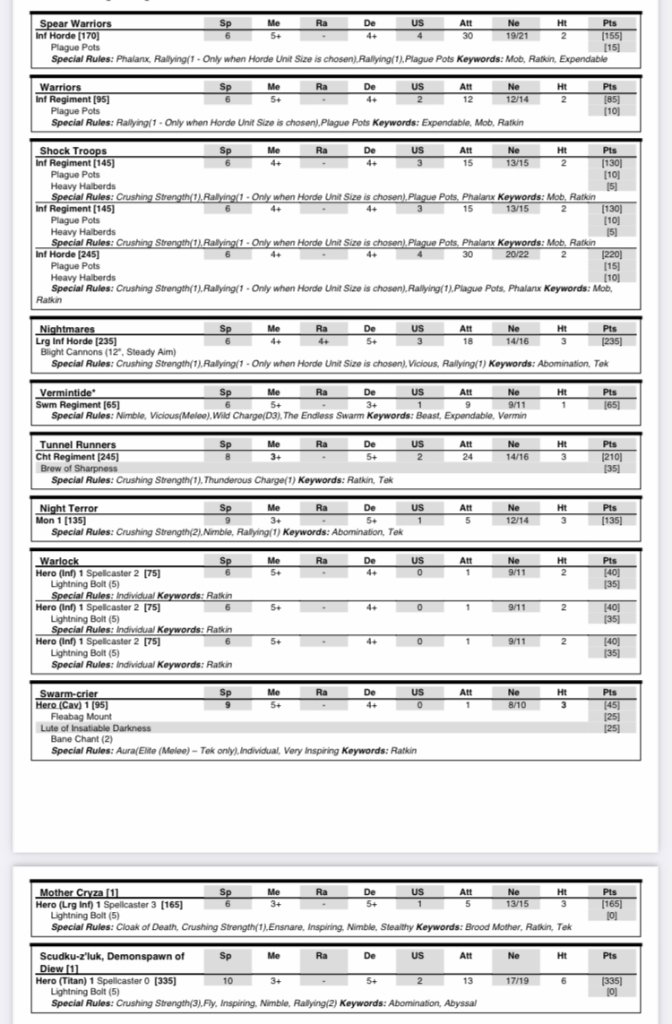
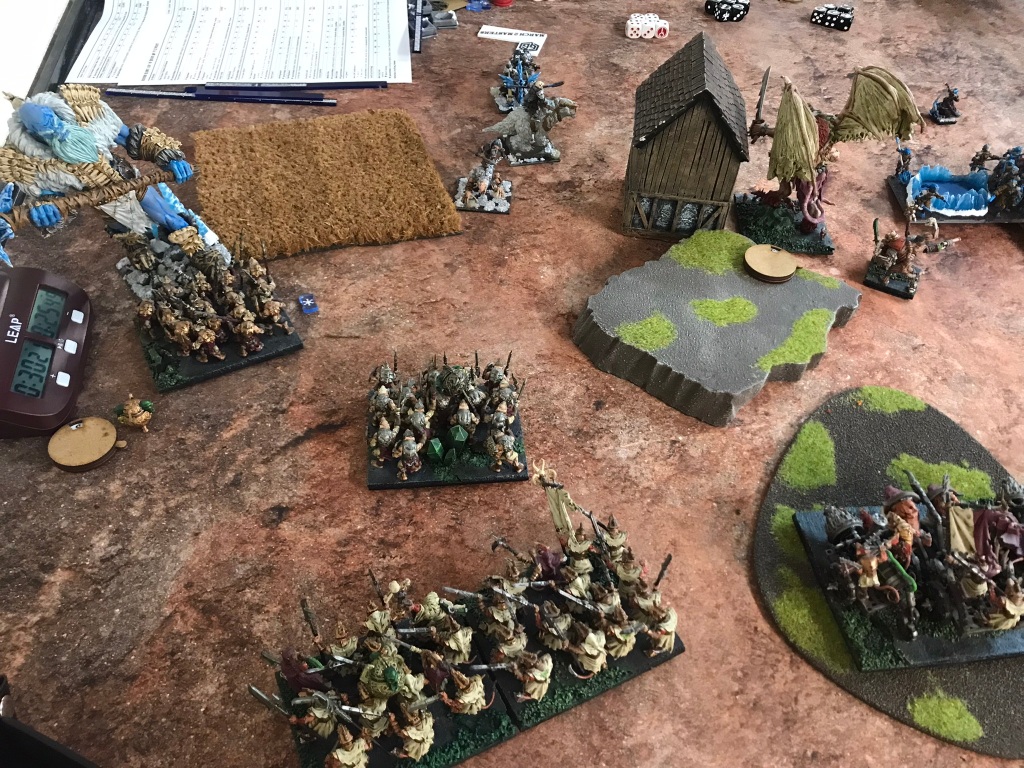
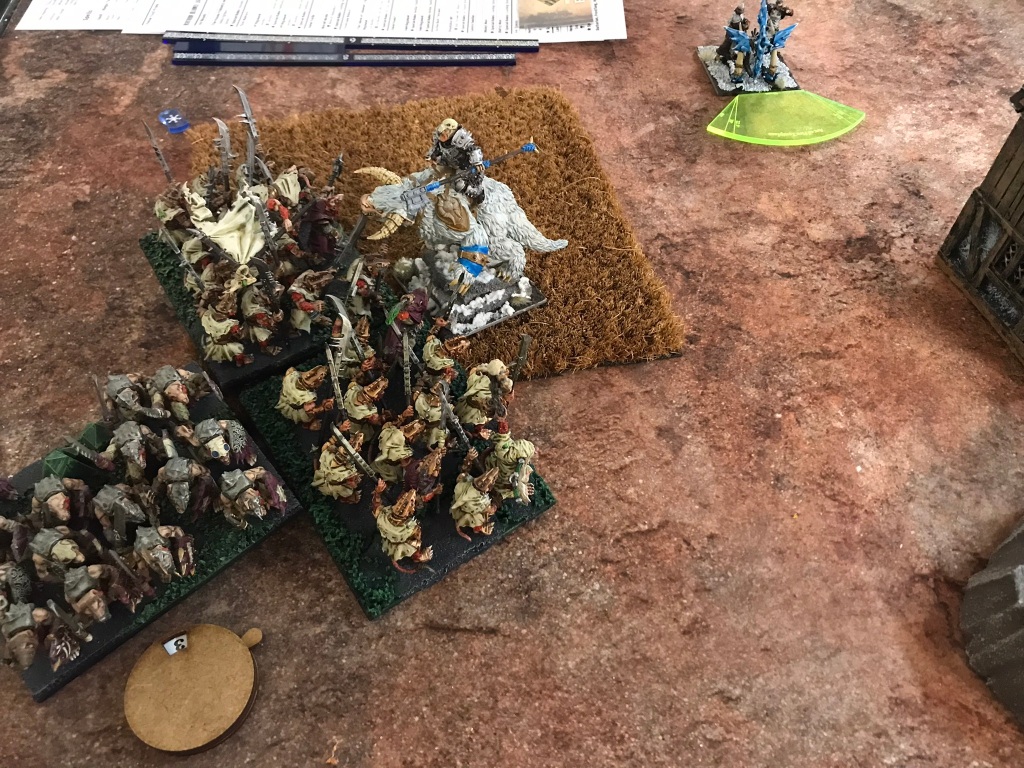
Game 1 vs Varangur, Control
I think it was partly reading this list the night before the event, knowing I would be playing it the next morning, that really removed any confidence I had remaining in my list. With lots of fast-moving threats, stealthy and reliable shooting this was exactly what I didn’t want to see. I knew my chaff would melt like butter in the face of so many solid units leaving my heavy hitters exposed to the nasty northerners.
What didn’t help was that my opponent had a great grasp on her list and that I decided to “try something a bit different”. For “reasons” I decided that rather than put all my fast stuff together to sweep away whatever they ended up facing on one flank and using my pretty cavalry proof shock troops to secure the centre, that I would put the hackpaws and one horde of shock troops on the left flank, facing the night raiders, ravagers and Magnilde, with the other shock troops and the tunnel runners in the centre facing the Sons of Korgaan. My rat warrior regiment went off to the far right of the board and ended up facing the fallen.
I have to admit that things on the right went absolutely swimmingly. The warriors managed to keep the fallen out of the main fight, of course they died, but that was exactly what they were there to do.
I would even go as far to say that things went okay in the centre with the war engine teams chipping away at the Sons of Korgaan and preventing them from simply bulldozing into my central zone. However, part of the plan, and the reason the fallen stayed out of the game was because they were holding one of the right-hand sections, and the draugr were holding the other right-hand section. Both of these things I had accepted as being part of the plan. That meant I needed to hold more than my own central section at the end of the game to win, and this is the part of the plan that fell apart.
Things on the right started to feel uncomfortable from turn two, and swiftly became massively dubious in turn three. The central engagements started off alright. The shooting from the raiders wasn’t ground-breaking, an acceptable exchange of units saw the reavers off. Unfortunately, Magnilde played a blinder. My hackpaws had managed to run up the edge of the left flank in the first two turns and were staring at the flank of the night raiders. I was expecting them to get charged by Magnilda and thought that they would keep her busy until the end of turn three, although I was expecting them to be waivered. When Magnilda managed a mere four wounds on them things were looking good. Unfortunately, she then rolled the ten required to take them off the board. To make matter worse, in turn three she charged the shock troops and rolled a double six on the nerve test, shutting down one of my hammer units for a crucial turn.
All this meant that by turn four most of my units on the left had gone and the shock troop horde was not long for the world. With the units in the centre unable to lend a hand the raiders finished off the shock troops and claimed the flank in turns five and six.
All in all, this was (in the main) a game that started out as a close fought game against an opponent who knew exactly what she was doing, until everything fell apart in the rat lines. In retrospect, in addition to my initial positioning of units not being quite right, I also realise that I should have probably not chosen to fight on the side of the table that had a building dividing up the area where the majority of the fighting was going to take place. Although I’m not sure how much of an impact it really had, it definitely made it harder for the units in the centre to provide any real support for the beleaguered units on the left.
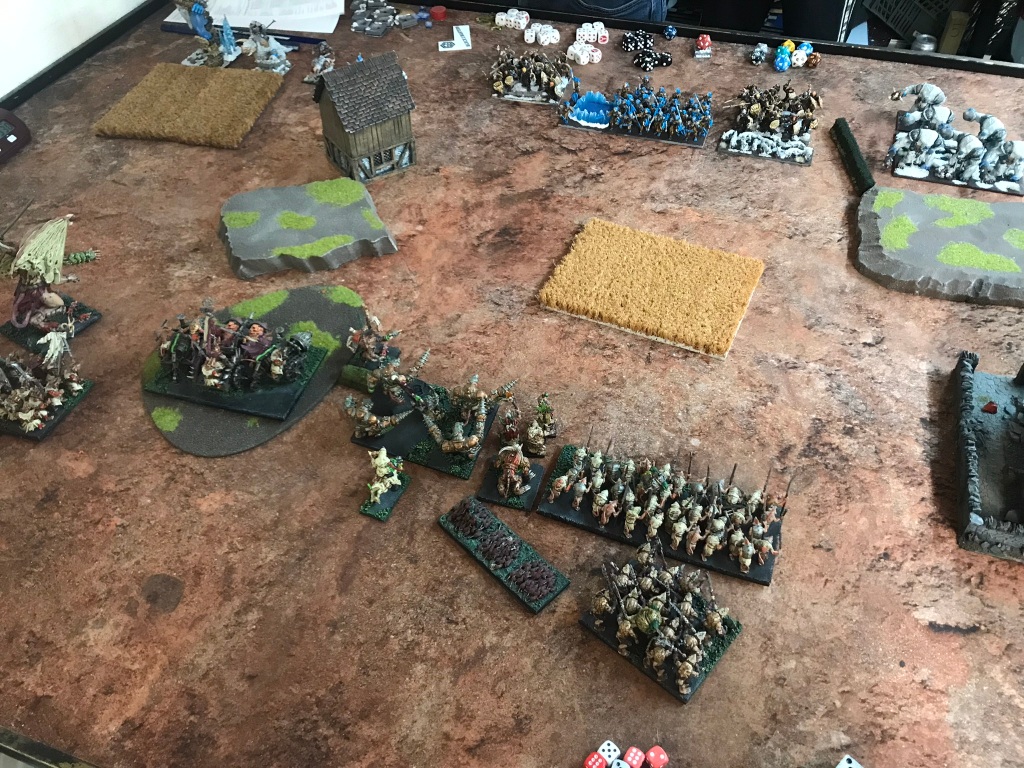
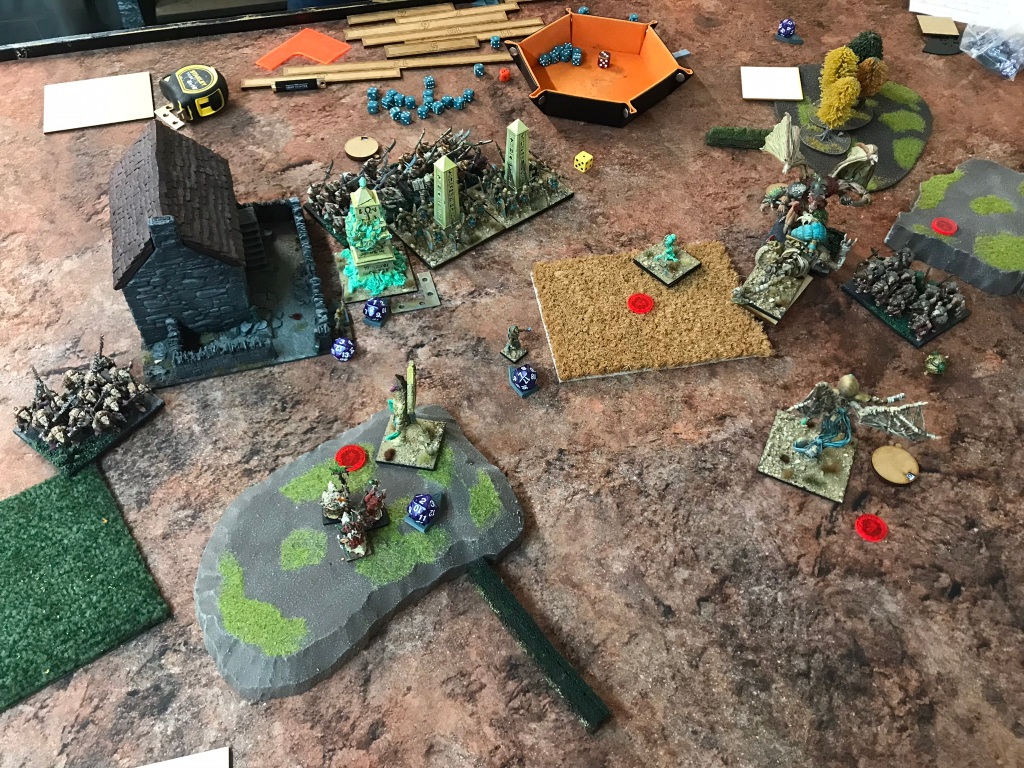
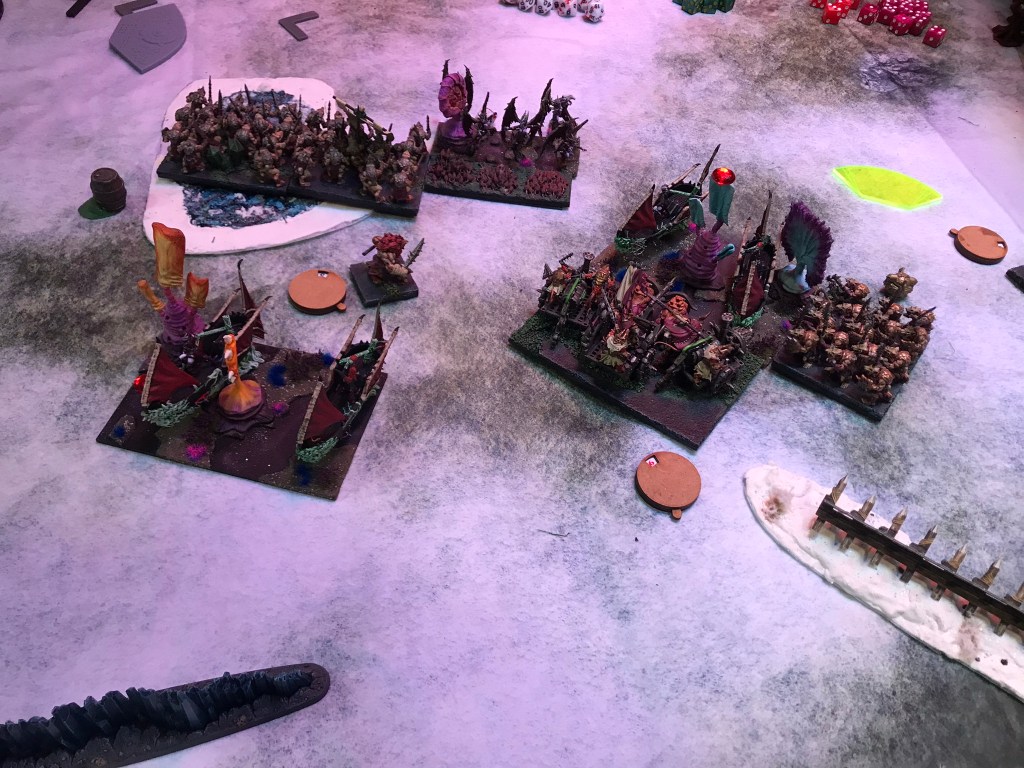
Game 2 vs Forces of the Abyss, Kill/Eliminate
With one army full of killy horribleness out the way, it was onto the next. It’s been a while since I last played the forces of the abyss, and it did not go well. However, this was a different day and a different player.
The scenario we chose was a version of kill where, in addition to scoring points for the amount of the opposition consigned to the dead pile, there were also points to be had for keeping your biggest monster or titan alive. This probably wasn’t the most balanced scenario for me to choose because my opponent’s biggest beastie could fly and shoot seven lightnings bolts, meaning that it could quite easily stay away from me, whilst still chipping damage off my units. My biggest titan, on the other hand, was my tangle, which provides any number of different types of support to the army and so would have to be somewhere near the fighting virtually every turn! I might not have thought this one through.
I returned to my default set up with shock troops and the tangle in the centre and the faster elements on the right flank, won first turn and pressed forward. My opponent matched my set up with molochs and ghouls in the centre and abyssal horsemen and tortured souls on my right.
As fortune would have it my hackpaws and night terror managed to get a cheeky charge against a lone regiment of tortured souls on the end of his line. The regiment was out of sight of the units next to it (with the exception of the seductress), making it an excellent opportunity to take a unit off the board and get access to the abyssal flanks. The rat riders made short work of the tortured souls and turned to stare aggressively at the horsemen.
This forced my opponent’s hand, and he sent the remaining tortured souls, the horsemen and gargoyles forward to block up my right flank, however a double one by the horsemen as they tried to drive of some vermintide created a bit of a blockage within my own ranks that prevented multi charges that would reliably kill anything. Fortunately, the hackpaws, who had survived a half-hearted savaging by the succubus managed to get a flank charge into the horsemen, but without their thunderous charge they failed to kill the horsemen as well.
I was starting to worry the right flank might become a bit of a tar pit, which I wasn’t set up to survive. One of the moloch hordes charged into the hackpaws and deleted them. In return, the night terror charged them in the front and a brute enforcer managed to get a flank on them at the same time. Normally I wouldn’t have seen this as anything other than a holding tactic against the formidable creatures, however, they had sustained wounds from shooting the previous turn that they hadn’t regenerated and the swarm crier was able to manoeuvre into a position where he could lend his elite aura to the fight which meant all eleven crushing two attacks landed, before the enforcer’s brutal was taken into account. I do think this particular combo is one that’s worth watching out for on the battlefield as it punches surprisingly hard now thanks to the elite aura.
The molochs went down, which inspired the vermintide facing the abyssal horsemen to do just enough damage to drive them off the table. Suddenly the right flank was looking very empty (if you weren’t looking for rats that is). The centre had been largely uneventful up until this point. The two bodies of infantry had crept towards each other and exchanged a handful of uneventful shots, but things were about to change – in ways that neither I nor my opponent could have realised.
Just as we finished the fourth turn the rats were slightly ahead due to kills, and then the round clock for the event went off and the whole room had to down dice. I think it’s fair to say that my opponent and I had something of a relaxed game. A clock issue early on had led to us abandoning it, and I think it’s fair to say we weren’t exactly playing the most super competitive game of our lives. In some ways it was a shame we didn’t get any further as it had been a really enjoyable and relaxed game, and the tide was very much turning in the rat’s direction. All this meant the rats scraped a win based on kills.
Game 3 vs Halflings, Hold the Line
It’s great to see halflings on the table again. They really are a great army, super characterful and, at times, surprisingly nasty.
I reverted to type, following my success in the previous game. The fast stuff went on the right with the hordes of shock troops and war engine teams in the centre. I also threw my warrior regiment as far out to the left as I possibly could to see if they would go for the distraction. My opponent responded by spreading his line across the board. There were wild runners at the far ends of the line, lancers on my left, spears and balloons in the centre and poachers, more spears and the Pride of the Shires on the right.
I moved forward on the right as quickly as I could, keen to shut down the shooting, as halfling shots tend to add up pretty quickly. In the centre I hung back, not excited about having to deal with the balloons and wondering if there was a scenario in which I didn’t have to feed a shock troop horde to them.
As expected, the shooting from the poachers, iron beast and wild runners on the right almost immediately took its toll and waivered the night terror, who I had been hoping to charge into one of the shooting units in the next turn to shut them down. In the centre the halflings moved forward very carefully, positioning the harvester and spearspike horde in such a way that they could not be reached by the war engine teams in the next turn.
Unfortunately for the halfling’s their careful positioning was for nothing as my opponent forgot to measure the distances between the guns and his balloons. Fortunately for me my dice did their job and by the end of the second turn the balloons were little more than distant memories. With this threat removed the rats could push forward.
Second turn charges into the regiment of spearspikes and the wild runners on the right saw the spearspikes removed by the tunnel runners and the mounted archers waivered. In return the iron beast charged the tunnel runners, but only managed a handful of wounds. The stand off in the centre continued as the wild lancers made their way through the woods to threaten the centre-most horde of shock troops.
Turn three saw the halfling right flank dissolve. The iron beast went down to the tunnel runners and a brute enforcer, the wild runners routed to the hackpaws, and suddenly the poachers were surrounded. In the centre a vermintide regiment delayed the wild lancers whilst the rest of the rats prepared to charge in the next turn. There was little the halflings could do now. With the tunnel runners positioned to flank charge the poachers in the next turn they fought the fights they were in and did their best to prepare for what was to come.
In turn four the poachers fell, and the shock troop hordes charged the wild lancers and spearspikes, starting to wear them down. The harvester managed to take out the tangle but ended up locked in a fruitless battle with vermintide for the rest of the game. In turns five and six the rats removed the spearspikes and wild lancers, positioning to take all three of the scoring zones for the second rat win of the day.
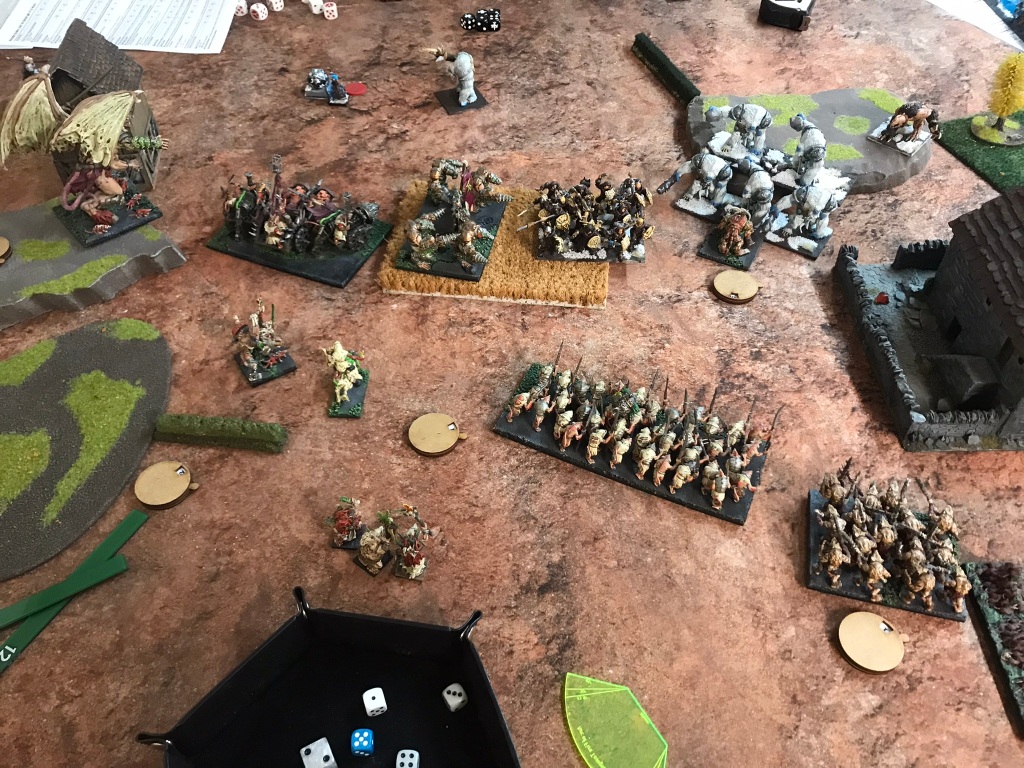
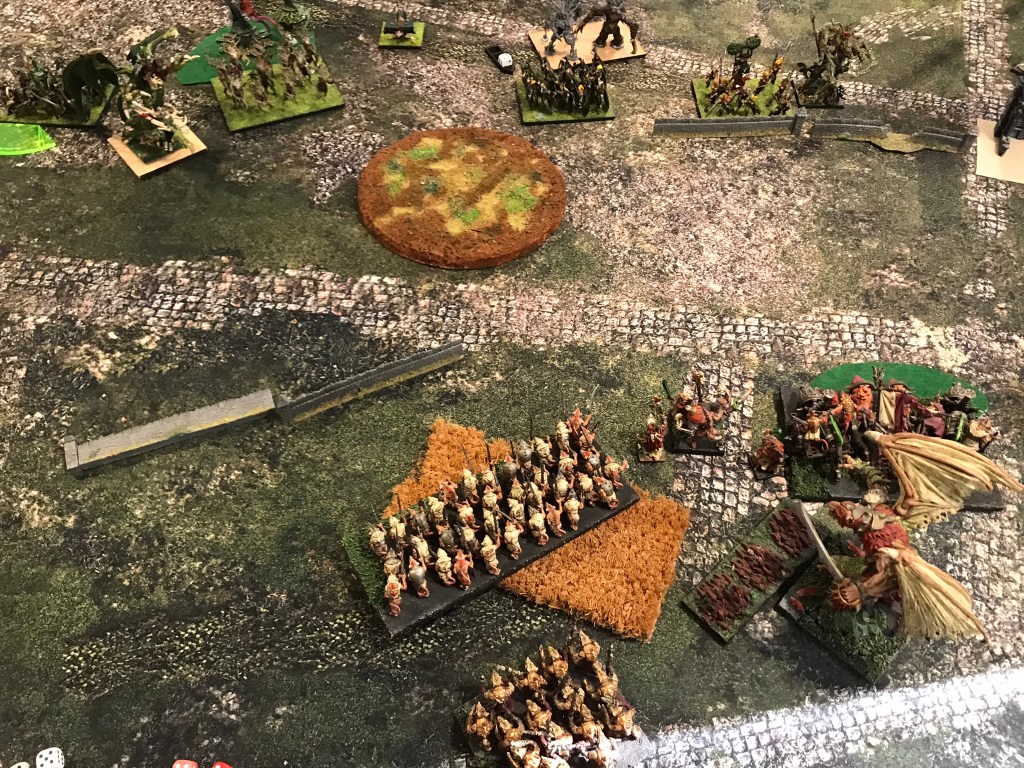
Game 4 vs Goblins, Smoke and Mirrors
So, we came to the final match up of the day against goblins. This was a very beautiful army that had absolutely no shooting and no Groany Snark, which was a bit of a turn up for the books. That being said the presence of the dreaded bangstick formation, a giant and a couple of hordes of trolls made me more than a little nervous. In all the excitement I also forgot which of my tokens I had put where, which made the game immeasurably more difficult.
My opponent set up in a way that I really wasn’t expecting, with most of his troops on my left flank, leaving a horde of trolls in the centre with the mawpups, and the fleabag riders on the far right. I maintained my, so far, game winning set up.
Not surprisingly the goblins on my left started to move up and the fleabags started to make their way towards the centre. I have to admit I have never been so happy to see a giant, as it was the perfect target for my war engine teams who managed to knock off about seven wounds in their first turn of shooting and marked the start of a prolonged grind on that flank. The tunnel runners removed one of the infantry hordes, whilst the hackpaws and night terror started munching on goblins from the other horde. I was in no hurry to see the second horde get destroyed as that would clear the way for the luggits and trolls to join the party, which would have overwhelmed my poor tunnel runners.
Having seen the fate of the first goblin horde the giant took a swing at the tunnel runners, failed to do very much, and was then run down in response. In a tit for tat trade off the trolls and maw pups ate a brute enforcer before the weapons team shot the maw pups off the table. Eventually the second goblin horde died, although they did manage to take down the hackpaws, and suddenly the luggits were in the fight. Frustratingly the tunnel runners failed to kill the trolls and all of a sudden it looked like the tide was turning on that flank.
On the right side of the table the fleabags danced around the shock troops, but the rats wouldn’t give them the satisfaction of a double charge. With superior unit strength the rats began to push forward and claim objectives, the tangle taking one and a brute enforcer heading off towards another. The trolls in the centre did their best to distract the shock troops, but their hearts weren’t in the fight and the elite rat warriors saw them off with relative ease, before side stepping towards an objective worth two points. The shock troops in the centre saw an opportunity to get at one of the bang stick regiments, charging and killing the goblin king, but failing to roll enough to follow through into the goblin cavalry behind him. The riders promptly made their way around the rats to claim the other two-point objective, however a turn seven allowed the shock troops to get a rear charge on the cavalry and claim the objective from them.
The drama on the left continued until the last roll of the dice. The luggits had claimed one objective and the trolls, having butchered the tunnel runners, were doing their best to get at a token, held by shock troops. Unfortunately, the war engine teams stood in their way. The trolls were already carrying some wounds which meant shooting from the guns easily waivered them in each of the remaining turns of the game, meaning that all but one of the objectives remained in the hands of the rats, giving the vermin a third and final victory.
Final thoughts
Well, that went a little better than I originally thought it was going to go, and I ended up really enjoying the list because of all the chaff elements. My war engine teams were undoubtedly the stars of the show, blasting balloons out the sky, seeing off giants and generally making a nuisance of themselves.
Whilst the list ended up being fun to play, I’m not sure I would take it again, with the benefit of hindsight. I’m still not quite sure what I would do instead, but I did feel as though it could have done with a little extra punch. I now find myself in something of a perma-quandary about the pros and cons of long-range shooting versus short range shooting. I believe that ratkin do need some sort of shooting in lists, but each choice feels incredibly nuanced in terms of what it brings to the table. Instinctively I prefer long ranged shooting, because you can start hitting things much earlier in the game, but the weapons teams just always seem to work so hard.
One option I haven’t really tried that much are the clawshots, which generally don’t get seen in the UK much. I have tested out one troop before and was pleasantly surprised with their performance, but feel I need to consider more than just one unit, but we shall see what the future holds.
For now, though all that remains is for me to say a very good evening to you all and send a massive thanks to Si Brand for hosting and all my wonderful opponents for a series of fun and memorable games.
Saturday saw the first ever Light the Beacons tournament open its doors, and I was heartened to see, for a second time this year, no less than three ratkin armies amongst the thirty forces taking part. As an enthusiastic rat fan its really great to see more players bringing them along to tournaments.
For this event I decided to give my lightening bolt heavy list a second run out. It served me well at the last event, helping me secure a 4th place, so I thought it would be worth giving it another go. I did feel a little gamey taking it after listening to the Counter Charge Ratkin army review where the availability of cheap lightning bolt casters was noted as something to keep an eye on, and this event definitely helped me crystalise some thoughts on bringing no less than lightning bolt 25 to the table.
The list
Game 1 vs Northern Alliance, Control
Despite their popularity I haven’t played Northern Alliance for quite some time at a tournament, so it was great to see them opposite me on the table. Looking through the list I was happy to see pack hunters, snow foxes and ravens, as these make great targets for massed lightening bolts. I was less excited by the hordes of naiads and trolls. Whilst lightening bolt is great at dealing with low defence units, high defence units with regeneration, and some heal in the list, tends to make this type of shooting pretty pointless, because chip damage simply doesn’t stick. On balance though I was reasonably happy with the match up on the basis that there were some good targets.
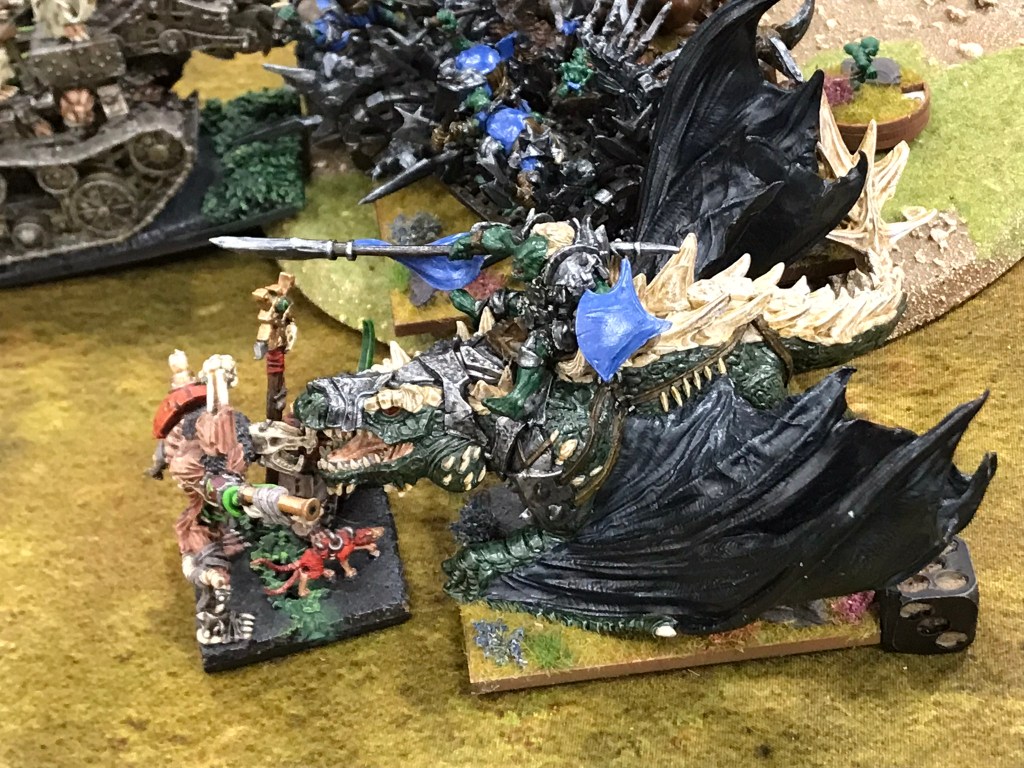
I won first turn and the lightning rained down. I managed to waiver the bolt thrower and kill one regiment of snow foxes. Across the table I held my forces in line because my opponent had a strong centre of naiads, trolls and pack hunters and a strong right flank of Hrimm, a lord on a frostfang and a cavern dweller. The northerners started to make their way forward and in turn 2 presented me with an opportunity I really should have thought more about! Whether it was the successful shooting in turn 1, or a delayed sugar rush from my morning toffee latte, I decided to throw Scud across the far side of the table into a regiment of pack hunters. Quite why I choose to do this, I’m still not sure, but as soon as I had committed, I started to realise just what a stupid mistake I had made. It was unlikely Scud would kill the regiment, and whilst there was no other threat to the demon, extricating him from the situation wasn’t going to be easy. Fortunately, the regiment was waivered and couldn’t fight back, but in the following turn the bolt thrower started shooting at Scud chipping three or four wounds off him a turn for the next three turns as I danced him around trying to avoid charges from the frostfang lord and the snow troll prime.
The good thing about Scud’s little adventure was that it managed to distract both the snow troll prime and lord on frostfang, and without these key support pieces my troops on my left of the table quickly finished of Hrimm and the Cavern Dweller, whilst the units in the centre polished off the naiads and pack hunters.
Eventually Scud’s misadventure came good, and he was able to flank charge the snow trolls, removing them from the table with a regiment of shock troops. By the middle of turn six things were looking very good for the rats, the northerners had largely melted from the table, and I was in a position where a bit of good fortune would see me take every section of the table. Unfortunately, I hadn’t been watching the clock and just as I started to roll for combats, I timed out. This was particularly frustrating as I had the remaining cavern dweller cornered by Scud and a regiment of shock troops and the frostfang lord had just charged into the shock troop horde, and I was keen to fight back. All this became compounded by my opponent rolling a turn seven. The upshot of all this was that the cavern dweller managed to kill the heavily injured demon, before flank charging my horde of nightmares and taking them off the table. Things were suddenly not looking so rosy. Fortunately though the frostfang lord was unable to remove the shock troops, and then some very tense measuring followed to work out which units were in which sections, by luck more than judgement my tunnel runners were just about in my opponent’s centre which out unit strengthened the lone cavern dweller, and I held three other sections, securing a solid win and a reminder to keep my eyes on the clock.
Game 2 vs Empire of Dust, Pillage
It’s fair to say this was probably one of the match ups I really wasn’t excited about. Empire of Dust don’t really bother too much about chip damage, and this list in particular had none of the few units in the army that are relatively easy to take down. Looking through the list I knew that my lightening bolts would only make an impact if I could target the priests, everything else would simply either bounce off defence six our get immediately healed.
I will admit to not helping myself with my set up. I had a plan in my head about contesting objectives in the middle of the table, but I definitely didn’t position myself in the best way possible to do this. All this meant that by turn three the rats looked like they were heading for an early bath, and then a glimmer of hope appeared. For reasons best known to my opponent, after successfully deleting my spear horde, in the centre of the table, with a revenant horde he repositioned it in such a way as to allow Scud an unhindered charge into the horde’s flank, with support in the front from some warriors and a shock troop regiment. The revenants went down, shortly after this the shock troop horde, on my left flank, managed to remove a regiment of revenant cavalry, followed in very short order by the horde of enslaved guardians. Suddenly, the rats were back in the game.
Coming into turn five, the sweet fragrance of opportunity lingered in the air. My three warlocks, who had largely been irrelevant for most of the game had a viable target on the cursed high priest, whilst the shock troop horde that had already one shotted two -/17 nerve units had a charge on Sebekh-Rei, that if successful would carry them into the back of the monolith (unhindered, which would be 90 attacks on 4s with crushing strength 1), that would then allow them to contest one of the objectives. In addition to this Scud was facing a revenant cavalry regiment with warriors supporting in the flank for another objective. Whilst I wasn’t sure all this would guarantee a win, it would certainly put me in a better place.
The lightning let rip, but sadly the priest survived. Not a problem, I thought, it was only the icing on the cake compared to the other two combats. Scud and the warriors went next, with a heroic effort from the warriors seeing the second cavalry unit leave the game. Finally came the big one, the domino run that could see everything change, unfortunately it was not to be. Despite a reasonable amount of damage going onto Sebekh-Rei I couldn’t make the nerve roll and so my unstoppable horde was very much stopped and with it any hopes of maybe drawing the game. Whilst undoubtedly a shame, my opponent had played a much better game than me and deserved the win, I was happy to hold onto one objective.
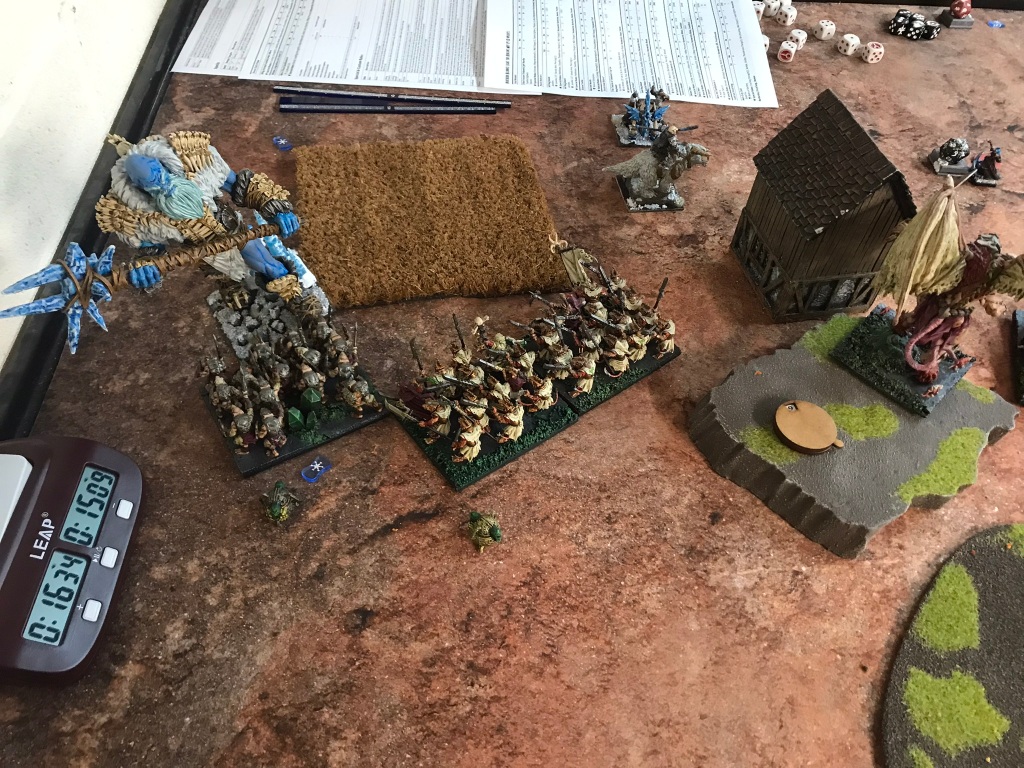
Game 3 vs Halflings, Salt the Earth
I felt massively excited to face off against Russ Charles’ amazing halfling force which I had been admiring on KOW Fanatics as he painted and sculpted it (not surprisingly it went on to take the Best Army prize). So excited, I failed to take any pictures of the game! It was an interesting match up from a lightning bolt point of view because of the prevalence of spellward in the army. I wasn’t overly concerned though because Russ had a number of units that don’t have the ability which were great targets for my casters, balloons – I’m looking at you.
In the first turn of shooting Scud and the warlocks removed the first balloon regiment from my left flank. With that threat gone Scud, the tunnel runners and the night terror charged down the spearspike horde not long after, removing it in a single turn, claiming an objective and turning their attentions to the centre.
The centre of the halfling line consisted of another balloon regiment, the Heroes of Holdenburg, an engineer and the Pride of the Shires. I held my forces back in the centre, not only because I wanted to wait for the flanking forces on my left to support the assault, but also because on my right flank the halfling juggers were pressing down on me. Much to my dismay the halfling chip shooting really started to take its toll, weakening both Mother Cryza and the tunnel runners. In addition to that the arrival of a muster captain in my back lines caused all sorts of upset as the plucky little dude managed to survive two turns of shooting and then two turns of combat, distracting valuable rat power from dealing with dogs and balloons that were starting to overrun the rear of the army.
Fortunately, though the rats managed to secure three objectives well away from the main combat zone, and the stalwart horde held back from joining the fight in the centre of my lines in order to secure an objective for the halflings. So, the fighting focused on the ownership of one final objective. Despite the halflings staking a solid claim repeated charges by shock troops took a massive toll and at the end of turn five the brave juggers were on the back foot. Unfortunately, at this point my opponent had to run for a train and so we called the game there with the rats taking the victory.
Final thoughts
All in all, it was a good day with some really interesting games, and a great test of the lightning bolt spam that ratkin have at their disposal. Having played this type of list at two events now I think I have started to form much more of an opinion on it. The first is that it is a pretty match up dependent list. Lighting bolt is a great spell for chip damage, and whilst twenty-five bolts have the potential to fell a horde in a turn, its rarely going to do that reliably. Consequently, you want match ups with armies that have decent targets that you can shoot from early on in the game. Against armies with high defence, high nerve and lots of heal your warlocks will be pretty useless.
One of the good things about maximising lightning is that you’re taking several different types of unit, namely warlocks, Scud and Cryza. This certainly doesn’t make it cheap, but it does mean you are bringing a variety of units that offer a range of different support to your troops, but this is also where it gets challenging. The main issue from this list comes from a combination of the number of unlocks required to bring all the casters to the table and then how best to prioritise the use of Scud and Cryza. Because of this the list can feel light on inspiring, even though it has three sources because of the need to prioritise the placement of units that contribute both lightning and leadership.
One final observation, I think the lack of a long-ranged unlocking unit in the ratkin list with piercing 1 shooting prevents my attempt at this list from being overly problematic. I think there is definitely a need for some other shooting support, which is what the nightmares are there for, but their lack of range means they can’t help out in the early stages of the game which is a shame.
Overall, though, it’s a fun list that definitely needs a little bit of thought and did land me in 8th place. Will I be taking it again? Well, I certainly won’t not be.
With all that said and done I’d like to finish by thanking my opponents for some great games, and Dave the organiser for a fun day.
It’s been a couple of years since I published The Rose of Amzharr and shared my very own fantasy world with, well, the world. Since I started writing the novel, I’ve always had grand plans to grow the universe and tell many more tall tales of talking squirrels, molemen, mortals and immortals all living side by side, and sometimes getting along with one another.
Whilst I haven’t been short of enthusiasm, I have found myself short of time on many occasions. The day job has definitely played a role in this, but so too has the actual and very real joy of having a young border collie join the family (my god they just don’t stop do they).
All this has resulted in very slow progress with anything Amzharr related. I have been trying to do short bursts of writing as and when I can, but one of the issues I find is that story telling tends to be a process I warm up to. Whilst I can write a couple of thousand words over four hours, its not evenly spaced and the first hour tends to result in a number of failed starts and a negative word count! This makes doing say half an hour a day pretty pointless.
More than that, my usual approach to writing has probably hindered progress more than anything else. I like to write a story down from beginning to end and then rewrite from beginning to end, improving and reworking as I go. This process doesn’t work when you forget what you have written one week to the next and realise that you are covering exactly the same ground in chapter 3 as you covered in chapter 1. Not helpful. To compound it all I have been chopping and changing chapter orders, as well as making several changes to the intended direction of the story.
All in all, I have contributed as many, if not more, issues as my day job and the result? That whilst the second book’s word count has grown to a reasonable 24,000 it’s about as far from coherent as I am after a bottle of scotch. So, after a lot of umming and aahhing I’ve made a massive decision. To bin the whole thing.
Worry not though, after much thought I realise it’s for the best, giving me a clean slate to start on, but with the benefit of already building out a lot of ideas that will be fed into the new draft. It is an exciting new start, and one that I’m keen to get moving with. I spent a decent amount of Saturday expanding on my previous plans and now have a much more solid foundation to work from. I’ve also got a few ideas to try and deal with the challenges I find of trying to fit in writing long form stories around about a million other things.
It’s been a big step, I have to admit, because I’ve been hanging onto my very imperfect manuscript in the belief that it represents progress, when in reality it represents chaos. So, for the first time in a while, I’m actually looking forward to sitting down and returning to Amzharr once again.
Old Mother Cinderpaw felt a sense of unease in her ancient bones. It had been many years since she, and her children, had fled the slave pits of Tragar and so many decisions had been made in that time. So many risks calculated, so many opportunities grasped at. She knew full well that she had made mistakes along the way, whether it was because she had made decisions too quickly, or without enough information, but not any big mistakes. She had always trusted the feelings in her bones as the final arbiter in all her decisions, and not once had they screamed so hard at her to abandon any other course of action. Not like they did now.
As she looked across the scarred and cratered battlefield, she had to admit there were considerably more orcs standing in front of her than she had been expecting. When the ratkin had first arrived on the grim plains, with sterile soil and great tracts of green crystalline rock that poisoned the land and made underground exploration all but impossible, they had fought for their survival against the local goblin tribes. Slowly they had carved out a meagre foothold before eventually squeezing the tribes out of their land, but now the ratkin needed more resources, which meant fighting the orcs.
Progress had been slow. The orcs were determined opponents, but Cinderpaw knew the mettle of her race. Born into squalid slave pits they had risen up and overcome, and whilst the baron land they now stood on could only be valued by any other race as something to be fought over, for her it represented freedom. The freedom to do as she pleased. The freedom to gnaw her mark on the world’s face, but for that she needed an army, for an army she needed a clan, and for a clan she needed resources and just the right amount of stability.
It was the need for stability that had finally forced her to take the decision to march on the orc encampment. Stability, and an intelligence report from a particularly ambitious birthing daughter. The report had suggested the orcs had taken massive casualties in a series of recent skirmishes and were now a significantly diminished threat. Something in her bones had told her she should wait for her trusted master scurrier to confirm the birthing daughter’s claims, but the cult of the Survivalists was starting to grow again within the clan, and whilst no single ratkin would be stupid enough to openly call for a change in leadership, the Survivalists would do what they perceived to be the right thing for the survival of the clan, regardless of how ill-informed and short sighted. She knew only too well how easily some ratkin could be manipulated, after all, it had been her who had founded the original incarnation of the cult, drawn her most loyal lieutenants from it before “disbanding” it in a night of frenzied blood letting after it had outlived its usefulness.
“For the survival.”
The chant rose in the ranks of warriors and wretches to Cinderpaw’s right. She shuddered. The ratkin in these horde packs still flew the red and bone flags of the clan. The colours had been adopted after the original Survivalist uprising that had secured her grip on power. They were chosen to remind the clan of the years of starvation they had faced which had forced them to survive off their own kind (specifically those who had even the vaguest difference of opinion to Cinderpaw). The colours represented the bone farms where the Survivalists had undertaken the bloody work necessary to ensure those loyal to the clan (Cinderpaw) would be fed. However, she had noticed that the new survivalists had taken to tattooing their hands red, which had made it relatively straight forward to see how rapidly the cult was growing once again. What she had not been able to ascertain was who was behind the resurgence. When the reports had started to arrive that the orcs were weakening, she immediately recognised the opportunity it presented. A decisive victory over the orcs would secure the clan new resources; and buy her time to root out whoever was responsible for the renewal.
Casting her withering gaze across the wall of angry green muscle and blood encrusted weapons that now faced the clan, she could not help but wonder if the reports the birthing daughter had brought to her had been tampered with, or simply invented. Had someone else realised what weakened orc tribes would mean to her? Had someone else presented her with a decision she could not afford to not make?
There was, however, no going back now. As the old Basilean saying goes, “One does not simply walk away from an angry orc.”
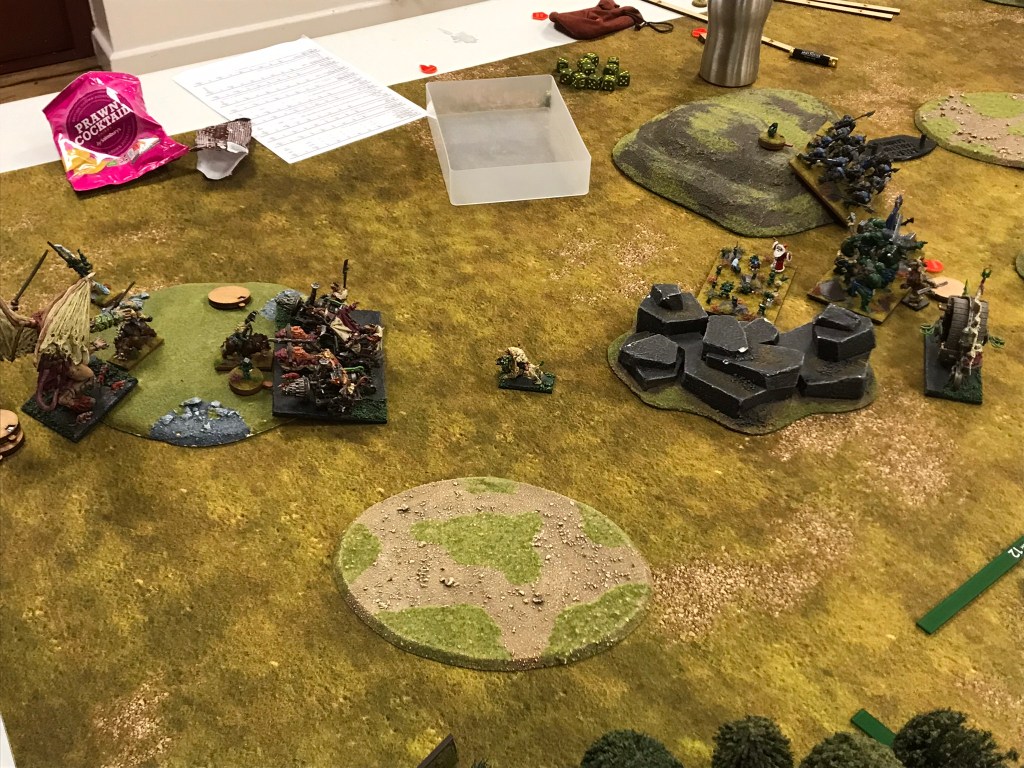
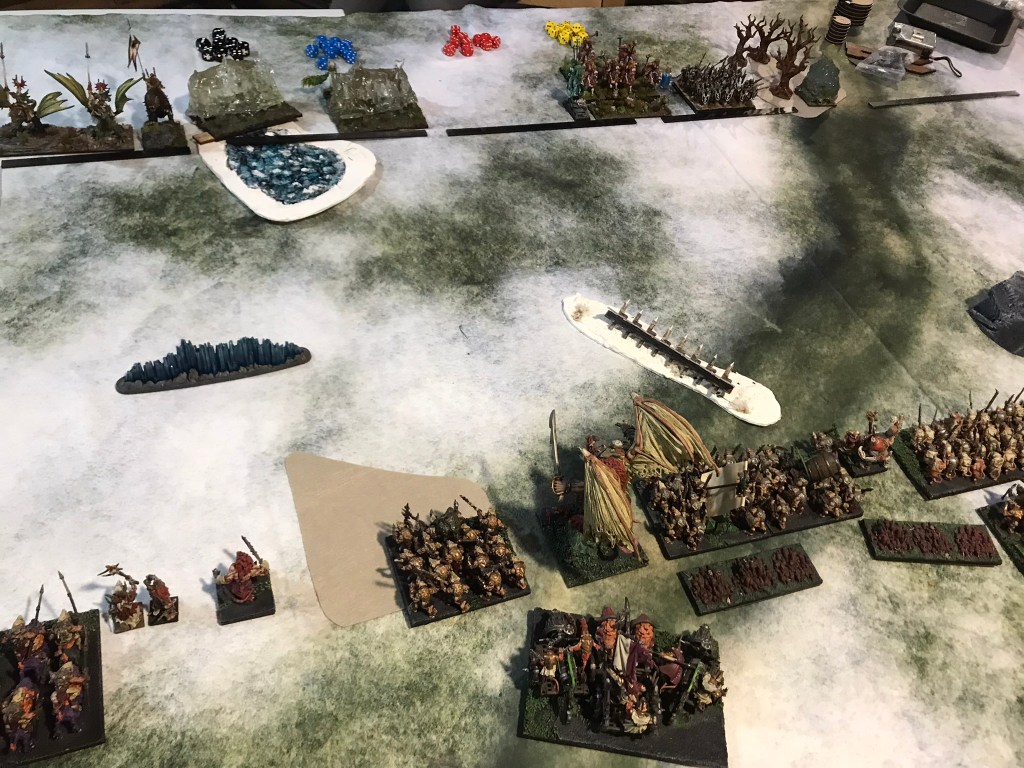
The scenario
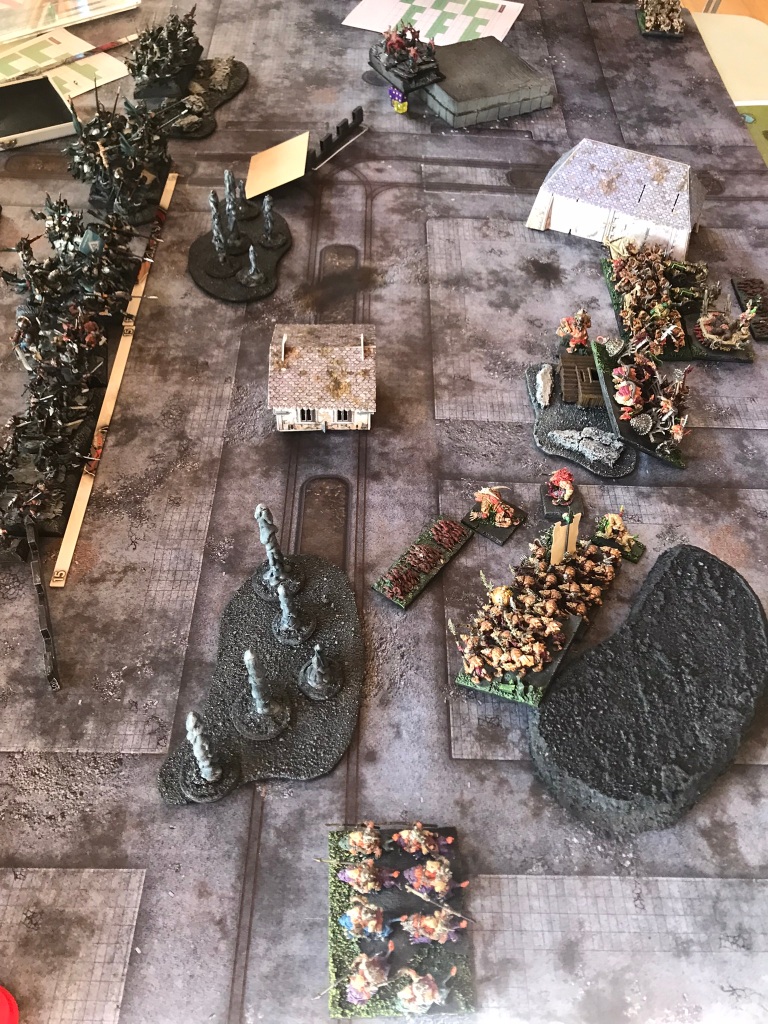
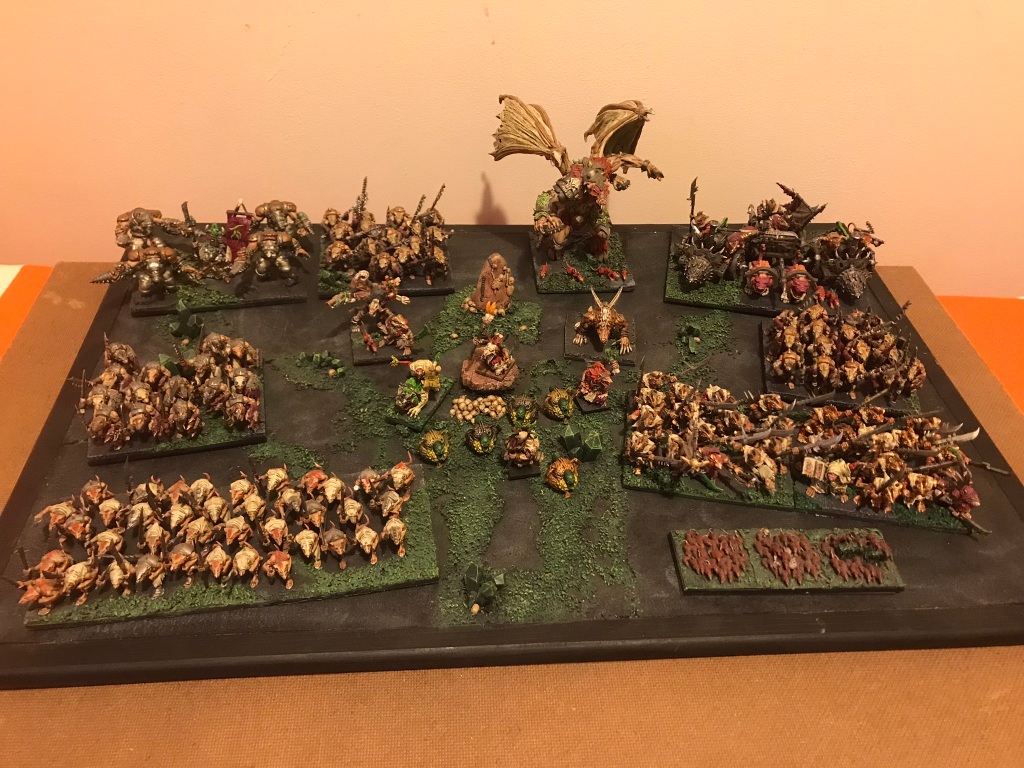
It’s been a few years since my last narrative battle report. With something approaching “time on my hands” and a 5k game lined up with Steve from Lazy Pirate Painting I thought it would a great time to revisit the narrative series I started based around my very own Fyrefur Clan.
For this game we’ll be using a 10’ by 4’ table and we’ve adapted the Control scenario. Each 2’ by 2’ section will be worth 1 VP to whoever has the most unit strength in it, with the exception of the section that has the orc village in it, which will be worth 3 points to the victor in that section.
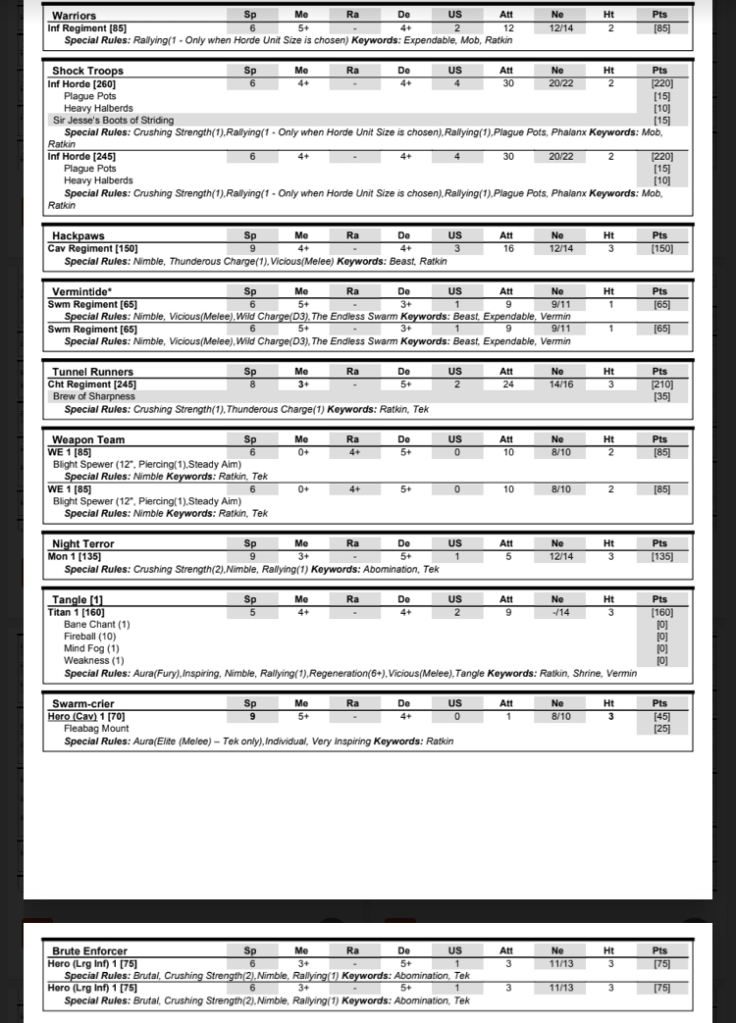
Army lists
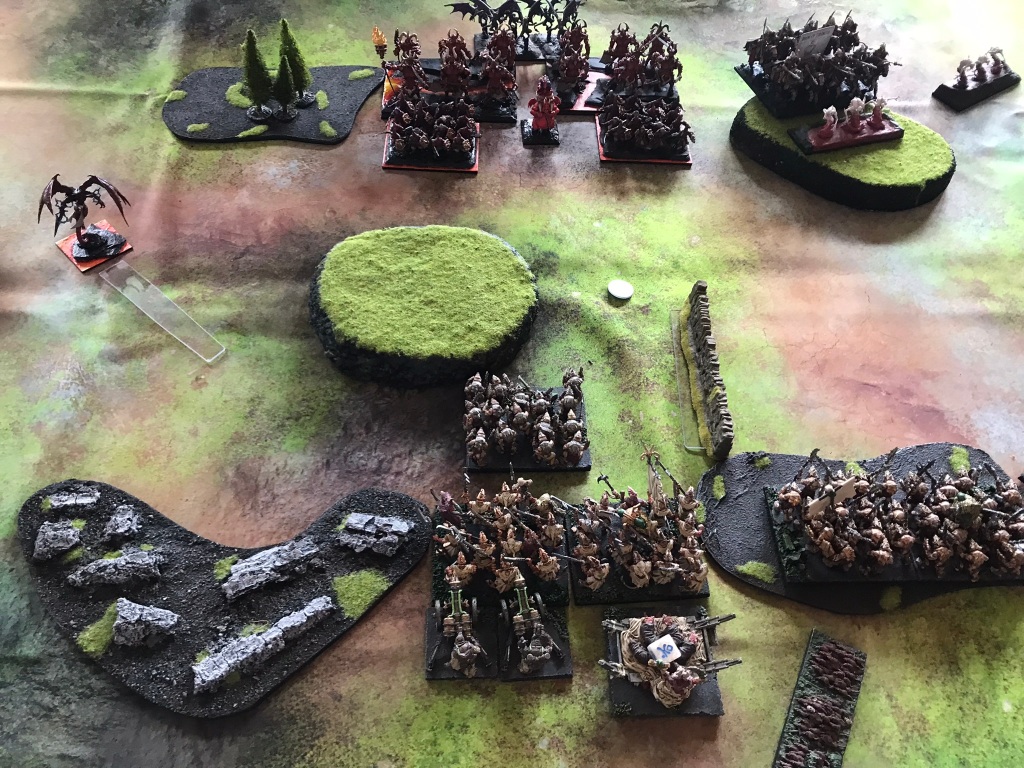
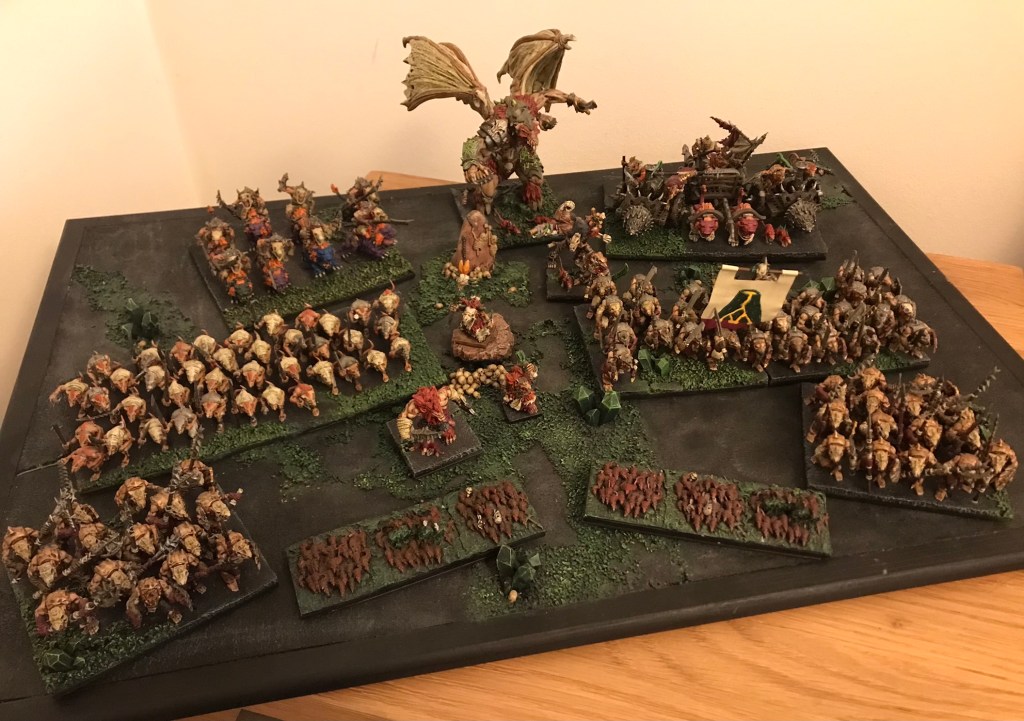
Between the two armies there are 67 units making their way to the table. I will add the pdfs of the lists to the end of the report, but to set the scene I’ll give an overview of the forces fighting on the left flank, centre and right flank (from the rat’s point of view).
Left flank
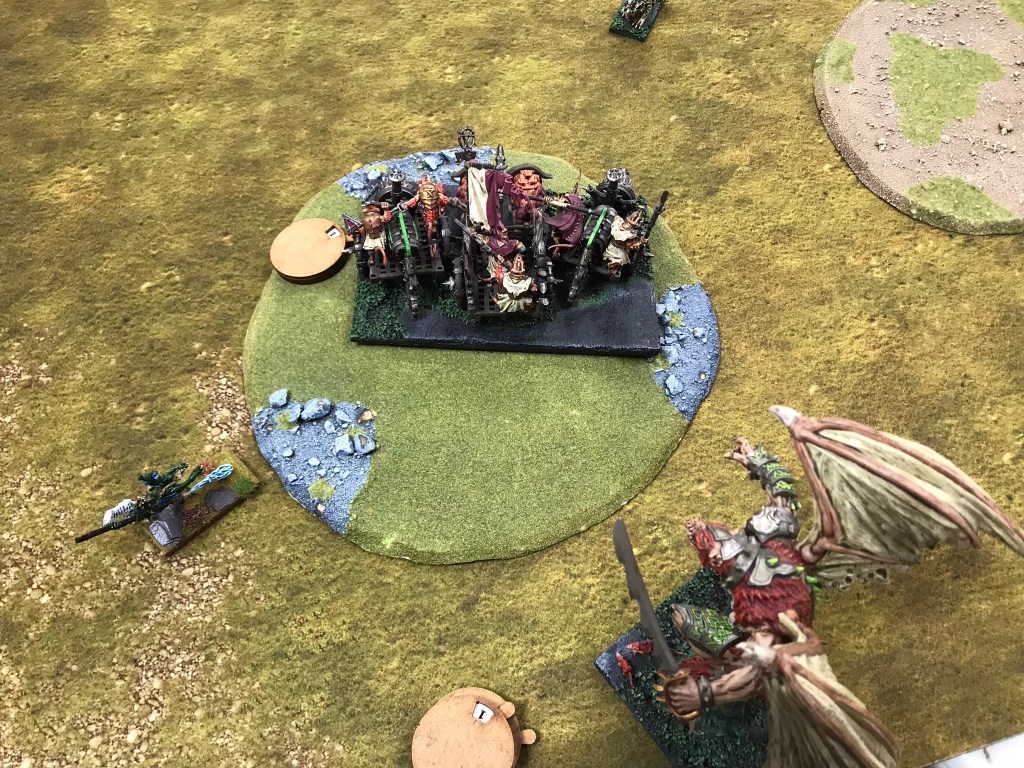
Rats: Tunnel Runners, Hackpaws, the Spawn (Scud), Swarm Crier, Night Terror, Vermintide.
Orcs: Gore Riders, Mounted Skulks, Wip, Wip’s playmates, Morax, Krushers on Gores, Gak.
Centre:
Rats: Death Engine Spewer, Death Engine Impaler, Mutant Rat Fiend, Master Scurrier, Scurriers, Nightmares, Shock Troops, Old Mother Cinderpaw (Cryza), War Chief, Weapons Teams, Vermintide, Birthing Daughter.
Orcs: Trolls, Morax, Morax Mansplitter, Longax, Ax, Flagger, Giant, Hackbeard and Puff (Krudger on Winged Slasher), Fight Wagons, Orclings.
Orcs: Chariots, War Drums, Greatax, Ax, Giants, Orclings, Ulpgar.
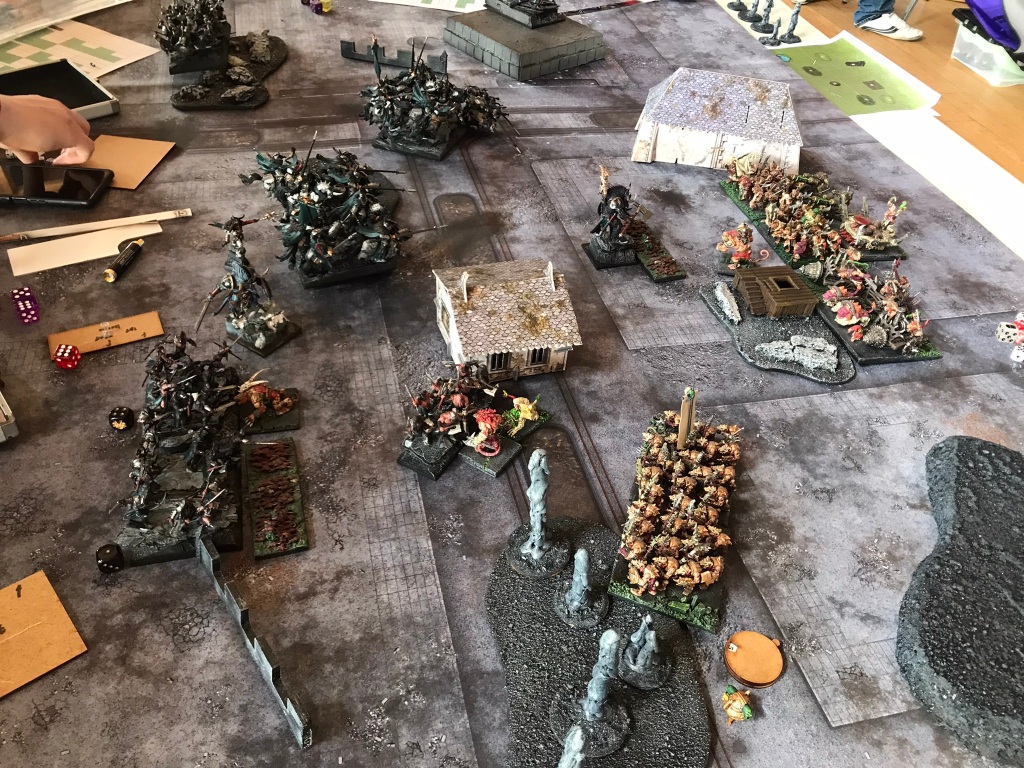
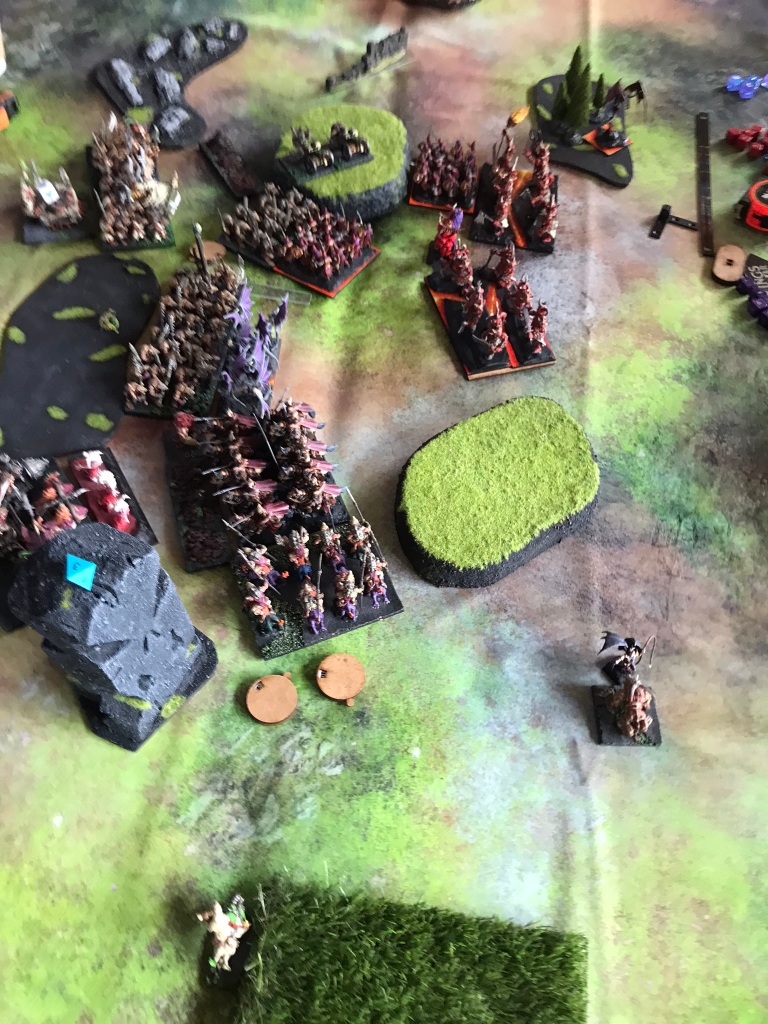
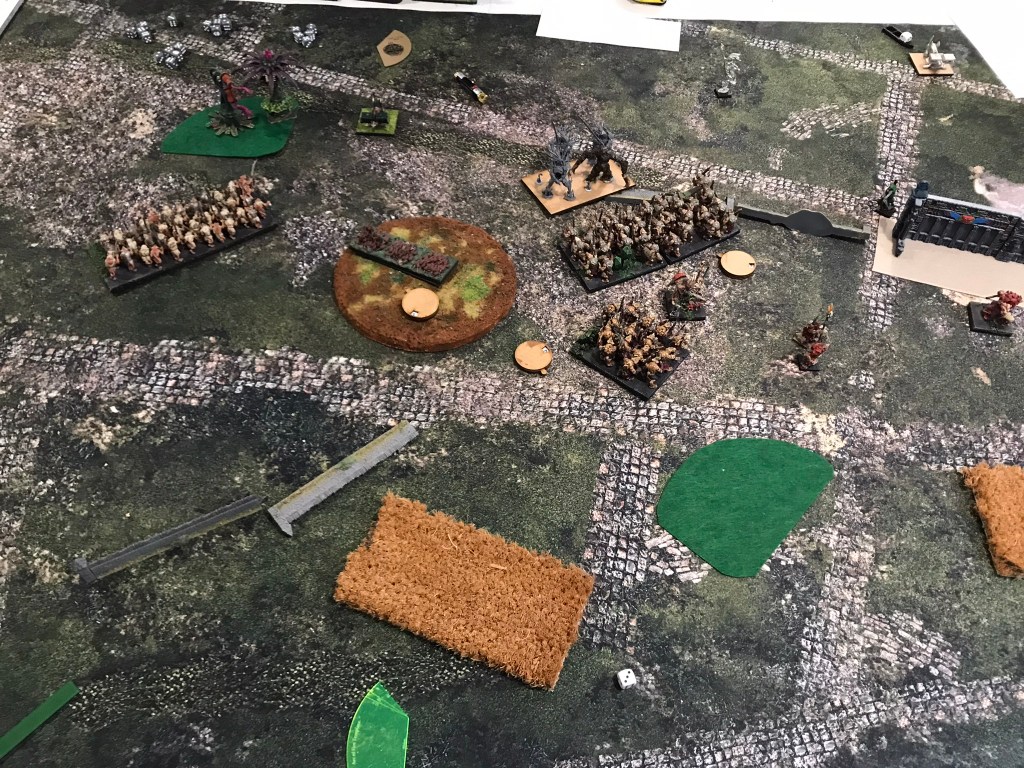
Turns 1 and 2
Putting aside the deep-rooted uncertainty that was now starting to gnaw away at her Cinderpaw unleashed a barrage of lightning bolts at the long ax regiment that stood in front of her, splitting the tension that had been building up between the two armies as they waited for the battle to begin, and signalling the ratkin advance.
The scurriers, who had slipped ahead of the main battle line, sent a volley of shots into some nearby skulks and they ran from the battlefield. On the Ratkin’s left flank the cavalry advanced cautiously, not wanting to get drawn into an unrewarding combat with the mounted skulks and krushers that would leave them easy prey for the gore riders hiding behind the hill. The Spawn released his own lightning bolts at the massive gore riding orc at the centre of the cavalry wing, to little real avail.
Seeing the lightning bolts flicker across the sky and ground themselves through Gak, Wip hexed the towering aberration before it could cause any real damage. The gore riders spurred their mounts and started off over and around the hill. Seeing the size of the threat that had been hidden from them until now the hackpaws charged into the screen of skirmishers, knowing they had to clear a path for the tunnel runners. The charges hit hard, a krusher was wavered and a troop of mounted skulks bore so much damage that if seemed unbelievable that they continued to stand, let alone fight back.
Fortunately for the ratkin though, the sheer volume of angry gores and even angier orc riders on the left flank made it difficult for them to manoeuvre off the hill. The krusher managed to pull away from the hackpaws that had attacked him, allowing one regiment of gore riders to charge the rat riders, but the charge failed to send them from the field. The miracle survival of the skulks meant the gore riders behind them, including the lightning singed Gak, were blocked up and unable to reach a combat. The chaos this was causing on the hill, as the frustrated beasts milled about desperate to enter the brawl, spread into a third regiment coming around the hill as they charged the night terror. Despite a number of orcish lances finding their target the terror managed to overcome its injuries and fight back, knocking two riders from their saddles and eviscerating them with its long claws in the process.
In the centre the orcs pushed forward, keen to get to grips with their enemy and unwilling to let anymore of their number be lost to shooting. Towering over the long ax she had blasted with her lightening bolts stood the orc krudger, Hackbeard, and his slasher mount, Puff. The pair made for an imposing sight. Cinderpaw eyed the monstrosity and its rider. She had heard much about the ruthless warrior, but all those things paled now she stood so close to them.
Their stench was overpowering, even at this distance, even for orcs. The slasher began to heave as though it was attempting to breathe fire, which made Cinderpaw wonder if in fact it could breathe fire, although she understood these creatures could not. Her question was answered a moment later when the monster half vomited, half choked up a sheet of bloody mucus which covered the long ax regiment that stood in front of it. Cinderpaw’s attention was drawn to a series of open wounds and twisted scar tissue that ran down one side of Puff’s thick neck and a broken spear end Hackbeard held in one hand on the same side. Her questions were answered.
Despite, or more likely because of, their unwelcome ablution the long ax pressed forward. Without hesitation the vermintide legion swarmed towards them supported by the impaler, the mutilated night terror that served as its engine pumping its severed limbs for all it was worth. The rats collided with the long ax. Spinning blades ground into them at head height, whilst the vermintide ran around their feet, up their legs and under their armour, seconds later the regiment had been reduced to red pulp.
Cinderpaw began to wonder if she might have underestimated the strength of her own forces, rather than that of her enemy.
On the right flank the ratkin held still, uncertain of the size of the force they faced due to the hills and standing stones that obscured the orcish line.
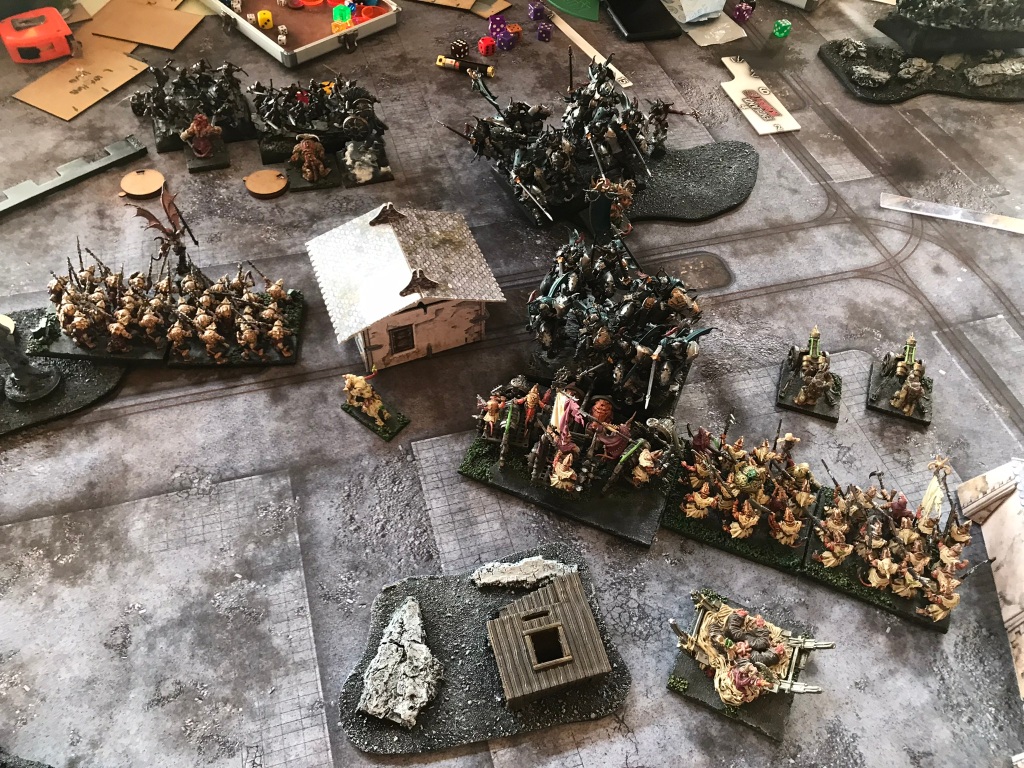
Turns 3 and 4
As the last of the long ax disappeared under the sea of vermin the battle lines began to meet in other places across the battlefield. Hackbeard goaded Puff forward, and together with the fight wagons, crashed into the impaler, whilst the giant that had been closest to them grabbed at one of the weapons teams that blocked it from getting to the shock troops and hurdled it out of the way. The weapon, and its crew, exploded in a spectacular cloud of noxious green smoke several hundred metres from the back of the ratkin lines as they hit the ground. The shock troops charged the giant in response, but despite causing grievous wounds to it, some losing the grip on their weapons so slicked they became with the giant’s blood, it refused to die.
The unrelenting advance of the mass ranks of orc infantry in the centre put a massive pressure on the ratkin there. Despite the centre being held by experienced and elite warriors their well drilled tactics, combining close ranged fire with waves of chaff and plague pots to distract and whittle down the enemy advance, simply wasn’t working. Although a lone war chief managed to successfully hold a horde of trolls at bay, bad shooting, or just plain bad luck, meant the troops of morax refused to succumb to the scurriers’ volleys, pressing forward and finding their way into the flanks of veteran hordes. The berserkers caught the preoccupied warriors off guard and caused massive amounts of damage that saw both the nightmares and the shock troop horde fighting the giant dissolve.
The fog of war surrounding her, uncertain as to how the battle was unfolding, Cinderpaw launched herself at Hackbeard. Puff sensed the cold, wilting air around her and instinctively drew his head back inadvertently exposing his damaged neck. Cinderpaw thrust the sharp end of her rotting staff into one of the beast’s open wounds and pushed with all her might. She felt the creature wince, and then convulse. A choking, spluttering bark erupted from his throat and Cinderpaw felt the weight of warm, bloody mucus land on her. The disgusting slime covered her from head to toe, momentarily blinding her and resulting in her next blow going wide of its mark.
Hackbeard had always been scornful of the wiry old rat witch, even more so after what the witch’s traitor had told him. Whilst he did not doubt she had some talents, he had not expected the decrepit looking, almost corpse like, creature to have any sort of fight in her. He could feel the unsettling stench of archaic death permeating the air around him, even in the heat of battle, and the viciousness with which she had lashed out at Puff made him re-evaluate his perceived one-sidedness of the duel. As the old rat thrashed about, attempting to alleviate her temporary blindness, the wily krudger took the opportunity to look for an alternative fight, one where he might find better odds. Seeing a horde of spear rats in the woods just beyond with their flank turned to him, he directed Puff towards them.
Despite her confusion Cinderpaw felt the downward rush of air as Puff flexed his wings to leap over her. In amongst the darkness, and the rush of air she heard the unmistakable sound of a fight wagon barrelling towards her, through the woods to her left. The fight wagons had become embroiled in a fight with the impaler, before becoming the target of shooting. Heavily damaged, only one of the contraptions remained. It struck her, but a collection of roots had wound themselves around the wheels and slowed it to the point that whilst the impact looked impressive the loud crunching sound it created came from the axels detaching themselves from the underside of the wagon. The body of the wagon, together with the orc crew, then flew backwards into the faces of the gores that pushed them. Cinderpaw gave a wicked smile as she surveyed the wreckage at her feet. “Maybe.” she thought to herself.
On the left flank the gore riders had finally broken through the regiments of hackpaws and vermintide that had held them up. They bellowed out challenges to the tunnel runners and the Spawn beyond, bloodied weapons raised above their heads. Despite the massive Spawn bolstering the charioteers’ confidence the number of gore riders, and a wave of morax behind them, made the outcome of the combats to come far from certain.
As the charioteers readied themselves a burst of shots flew from the deathspewer in the centre of the field and tore into the morax. As the smoke clearer it became apparent that the deathspewer had managed to wipe out the troop to an orc. Emboldened, the Spawn and the tunnel runners charged. The Spawn landed in front of the gore riders to the furthest left, on the very end of the orc line. His heavy sword fell, unseating orcs and spreading terror, but not quite forcing them from the field.
The tunnel runner regiments charged a second gore rider regiment that had positioned itself awkwardly on the hill. Despite the regiment being swiftly dispatched the subsequent attempts by the tunnel runners to reform for the next charge resulted in the remaining unengaged gore rider regiment catching the flank of one unit of chariots and swiftly routing it.
Suddenly the brief window of opportunity the successful destruction of the morax had opened seemed to be slamming shut.
Turns 5 and 6
The orcs on the right flank had been advancing slowly, held up by the forests, hills and uneven stretches of scrub land. Cinderpaw had hoped to take advantage of the terrain on the right of the battlefield to buy her time to over run the centre and establish a rally point around the encampment before the orc reinforcements could join battle. With the centre lost to the rats, the rally point had never materialised and now the troops on the right flank were scrabbling to mount some sort of defence. Orc infantry and a giant were making there way through the woods in front of the encampment, whilst regiments of chariots had crested the hill and were now within easy distance of the remaining ratkin.
Hackbeard’s arrival had thrown the flank into disarray, forcing a horde of spears to turn their back on the chariots to deal with the new threat. Despite the damage that Cinderpaw had inflicted on the beast, the confusion resulting from the direction of his attack meant the spear armed warriors were in no position to capitalise on it, and spear tips flew wide of their mark. As the rat warriors did their best to fend off the krudger, the orc chariots prepared to charge.
At the birthing daughter’s command a horde of wretches flooded into the side of an ax regiment that, together with the giant, were engaged with the vermintide legion. Despite the weight of numbers, the rats were simply no match for the brutal orcs and their towering companion.
Cinderpaw looked across to see the wretches and vermintide fleeing, leaving a lonely shock troop horde that had been in reserve as the only chance to stop the onslaught. Aware of the failure in the centre and now seeing the right flank overrun, Cinderpaw turned to see what support she could offer the shock troops. Distracted, she did not see the morax mansplitter bearing down on her and offered no defence as the reckless berserker swung repeatedly at her, each axe blow landing with a sickening crack, splitting flesh, breaking bone, and driving the withered matriarch to the ground.
Awareness of Cinderpaw’s demise spread almost instinctively through the remnants of the ratkin on the right flank and in the centre, discipline broke down completely and the army fled.
Only on the left flank did the fighting continue. The Spawn swung again at the wavered gore riders, finally putting them to flight, only to be charged by both Gak and the remaining krusher. The two champions lashed out with an almost superhuman rage, rending great wounds in the creature.
Supported by their swarm crier the remaining tunnel runners surged into the last of the gore riders. Such was the ferocity of their charge not only did they wipeout the gore riders, but also rode over the krusher, who had attempted to stop them from interfering with the combat between the Spawn and Gak, and then trampled Gak.
As the Spawn surveyed the carnage the charioteers had left behind them with grim glee a single lightening bolt shot from Wip’s direction. It struck the beast directly between the eyes. The creature went still, before collapsing to the ground.
For the first time the charioteers turned their attention to the rest of the battlefield. Despite their hard-won victory, they knew immediately that there would be no celebrations as they saw the piles of dead that littered the plain, far too many of which they recognised as their own brothers and sisters.
The aftermarth
Dying fires offered their last light to the night as the first hint of dawn’s arrival crept across the battlefield. The sounds of celebration had echoed across the plains for many hours until the orcs had finally drunk more than even their vast thirsts could handle.
The birthing daughter picked her way carefully across the battlefield. The corpse mountains provided sufficient cover for her not to worry too much about being discovered. Led by an amulet that aided her in searching for what she most desired she quickly found the crumpled body of Cinderpaw.
She paused for a moment as she took in just how fragile the old ratkin was. Her desiccated limbs were shattered. The birthing daughter drew in a quick breath. Where was it? She rooted around frantically, over turning corpses and scratching at the dark earth until her fingers started to bleed.
“Looking for this?” Hackbeard rumbled as he stepped out from behind a tree.
The birthing daughter froze, before slowly turning to face the massive krudger.
“She was a strong enemy. Stronger than you had me believe.”
“You won the day.” The birthing daughter retorted defensively, “Now give me what’s mine.”
The krudger threw a ball of bloody cloth towards the birthing daughter, “It’s all yours.”
The birth daughter reached out a hand, fresh red tattooing etched into her skin.
“I’ll never understand your race’s obsession of making helmets out of your rival’s skulls.” The krudger grumbled.
“It’s symbolic.” The birthing daughter snapped back, taking hold of the bundle.
“I hope for your sake it’s more than symbolic. A weaker one than her won’t last long on my plains.” Hackbeard sneered as the birthing daughter disappeared, without another word or backwards glance, into the new dawn.
There is the odd low-key spoiler in this review, but I’m not giving away the ending.
Every so often I pick up a book from a small publisher, or a self-published author where the overall quality of the writing, or presentation/formatting of the book isn’t as good as you’d like it to be, but the enthusiasm in the story telling, and the story itself just keeps you turning the pages.
I felt, to some extent, the opposite of this reading the Fourth Wing. Rebecca Yarros is clearly a very talented storyteller and her writing is exquisite, the world she has created is rich and engaging, overall the story intrigued me right up to the final series of dragon sized plot twists, one of which I really didn’t see coming at all. There were, however, a couple of plot lines that I just wasn’t able to buy into completely that could have seen me ditch the book halfway through if it wasn’t for the overall package Rebecca Yarros provides.
The book tells the story of an academic named Violet who comes from a family of Dragon Riders. Her mother is the second highest ranking officer in the kingdom, and so the expectation is that Violet will follow in the family’s traditions. This means enrolling in the Dragon Rider training college. A massively dystopian school where students are expected to die, and murdering your classmates is generally okay, provided they’re not sleeping.
Violet must use her formidable intellect to make up for her lack of physical strength and stamina to navigate the initial tests and challenges if she has any hope of being given the opportunity to bond with a dragon. All this whilst being the top of any number of her fellow student’s “most want to kill” list.
There are elements of the level of violence tolerated between the students that I find hard to accept within the story. An example is where one student casually throws another off a parapet without any consequences (what makes this scenario harder to believe is that the test they are undertaking is not even a combat one) which feels out of character for what is meant to be an elite military school, and no, the student’s behaviour does not improve and he has no redeeming qualities whatsoever.
However, whilst I feel it is a level beyond what is required or believable, it certainly creates an unsettling environment for the reader to navigate which set up, for me, a number of questions that were answered in a very fulfilling way as the story unfolded.
I’m a big believer that you don’t have to love every word on every page of a book to really enjoy the story, and this is very much what I feel about The Fourth Wing. In fact, as the story started to progress outside the college I found myself more and more drawn into it to the point that finding out there is a requirement for a second instalment was the second best discovery in the final paragraphs (when you get there you’ll know).
Whilst The Fourth Wing hasn’t made it onto my “must read” list, it’s definitely on my “glad I made time for it” list and my “looking forward to the next instalment” list.
***
I hope you enjoy my brief book reviews and find them of interest. I would love to recommend my own five-star fantasy novella “The Rose of Amzharr”, which is available to purchase from Amazon, with proceeds going to support the Wizard’s Bookshelf.
This month’s book review is The Adventures of Amina al-Sirafi by Shannon Chakraborty.
I really want to try and be that distance, slightly aloof, analytical book reviewer, but there are times when it’s just not possible. I always remember very fondly reading the Tales of 1001 Arabian Nights. It was some years ago, and the stories themselves are lost to my memory, but I remember how I felt when I read them. Excited and exuberant.
Despite reading them as an English translation (I am not much of a linguist) there was something about the style of writing that shone through the pages and transported me to a whole new time and place. The experience encapsulated everything I enjoy about reading fantasy, finding myself into a new world full of intrigue and daring do.
I suspect, dear reader, that you have a strong suspicion you know where this is going… and it is. Life’s simply too sort, some times, to beat around the bush. The Adventures of Amina al-Sirafi was released in 2023, but beautifully emulates a much older flow of storytelling. It is a gripping yarn about pirates, sea monsters, demons, and deals – what more could anyone really want? A historical fantasy set in the medieval period sees retired pirate captain Amina al-Sirafi gather a crew for one last adventure around the Indian ocean. I loved it and would highly recommend it to anyone who enjoys similar stories.
The best thing is, at least from my point of view, is that I understand it’s the first book in a trilogy.
After a super successful start to the year at Stanes of Blood it was time to pack the rats up again and head up to Burton on Trent. Having really enjoyed taking some of the units that were refreshed in Clash of Kings 2024, I decided to change things up and give a couple of other units a whirl.
Last year I decided to try out a lightning bolt themed list at an event. Ratkin have a number of sources of lightning bolt which mean they can put no less than lightning bolt 20 on the table in a 1995 point army, and because it comes from warlocks, Scud and Cryza you aren’t technically spamming anything (unitwise), which makes me feel great about not being part of a problem that I’m not convinced is a massive problem in Kings of War.
Last year my list performed admirably, and although I only won one game, I distinctly remember that user error contributed a lot to this. This year, though, things have changed. Not only have there been price reductions to the warlocks and, unbelievably, Scud, but I have also given myself a good talking to, agreeing that I will give thinking before acting a serious go.
The points reductions in the units above gave me an extra 45 points to spend on the list and I decided to strip out a couple of magic items to free up some extra points. This allowed me to remove a shock troop horde and replace it with two regiments with phalanx and plague pots.
NB – I’ve done my best to recreate the lists I faced below, but they are best endeavours so the odd magic item or spell might have been missed, especially if it had no noticeable affect on the game.
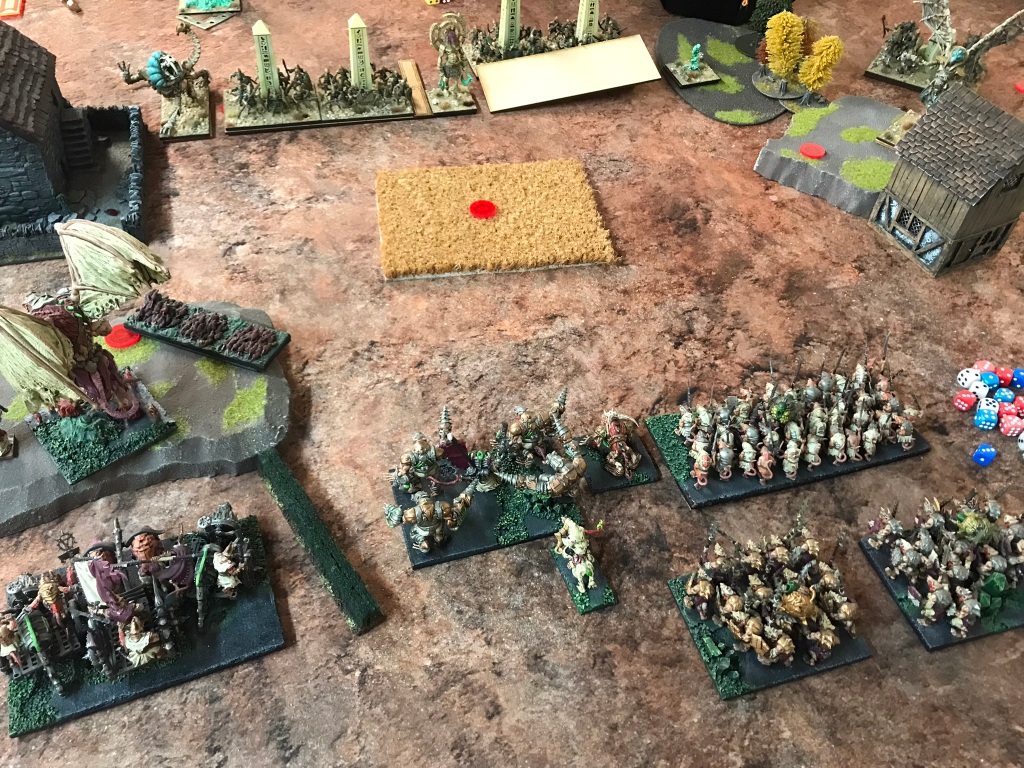
Game 1 vs Twilight Kin, Invade
My opponent is a regular opponent, so I had pretty low expectations for this game as I’m pretty sure I’ve lost to him every time we’ve played at a tournament. His Twilight Kin list is quite interesting as it’s a mixed arms affair that leverages the crone’s ability to cause damage with spells.
We set up with the bulk of our armies on opposite flanks. I was wondering if the game would end up being a case of us both trying to dance around each other and get onto the other side of the table with minimal casualties. However, as the kin had less unit strength than the rats they were keen to engage and even things out a bit.
This is my second time playing the new kin list, but my first time against new units like the skiffs and mutants. There is undoubtedly a lot of mobility in the army, and I will certainly have to get used to the skiffs, but fundamentally most of the units in the army I had an answer for. The mutants were brought down with spears and lightning bolts, the skiffs were easily taken down once you got hold of them, however there was a component of my opponent’s force that I really underestimated, his shooting, specifically the crones. Between the three of them he was able to put out 19 shots per turn with piercing one that were not impacted by cover, stealthy or being an individual. The impact was noticeable against defence four units as you simply had nowhere to hide, and to make matters worse the shooting had magical effects too which absolutely impacted the scenario.
Towards the end of the game the magic had really made its mark. The damage racked up and my hackpaws got shot off the table before the final nail in the coffin was driven home when a shock troop regiment got pulled back across the centre line and took eight points of damage thanks to a couple of the casters removing even the slightest chance of a win.
All in all, it was an interesting game. I’m looking forward to see how Twilight Kin develop over the next year or so. I genuinely like the army and think ratkin have the tools to deal with what they can bring to the table, although I have a little more thinking to do in regard to the shooting the crones have. I can’t think of any army that has the capacity to dish out such reliable shooting that isn’t considerably more limited in some way, e,g, Dwarf throwing mastiffs are one use only and have a 12” range, whilst hexcasters only have weakness with low dice. All that being said we mustn’t dally. On to the next one…
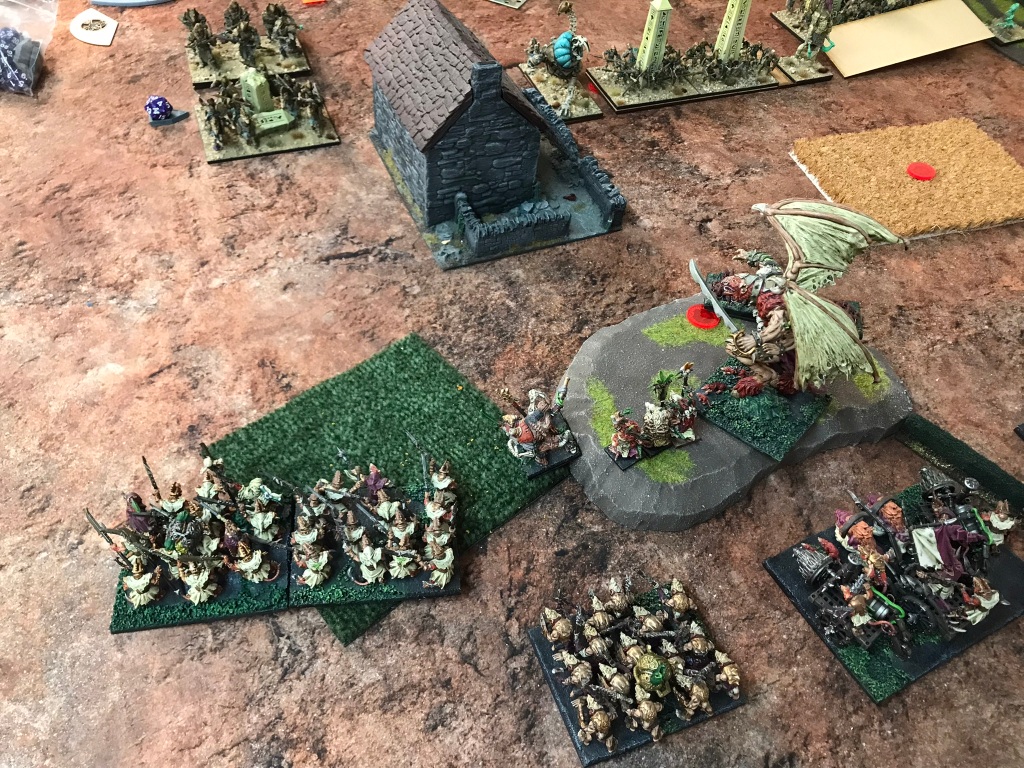
Game 2 vs Sylvan Kin, Hold the Line
This was a very unusual Sylvan Kin list, with no gladestalkers and no air elementals. As we set up it dawned on me though that despite the lack of these mainstay units I would expect to see I needed to be careful as the list had a lot of units that could deliver chip damage shooting, which as I’d found out in the previous game, quickly adds up.
I set most of my units up in the centre and on the right flank. There was a hill in the middle of the table and a piece of blocking terrain on the right which helped to minimise the impact of the bolt throwers. I did put one regiment of shock troops on the far-left flank to make sure I didn’t completely give up the that scoring zone and to serve as a distraction.
The opening turns were really just an exchange of shots as I crept my units closer to his lines and he proceeded to circle me. By about turn three things were starting to get into charge range and my regiment of shock troops on the left found themselves looking at a flank on hunters of the wild in the centre of the board. I decided it was go time. Scud slammed into a damaged archer regiment in the centre of the line and the tunnel runners made a hindered charge into the undamaged warriors. Unfortunately, it didn’t quite go to plan. Scud did kill the archers, but then got shot off the board, the shock troops only wavered the hunters and whilst the tunnel runners also only managed a waver they had left a tiny corner of their base in sight of the dragon which meant a flank charge in the next turn that ended their time in the game.
As I looked at the damage and wondered what next the Wiltfather, who had also been involved in the tunnel runner altercation, made an over run move that gave my shock troop horde a flank on him. It was too good an opportunity not to pass up. Fortunately, the dice fell in my favour. Even better was that Cryza not only managed to ground the dragon, but also waver it. The hunters on the hill expired and various ratty eyes turned towards the lone archer regiment holding the left scoring zone.
The only combat presence left now was the shamblers and a regiment of hunters on the right flank. The shamblers were essentially out of the game at this point as they were on the wrong side of the scoring zone with an undamaged horde of shock troops blocking their way. The hunters managed to fend off a charge from the hackpaws and rout them, but a round of lightning bolts finished off the work the riders had started. The game ended as a solid victory for the rats.
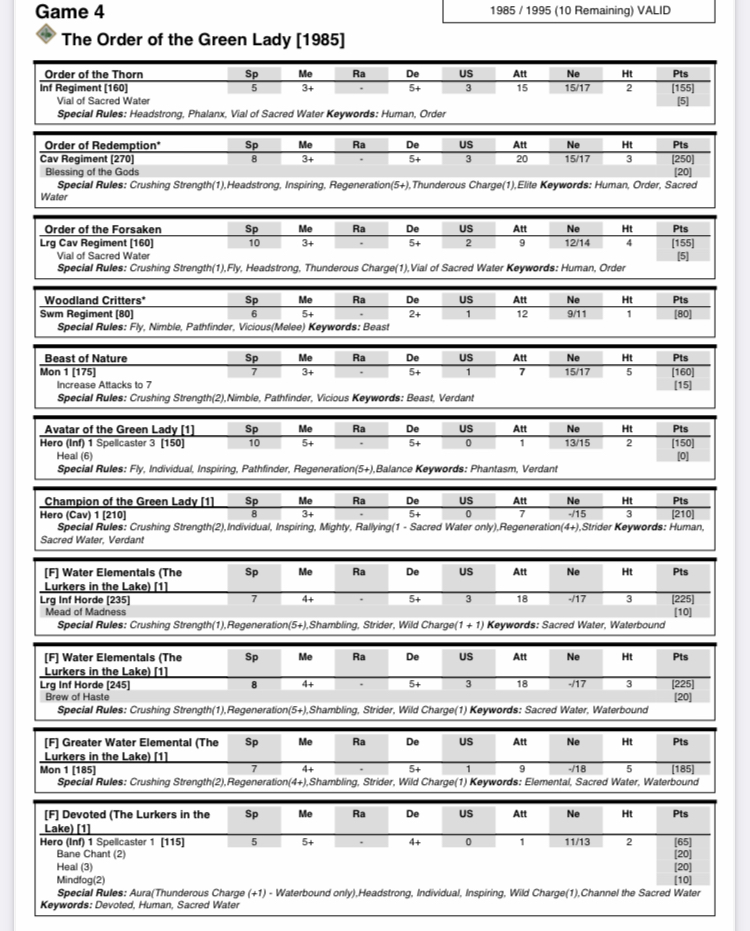
Game 3 vs The Order of the Green Lady, Fool’s Gold
The Order of the Green Lady drew their cavalry lines up opposite my rats from the centre to the far left of the table. On the right flank a lone troop of centaur archers faced off against a regiment of shock troops.
I have to admit that this game went about as according to plan as it could have with each element of the rat army doing exactly what they were expected to. In the first turn my cadre of lightning bolt casters removed one of the centaur archer troops. In the second turn they tried to remove the centaur brave regiment, however the manhorses held their own before charging down my hackpaws. A hindered charge kept the hackpaws in the fight, but the centaurs would manage to hang on for another couple turns despite various attempts to remove them.
Sadly, for the Green Lady the knights lacked the centaurs’ tenacity and found their charges blunted on ratkin spear tips. Redemption and forsaken knights failed to shift my spear horde before being pulled apart by the tunnel runners and shock troop horde whilst Cryza and a shock troop regiment broke the order of the brotherhood regiment.
The redeemer’s failure of his headstrong roll twice in a row only added fuel to the fire. The one ray of light in an otherwise dark day for nature’s nobles was the lone troop of centaurs on my left flank, who skilfully ran around the shock troops wearing them down and claiming a lone two-point objective, whilst the rats claimed five points, and the field.
Game 4 vs The Order of the Green Lady, Dominate
Having had two elf lists to start the day there was something strangely appropriate about facing a second wave of the Green Lady. This list was completely different to the previous one, instead relying on the healing powers of the Lady. I will admit to having a moment of hubris in thinking the list looked quite a tame one, however after a quick chat with my opponent the reality of the task ahead became apparent. All the units in the army were incredibly resilient which meant if I didn’t kill things quickly, I would end up in a grind that I would inevitably lose.
As if to underline the point I found the six points of damage done to the forsaken regiment by my lightning bolts instantly healed off in the first turn, followed by another five points of damage in the second turn. Despite not bringing the usual cavalry and pegasi I would have expected the list had a nasty turn of speed and in the second turn the lines clashed. The forsaken and a water elemental horde killed off Scud, whilst the other flank charged Mother Cryza. Fully rallied the matriarch took the hits and shrugged them off. Ignoring the water spirits, she charged forward to kill off the troop of forest critters before blocking up the redemption knight regiment.
Despite the demon’s demise the tide was now turning towards the rats. With the knights blocked up for another turn the slaughter began. The failed flank on Cryza meant the elementals now had to take a flank from the shock troop horde, with a regiment in the front. At the other end of the battlefield bane chanted hackpaws chased the forsaken from the field whilst the tunnel runners and the other shock troop regiment saw off the water elementals. The next turn the tunnel runners finished off the beast of nature and joined the rest of the army making their way to the centre.
Despite clearing out the flank the strength of my opponent was now starting to come to the fore. A doomed charge by the redemption knights into the shock troop horde left the order of the thorn and the greater water elemental alone in the centre. Despite my best efforts there was no shifting them. Whatever damage I did seem to be healed off by the devoted and the avatar of the Green Lady. The attrition kicked in and the shock troop horde routed. The avatar of the Green Lady blocked the path of the tunnel runners, and it all came down to a final combat between the order of the thorn and the hackpaws. If the foot knights could see off the riders the day would go to the Green Lady, if not the rats would carry the field. The final nerve test was rolled and the hackpaws stood.
Final thoughts
First of all, I want to say a massive thanks to all my opponents and Scott who did a great job with his first event. I do love a four-game event, especially when there is a good spread of players. The venue was really interesting with some lovely sofa seating sections, the positioning of which decided the table side I took in the last game. The food was tasty and a reasonable price. All in all, a pretty perfect day.
With three wins the rats came in fourth, in a field of twenty. At this point I’m starting to wonder if I might actually have some sort of a vague understanding of this game, but best not jinx it.
I was generally pretty happy with my lists’ performance. The MVPs had to be the shock troop regiments who managed to find their way into a number flanks, run interference and get some sneaky scoring in. I definitely felt the benefits of having the two units over a single regiment.
I have mixed feelings about the lightning bolt. I don’t think there was a game where it especially shone, and yet there where a number of scenarios where it certainly took the pressure off by moping up the odd damaged unit hear and there. I did make a slight error in the final game by not moving my casters across to the centre quickly enough and probably lost out on at least a turn of shooting at the avatar of the Green Lady, whose sudden disappearance would have made my day a lot easier.
Having Scud back on the table was great fun, I definitely missed having the centre piece model at Stanes. I do think not having him in the army for a while has changed my approach to using him, bringing him more into the heart of the deployment to get the most out of his rallying and inspiring rather than sticking him out on a flank on his own.
I’m now looking at a list for my next event, in May, and wondering how many night terrors are the correct amount?
I always think, as a unit, you know you’ve made it when my opponent puts some effort into trying to take them off the table. My swarm crier has been the subject of several such attempts, and thus I feel his value has been measured. I’m generally excited about Ratkin at the moment, but there is one model that I’d love to get back to the table, my Master Scurrier, the assassin of the Ratkin world. However, it’s not just the Master Scurrier I’d like to bring back, but I’d also love to see the assassin class characters around more often, but in order to do that I think they need a bit of an overhaul, similar to that of the standard bearers.
Firstly though, why don’t we see them on the field that often? The last time I took my Master Scurrier to a tournament was in 2021, the Clash of Kings to be exact, and I thought he did pretty well. However, if memory serves, he did not in any game use duellist. I’ve also used him in a number of casual games in addition to CoK, and I genuinely can’t remember him fighting that many individuals. Not that there haven’t been individuals for him to go after, it’s just that they’ve either been too well protected because of their importance to my opponent (I’m thinking surge casters) or there’s precious little he would do to them even if he could get hold of them (I’m thinking Thonaar). Essentially, I feel as though many assassin characters in the game are perfectly tailored to taking out individuals that are not that important, or that great in combat, if only Basilean Paladin Chaplains made it to the table more often.
That doesn’t mean I think the assassin class has no place in Kings of War, I believe they just need a little shove in the right direction, the right direction being one that makes them more manoeuvrable or a bit more killy. So, having no real deep knowledge of assassins outside of what Terry Pratchett novels have taught me I thought I would throw a few unsolicited opinions at anyone who finds their way to this page as is my internet given right.
It’s probably worth clarifying a couple of things. Firstly, I would define assassins as being the more middle of the road individuals with duellist, such as the Master Scurrier, halfling Feast Master and kingdoms of men Assassin, the likes of vampire lords really don’t need any more buffs. In addition to this, I think the currently stat lines for these mid-level characters are perfectly reasonable, I think what’s missing is a bit of special ability sparkle. That being said the addition of thunderous charge 1 to their stat lines wouldn’t go amiss to represent an element of surprise in their initial attack (I can’t imagine assassins turning into bellowing brawlers just because they’re on a battlefield, I want to believe they would still look to make use of their surprise stabby skills).
I’m going to start by suggesting three existing(ish) rules that I think would be great for the assassin class and three rules I’ve slung together, inspired by existing KoW rules that I just think would be cool.
Herja’s Legacy – this would need renaming but allowing an assassin to fly and get speed 10 for one turn in the game would give them a much better chance of engaging with those well defended characters, and really putting some targeted pressure on the opponent.
Unleashed – this is the twilight kin Corsair Wrangler special rule that allows a successful wound from a shooting attack to disorder a unit. Whilst this is less character killicentric it does play to the idea of an assassin as a saboteur and dispenser of rare neurotoxins.
Thonaar’s nonsense with duellist – technically this is a combo of several rules, but they all do currently exist. The idea is to improve the amount of damage an assassin can deal, maybe resulting from an especially well-executed attack. This would still see the assassin doubling attacks against individuals, but also receiving blast 2 for each attack where a 5 or 6 was rolled to hit.
Those are my first three suggestions. Now we get to the slightly more interesting, maybe even controversial, stuff:
See things for a different angle – assassins are masters of movement, with lightening fast reflexes and an array of interesting items stowed about their shadowy robes to help them locate and destroy their pray. Assassins can locate an individual even when they are shielded by their own units, regardless of the relative heights of the assassin, the target individual, and the intervening units (both friendly and not). Through a combination of dodging, weaving, sliding under legs and vaulting over heads the assassin can charge an individual within charge range, passing through any intervening units, who is not in their line of sight. Terrain rules would apply here, and the assassin would have to obey all other charge rules.
The bigger they are – the lives of assassins are so much more interesting in fantastic worlds. Who knows what you’re going to be asked to kill, a mage, an orc krudger, Hrimm? The bigger they are builds on duellist by allowing double attacks against heroes, rather than just individuals, and treble attacks against unique heroes.
Hidden deployment – possibly a bit less interesting than the first two, but none the less I feel it’s still very useful and pretty thematic. The assassin is placed anywhere on the table once both players have completed deployment. The only restriction is that the assassin must be at least 12 inches away from the nearest enemy unit.
So that’s it. A few thoughts that might, or might not, be of interest.
Set predominately in modern New York, this debut thriller caught my attention because it is centred around a 15th century Tarot deck.
The book tells the story of a shy academic who lands a summer internship at the Cloisters, part of the Met museum, in NYC. Once at the Cloisters she finds herself at the centre of a search to find a deck of tarot cards where the principal protagonists share the same goal but have very different motivations.
Not surprisingly, a theme of the book was about fate and free will. The main character, Anne, is initially sceptical of divination of any kind, however as the book progresses and she starts to engage with tarot cards she finds she has an affinity for them. However, whilst readings are a component of the storyline Hays avoids a heavy reliance on mysticism to drive the plot which pushes the weight of responsibility onto the characters for their actions.
Hay’s writing is lavish, her descriptions of the Cloisters bring the unique environment to life. The way she talks about New York, whilst not exhaustive (and understandably so) both set the museum apart from the city and at the same time give it a sense of belonging. She doesn’t talk about the city as though it is a homogeneous sprawl in which the Cloisters stands out, more a grouping of distinct locations and boroughs that are pulled together within the city.
The city makes a suitable backdrop to both the story and the discussion the book touches on about the nature of academic careers and the roll class and connection play in them. Interestingly I feel that this theme is far more of a driver for the plot than the cards, or the question of destiny and self-determinism. However, neither of these themes overshadow the story to the extent that I felt the author strays away from writing a damn good thriller.
Hay’s story and her characters drew me in and kept me captivated from the first to the last page. The story built gently, teasing just enough to keep me turning the page until the final crescendo of action. I found Hay’s decision to not lean into giving the cards a more supernatural aspect refreshing. I believe this kept the focus on her well-crafted characters and their machinations.