Last week the Company of Mimos, as my halflings are now officially titled, had their first, and only practice game, ahead of the Birmingham Bull run in March. Now I have less opportunities to play there’s definitely more excitement in each game, but it makes major tweaks to the list a bit more of a step into the dark.
There has been something else to consider as well. Not only command dice, but also a recent tweak to command dice from the games I played at the end of last year. I understand that command dice have now been amended so that players get 3 red dice for free rather than a red, white and blue. Additional dice have to be bought.
To test my list I was going to be able to take another proverbial swing at the nasty Ratkin Slave army that tore me to shreds at the end of the Hinckley Heist. I always find moving from a 2,300 to 2,000 point list harder than going the other way. It’s much easier to find toys to add in than take out. With my rats I tend to design completely different lists, building from the ground up, but with my Halflings I don’t have the luxury of 6,000 plus points painted to do that. I’m fine with that though for a couple of reasons:
1 – I love the units I have and think they’ll work really well together
2 – the efficiency savings I took to Hinckley, such as reducing the number and mobility of saucerors worked really well so it means there’s an easy candidate for deselection.
After a good think it became apparent that there really was only one way to cut down the current list to a not so big list, and that was to remove the Jugger horde. I’m not super happy about it because it is such a cool unit to have on the table, but it does mean that I have a pretty solid core of an army as a starting point and enough spare points for command dice without having to think too much.
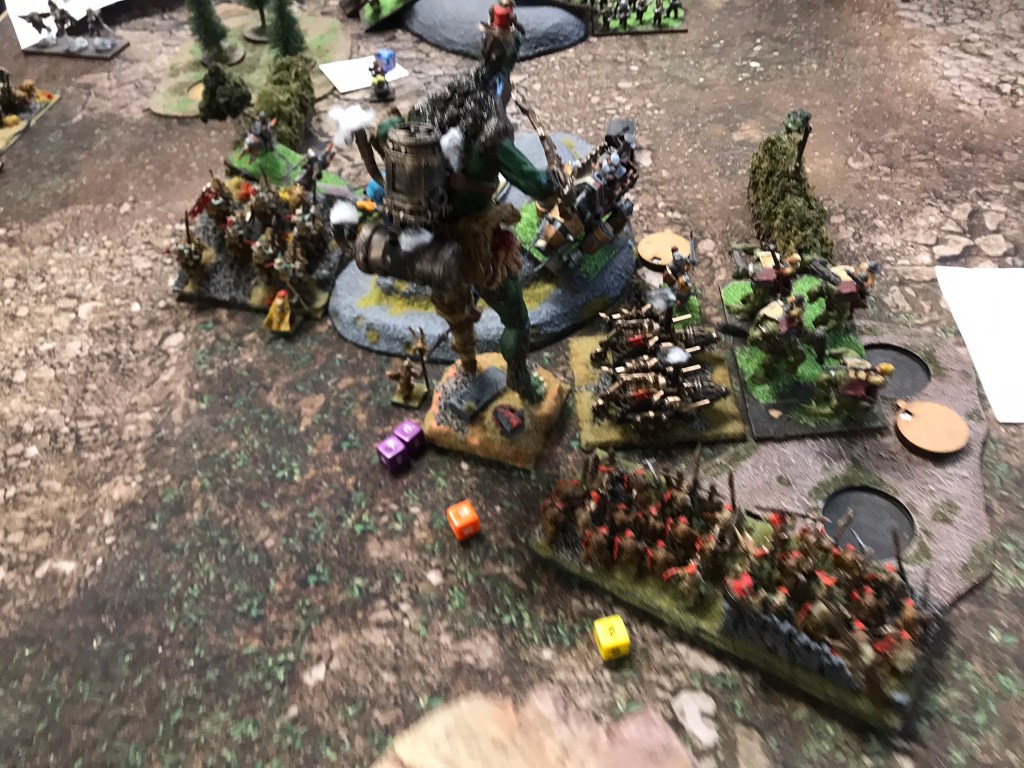
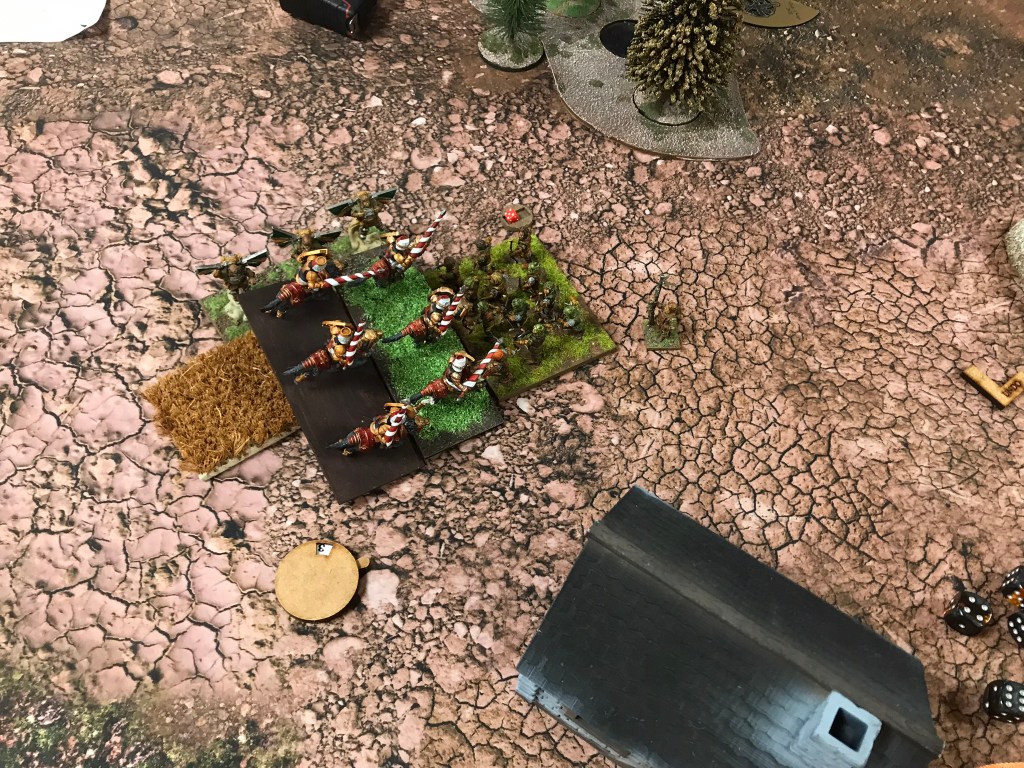
That being said though I decided to make another couple of tweaks. I’ve been thinking a lot about my Stalwarts and the Harvester. I love the units but given the way I play I just don’t think they’re quite the right pieces. I like having a chaff horde, and Stalwarts aren’t that. I also find the Harvester needs a little thought when I play it because of the exposed flank and the chariot base. With the resulting juggling of points, I have enough to replace the Stalwarts with Braves and the Harvester with another Iron Pig (if it works well, it means I have a pig to paint up!). I also decided to take a white command dice and throw the Brew of Haste onto the Muster Captain on the Winged Aralez.
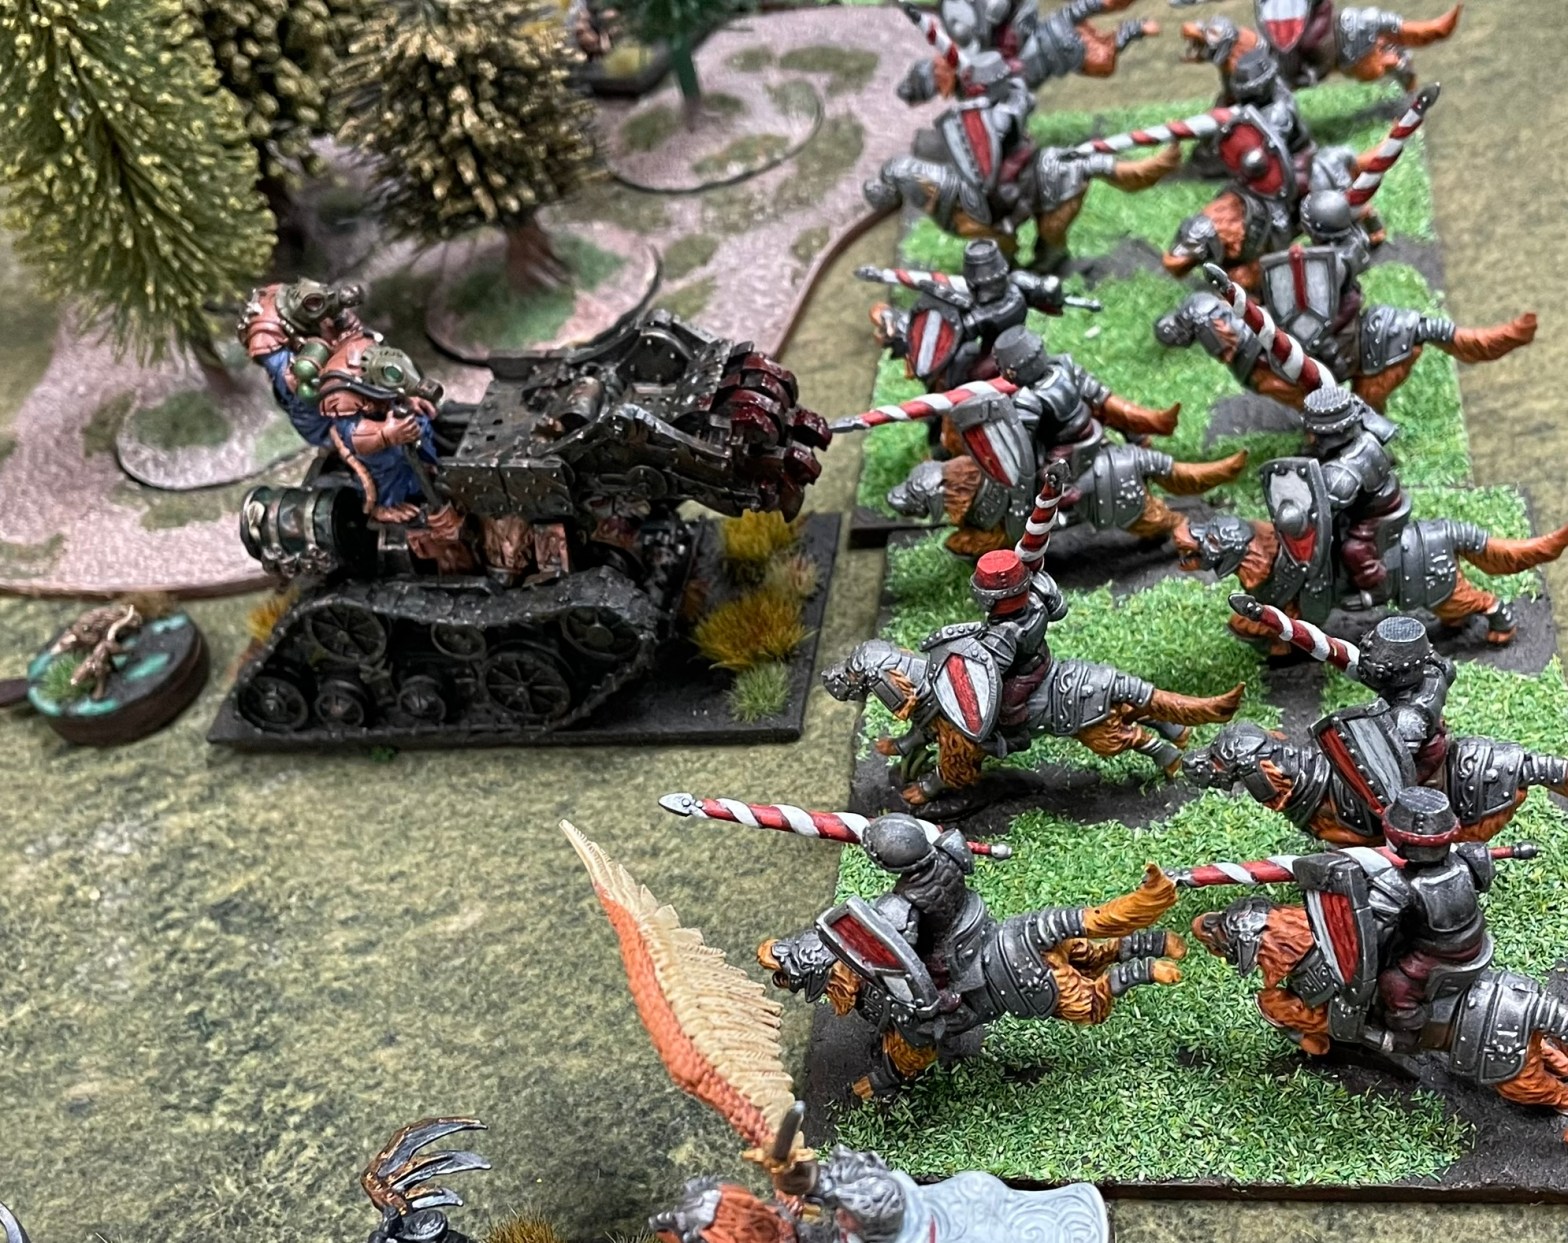
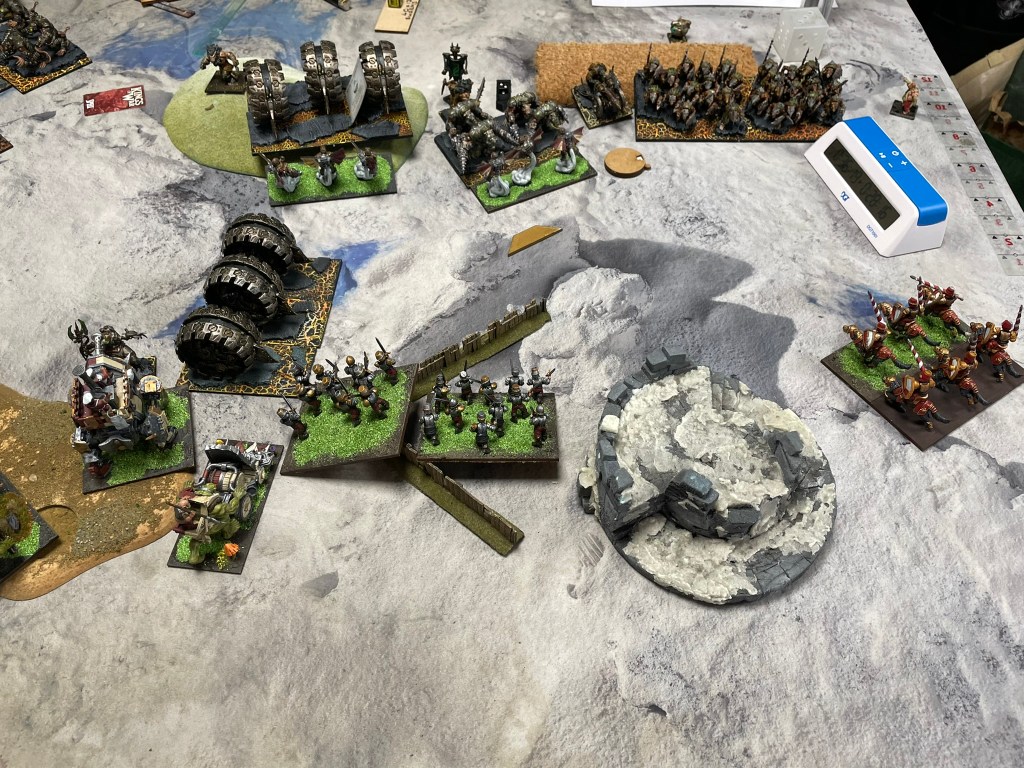
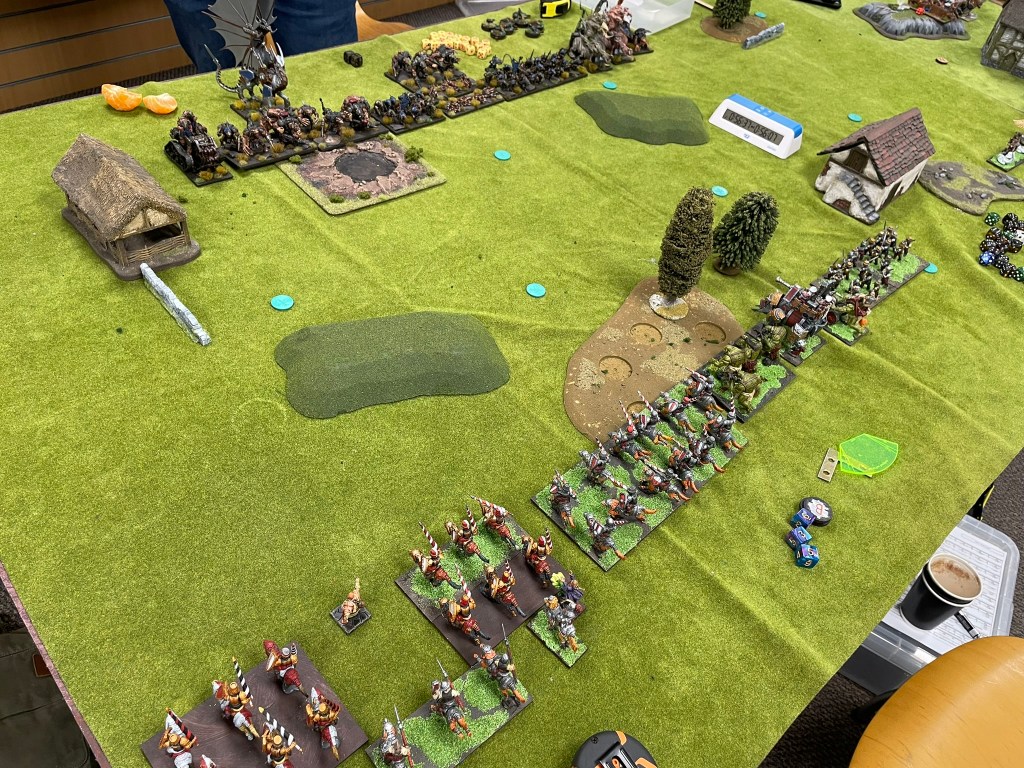
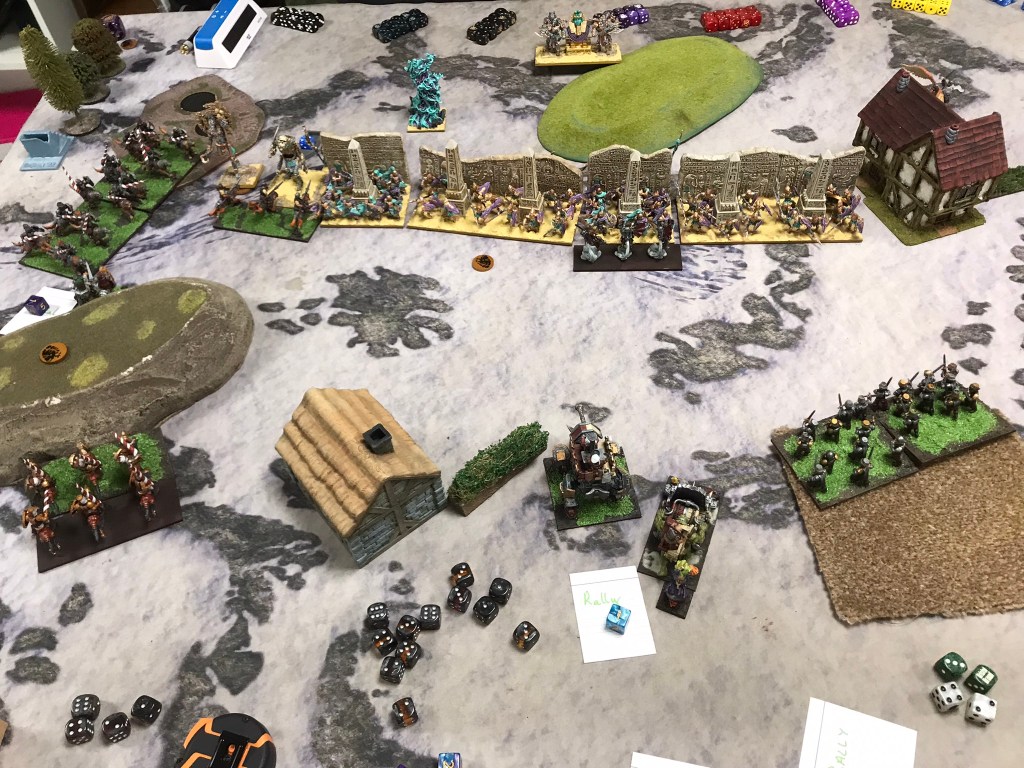
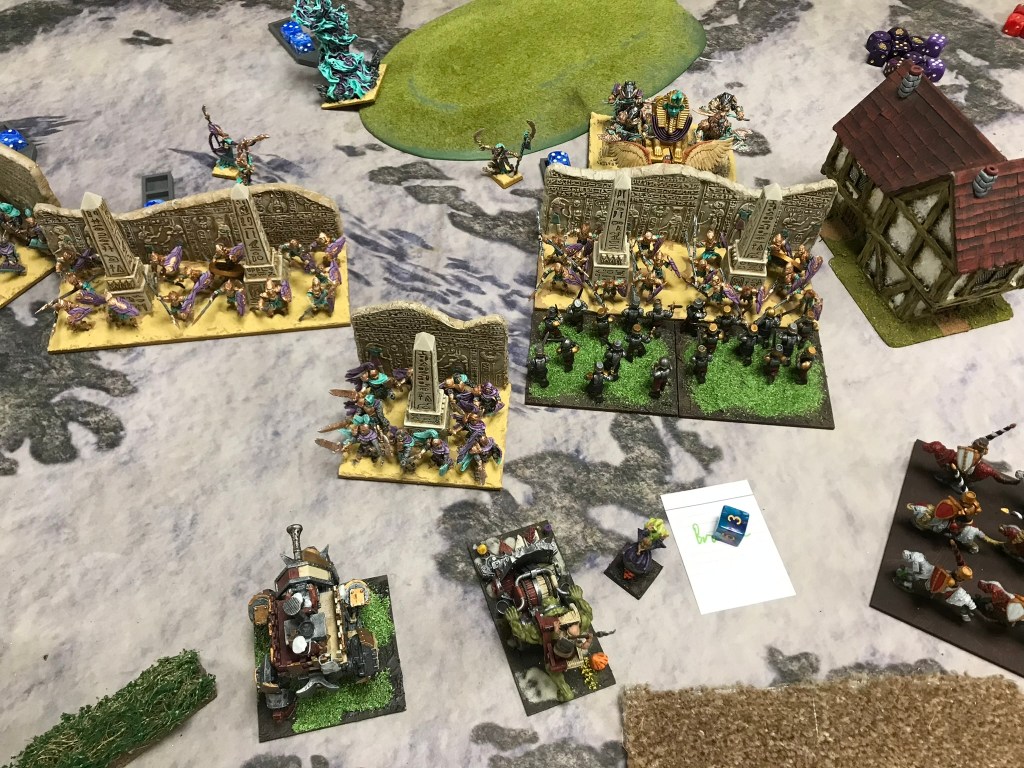
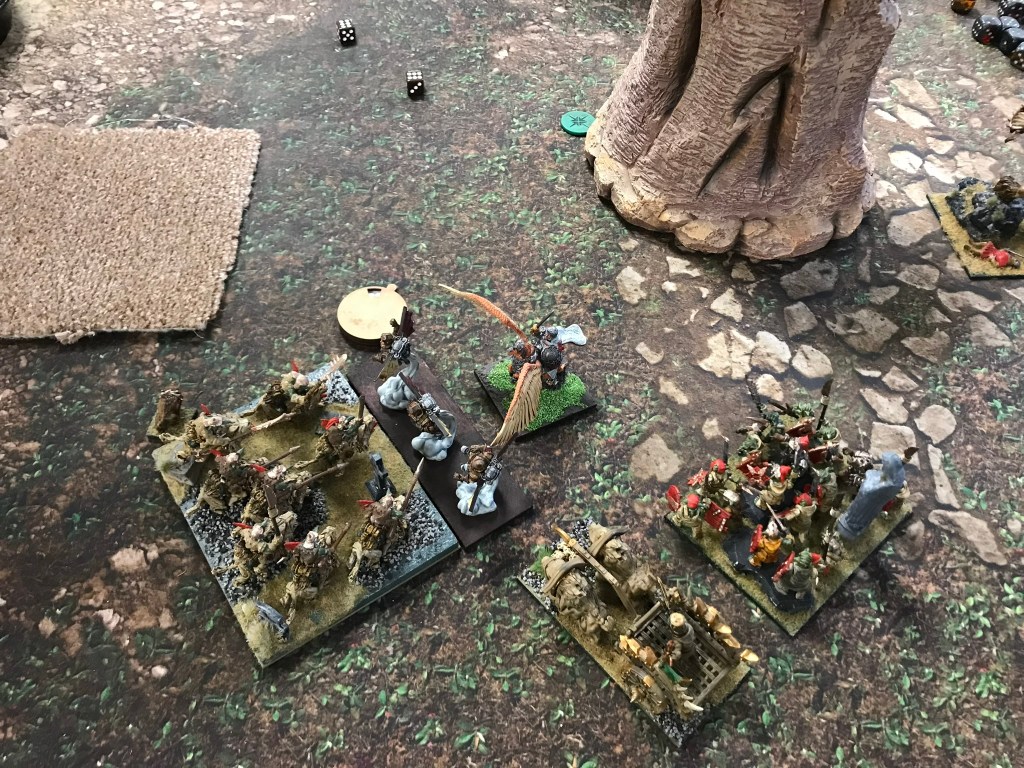
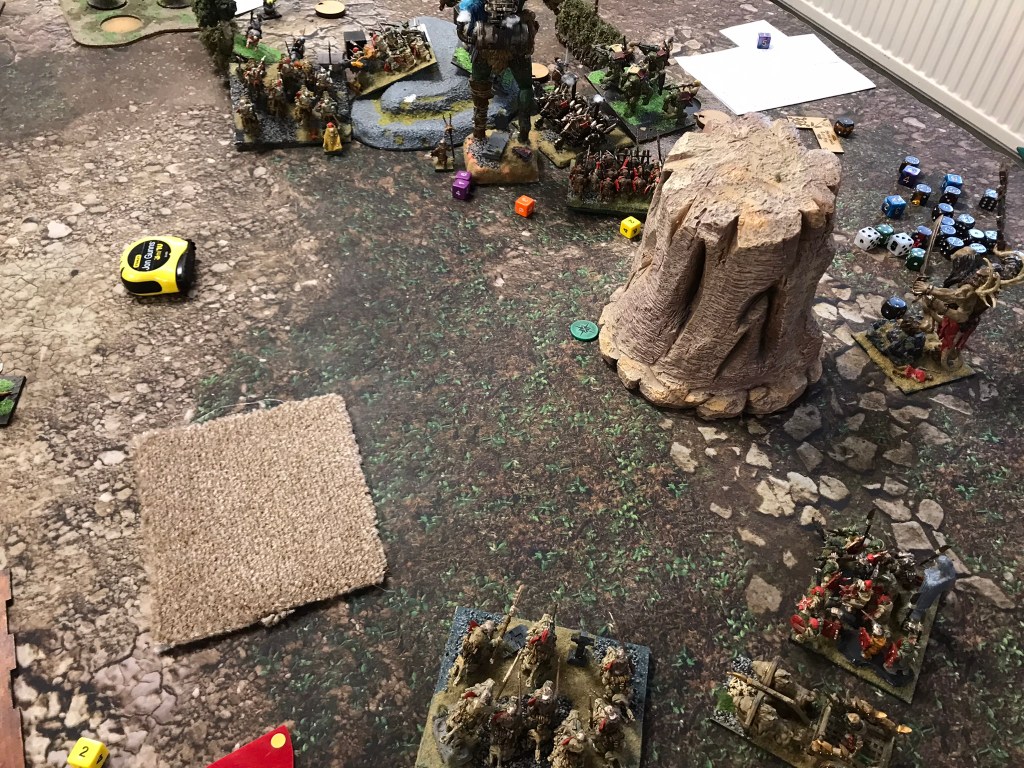
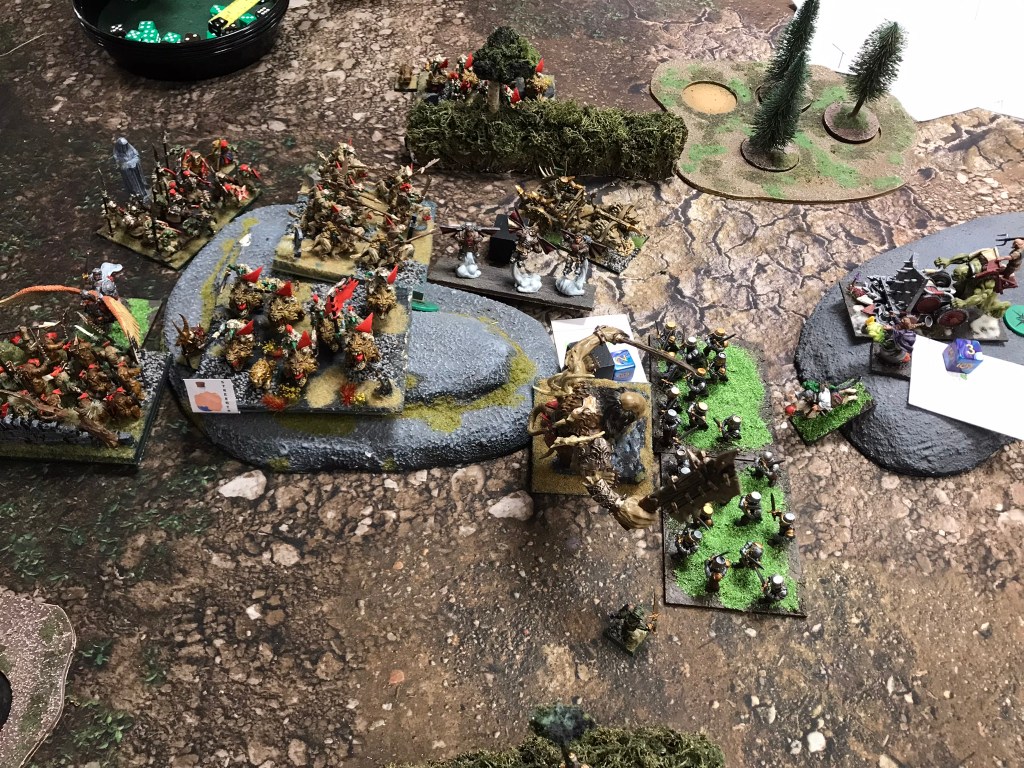
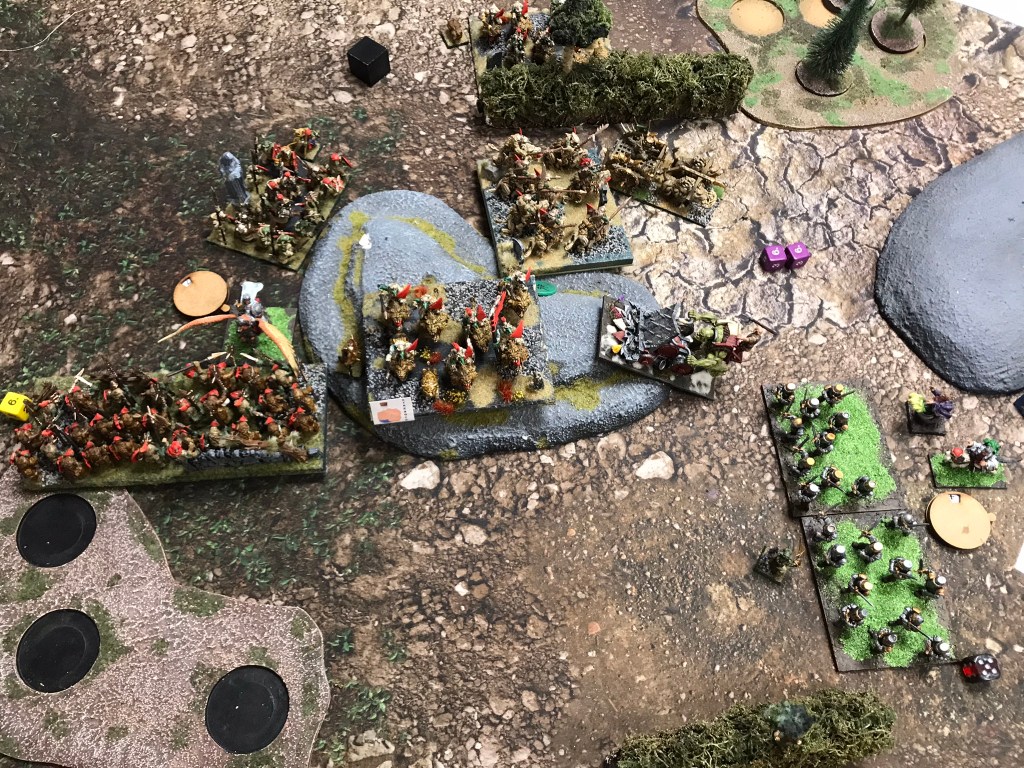
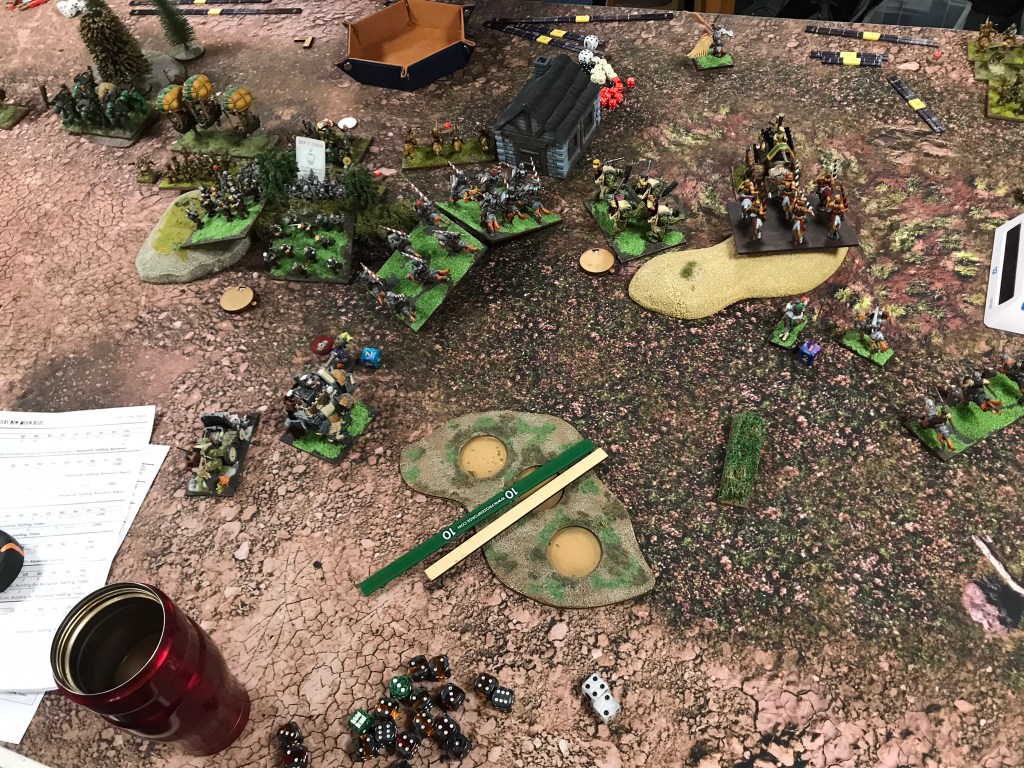
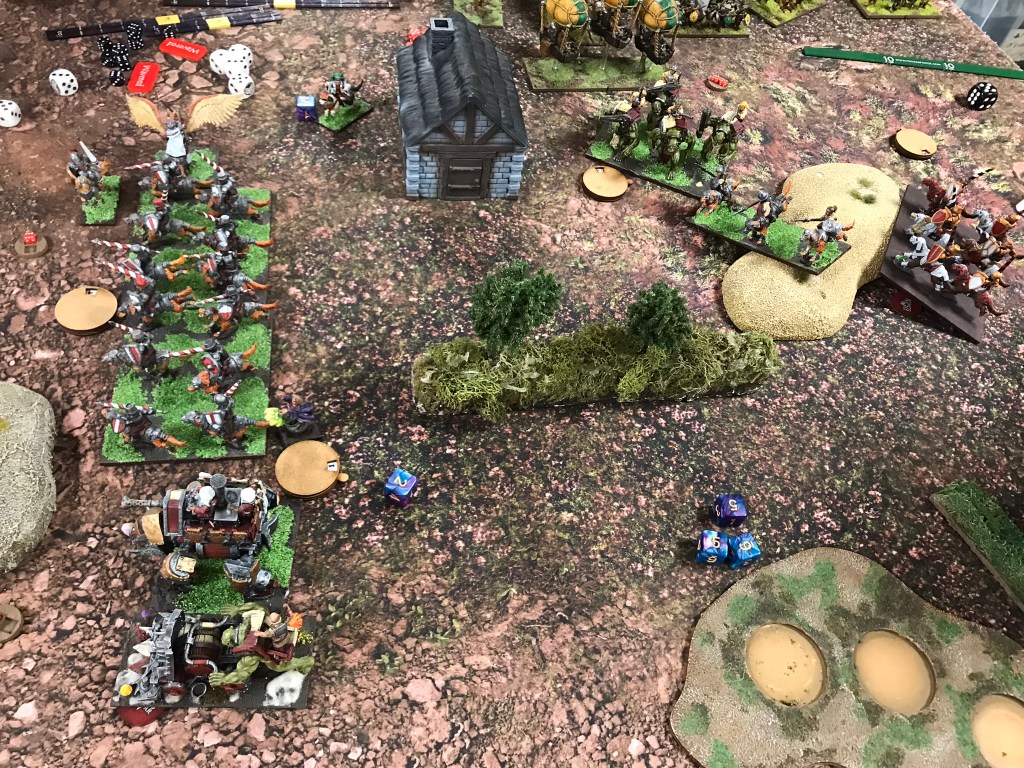
This time around the game went significantly better. Remembering just how devastating both the Impalers and the Nightmares could be I deployed far more sensibly. All my fliers went on my left flank with the cavalry. The pigs and braves went in the centre with the trolls and Greedyguts covered the right flank.
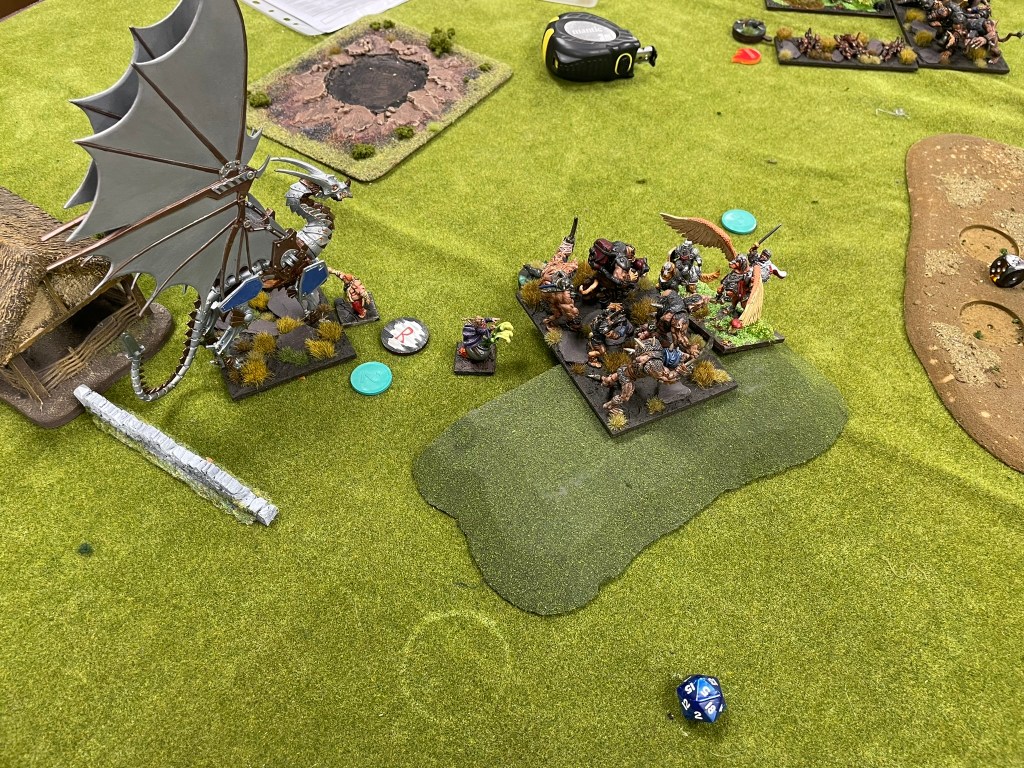
One of the great things about the downsized slave list was that there were less Impalers, 2 instead of 4, and the nightmares were broken up, 2 hordes in the middle and 1 on my right flank. I breathed a sigh of relief. Also, the massive flying thing had vanished.
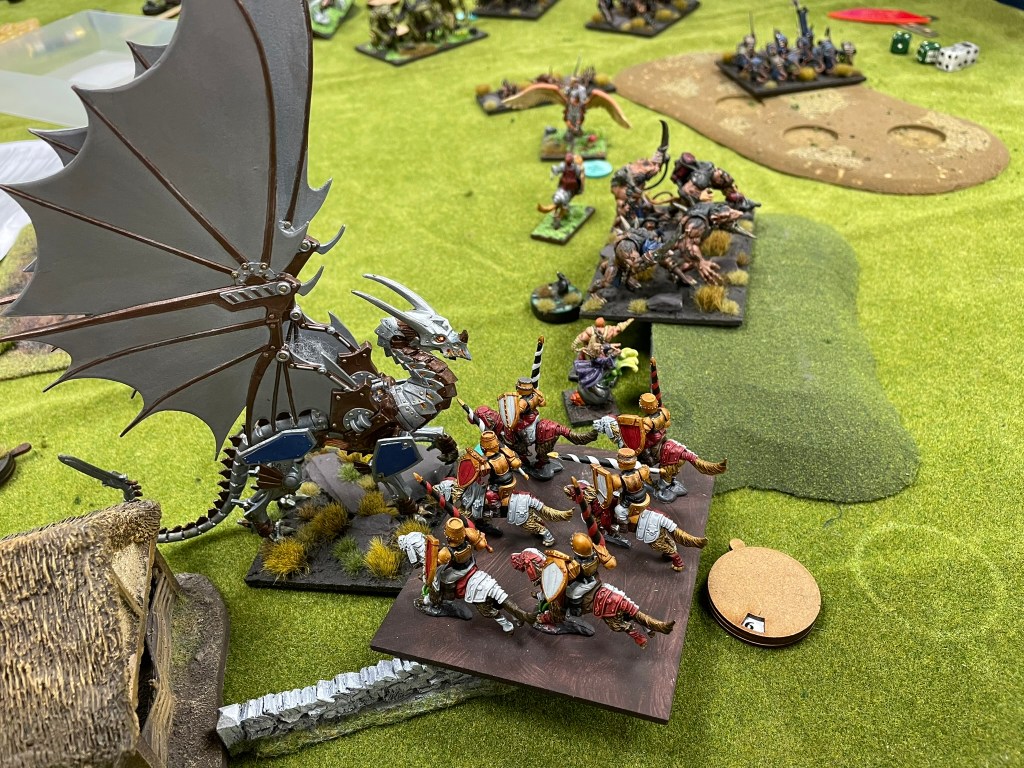
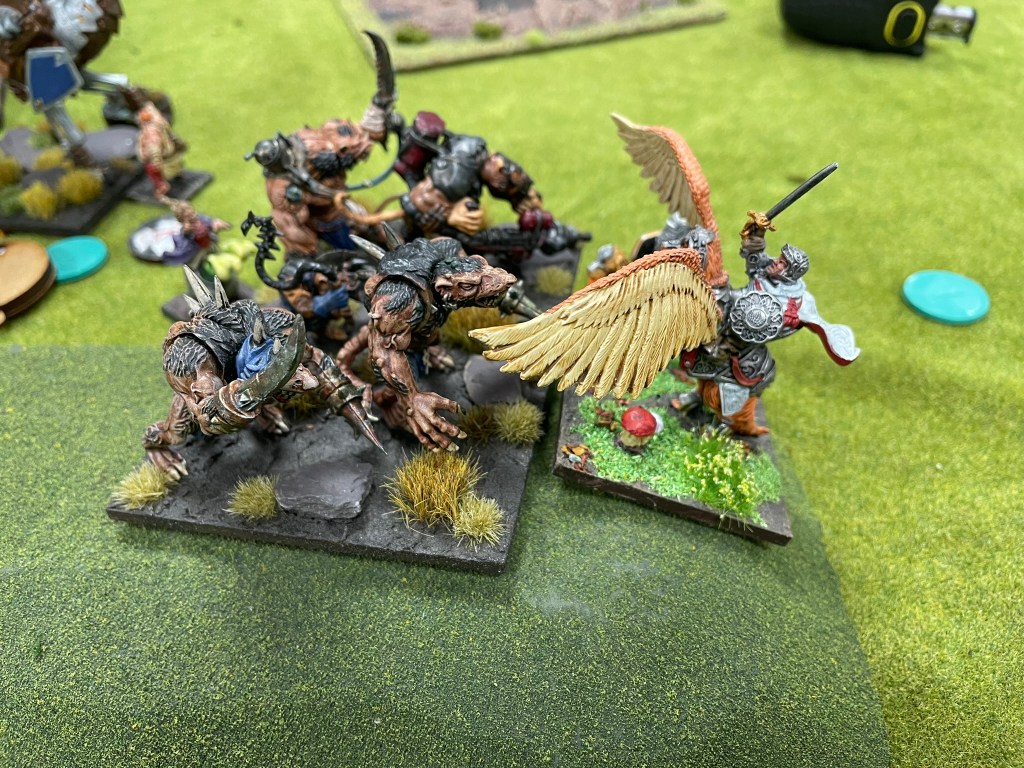
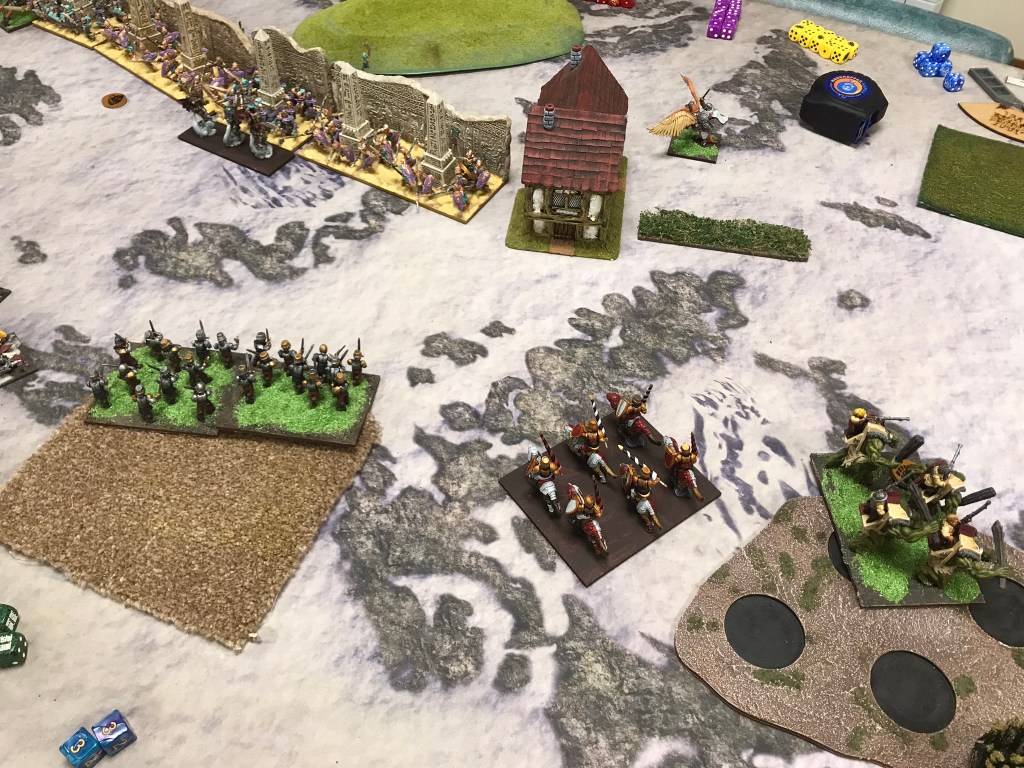
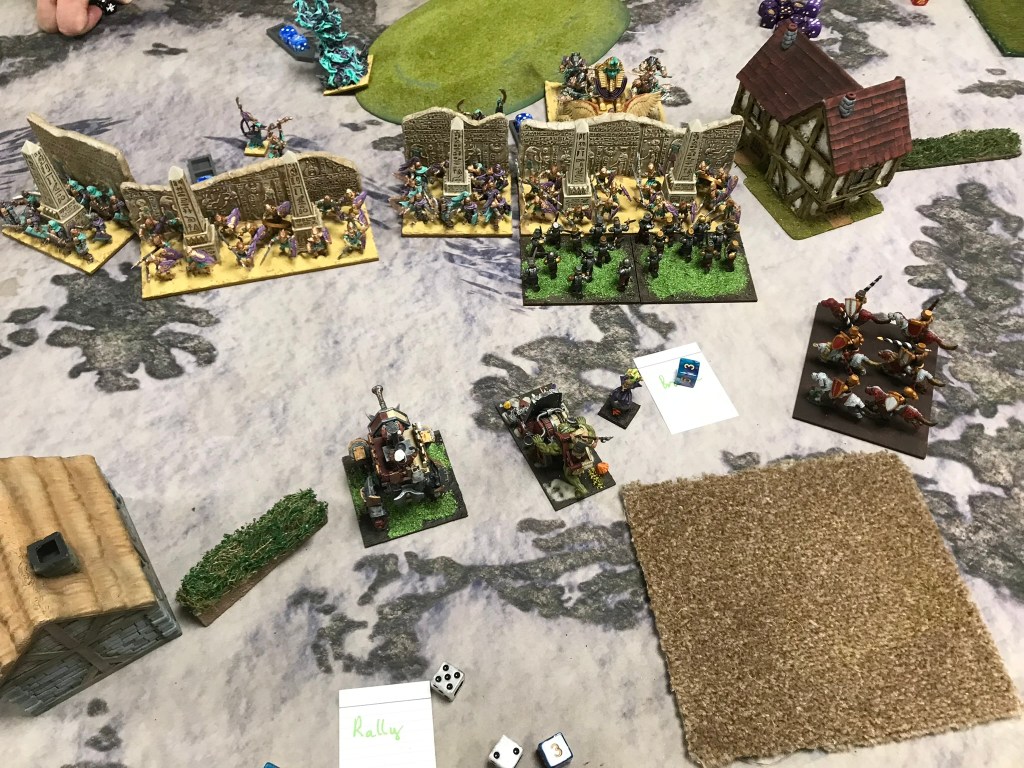
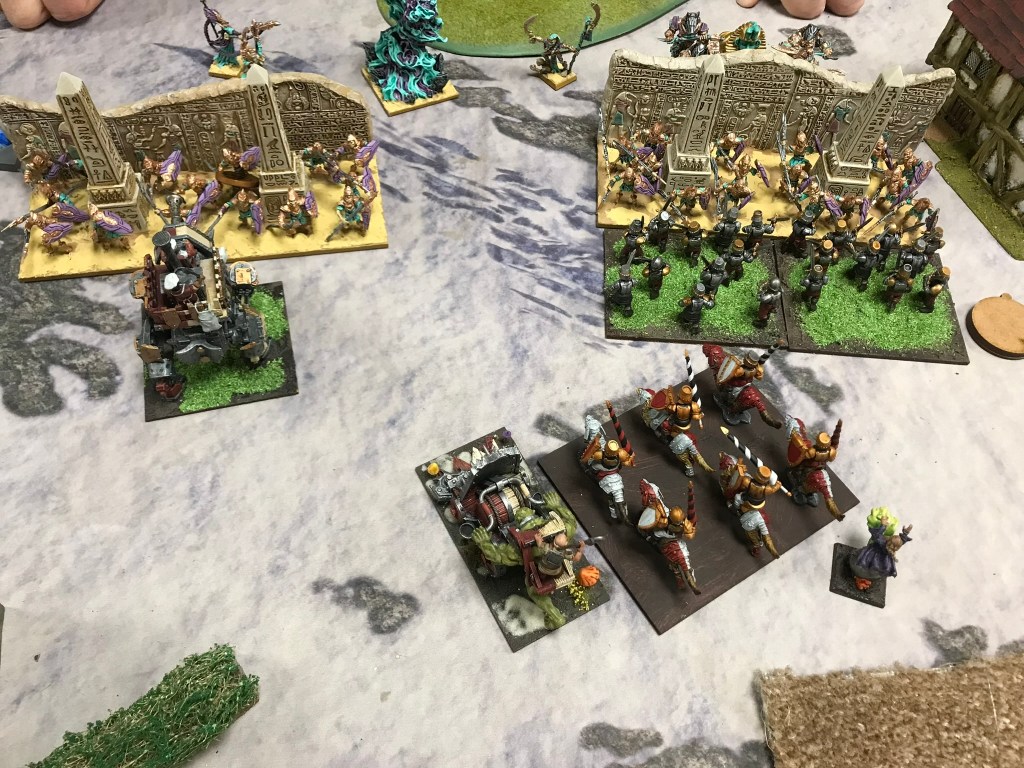
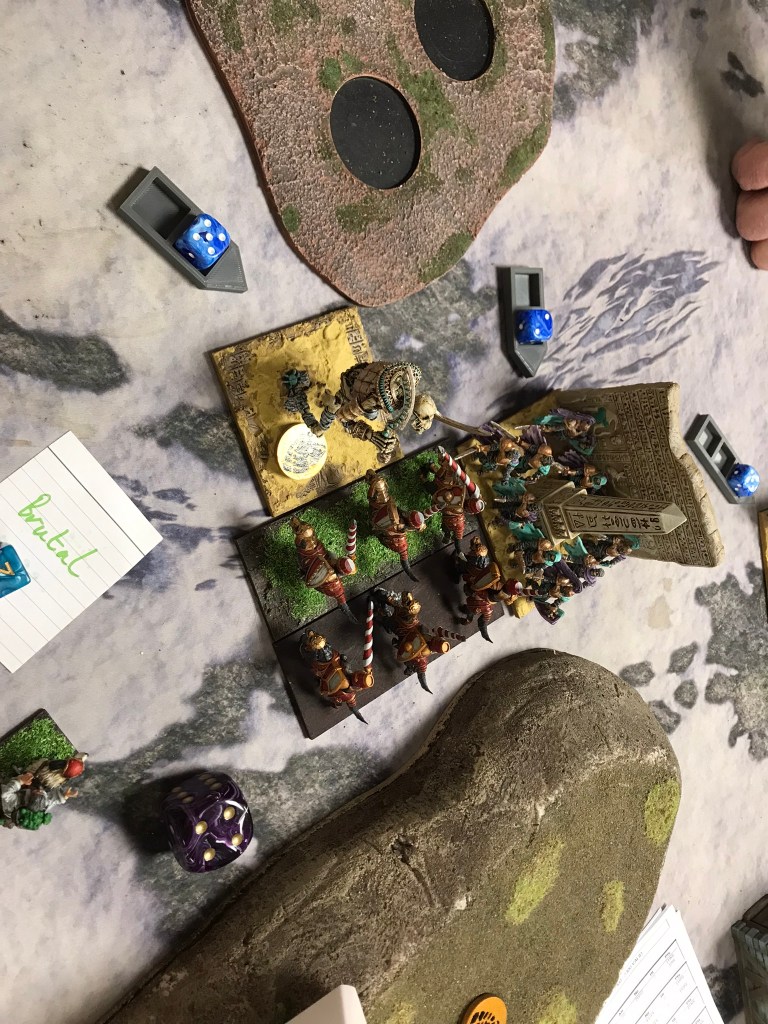
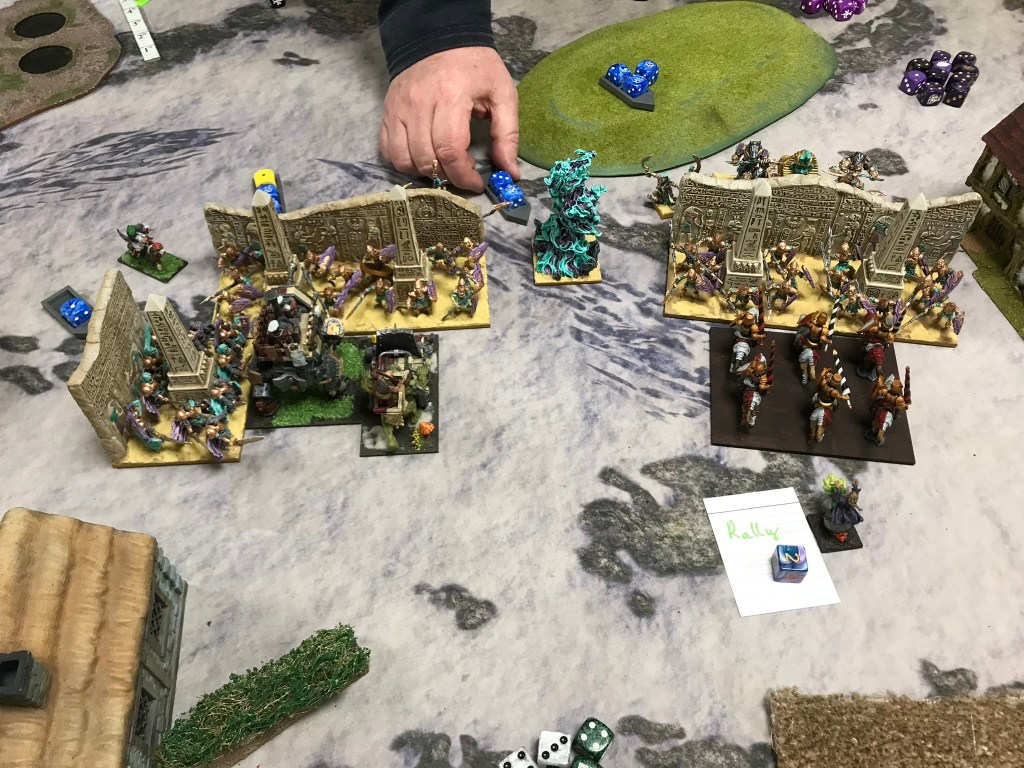
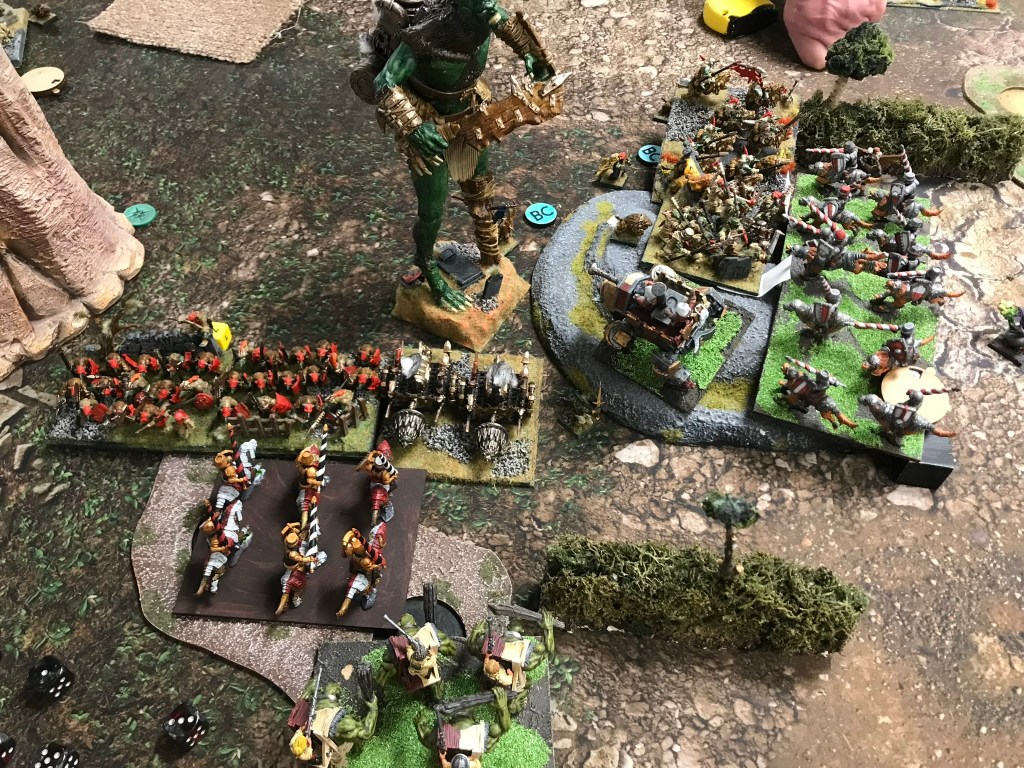
We played Stockpile with loot counters on both sides of the table. This time everything went pretty much to plan. My flying chaff disrupted the Impalers and Golekh, allowing my Juggers to grind them down one at a time before turning their attentions to the centre. On my right Greedyguts munched his way through a regiment of slaves, nibbled at a slave driver, before tearing chunks out of a slave horde and then consuming another slave driver and his chariot. It was a glorious sight to behold. Supported by the trolls and one of the pigs the right flank quickly fell.
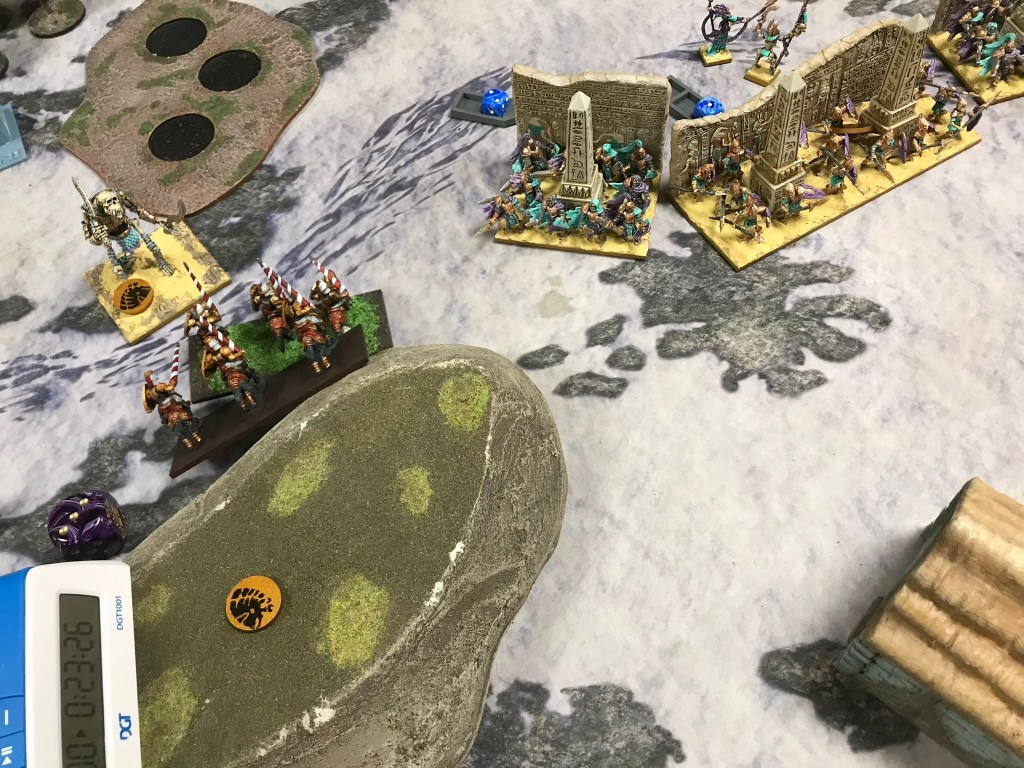
In the centre there had been no hurry to engage, but an opportunity in the shape of a saucery fuelled flank charge on some Nightmares with the other pig threw a massive spanner in the rat’s evil works. They found themselves having choose between supporting the Impalers on the left and the slave horde in the centre and at this point things started to fall apart for them. The game ended with all the rats removed from the table.
Being completely honest I don’t think the slave list was as scary as it could have been, it was a first attempt. The most recent version I’ve seen is far more problematic. That being said I was pretty happy with how everything performed, and I can’t see myself making too many more changes.
What was interesting though was the new command dice dynamic. Previously I found the dice to be pretty reliable, which worked well for Halflings because they have some very useful tools. What’s more the amount of iron resolve, rallying and lifeleech in the army makes the capacity to recover a point of nerve a turn pretty meaningful. In previous games I could plan to have a unit with stealthy or additional thunderous every turn. However, with 3 red and a single white dice those four points were much harder to come by. My initial observation is that this is an attempt to balance dice for those armies that have powers they absolutely want to access and those that aren’t bothered. For this game the dice powers were a nice to have and I only managed to pull off two of the big hitters, stealthy on Greedyguts as he made his way towards some Nightmares and extra thunderous on some Juggers. Given the overall flow of the game my first thoughts were that I wasn’t particularly bothered whether those two had come up or not, so did I really want to bother with the extra white command dice at all. I think that’s a reasonable position to hold immediately after a pretty solid victory. However, the more I think about it the more I get that mind worm wriggling around saying “What if… what if?” and I’m starting to think it might just have a point, after all I have a 20 point item I didn’t get to use all game and an extra point of thunderous on just about anything is nothing to be sneezed at.
Have a great week peeps.
If you don’t want to miss a post, drop your email below and subscribe. Thanks.
Way back in December 2019 Games Workshop announced that The Old World was being developed. For anyone reading this who isn’t familiar, The Old World is a revised version of the original fantasy wargame, Warhammer Fantasy Battle.
For wargamers of a certain age, Warhammer Fantasy Battle was the first step into toy soldiers and tabletop gaming. For someone who works in product development I found the initial launch a little bit weird. Even the advert at the time acknowledged it could be a few years in the making. I know there is value in teasing products but telling your customers something is coming in a few years just feels a bit unnecessary.
Weirdly this happened at the same time as Mantic’s third edition of King’s of War was released. Coincidence? I have my suspicions, but any way I try to cut it it’s always seemed an odd step. Leaving aside GW’s communication approach, the idea of breathing new life into an old format is not something that doesn’t happen anywhere else in the world, and the launch of Heroquest is a great example of where it’s gone well in gaming.
Roll forward several years and we’ve now had the release of The Old World. Personally, I knew I was never going to be interested in the game. Kings of War works for me on a number of levels, and as the releases have followed I’ve been largely unexcited, until a couple of weeks ago when a number of characters for the Empire army dropped. Amongst them was one of the first miniatures I ever bought, the Grand Master of the Knights Panther. I absolutely loved the model then, and I was surprised by just how much I loved it when I saw it again a couple of weeks ago. What was even more impressive though was the fantastic new sculpt based on the John Blanche artwork. I was also suitably impressed with another couple of models in the range, which found their way into the basket.
They are now happily on my painting table, at the start of their respective journeys and the question becomes, what am I going to do with them? The answer – they will be joining my Basileans. I’ve always had a few issues with my Basileans, simply because I’m not keen on a lot of the models in the range at the moment. They have some lovely men-at-arms which I would say are some of the best high fantasy human soldiers on the market, but the more elite elements of the army are pretty old and not great quality (although I love the aesthetic, they’re just a bit of an effort to clean up and put together). All this has meant my Basileans don’t really get the love I think they deserve or the play time. But I have a feeling that’s about to change.
So, whilst the Old World has been, in many respects a non-event for me, at least it’s produced some beautiful models and got me digging out my Basileans once again.
If you don’t want to miss a future post, pop you’re email address below and subscribe.
I’m having loads of fun with the halflings so far this year. As happens with all of us commitments change over time. At the beginning of this year some changes with family routines meant that I am, for the foreseeable future, not able to get to my local gaming club. That means far less gaming time, and now tournaments are becoming the main opportunity to play. So, I was pretty excited to get the car packed up and head off.
What’s even better is that over the past couple of years we’ve seen more events coming to the Midlands, which for a Bristol based boy is a bit easier on the petrol costs than heading down to the Southeast. What’s also brilliant is that there is a welcome consistency between Kings of War players on the tournament scene in the UK, which is that everybody is friendly and relaxed whether its in the Midlands or the Southeast, which means there is little other than location I need to take into account when considering where to play.
The cherry on the top of this particular Kings of War sundae (actually on a Saturday) was accepting a challenge from Jake and his Ratkin. Jake was the other main contender for the Ratkin faction crown last year. Although I squeaked the win, Jake has started the year strongly picking up third place at the New Moon event in January. So I knew I was looking forward to a great game against his rats.
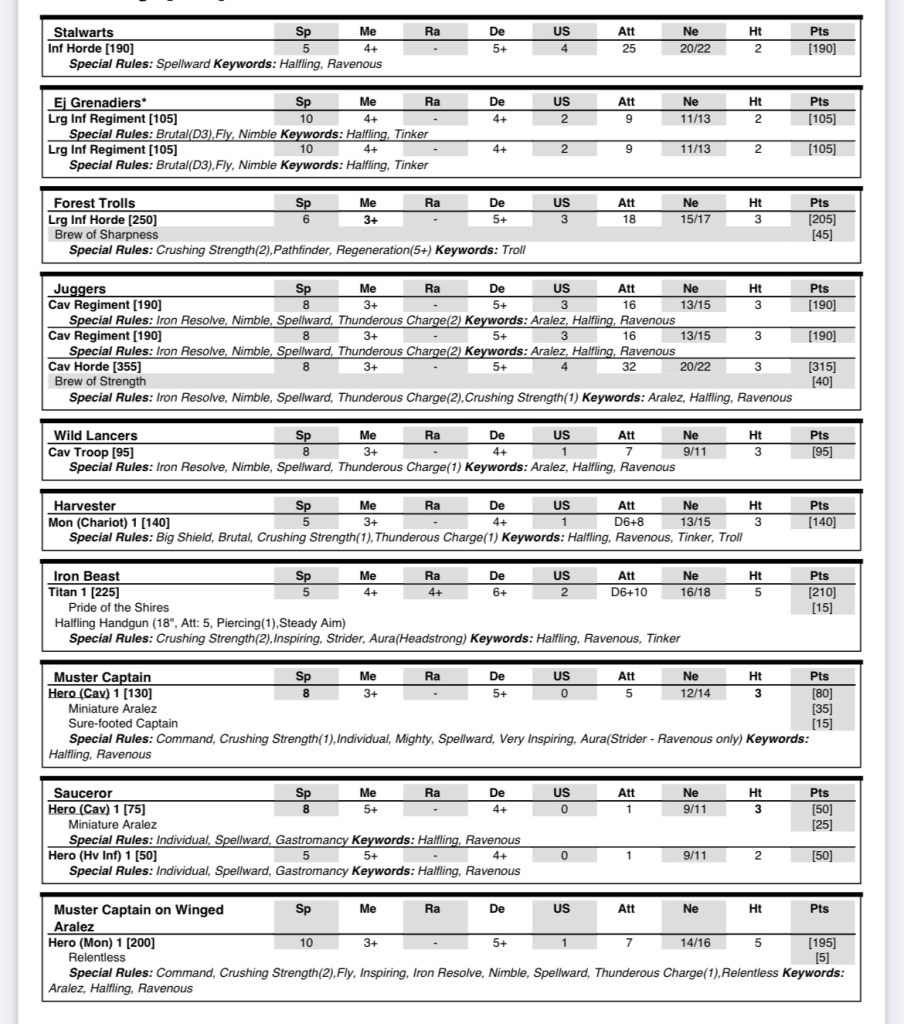
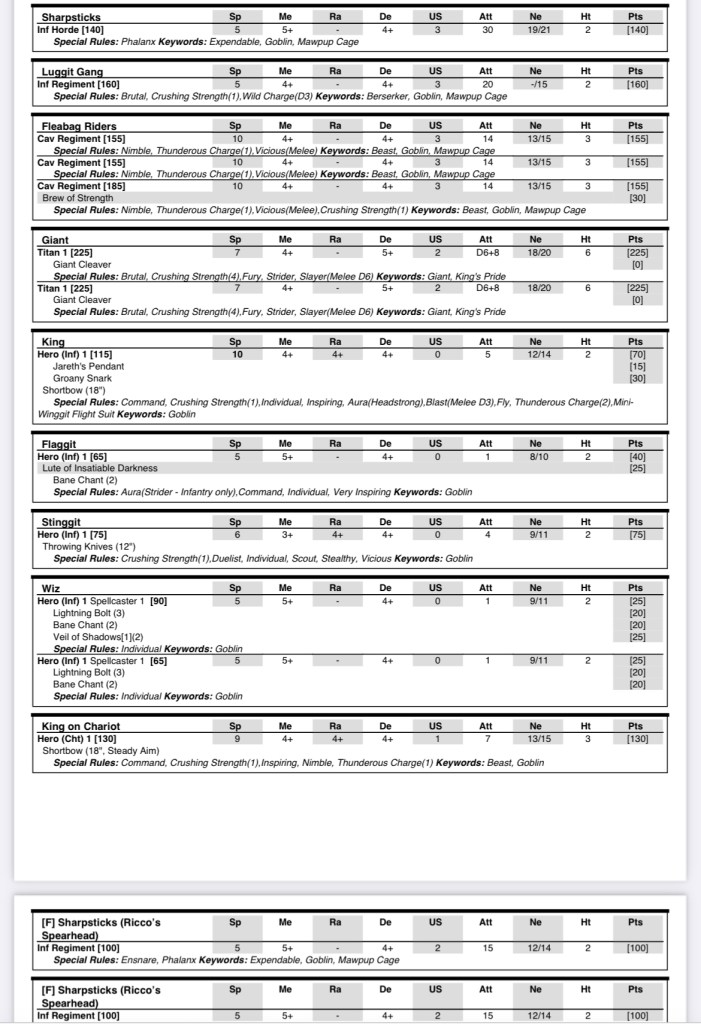
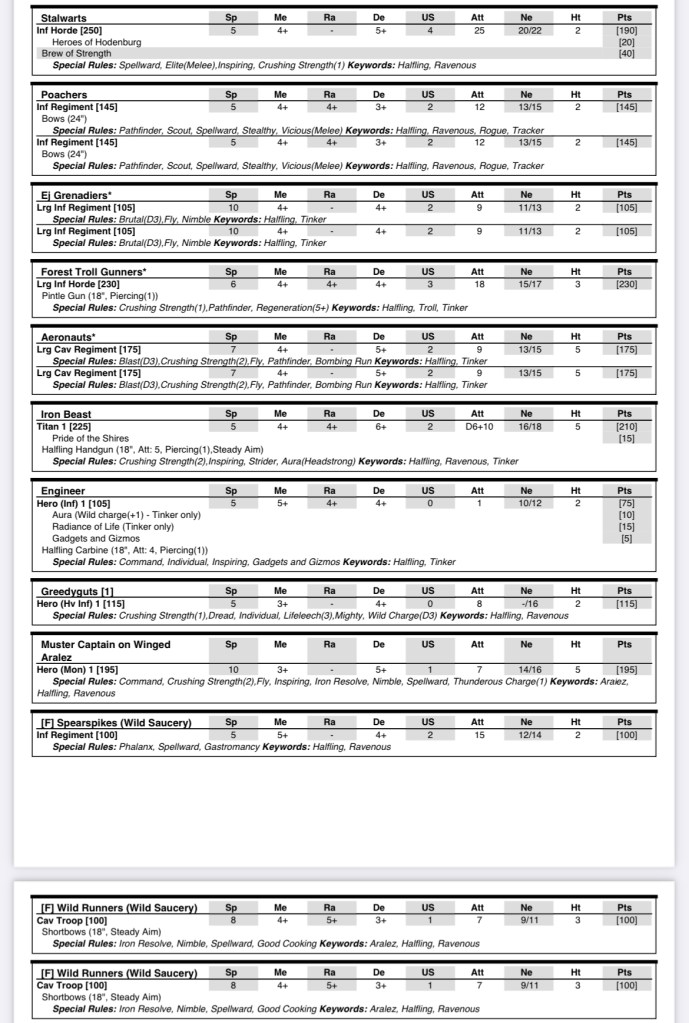
My list consisted of:
Horde of Stalwarts
Horde of Forest Trolls
2 Regiments of Juggers
Horde of Juggers with Brew of Strength
2 Regiments of EJ Grenadiers
Troop of Wild Lancers
Harvester
Pride of The Shires
Sauceror with Hotpot
Greedyguts
Sure Footed Muster Captain on Aralez
Muster Captain on Winged Aralez
Without regular games I felt a little uncertain about the list as I didn’t get a chance to play beforehand. This was a little unnerving as there were a couple of changes I had made from New Moon that were not exactly embedded in my mind. The biggest one being the removal of my Sauceror on Aralez and the inclusion of Greedyguts. Saucery has been a bit of a comfort blanket to me (regardless of how well it actually works) so I had lots of concerns about not only the reduction in number of Saucerors, but also the lack of mobility of my sole source of Gastromancy. Greedyguts worried me because the one time I’ve played with him he did exceedingly well, and that meant, under the strict laws of Sod, he was likely to be a massive let down when push came to shove.
Game 1 vs Ratkin, Control
With 17 drops there were a lot of rats to shift. What was unnerving was the large amount of short-range shooting they could bring to bear. I felt I had an advantage with speed, but having a massive cavalry horde for all that shooting to target was a little worrying, although on the plus side I had a good idea of where most of the shooting would end up if I gave it half a chance.
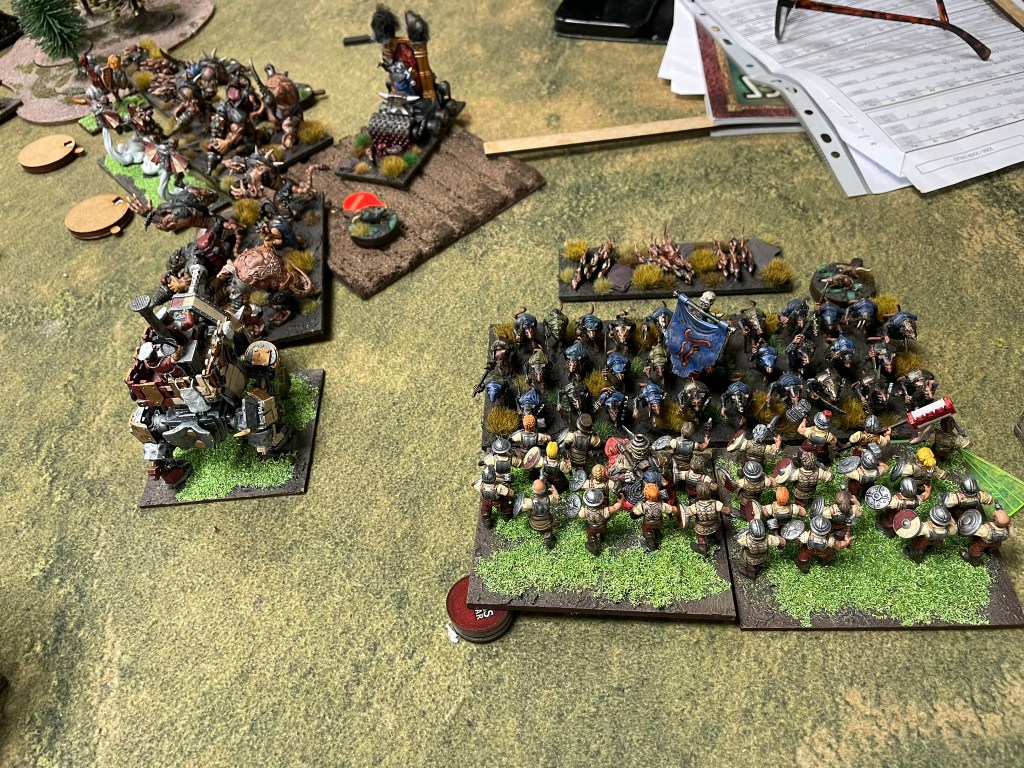
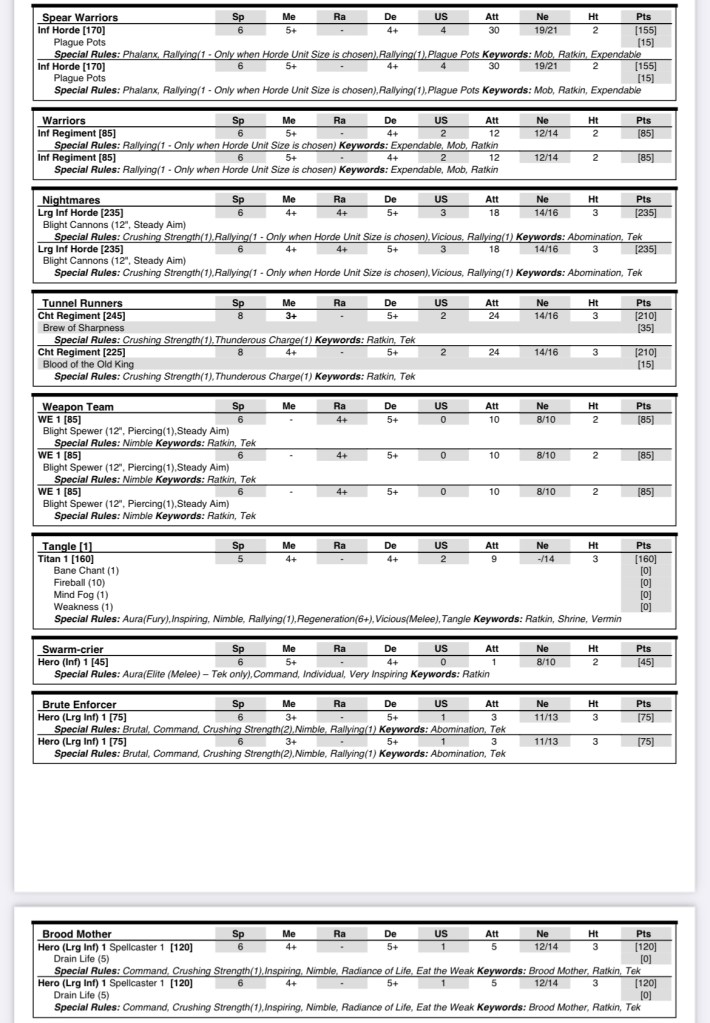
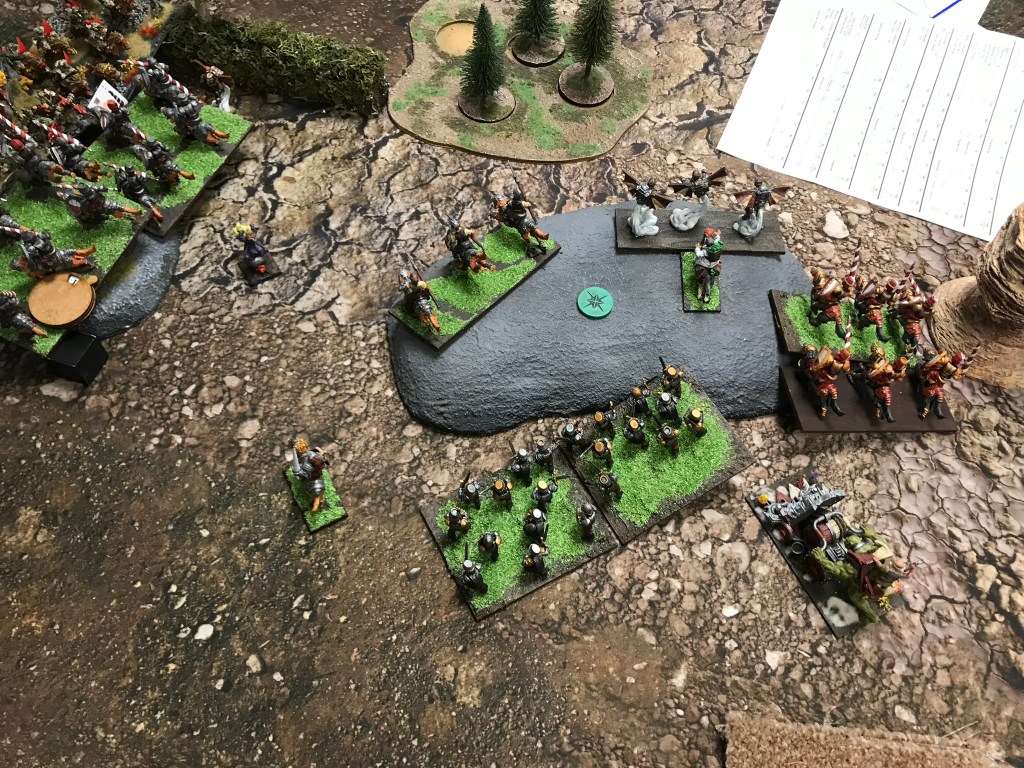
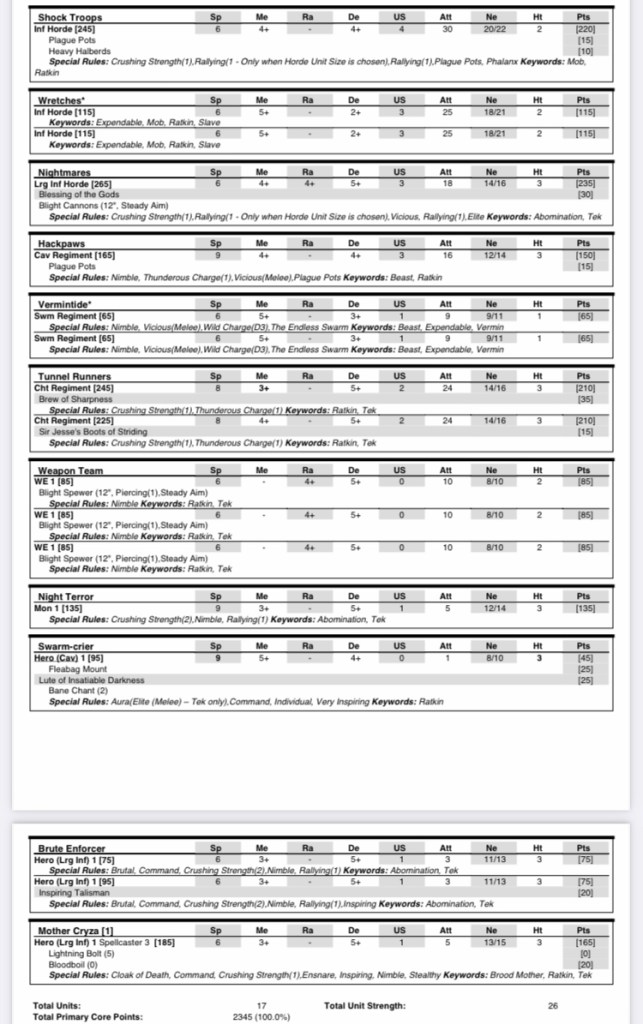
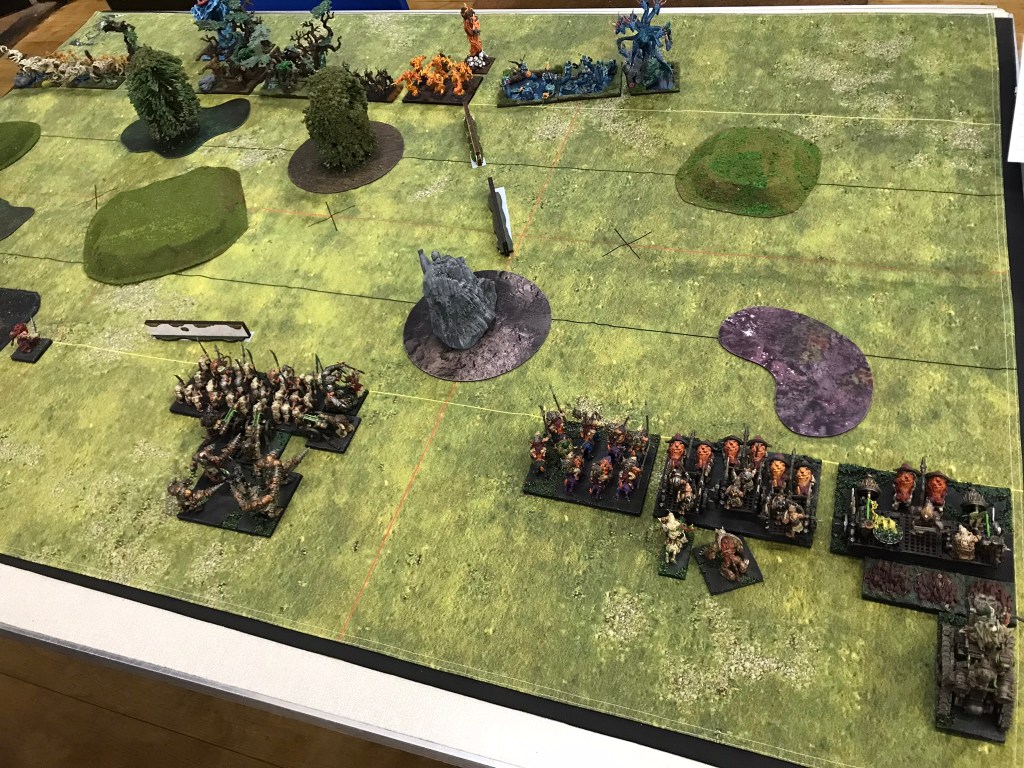
The Rats set up with Spear Hordes at either end, Tunnel Runners in the middle and Nightmares and Warrior Regiments filling in the gaps, with the Weapons Teams weighted more heavily towards my left, where my Jugger Horde was deployed. I spread my troops out across the field with the majority of cavalry and the flying Muster Captain on my left, the infantry and Pride of the Shires in the middle and a single Jugger regiment and Greedyguts on my right.
For the first three turns things were very cagey as both armies did their best to avoid getting into each other’s threat range, in the end though I decided it was time to push forward. I sent in my Grenadiers to block up some of the shooting and the Wild Lancers and Flying Captain made a double charge on a Warrior regiment, which did not result in any dead rats, but did break the stalemate. Unfortunately, I made a slight mistake which resulted in one of the Tunnel Runner regiments getting a flank charge on my Stalwarts, what made this worse is that the units around the Stalwarts were positioned in such away that the difficult terrain around the flank was completely covered, giving the unit a massive 48 attacks with elite and vicious and seeing the Stalwarts off. Suffice to say this was something of a loss and left my trolls and the Iron Beast battling to save the centre.
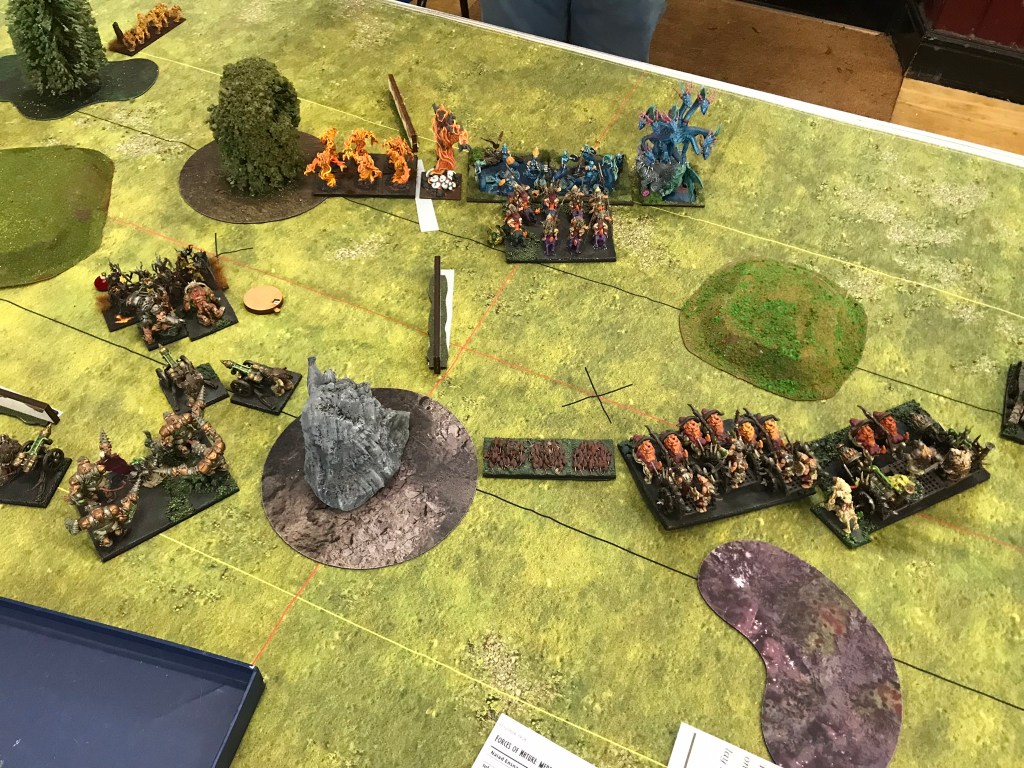
Despite the great gap that had developed the Juggers and Greedyguts on the right managed to cause quite a bit of damage. The Juggers knocked a few points of nerve off a Nightmare horde and Greedyguts started munching his way through a Spear Horde whilst also holding off a Brute Enforcer in his flank. His healthy appetite got the spears up to 15 points of damage and there was now hope that a nerve role of 6 or more could save the flank, giving him an opportunity to finish off both the spears and the Nightmares.
On the left the cavalry was making a reasonable job of chewing through things, but there were just too many units floating around and blocking up charges for them to make reasonable in roads. Fortunately, some nifty Gastromancy kept the Jugger horde healthy, and their mission changed from killing to scoring. Backing off from the futile rat swatting exercise the horde took control of the left scoring zone on my table half. In the centre the Iron Beast and the trolls did what they did best, grinding down the Tunnel Runners to hold their scoring zone.
It was unlikely at this stage that a win could be salvaged, but Greedguts held the glimmer of a hope that the win could be minimised to just a point. If some realistic rolls landed that would allow him to finish off the spears and then get stuck into the Nightmares. Unfortunately, it was not to be. Rolling a 4 meant the spears and the Brute Enforcer got another round of combat in and some great spear work resulted in Greedyguts retreating from the field and a 2:4 loss.
Game 2 vs Dwarfs, Compass Points
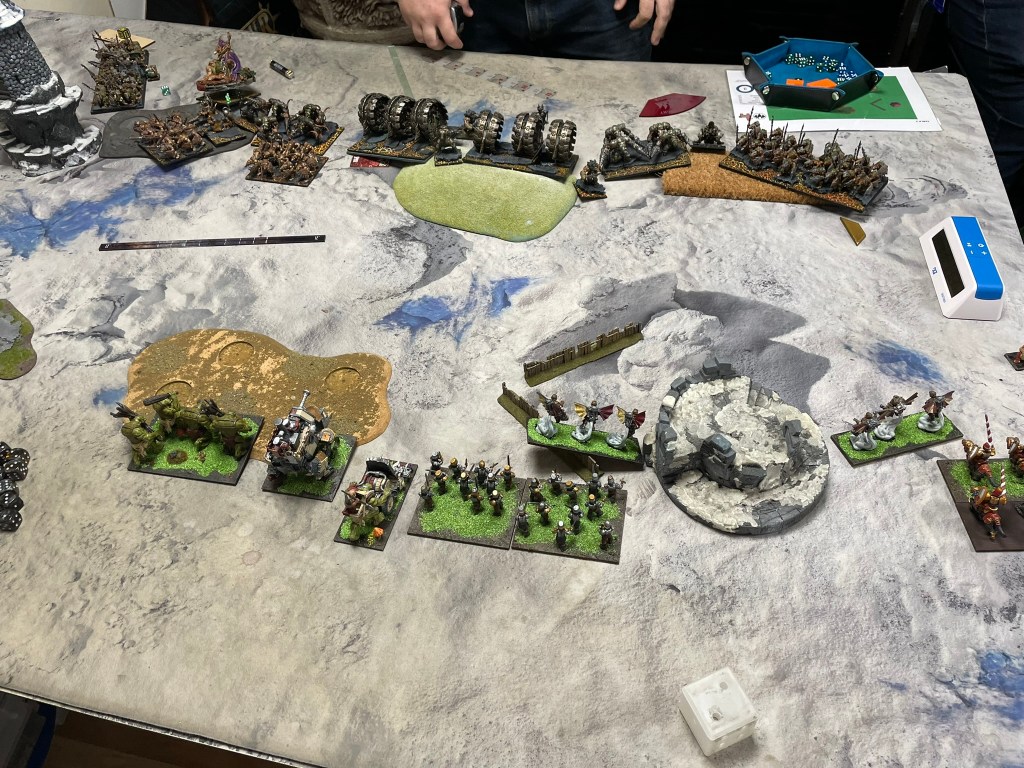
Dwarfs make me nervous! In particular the Dwarf Lords on Large Beasts. With defence 6 and a lot of mobility they can cause real problems. Couple that with a wall of defence 6 infantry and Golach’s Fury and you have fun times ahead. Fortunately, whilst this list brought 2 of the Lords there was no defence 6 infantry and no Golach’s Fury, which made this a really different list to what I would expect to face.
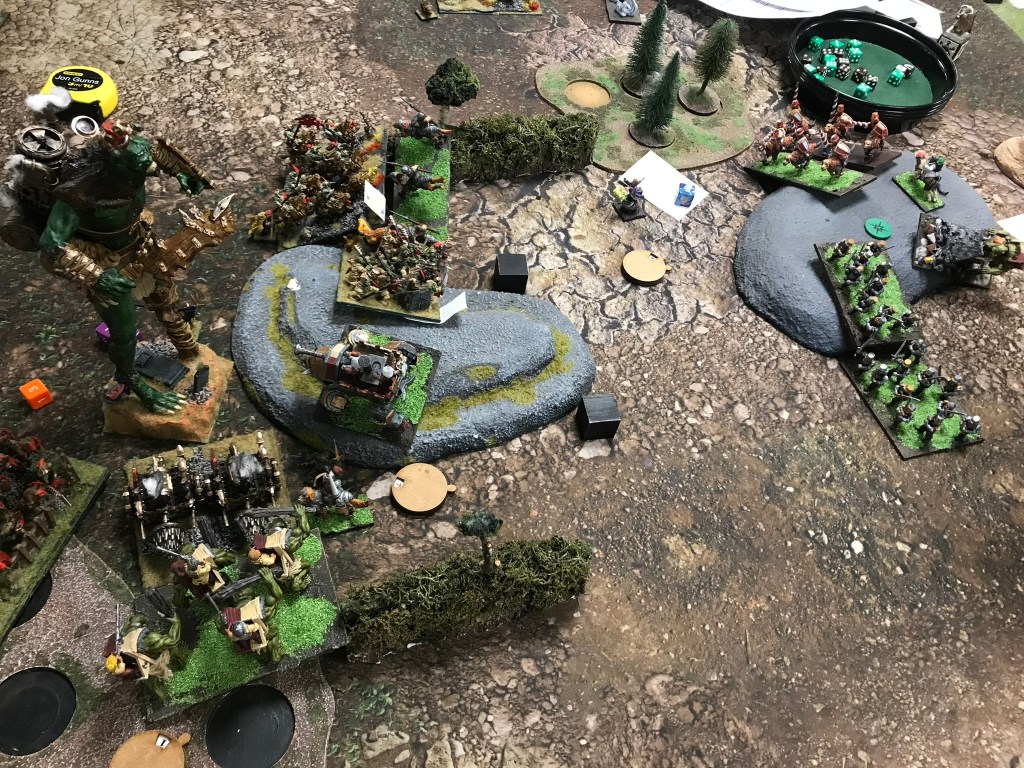
For this game the Dwarfs spread themselves fairly evenly along the opposite table edge with a Beast Lord at either end supported by a regiment of Ironclad whilst a block of infantry and brock riders held the centre. I ran my cavalry on my left again, The Iron Beast and footsloggers held the centre and on my far right a Grenadier regiment and the flying Muster Captain stood ready for action. My plan was to deal with the lords first and then hope for the best in the centre.
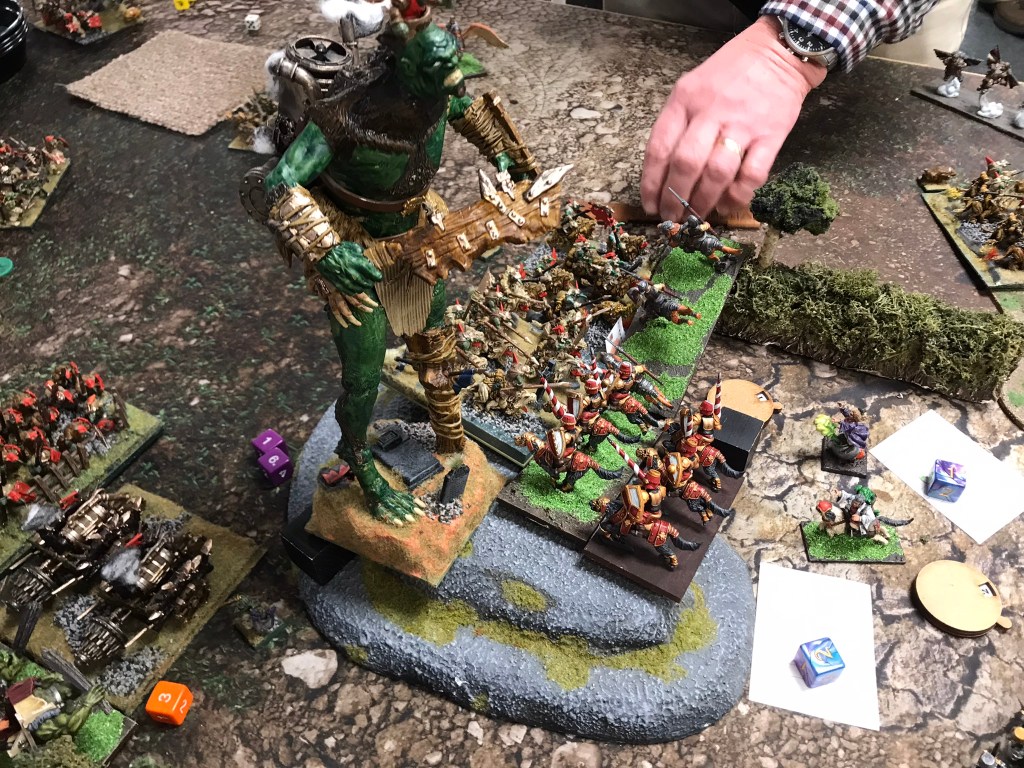
Happily, the Lord on the right was easily outmanoeuvred and both my fliers were able to dodge their way over to the centre to help out with the brock riders heading towards my poor Stalwarts. On the left though it would not be so easy. Keeping himself out of trouble using an infantry regiment meant the Ironclad had to be disposed of first. Greeedyguts and 2 regiments of Juggers later this was achieved, but there was still the issue of the Lord and regiment of Brocks hanging around in charge range. Thanks to some wild charge on the Gastromancy the Wild Lancers managed a few wounds on the brocks and penned them in for a turn. Greedguts then attempted to do the same with the Beast Lord whilst one Jugger regiment stood on guard and the other headed towards the centre.
Unfortunately, the nimble Beast Lord managed to slip away from Greedyguts and rear charge the departing Juggers. This could have been a problem, but fortunately the charge was hindered, and the handful of resulting wounds meant the Juggers remained, and the hapless Lord was left to receive a rear charge from the other Jugger regiment and Greedyguts. The hapless Lord was neither hapless nor a Lord anymore.
Not surprisingly the Wild Lancers did not survive the revenge of the Brocks, however the dwarf cavalry was left in an awkward position where my Jugger horde could charge them, which happily brought my horde into the backfield of the Dwarfs and saw Garrek Heavyhand step up to take them on. Clearly there was a goodly amount of righteous fury in the old warrior as the managed 5 wounds and a double 6 waiver. The dogs came to a standstill.
In the centre things were on a knife’s edge. The Pride of the Shire’s led by example, resisting round after round of damage and keeping waivered units in the fight until the brutal Battle Drill finally punctured it’s steam powered heart, but by then it was too late. The trolls survived the onslaught and claimed the objective on my side of the table. The remaining Beast Lord decided to play for a draw and headed down to claim the Dwarf’s central objective whilst the Halfling Cavalry massed. Juggers flooded in on all sides of Garrek and it wasn’t long before the horde had rid itself of the Dwarf and turned to face the final Beast Lord. They set their spurs and levelled their lances. Despite the strider aura the magics of the Dwarfs meant they hit the massive beast as though they had been hindered, and whilst damage was done, it wasn’t enough to take it down, resulting in a draw.
Game 3 vs Ratkin Slaves, Fools Gold
The less said about this game the better!!! Going into this game I felt reasonably confident. My army had been working well, and I had avoided making any of the standout mistakes that I’d made in the first game, but that all came to an abrupt end in this game which meant by turn 2 it was largely over. There were three big mistakes I made which I’m going to talk through instead of going through the game more generally:
1/ Deployment – a feature of most slave lists are the Impalers. These are pretty hard-hitting chariots that because of their base sizes are really difficult to block from making multi-charges. I should have remembered this and used my flyers to block them up and start taking off wounds. Unfortunately, I deployed them in the wrong positions and couldn’t bring them to bear where they needed to be.
2/ Cryza’s Gore Impaler – this special character is able to kill units and overrun through them as though they are individuals. Having set up one blocking unit in such a way as to take account of this on one of the charges the chariot had, I overlooked another charge it had. This resulted in the chariot removing not only a regiment of Grenadiers, but also a regiment of Juggers in turn 2.
3/ Massed shooting – possibly the costliest mistake, Nightmare shooting isn’t particularly great when the units are on their own, but three of them together cause absolute carnage. I messed up my measuring when moving the Jugger horde in turn 2 and left them in range of the massive rats. Whilst this didn’t kill them it did enough damage that they could then be shot off in turn 3 without contributing much of anything.
To be fair to the halflings, they fought well despite the avoidable mistakes I made in the first couple of turns and managed to score a point, but they were never going to win it back. What didn’t help was the Supreme Overmaster had an absolute field day on his regeneration, recovering what seemed like at least 5 points of nerve a turn! Not a massive game changer, but definitely frustrating on top of all the self-sabotage.
Final thoughts
The day was absolutely brilliant all in all. I’m still kicking myself over the final game, but what can you do?
I was genuinely impressed with the overall army performance and I’m increasingly feeling better and better about the Jugger horde. I would definitely say it’s not the easiest thing to use, I would go as far as to say it’s pretty counterintuitive. Whilst you want to throw it forward it really works well being held in reserve whilst smaller units run around it doing the hard work.
The reduction in Saucerors also went well. It did force me to commit to where I wanted the support, which was usually with the cavalry, but surprisingly the mobility wasn’t an issue. What’s more the hotpot was a life saver. Also, I found myself using a greater range of abilities this time around with Wild Charge really helping in game 2. I might have a go at putting together some thoughts on Gastromancy in a separate article because whilst it’s subtle it definitely adds value.
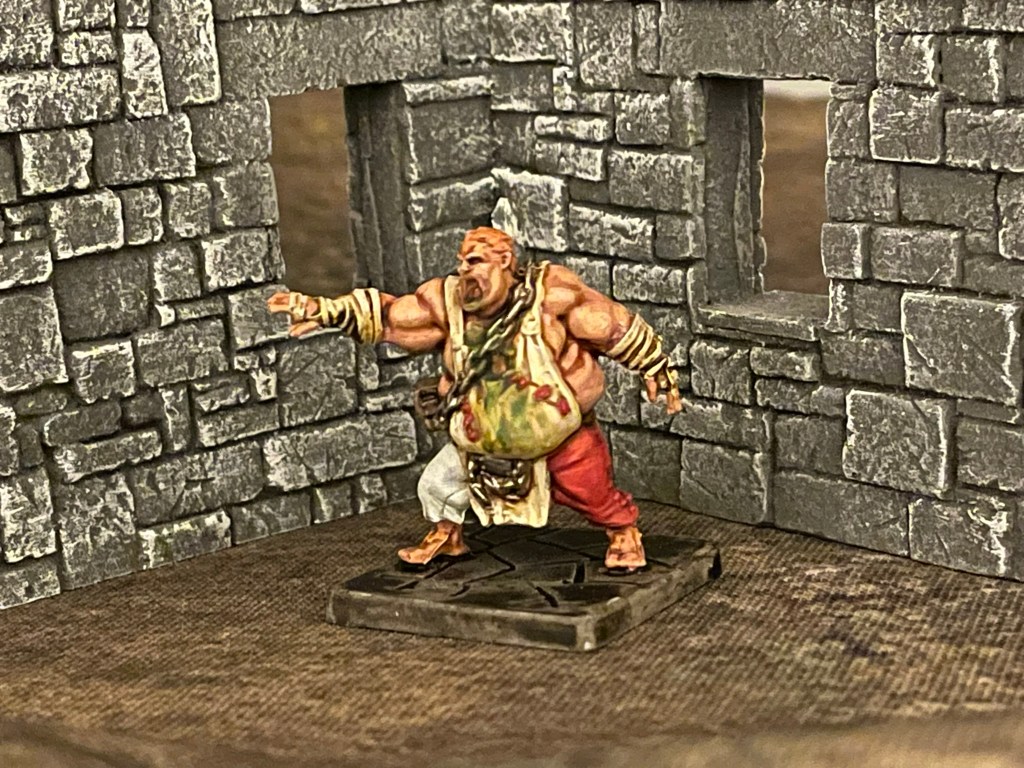
And finally, the MVP, the mighty Greedyguts. What an absolute beast. I’m really not sure why I don’t see him in more halfling lists, of course I’m willing to put this outing down to pot luck, but for 115 points he really punches above his weight (which makes that a pretty big punch in relative halfling terms).
I hope everyone has a great week.
By the way, if you want to make sure you don’t miss a post, put your email below.
Something I’ve come to accept over the past couple of years is that there really are two ways of looking at things. It’s the classic half empty half full scenario. To be honest I’ve spent most of my life in the half empty camp, although over the last couple of years that’s started to change, and the world seems to have become a busier and more satisfying place.
One of the biggest changes has been my own views on my first venture into self-publishing. It was a bit of a lifelong ambition of mine to publish a book, although having done that it occurred to me that it might not be anyone’s lifelong ambition to read it. Happily, though, I thought, the internet is full of stuff that no one’s going to read, so why shouldn’t I add to it.
Despite some good feedback following its launch, which really caught me off guard, I was quick to label it as the book that no one asked for, before jumping headlong into a bunch of other new projects. The thing is though that regardless of how I felt about the end results I absolutely loved writing it. There is nothing like creating your own world from scratch and releasing a bunch of misfits into it to see what they get up to. It’s an amazing feeling, but then to dump it onto some pages, bundle them up with a pretty picture on the front and say you’ve written your own book, well it’s a hell of a cherry to put on top.
Now I have a bit of a confession to make. When I started writing I hadn’t intended to write a series. The intention was to write a single one-off novella set in a suitably generic fantasy world that would focus on the aftermath of a theft. It’s fair to say things got away from me and I ended up with a rather different book than I had envisaged, and far more fun. Unfortunately, the time I had to write in ran out and it was a case of publish or be damned. I didn’t fancy damnation.
I did start writing a sequel at the start of 2023, if memory served, but I couldn’t find the time to work on it properly. The word count increased but I couldn’t find my previous rhythm, the all-important story telling wasn’t there, Amzharr didn’t feel alive. So, I hit the delete button.
Towards the middle of 2024 there was a small run of sales and some more great feedback and it got me thinking – what would it take to get the story finished. I experimented with some different approaches and finally something clicked, I found myself back in Amzharr, at the siege of Tanglehaven. Then a plan got written and the first 10,000 words are in the can, and I’ve enjoyed writing every last one of them.
Last week I received a great review from a reader which mentioned they wanted a sequel, and I thought, as I don’t really do social media at the moment, about popping up a few progress posts here. At least that would mean that if there is anyone trying to find out about the next part of the adventure there would be something out there.
In the meantime, for anyone who isn’t aware, or known where to go, there are a small number of short stories set in Amzharr on this very site (one of them might even be an early draft of the prologue for the next book)…
And finally, if you want to be sure of getting future updates drop your email here.
The New Moon was a few weeks ago and that means I’ve had time to reflect on any changes I want to make. A couple of things have happened since that event. I’ve had a bit of time to think about how much my final position was the fault of my army selection over my use of it. I’ve played another couple of games and halflings won the UK Masters (not mine for avoidance of doubt).
Whilst I don’t have any particular aspirations to make it to the Masters, I do like to see what better placing players do with the armies I play to see if there any lessons to be learnt. For what it’s worth I really liked Radek’s list. It’s one of those lists that just doesn’t look particularly tough and pulls together some of my favourite units, such as Wild Lancers, multiple Iron Beasts and Greedyguts. It’s the sort of list I’d love to be able to play well but know I wouldn’t!
What was of particular interest to me was the inclusion of one sauceror with a hot pot and Greedyguts. Since I first started playing halflings I’ve always used Gastromancy and always brought two saucerors to the table. By its very nature Gastromancy is fickle. I’ve heard it described as a trap (i.e. not worth the points), but I’ve never signed up to that particular view, but I have increasingly questioned just what the right number of saucerors should be.
I tend to get seduced by Gastromancy in its more aggressive forms, brutal and wild charge, but throughout the New Moon there were too many times when the better choice for a number of turns would have been lifeleech or rally. My rationale for this is that halflings aren’t super killy, so my experience has been that even when brutal 3 is in play it often gets wasted as the fighters just can’t deliver. On that basis you might as well just throw some rally up and wait for the counterpunch. I further frustrate my forces by putting one of my saucerors on an aralez, and I’ve slowly come around to realising that much mobility isn’t necessarily needed. So, taking Radek Bry’s example I’ve played a couple of games with just one unmounted sauceror with a hotpot. It definitely felt more proportionate. The hotpot has been great at levelling out the uncertainty of Gastromancy, and whilst I have had to put a bit more thought into where I place the sauceror and how they move it definitely seems the resource spent on Gastromancy is now more appropriate.
That means I have some extra points to spend. Happily, I’ve made two further changes which have shaved a few more points from the list. Whilst I think the Heroes of Hoedenberg is a great update I just didn’t find it was really used in my games. I’m not expecting my Stalwarts to kill things, they are a roadblock, so elite isn’t adding much, and the Iron Beast is generally quite close to them, so the inspiring isn’t needed either. Finally, the shooty trolls just haven’t really used their guns, so they’ve been changed to regular forest trolls (which we all know are the best types of trolls). All in all, these savings add up to about 115 points, which is the exact cost of a Greedyguts.
I’ve always loved his rules, but the defence 4 made me nervous. I think this is more because I thought his stats were not dissimilar to a Mutant Rat Fiend, and that little beastie has a habit of disappearing from the table very quickly if you aren’t careful. Having played against Big G though and seeing him in Radek’s list definitely made me want to give him a try. Fortunately, the model is a delight to paint up, which is always nice.
So far, I’ve run him out twice and he’s done brilliantly. I still have my reservations but there is nothing more satisfying than watching him munch his way through one thing after another. Clearly, whilst there are some similarities between the Fiend and Big G more fundamental differences around movement and points cost make Big G a very different prospect. I’m really looking forward to seeing just what he can do once I’ve got a bit more practice in with him.
Aswell as messing around with the list I’ve also ordered a few extra basing bits. The army is a work in progress in a number of ways and I wouldn’t call any of its units completed at the moment, but I’m hoping to share some complete units soon.
Have a great week peeps, and if you don’t want to miss out on any future posts pop your email address below.
I hope this letter finds you well. It’s been a bit of a trek getting here, and I’m not entirely sure it’s quite all Grandgnome Grabdistuff said it would be. I’m wondering if we took a wrong turn somewhere and he doesn’t want to admit it, you know how he can be. It’s a lot colder than I was expecting, you were right I should have packed the jerkin with the furry lining.
It’s also a bit weirder than I was expecting. I mean we’ve all heard stories of Grabdistuff’s journeys before, and I know everyone in the village says he wears his pointy hat the wrong way up, so to speak, but I’m starting to wonder if there’s a bit more substance to them than a pint of mushroom cider and that funny smelling tobacco. I mean, it turns out that he is best friends with a talking squirrel and does literally ride around on a talking toadstool…
…and then there’s the bears. Up here the bears are a bit different. Last Thursday Grabdistuff introduced me to Theodore Phuqspin, the newest addition to our party. Apparently, he’s a very experienced treasure hunter. You wouldn’t think it to look at him though as he looks suspiciously like a teddy bear, although he says things sometimes that you would hope no teddy bear would actually say, especially if there are children around… the big bears up here also have their own way of doing things. Not only do they do the thing Papi says they do in the woods everywhere but the woods, but they also carry massive swords and axes, and if there is something I am now more certain of than anything else in my life, it is that an angry bear should not have access to an axe…
Write soon
Brergle, the enchanter’s apprentice (now starting to believe Grabdistuff is actually an enchanter)
I really enjoy a game of Frostgrave, but haven’t had time to play it regularly over the past year. When I do, I invariably lose my warband roster after a couple of games and so I never seem to see my warbands grow. I’m hoping this year will be different.
I’ve decided to run an enchanter’s warband. Partly because over the years I’ve become particularly fond of telekinesis as a spell and partly because I want to use my Northumbrian Tin Soldier Gnomes in my warband, and nothing (in my mind) screams enchanter more than a beardy chap in a red hat sat on a massive mushroom.
We decided to play The Summoning Bell scenario from the core rule book. With the benefit of hindsight, it’s possibly not the best scenario for starter warbands as it requires a random monster to be generated for each table corner from the start of the game. As luck would have it (for my opponent) I started the game with a bear on either side of my gnomes, whilst my opponent (a necromancer) started with some skeletons and a wraith at his end of the table. Within a couple of turns the restless spirits were in his control and heading towards me.
I on the other hand had to spend my first couple of turns dealing with angry bears, which meant splitting my warband into a group that would push forward to grab treasure and a group that would try and stop Grabdistuff getting eaten. With a combination of gnomish steal and cunning one bear was dispatched and the second sent off on a wild goose chase which ended up with the creature being frozen by the wraith.
The point of the scenario was to stop a bell tolling in a tower at the centre of the table and steal the treasure beneath it. The bears meant I didn’t have an opportunity to get to the tower first. So, I focused on securing two other treasure chests and seeing what I could do to scupper the necromancer’s attempts at stopping the bell.
The necromancer spent a fair few turns casting fleet of foot on his retainers, which helped them scale the tower and silence the bell rapidly. Now I needed a plan. An opportunity soon presented itself as a carefully aimed crossbow bolt badly wounded the thief who had silenced the bell and was escaping with the loot. One of my thugs had found themselves near the stairs into the tower and made their way to the level where the injured thief struggled with his extra load. Unfortunately for my thug though, just as she saw the thief the necromancer’s own dark hearted knight attacked her from behind, allowing the thief an opportunity to escape.
I had hoped that Sir Broderick and one of the thugs, with a bit of support from Grabdistuff might be in with a chance of intercepting the thief. Especially since the necromancer and his apprentice had already excited the field with another two chests so there weren’t as many bone darts to be thrown. However, just as the brave gnomes made their way towards the bottom of the tower the wraith loomed around a corner. With no magical weapons to injure it Grabdistuff decided that discretion was the better part of valour and signalled the tactical retreat.
Whilst only two treasures were recovered there was some pretty decent loot to be had. Grabdistuff now has some Gloves of Casting, a bit of extra gold and a Grimoire containing the Write Scroll spell. Sadly, Theodore had the stuffing knocked out of him as he tried to approach the tower and will have to miss the next game, although Grabdistuff and his gnomes are hauled up at a local alehouse so are currently trying to recruit a reliable thief to cover for him.
So, until next time, keep warm and beware the bears that bear arms.
By the way, if you don’t want to miss the next post, pop you’re email below and subscribe to get an email notification.
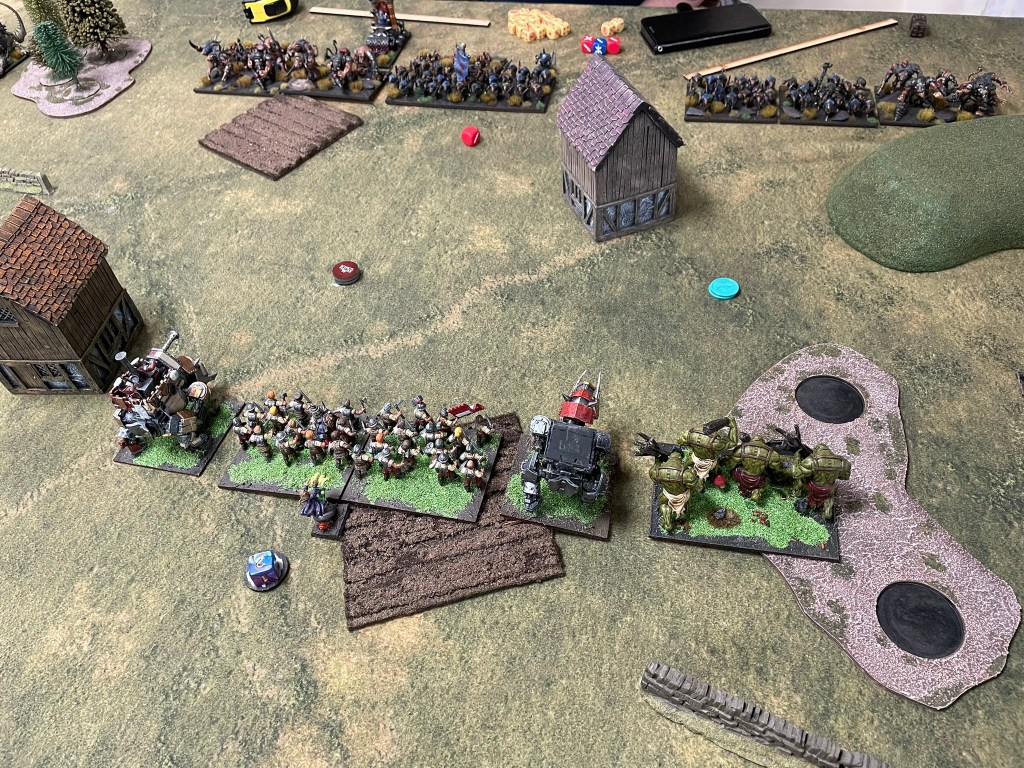
For the past couple of years, the first event I’ve attended has been Stanes of Blood over in the Southeast. However, this year it wasn’t on and instead the Moonrakers stepped up to run a small event in Bristol, that rapidly became a 44 player showdown. As a result, the Halfings found themselves rubbing shoulders with some of the premiere players in the South.
Going into the event I’d accepted a challenge from Heath, who was bringing Empire of Dust, and I had a lot of feelings about the game. As someone who’s great at picking armies that don’t really pack much of a punch Empire of Dust is always a bit of a tough match up. However, my list for this event includes a Jugger horde with the Brew of Strength, which I was hoping would make life a little easier in this match up.
The Jugger horde is definitely something of an experiment, which to date I’ve been massively on the fence about. It’s performance today was likely to determine whether it would become a permanent fixture in the list. The rest of the list included:
Game 1 vs Empire of Dust, Seek and Destroy
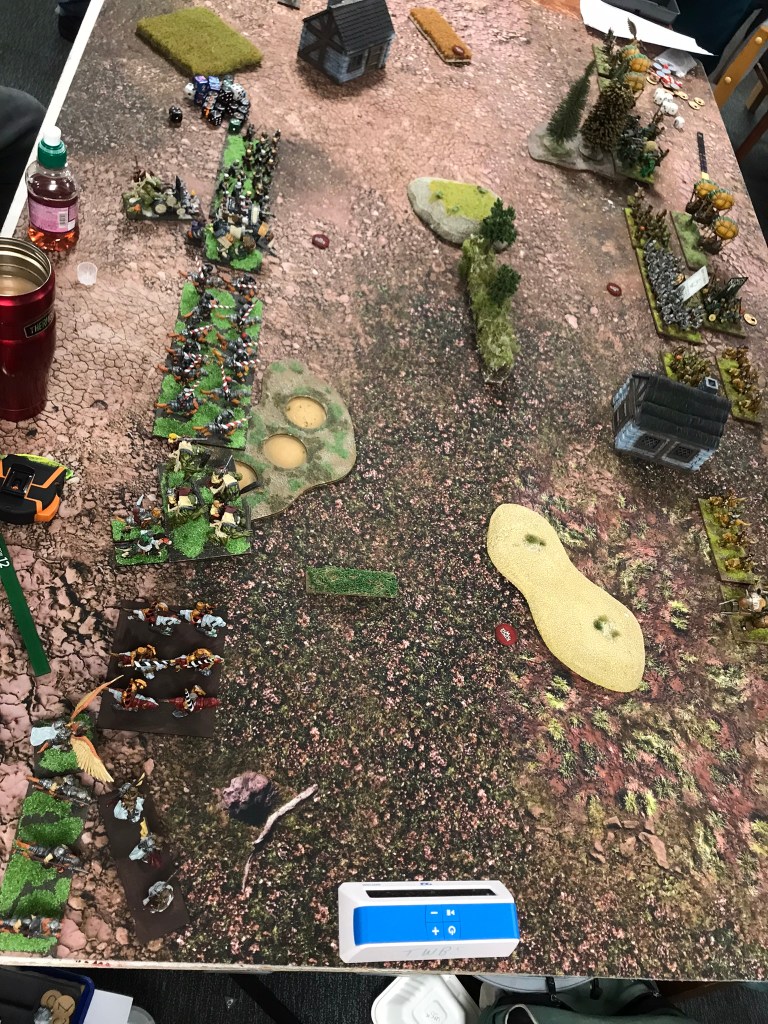
Heath’s list was massively intimidating on the table. A solid line of high defence and nerve with loads of healing. What I tend to find with games against Empire of Dust is they tend to go one of two ways. Either you manage to smash through a couple of key stone units at either end of the line and roll up into the middle for a solid win, or you bounce off them in the first couple of turns and then they grind you down.
When I set up the loot counters, I did my best to spread them around the table, knowing that the EoD’s strength lay in sticking together to deny flank charges. I was hoping he might send a unit or two off on their own reducing the inevitable wall that would form in the centre. Unfortunately, Heath was not going to fall for that trick and so the game kicked off. On my left flank I had put the Jugger horde, together with a regiment and the Wild Lancers. They started out well, managing to fell a Bone Giant and Shobek. Unfortunately, I messed up the reform allowing the second Bone Giant to get a charge, which could have been avoided, into the horde which took it off the table.
It was a bit of a shame, but to be honest the horde had done more than enough at that point and put me in a great position where I believed I might have a chance. My positivity stemmed from my token placement, which meant there were two loot counters on my far right I could collect with my trolls completely unchallenged, which meant I only had to secure another two tokens for the win.
With great in roads being made on the flanks I prepared to break the centre. An over enthusiastic over run from a Mummy regiment left it open to a multi charge from the Iron Beast, the Harvester and unhindered Juggers in the flank. Now all I needed to do was breakthrough the horde of Revenants that anchored the EoD line in the centre of the board. With a rear charge from the Muster Captain on Winged Aralez, a Stalwart horde in the front and some brutal from one of the Saucerors I had high hopes! But it was not to be. The Revenants weren’t going anywhere and over the next few turns the combat would wipe out the Stalwarts, the Captain and a Jugger regiment. Unable to break the centre, and with the momentum from the right flank falling away the Halflings found themselves running from the field, although there was a moment of celebration to be had that they had escaped with two loot counters, but they weren’t enough for the win.
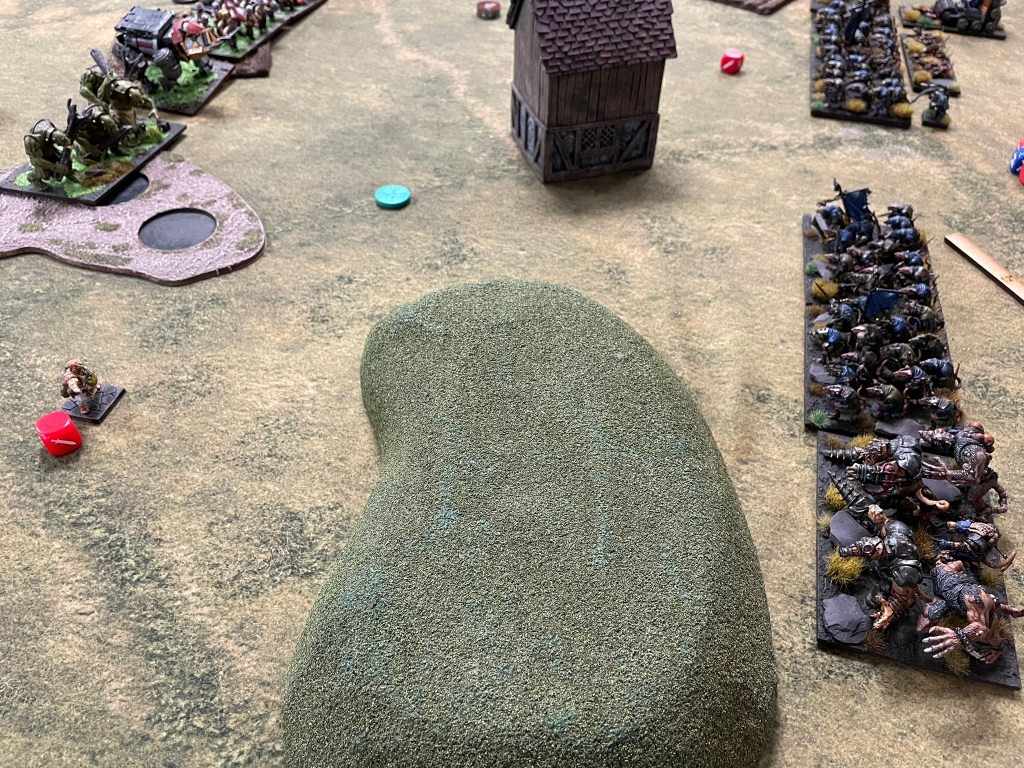
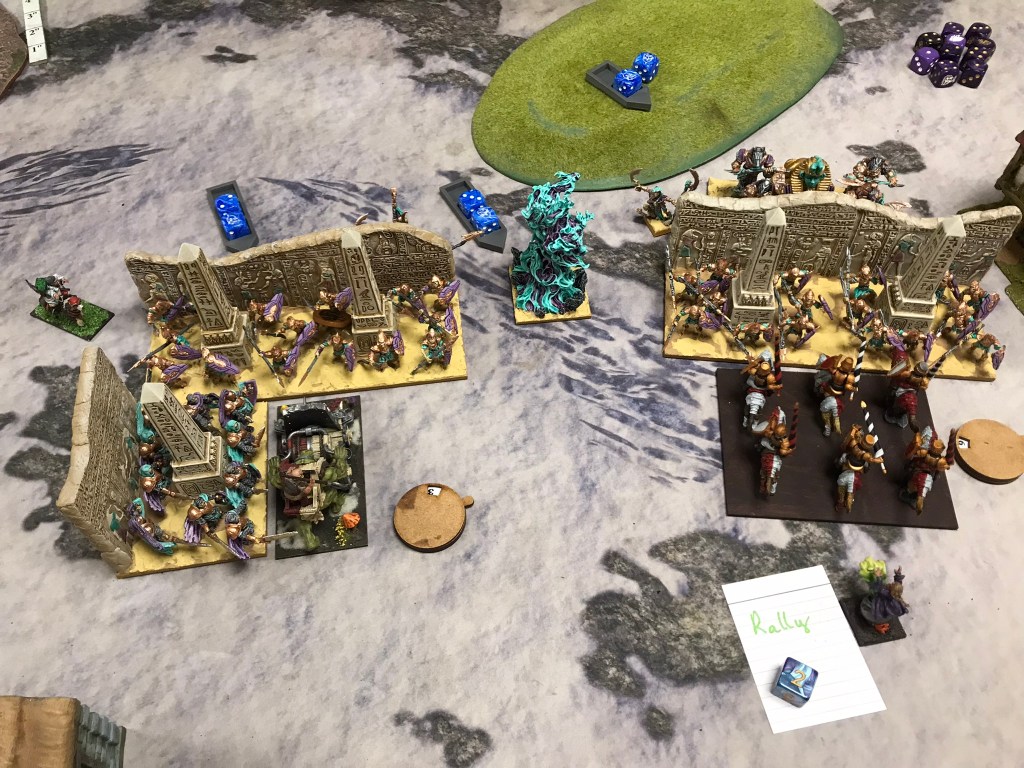
Game 2 vs Goblins, Wrack and Ruin
I always think it’s a shame I don’t encounter Goblin armies more often as they are great fun to play against and offer some really different challenges to a lot of other armies. This particular list featured a good mix of infantry, fleabags and giants as well as the new formation. Having had a few issues with Wrack and Ruin in the past I decided to keep it simple and throw the majority of my unit strength onto my right flank with just a small force of Juggers, Ej Grenadiers and the Muster Captain on the Flying Aralez on my left. The Goblins set up the majority of their troops on my left flank with only a regiment of Fleabags and Groany Snark on my right.
Both armies pushed forward into their respective scoring zones, before turning in towards the centre. With the benefit of hindsight, I realise that I was probably a little too eager to engage with them and foolishly threw both my Iron Beast and Jugger horde into a regiment of goblins that had been pushed ahead of their line. Not surprisingly, the goblin regiment rapidly disappeared from the table however this opened up my Horde to a charge from a hindered Fleabag Regiment, Groany and a unit that I completely forgot was the Luggits. The damage from Groany and the Fleabags was negligible, however the Luggits rolled exceptionally well and the Jugger horde broke.
Despite the breaking of the horde the Halflings where still strong enough to hold onto the scoring zone on the left for turns 3, 4 and 5. What I loved most about this game though was that whilst there was quite a brutal trade of units going on in the centre of the board there was a far more intricate game of cat and mouse happening in my opponent’s deployment zone. The flying Muster Captain and a regiment of Ej grenadiers played cat and mouse with Fleabags and the King in the Chariot looking for an opportunity to support the struggle for the centre. Unfortunately, that opportunity didn’t materialise in a meaningful way, and whilst the Halflings easily managed to keep the Goblins out of their scoring zone they didn’t have sufficient strength to push the green mob back from the centre.
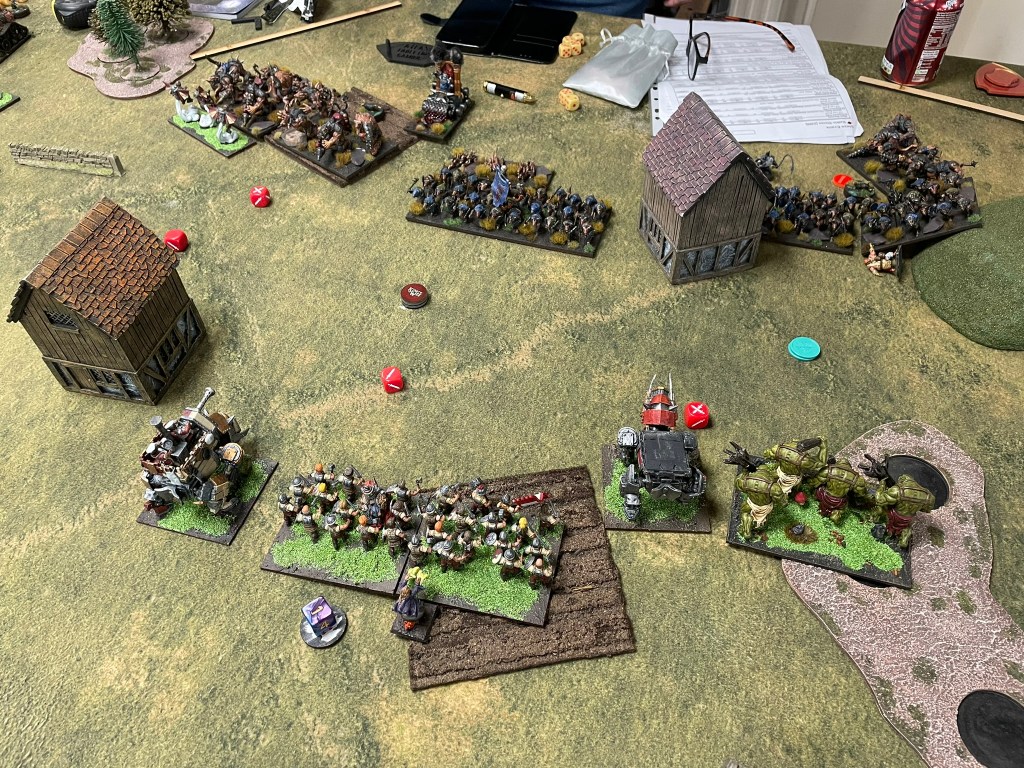
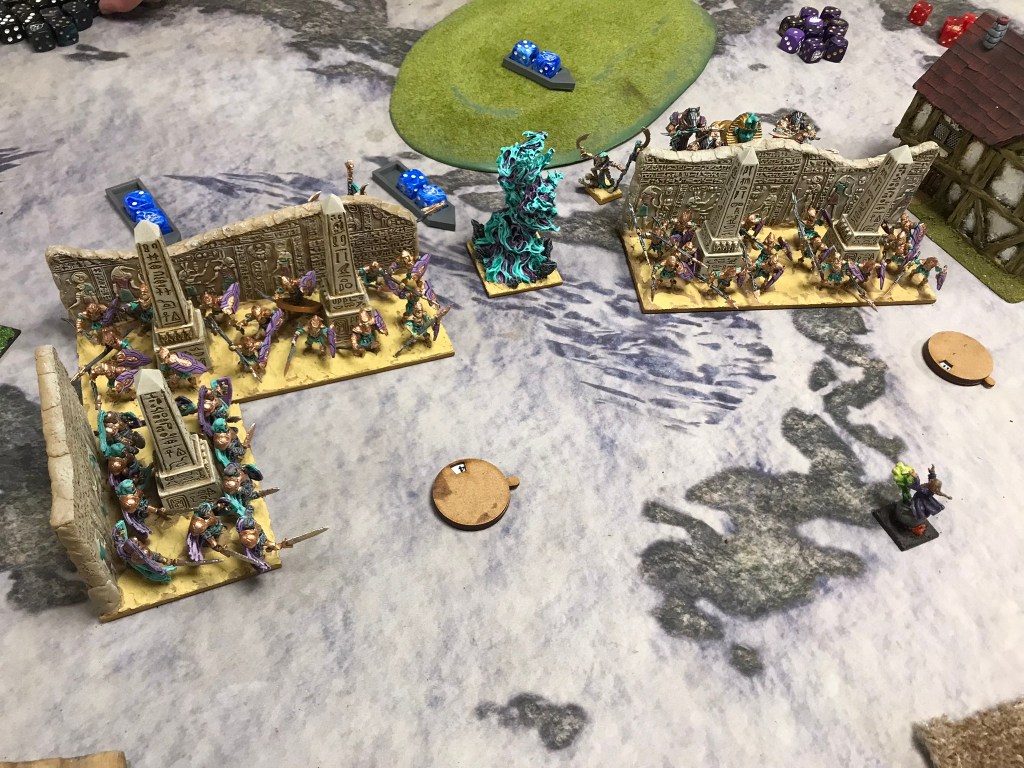
Game 3 vs Halflings, Compass Points
One of the reasons why I wanted to get my head around Halflings is that over the past couple of years when I’ve played against Halflings I’ve found them to be a real challenge, and the people playing them have been great to play against. So, it was brilliant to find myself up against another halfling army. What was particularly great from my point of view was that the list I was playing against is far more representative of what I would expect to see in a Halfling list, so I was interested to see how my force would fair.
Having deployed my opponent scouted his poachers forward right into the charge range of my Jugger horde and I had a sudden flash back to the previous game. Taking the first turn I was immediately faced with the opportunity of a turn 1 charge.
For this game my opponent had deployed relatively evenly across the table, kind of. Although there was a heavier unit count on my left flank, they were quite low on nerve with a flying Muster Captain, Ej grenadiers and Aeronauts. On my right flank stood the Iron Beast and a troop of Wild Runners. In the centre were the majority of their infantry and a regiment of Aeronauts. I had deployed largely across the right side of the table with only a Jugger regiment and grenadiers on the left.
In an audacious moment I decided to aim to take both the centre objectives and the one on my right flank. I ummed and ahhed a little over the turn 1 charge with my Jugger horde as a way to remove one of the Poacher regiments and really press the attack on the central objective on my opponent’s half. In the end I got cold feet due to the amount of enemy units that could potentially find ways to multi-charge the horde (I wasn’t keen to see my horde disappear so quickly again).
Instead, I moved forward cautiously in the centre, keen to avoid the troll gunners and wanting to keep the Aeronauts at arm’s length. On the right flank though I pushed forward very aggressively, given the enemy units protecting it I knew it would be relatively easy to remove the Wild Runners and then deliver multi charges into the Iron Beast at my leisure. Once the beast was dealt with, I would then be able to send units around to secure my opponent’s central objective.
In turn 2 the charges began. Whilst the Stalwarts blocked up the centre by rushing their opposite numbers, the horde removed the poachers they’d had their eyes on, and the trolls took off the Wild Runners with the Iron Beast. However, the momentum got lost very quickly as the enemy Halflings started to bog down my key units. With quite a few units in the centre there was plenty of low value units to throw at my horde. On the right though the Iron Beast just wouldn’t die. Despite taking two rounds of flank charges from the trolls nothing seemed to be able to bring the mechanism down. By the time my Halflings had killed it, there was not enough time to get the cavalry around a house that blocked their most direct path to the furthest centre objective.
Fortunately, the flying Muster Captain had made his way behind enemy lines and, after making an absolute nuisance of himself, turned his attentions towards the objective. However the turns were running out, and my opponent still had a lot of options to delay my progress. His flying Muster Captain came face to face with mine by the objective, effectively cancelling out the scoring. We had both taken control of a flank which left, in turn 6, the tie breaker coming down to ownership of the objective in my centre. I had my Iron Beast and Harvester defending, positioned in such away that his nearby Aeronauts would only be able to reach the beast. The Aeronauts descended, but rolled poorly, failing to even dent the construct, giving the game to my Halflings at the end of the turn, but then a turn 7 meant that my Halflings were also able to secure the object in my opponent’s centre, strengthening the win.
Final thoughts
What a thoroughly great start to a new year. A massive thanks and congratulatory hats off to Andy Marshall for putting on a great event. And of course, a massive thanks to my opponents for a great series of games.
I have to admit I was really impressed with the army overall. Although I finished with two losses and a win, the losses were what I would call good losses, and as a result I ended up coming in a respectable 25th. Despite my misgivings the horde did very well and I’m pretty sure timing is everything when it comes to deciding when to finally commit with it. My main concern about the Halflings was their low nerve, which was one of the reasons for choosing the horde, but it didn’t impact me as much as I thought it would. What was very noticeable was just how useful the terrain mitigation in the army was with strider and the trolls.
The one area where I think the army did underperform was in the killing department, and there is a change to the line up I’m carefully considering that I think would have made a difference in all of the games at this event, but more on this later. The other aspect of the army I really need to give greater consideration to is the Saucery. I think the army really benefits from it, but there’s definitely an art to choosing what the best option each turn is and I got the feeling from a couple of goings on that the buff that benefits the most immediate situation is not always the best one to take. For now, it’s time to kick back and prepare for The Hinckley Heist.
Happy New Year
If you enjoyed this and really don’t want to miss anything else I post, ever… pop you’re email address below and you’ll get a notification for each and every new post.
2025 has arrived and I’m feeling unusually ready for it. Last year I had a great time playing Ratkin, and now I’m looking forward to my next Kings of War chapter. This year I’m planning on finally getting my head and heart around halflings. I’ve had the models kicking around for a couple of years and even manged to play a couple of events with them back in 2023, but wasn’t able to find an army list I could really get excited about.
Halflings are a bit of weird one for me. It’s a faction I’ve never really been that excited about, in any IP. I think it’s because I’ve always seen them as a bit of a one note joke, without that much depth. That changed a little when Mantic released their first version of the army list, but not for the reasons that would usually get me into an army. Unusually I was drawn to the army because of their rules. Normally I pick up an army because of some models I particularly like, or because there is a narrative spark I want to explore. However, in the case of the halflings it was simply because they had loads of nimble cavalry and auras, which are the rules mechanics I really love playing with.
As a result, my relationship with the little people has been a little bit rocky. I’ve been trying to build armies around certain units that just didn’t seem to work well enough for my liking. Just as I have with the rats, I managed to build lists that seemed to both under perform in terms of survivability and killiness. This really came home to roost in the lists I took to a couple of events in 2023 (but unlike with rats I wasn’t excited enough about the faction narrative or models at the time for me to really want to continue playing with them), so whilst I have occasionally revisited the army it’s been in a pretty lacklustre way. That was until a few months ago when I was playing around with some concepts and wrote a short story delving into the relationship between halflings and forest trolls (you can read it here).
Whilst Mantic’s halflings still have a bit of an appetite, it’s no longer their defining feature (second breakfast can be a necessity, but it’s not a personality) and has been tempered considerably compared to other versions of the little folk. Not only that but the introduction of the Greedyguts casts a much welcomed shadow over their world. What’s more their relationship with food, agriculture, animal husbandry and technology has been considered far more deeply, and the result is an interestingly pragmatic and down to earth race. I feel Mantic have made a real effort to create a believable faction that can hold its own in a violent world, and the more I’ve reflected on that the more I’ve found myself getting excited about putting together a force for 2025. What I’m hoping is that my experiences with rats from last year, where I did my best to think more about the structure of my lists from a more competitive point of view, will pay off. In theory what I’m taking to the New Moon tournament in Bristol on 4th Jan will be both a little more resilient and stabby than previous incarnations.
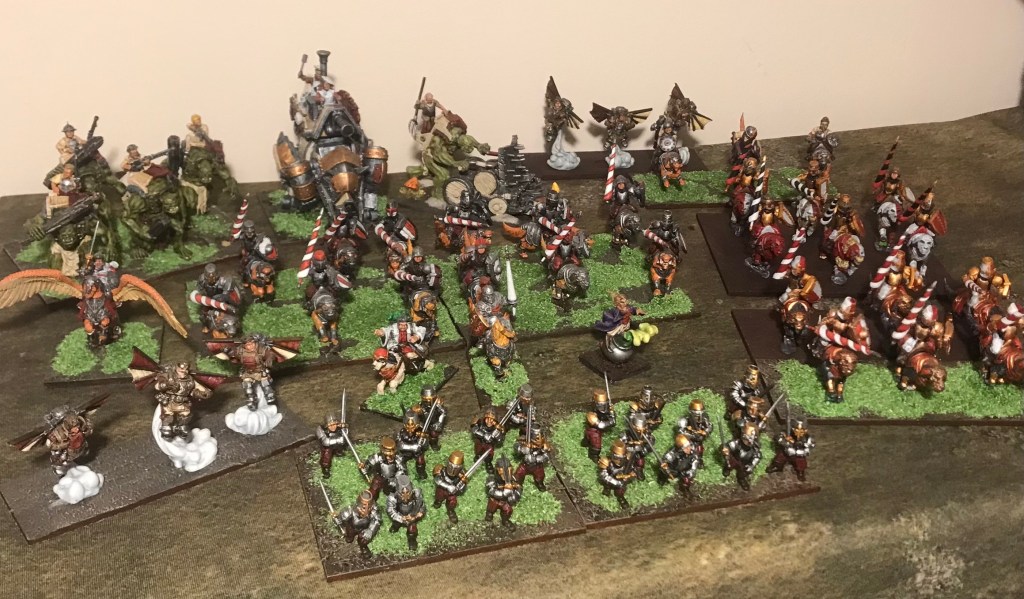
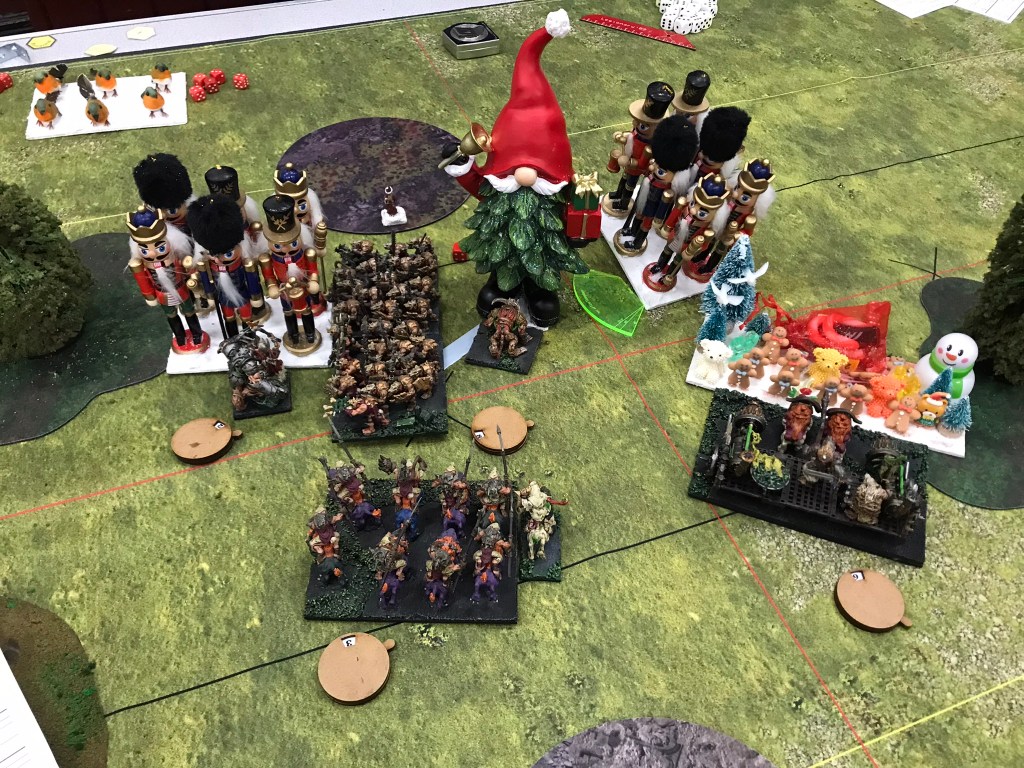
Whilst I technically have everything painted and based there has been quite a bit of rushing to get it done. It’s definitely not my best work, however I have a bit of a plan. Over the next year I intend to continue working on the army to improve on what is already there by tidying paint jobs up, adding highlights, overhauling the basing and… maybe even upping it to full model count (although even I feel this last one is a bit of a stretch). So, for now I’ll leave you with a family photo of what is the starting place for an exciting new year.
Best wishes one and all.
By the way, if you fancy getting an email notification every time I publish a new blog pop your email below.
It’s been a pretty awesome year for the rats. Traditionally I play them for the first half of the year, realise I have no idea how they work, flit between other factions before returning to them for the last event of the year. I then take 6th place in the faction listings in the UK. This year though things have been very different. I’ve not only managed to stick with them for the entire year, but also ended up on top of the Ratty charts (it’s at this point I feel it’s only right to thank Si Brand for only playing Ratkin twice this year to allow any chance of this happening!!).
To Scud or not to Scud
As I planned my list for the 2345 point event the first question I had to answer was whether Scud was coming out to play? After a bit of reflection, I decided to leave him at home as I wanted to maximise the number of drops I could put on the table, and I liked the idea of trying to swamp the opponent with a bit more trash than usual. I also felt the lists I played later in the year suffered for trying to include too many expensive unit choices that lacked reliable damage output because they still only hit on 4s over cheaper trash.
The removal of Scud meant I had the chance to add a couple of Wretch hordes with an inspiring Brute Enforcer to my usual choices. I also decided to include a Nightmare horde which was something of an experiment as I haven’t been blown away by their performance year to date, but I reasoned, they have also not had shooting support from no less than three weapons teams. Maybe this would be the key to getting the most out of this unit without painting up another horde or two. In the end I settled for the following list:
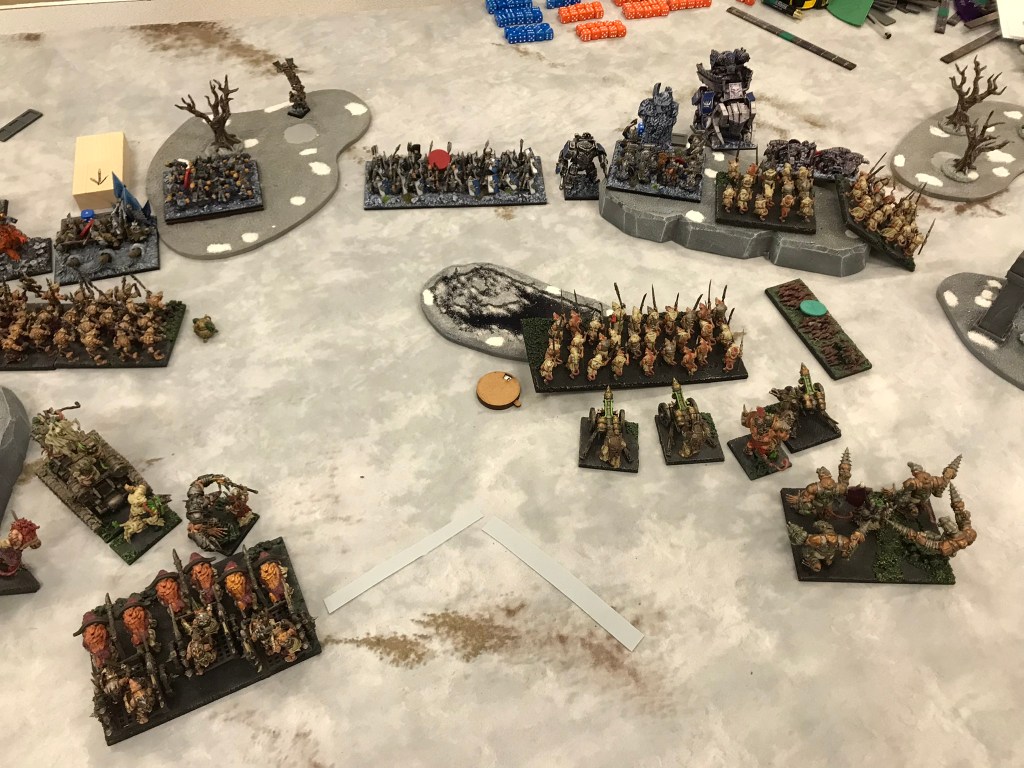
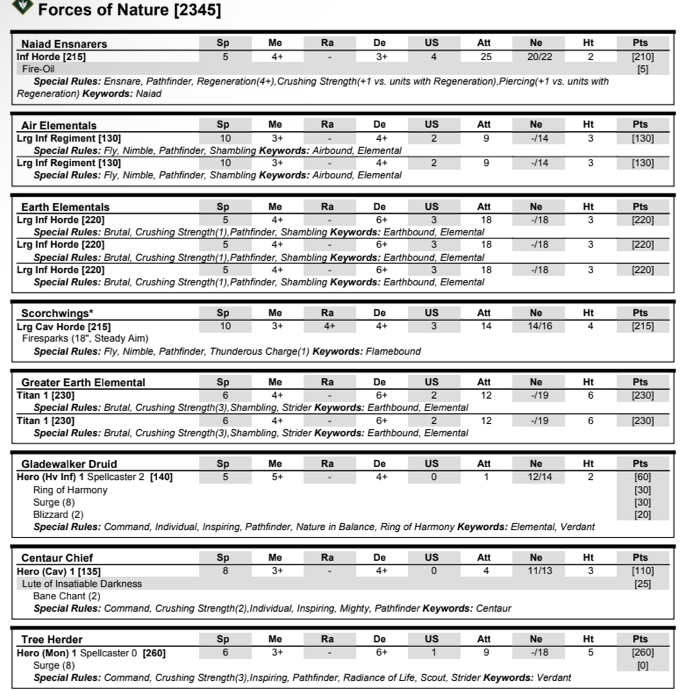
Game 1 vs Forces of Nature
The scenarios for Reaper events can be a little different. The first was a combination of Kill and a chase scenario. Everyone going to the event brought a special chariot-based Reaper character in addition to our armies. I’m not going to go into the details as the character didn’t have a massive impact on any of the games, with the exception of the first one. For the first game points were scored on whether we could keep the character alive and get them over to the opponent’s table side, as well as for the amount of enemy troops killed.
The emphasis of this scenario, for both me and my opponent came down to keeping our characters alive and getting them to the other side of the board. To that end we focused our forces at either ends of the table. My heavy hitters mustered on my right-hand side of the table, whilst my opponent had the bulk of their forces on my left, with what could best be described as token forces attempting to slow down and kill off the characters. In both cases our defending forces could do little to really break the onslaught charging towards them. On my left flank a horde of wretches, the shock troops, a brute enforcer and a regiment vermintide failed to make a particularly impressive stand against forest shamblers, the Wilt Father, air elements, and a whole host of other environmental nasties. Whilst on my right the tunnel runners and shooters easily cut through the resistance offered by fire elements, a hydra and a horde of naiads. There was a moment of high drama when I accidentally left my special character open to a charge from the naiad horde, but fortunately a spectacularly bad set of dice results left the character with only one point of damage. The sharpness tunnel runner regiment then had a flank charge on the naiad horde, which subsequently disappeared.
However, by the time the dust settled, our main fighting forces were too far apart from each other to have really caused sufficient damage to one another for there to be a clear winner based on kill points. I had taken off a little more of my opponent’s force than he had of mine, but it was not sufficient to break the impasse of a draw. All in all, though this was a massively fun game, and a great way to kick off my last event of the year.
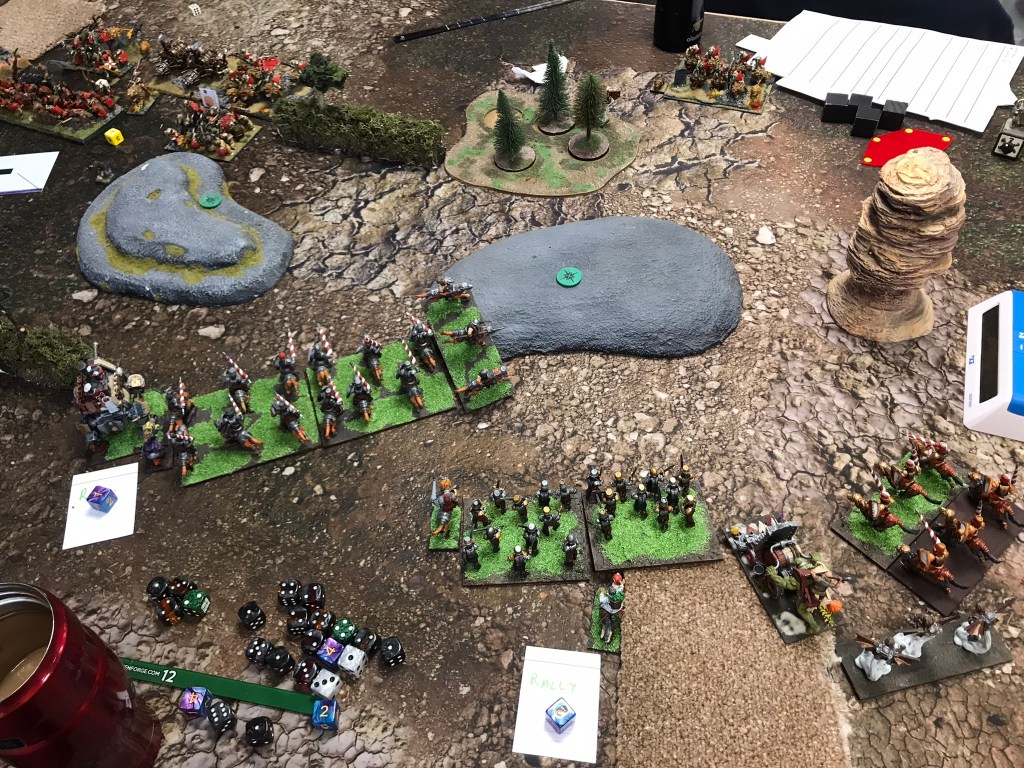
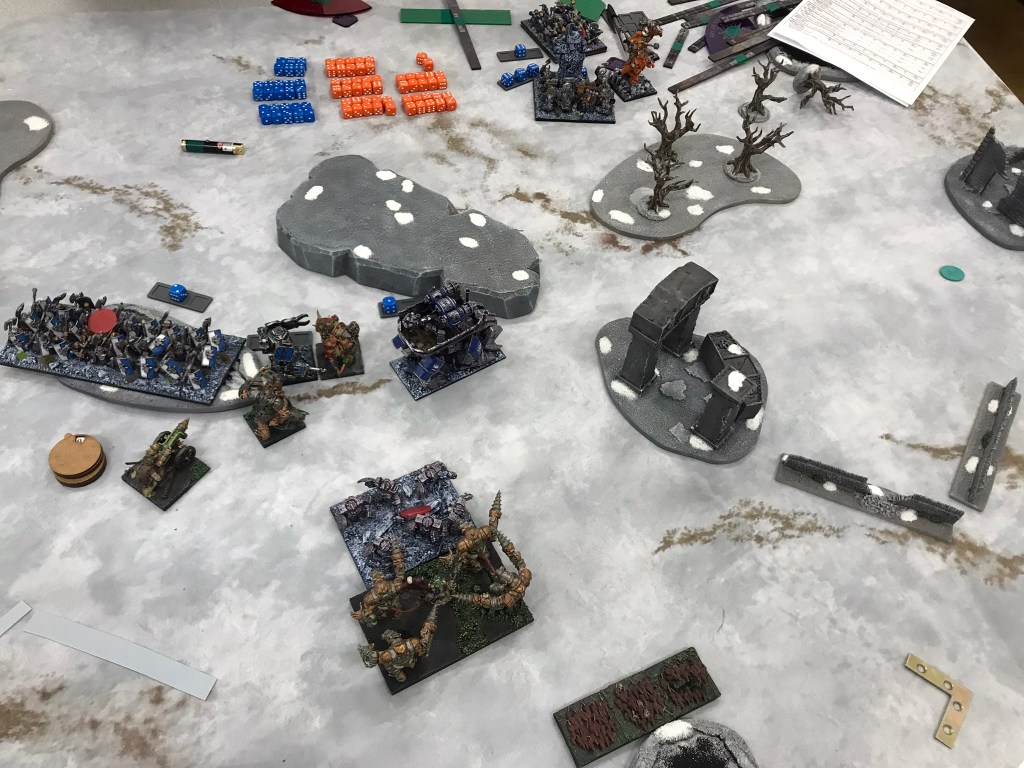
Game 2 vs Dwarfs
The scenario for this game required each player to place a loot counter on the centre line. Grab the counter and carry it to a deployment zone. You got one point if you took it to your opponent’s deployment zone, and two for taking it to your own. Once you got it into a deployment zone the counter would then return to the centre line and could be picked up again.
The rest of the Bulwarkers did show up for the game, they just didn’t quite make the photoshop cut!
I was a little worried going up against the dwarfs. This was mainly because I felt I lacked sufficient crushing strength to quickly cut through all the defence 6 they had brought, in particular the three lords on big beasts. For some reason I ummed and ahhed before choosing to go first after winning the dice role to decide who should go first. My opponent nudged me gently into taking first turn though and I very quickly became glade he did.
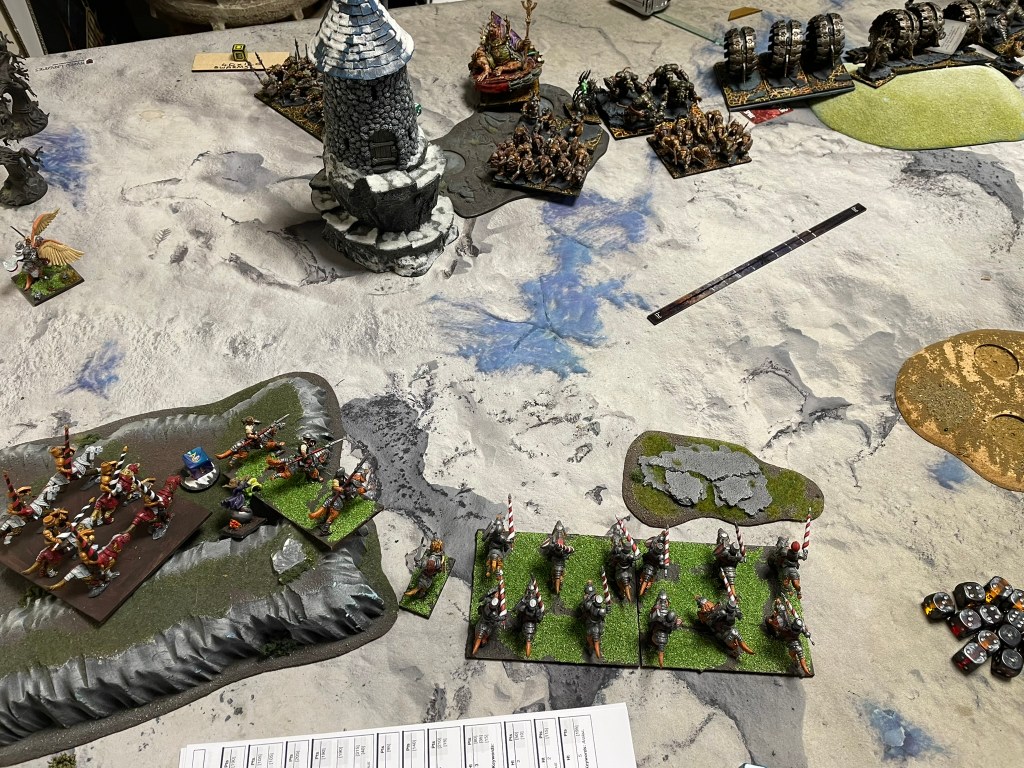
We had set up so we had similar capabilities opposite each other. On my left flank I had my tunnel runners, night terror and shock troops, opposite his beast mounted lords and infantry. In the centre I had focused my shooting units with the wretch hordes, against Goloch’s Fury and the iron guard.
In the first turn my night terror shot forward and secured the loot counter on my left flank whilst the remainder of the army hung back, ready to charge in if any of the dwarfs decided to charge into the wee beastie. In response the dwarfs moved forward trying to close the gaps between them and the counters without breaking ranks and offering potentially favourable charges to my toughest units.
The result of this was that the night terror was able to start smuggling the first counter back behind my lines, towards my deployment zone. In the centre, the lack of dwarf speed resulted in my wretches being able to form a wall between the tokens and the dwarfs, allowing a vermintide regiment to grab the requisite token. Over the next few turns I slowly carried the counters back to my deployment zone to score four points, whilst using the rest of my army as chaff to block the pursuers. Not much of the rats remained by the end of the game, but it was a win none the less.
I spent a bit time talking through the scenario with my opponent afterwards, and whilst it is a really interesting concept we felt it wasn’t as balanced as it could have been, and gave a massive advantage to the player taking the first turn. I also believe that the composition of our armies made the scenario even more challenging. This is because we both has fast units that could claim counters from the first turn, we then had units perfectly suited to blocking the loot counter carriers on their journeys to the scoring zone. In addition to this neither of us had flyers or long-range shooting, which limited the opportunities to take out the counter carriers. The game certainly felt quite one sided from about turn three, so whilst it was a win a bit more consideration to get the scenario to a really good place would make it more fun. I would love to see a future iteration of this at another event.
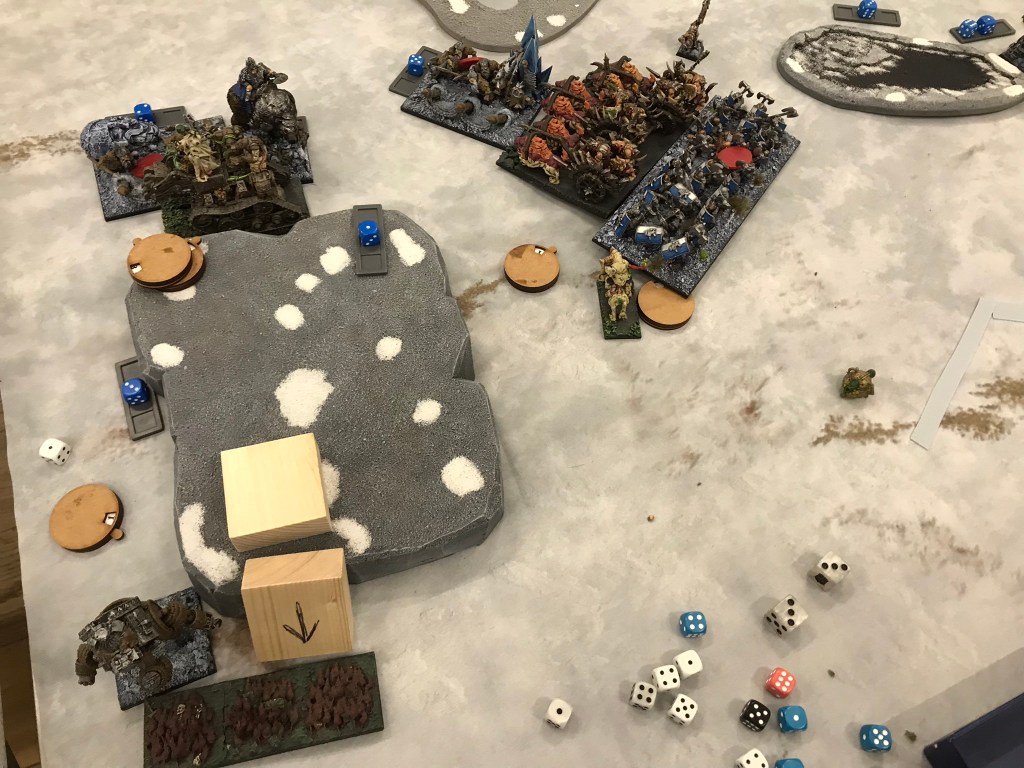
Game 3 vs Forces of Nature
The scenario for this game was Wrack and Ruin, an actual scenario from the book! Crazy!
This game was my second game of the year against Forces of Nature and my second game of the event against a wall of defence six. Wrack and Ruin tends to be one of those scenarios I don’t particularly fare well in. I generally make a big mess of how I spread my forces, and this time around was no exception.
You might notice that this army had a very particular theme…
I decided to go in heavily on the left dominate zone, whilst leaving a solid distraction of unit strength on the right. So, the shooters and the wretches went to the right and the tunnel runners and shock troops went to the left. Moving slowly forward it looked like I might just have the balance about right, possibly even perfect as I managed to score in both circles in turn three. I hoped another round like that would clinch me the win and I wouldn’t need to worry about the attrition of the rats for the rest of the game as the maximum points my opponent could score would be three from turn five onwards. Sadly, I ended up being a little over optimistic as to just how quickly I could kill the durable elementals and naiads and slowly the tide turned, spurred on by a double one on a devastated horde of earth elements.
Unfortunately, the army just didn’t have the strength it needed to munch through the enemy, and with no healing nature ground its way through the brave vermin in both circles until a handful of rodents remained to see out turns five and six. However, despite the decisive victory for Nature the turns leading up to turn five were filled with some fantastically dramatic dice outcomes that saw scorchwings held at bay by successive waivers and mighty elemental one shotted by shock troops, dangling a glimmer of hope ahead of us, not to mention making an incredibly fun game and a great way to end a year of playing rats.
Overall, I believe I finished eleventh, but most importantly had a great day playing some fantastic games with some lovely people. It really is the best way to round off a pretty incredible year of gaming. This is my second year attending the Christmas Shroud of the Reaper event, and I would really recommend it to anyone wanting an event that’s a bit different. Now it’s time to pack the rats up and get on with putting the finishing touches to my halfings as it won’t be long until the new moon rises.
Oh, and as to whether I should have Scudded or not… with the benefit of hindsight I can say I probably should have.
Have a great Christmas and a happy New Year.
By the way, did you know you can pop your email address below and subscribe so you won’t miss out on any future posts.
Over the last couple of weeks I’ve played another couple of games with the dogs of Kings of War, and there’s a theme emerging. In fairness it was present in previous games with similar lists but now it’s really starting to be born out, and I just can’t ignore it anymore.
That theme is nerve. It’s something I hadn’t given a huge amount of concern to, the lack of crushing strength and Banechant in the army just seemed more of an issue. In addition to this I was hoping recruiting a fifth regiment of Juggers would sort of address the nerve situation by having more hard-hitting units to throw into the enemy. The hope being that if one was wavered there would be enough to pick up the slack. In my first game, against Kingdoms of Men, this sort of worked, however because there was no real shooting in my opponent’s force the irritating wavers generally occurred in combat, which is immeasurably more useful when the units are locking opponents in place to receive flank charges in the following turn. Consequently, the waver issue was more than made up for by the resulting carnage of the flank charges.
Cavalry hordes just look awesome. Fact.
Despite this I decided to try something a little different for the next game, against the wonderful Steve Hil. On a whim I decided to give a Jugger horde a go. Partly this was serendipity and partly I think concerns about nerves were starting to get under my skin. I’m not going to say too much about the game because it’s been recorded for a future Death By Dragons release (I figured it was only fair following the great Twilight Kin debacle of Clash 2021 {and yes there is a tournament report of it on DBD} where my rats had an absolute field day, that in our next meeting I let him pit the army he’d been playing all this year against a list I’m still very much testing out).
So once again I found myself facing a Kingdoms of Men list. This list presented more direct challenges to mine in the form of a pike horde (phalanx and ensnare) and a reasonable amount of shooting. This absolutely put the cats amongst the flying aralezes. From the first turn shooting resulted in wavers cropping up amongst my troops, and then there was the small matter of a redeployable pike horde that was effectively invincible to most of my army.
All in all, it turned out to be a massively enjoyable game with the takeaways being that nerve is definitely a problem, and I think I need some shooting to deal with ensnare, phalanx and other shooting! So, with that in mind the list moves on… the horde will remain (although I’m really not sure what to do with it, it looks mega), I will be dropping one of the jugger regiments, and I’ll be putting some forest troll gunners in their place.
Now I just need to get it all painted.
I think the gunners will compliment the list quite nicely as their pathfinder makes them pretty mobile, whilst their regeneration will hopefully mean they stick around for a while. A bit of crushing strength will also not go amiss! The aim will be to field this army at the New Moon tournament in Bristol on 4th of January 2025. There’s a fair bit of painting to be done and no more test games as it’s back to the rats for a bit.
Now for the dice
With the first couple of games under my belt I’m finding myself considering the dice in two distinct ways. The first is the actual mechanic, by this I mean the rolling of the dice, the points accrued and that the abilities can happen anywhere on the table. The second is the abilities themselves.
My position going into this is that Kings of War does need a new rules avenue to explore. Over third edition we’ve seen more and more auras applied to the armies and I think there’s only so far this can be taken, and we must be pretty near to the edge of it. I want to see another way that armies can be differentiated, so the arrival of command dice are welcome if only because they indicate a new direction of travel for force development.
Having played with them I think the mechanism is pretty unobtrusive and really easy to get to grips with. I know there are concerns that this could introduce more complexity, but I don’t think the current format does – roll dice, count points, spend points. In that respect I think it’s very Kings of War. Furthermore, the decision to not tie the use of a command to a character, e.g. a unit must be within six inches of a hero to use the command, makes them distinct from an aura and adds to the simplicity. As a Ratkin and Halfling player the last thing I really want are more bubbles that need to be considered to make my armies work. So, on that basis I’m really happy with the general mechanic, it’s quick and easy to get your head around.
However, as with all things, balance is key, and this is where I have slightly more than mild concerns. As has been discussed quite widely, there are some value issues with some of the abilities, and I would go as far as to say these might be as much to do with the general commands (depending on the army using them) as the faction specific ones. My first game against Kingdoms of Men saw my Juggers slaughter everything they touched with an extra point of thunderous charge and a strider aura, even the EJ grenadiers reliably grounded defence five fliers. It wasn’t the best experience for the Kingdoms of Men player whose abilities were limited by terrain and had no mitigation in their list.
On the bright side though Endurance saw Lifeleech played far more by the Saucerors as combined with Iron Resolve it meant a unit could potentially heal back up to five wounds per turn. No small feat. I definitely think my second game with Steve was a great example of just how much fun the dice can be. The nature of our armies meant the abilities didn’t enhance anything to a troubling amount (thunderous charge is irrelevant against phalanx and furious charge is very manageable when applied to melee 5 troops), but they absolutely contributed to the game overall, making it massively enjoyable. I will absolutely be playing the dice going forward casually, but I’m not sure I’ll be overly excited about seeing them at tournaments this year. All that being said I’m excited for the future.
Oh yeah, I’ve recently found out a handy subscription widget exists. Pop an email address below, hit the big green button, and you’ll get notified whenever there’s a new blog up. See you soon.