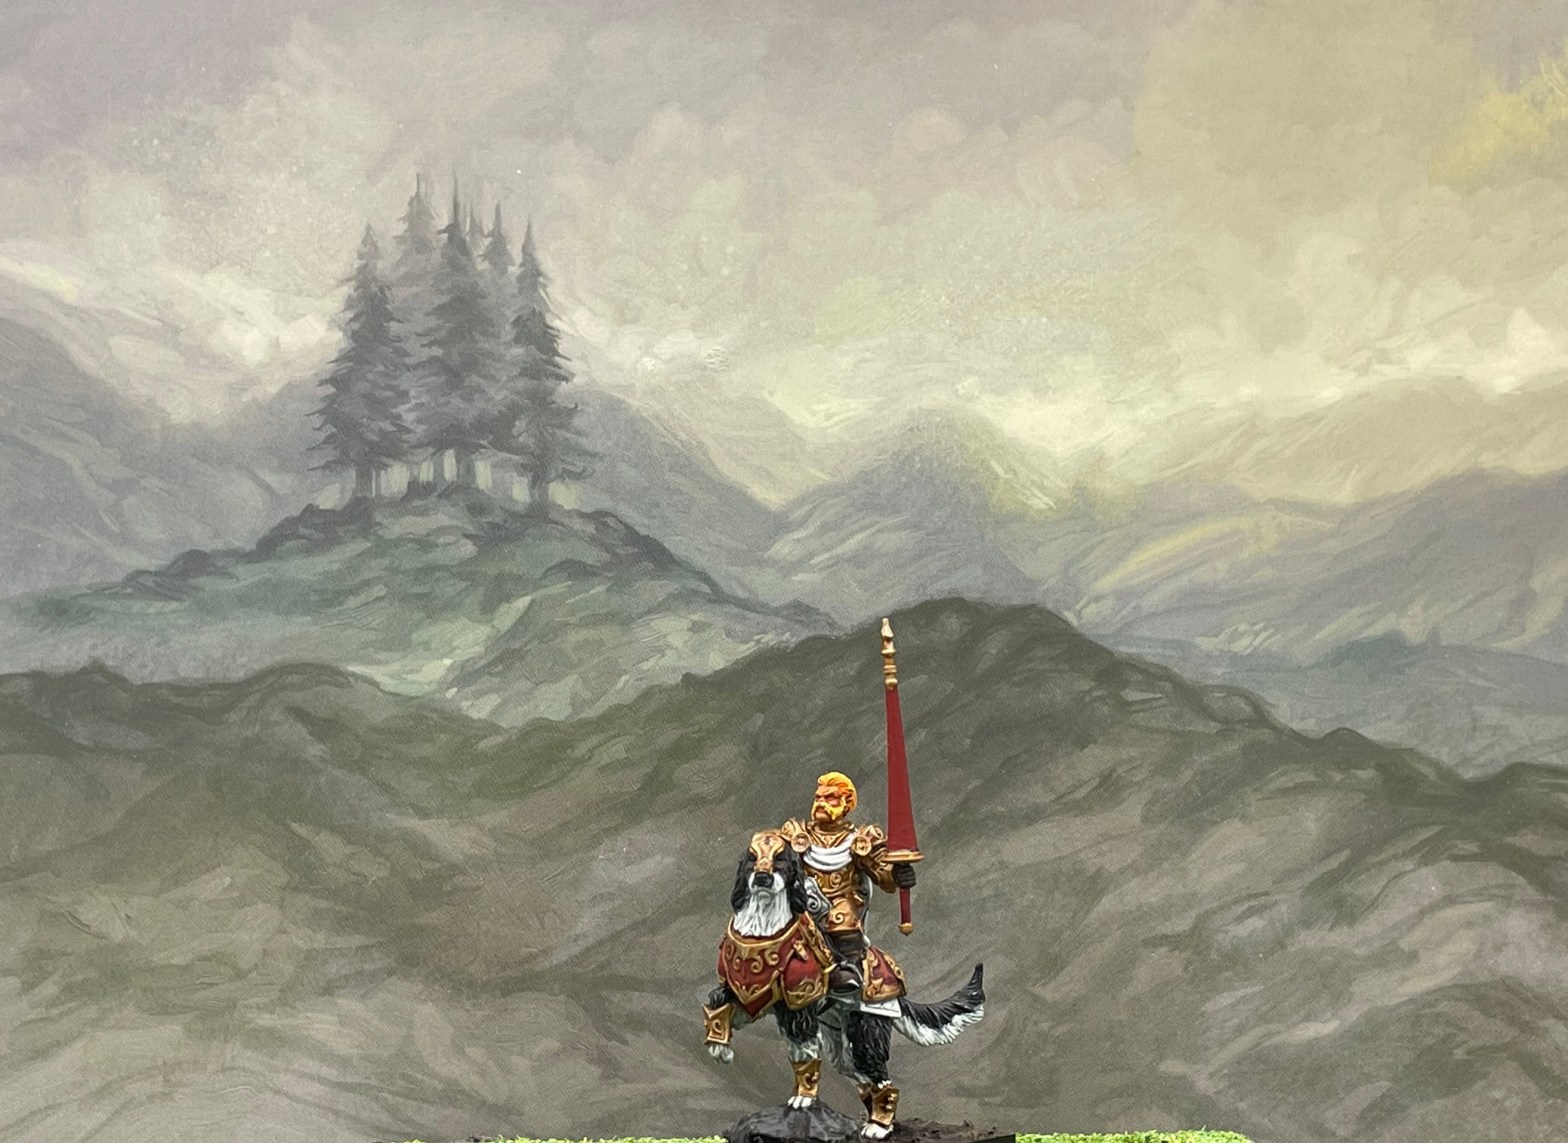
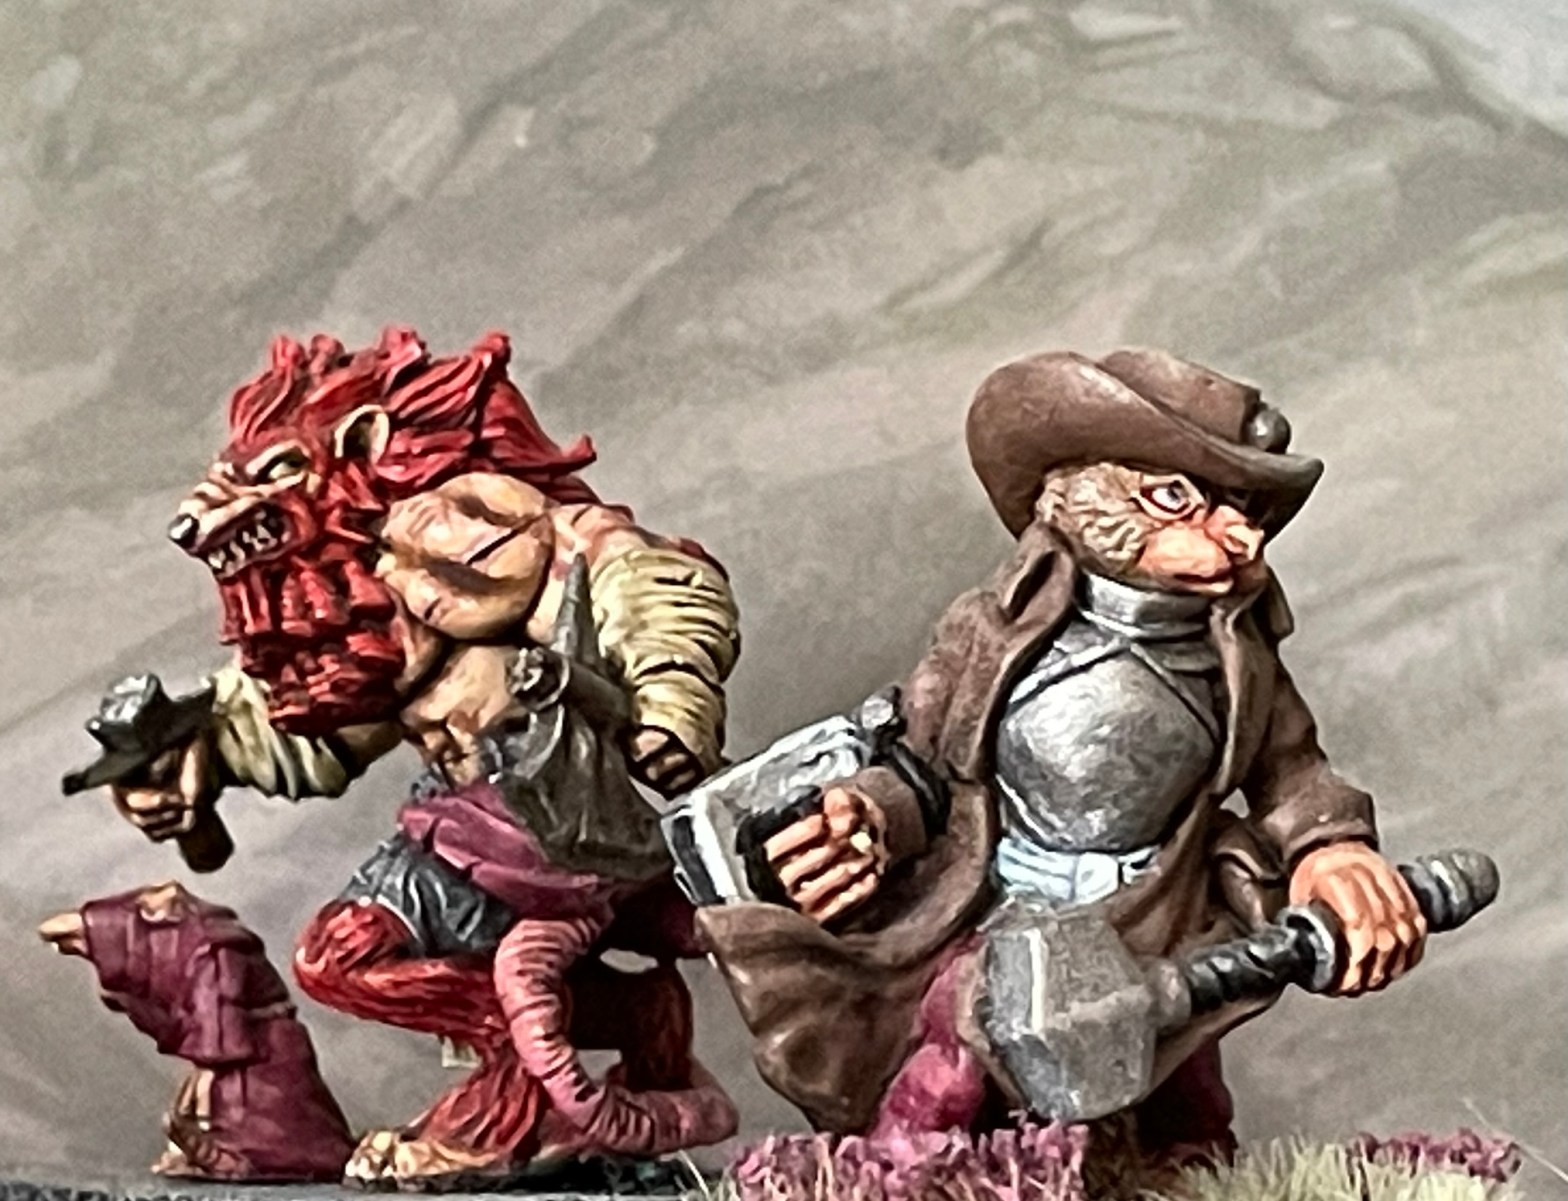
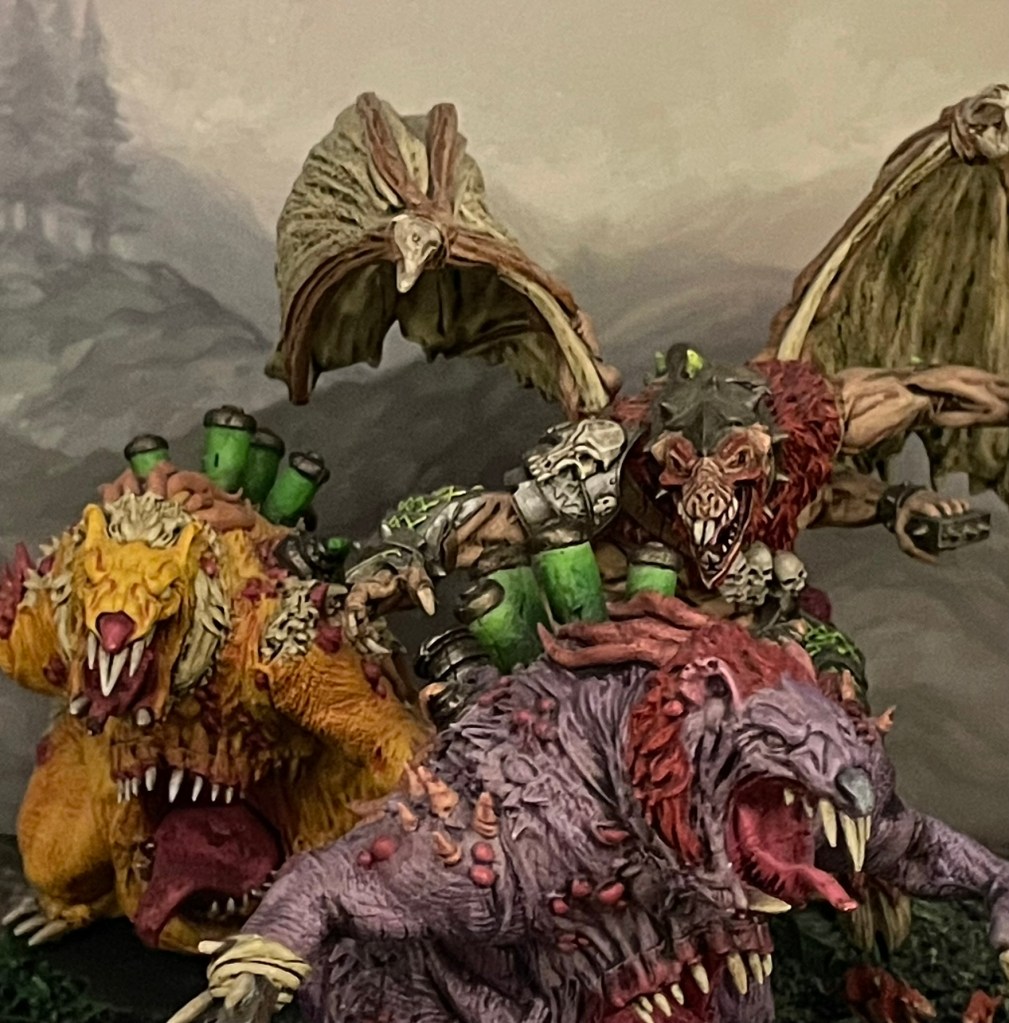
Things are going better than expected! With the exception of the trolls, I’ve now decided to go full model count on all my bases. Admittedly the Iron Beasts were already there, and I’ve now managed to complete the Braves (and there’s still enough space for one more plucky little dude), Wild Lancers and one regiment of Juggers. I’ve just got four Jugger models left to finish for a second regiment.
Ambition has been spurred, and I have even bigger dreams for what I can achieve in my dwindling time. I’m hoping to put together an alternative command crew for the Pride of the Shires that will make the army 100% Mantic, but that’s really dependent on when the models get printed and it won’t be the end of the world if they don’t arrive in time. A random visit to a charity shop also turned up a very cheap and appropriately sized picture frame, which means I’m suddenly trying to squeeze in a basic display board as well. This project has definitely grown wings, and I’m quite excited about it.
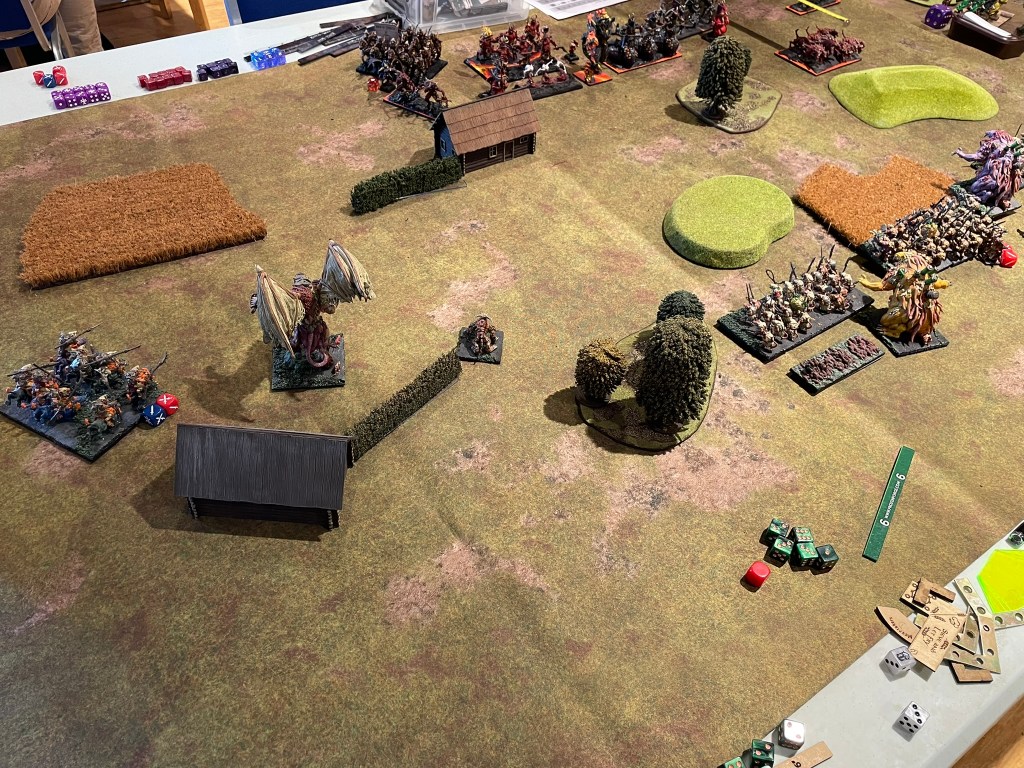
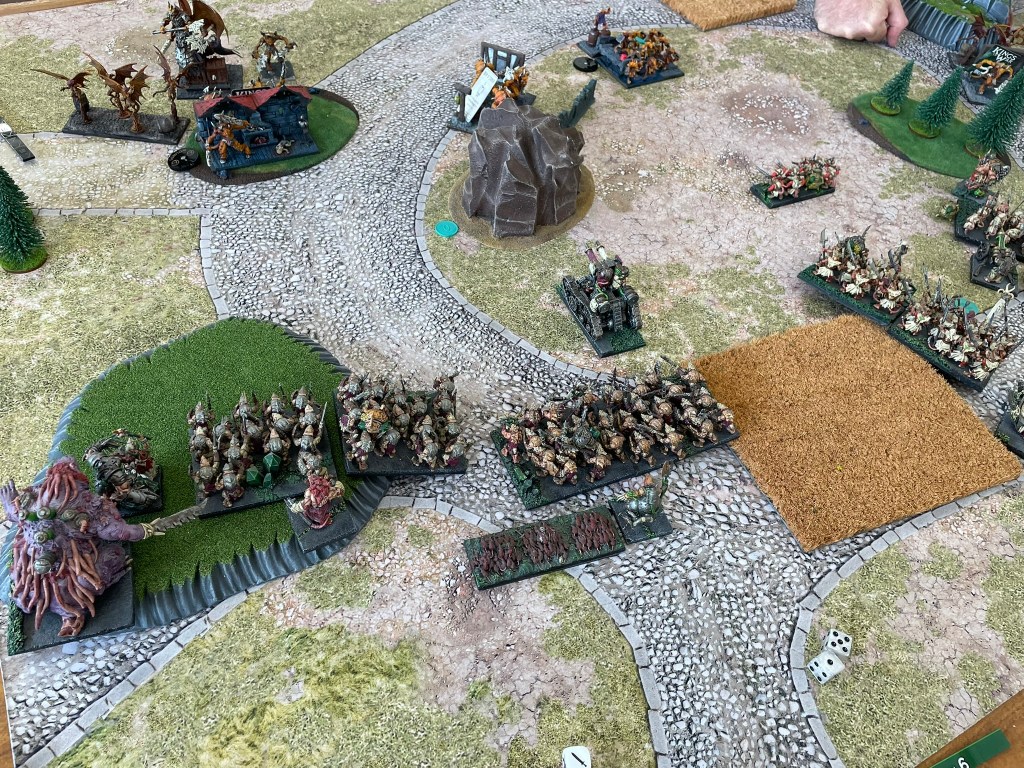
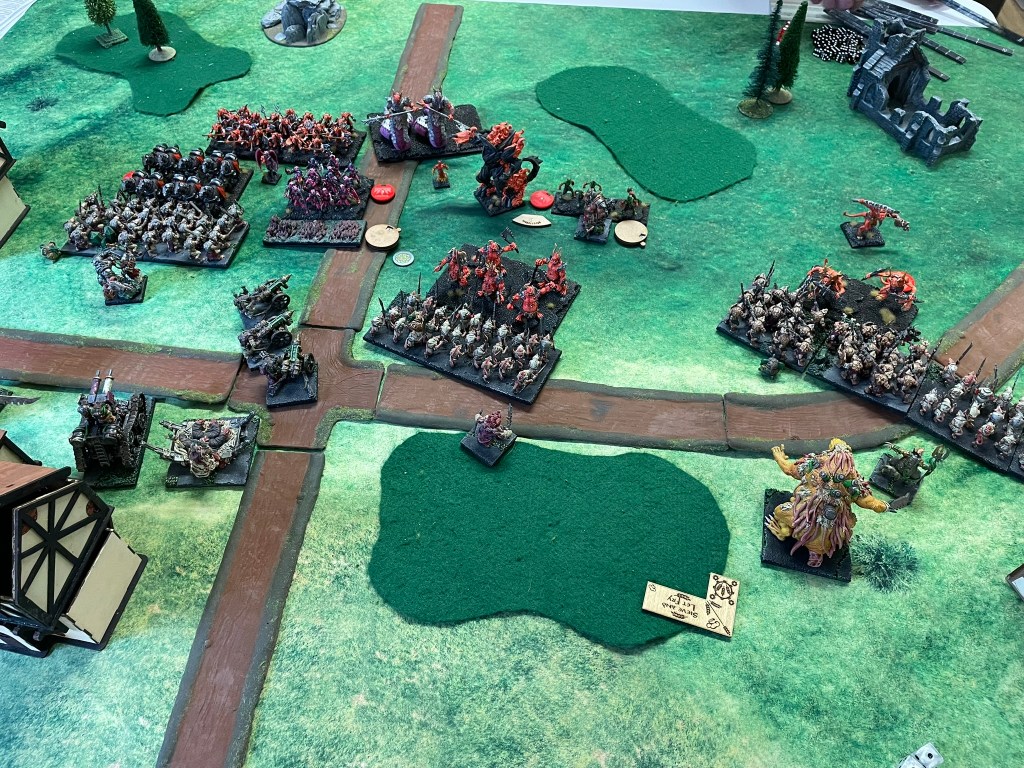
Whilst things are going pretty well on the hobby table, I’ve also been able to fit in a couple of practice games. On Sunday I faced off against a particularly punchy Trident Realms force with loads of toads, a couple of frogs and some absolutely beautiful titans. We played the Raze scenario, which was a great change of pace as I’ve played it for ages.
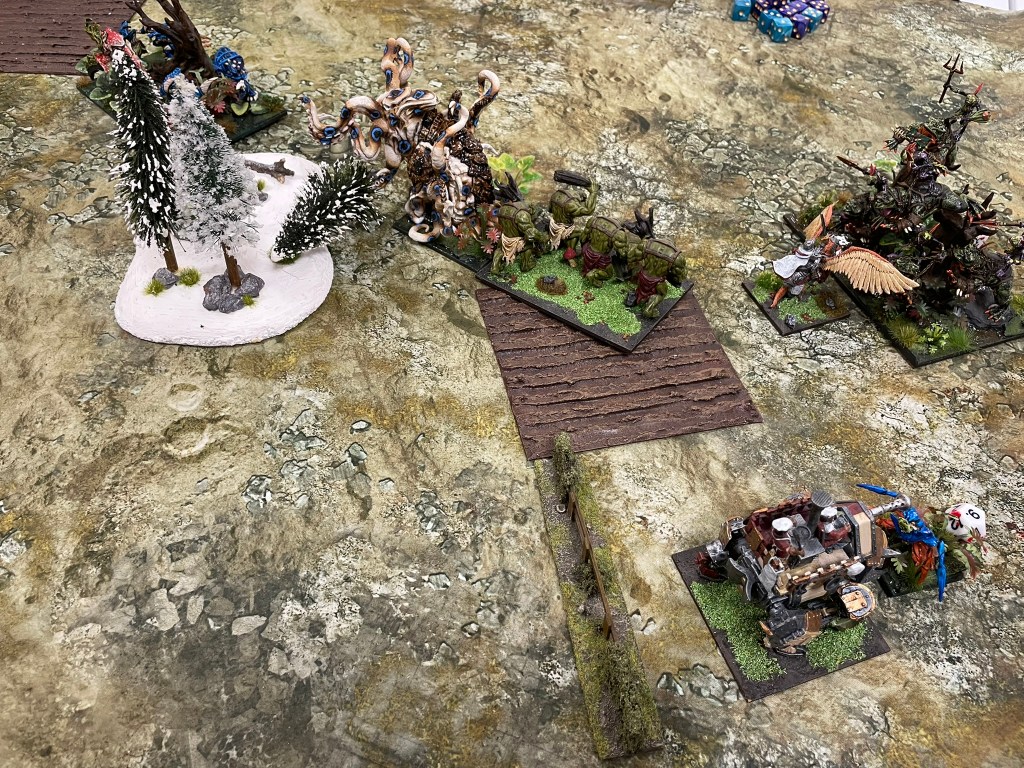
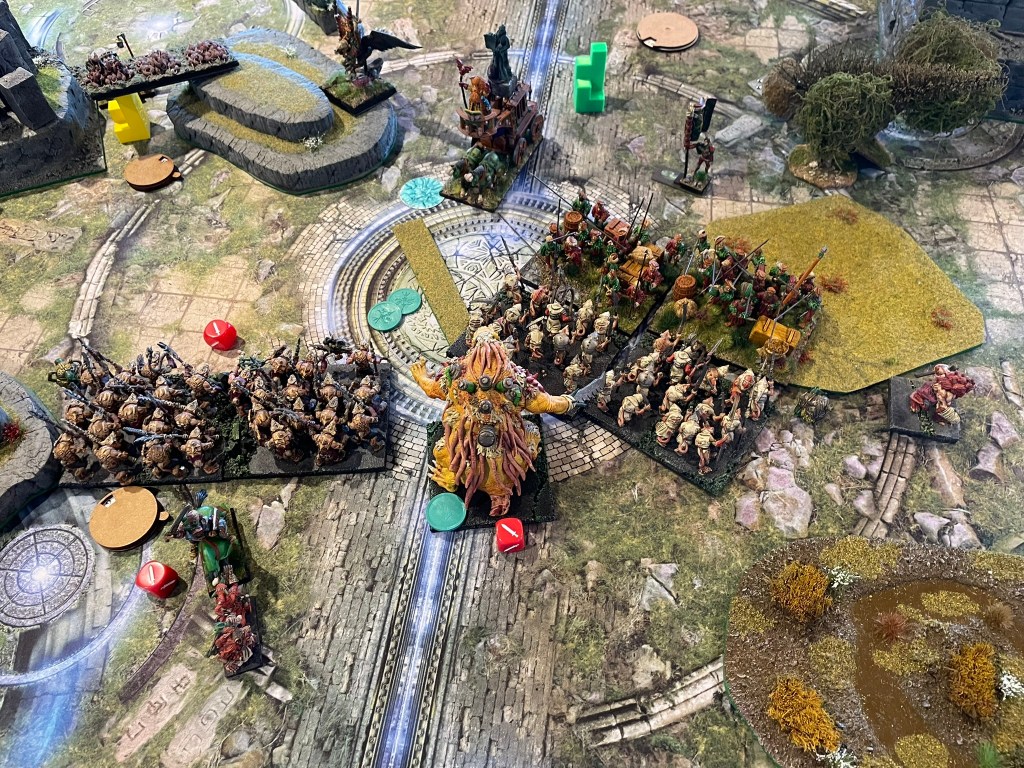
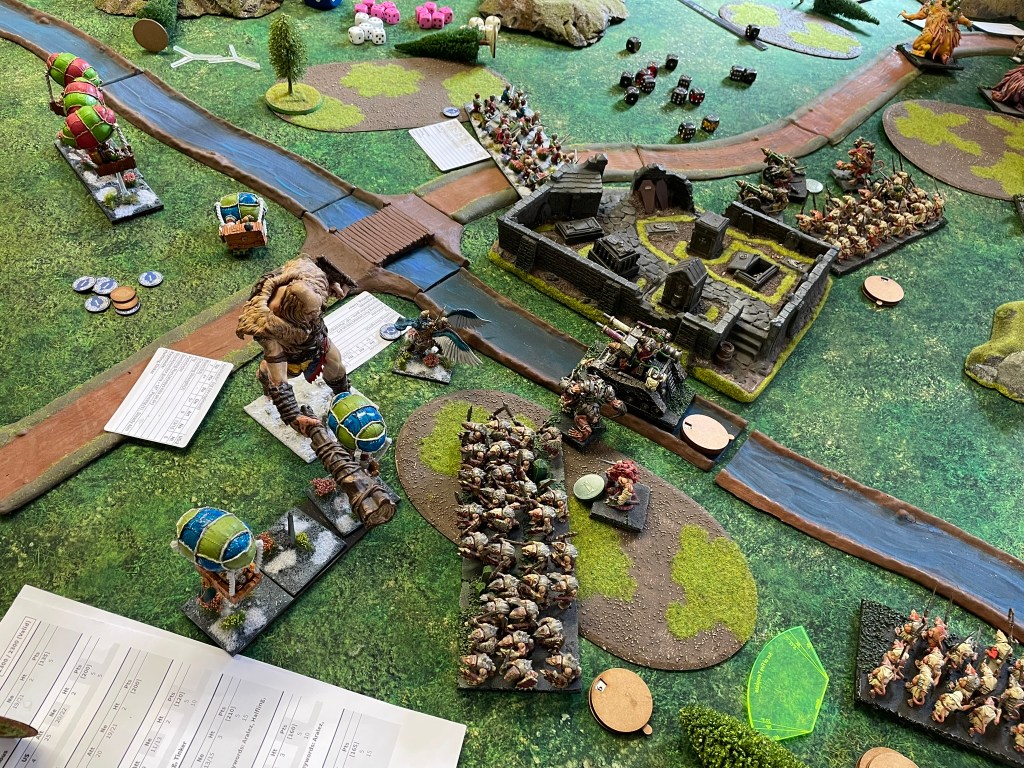
There were plenty of standout moments. In particular the Troll Gunnery Captain played a pretty pivotal role. His shooting contributed to a turn one waiver of the Coral Giant, the giant shrimp thing in the pictures below, and he managed to keep a toad mounted champion grounded for a couple of turns. All in all, he proved useful, but I’m not sure I’m quite getting the most out of him at the moment (six games on the trot next weekend should fix that though).
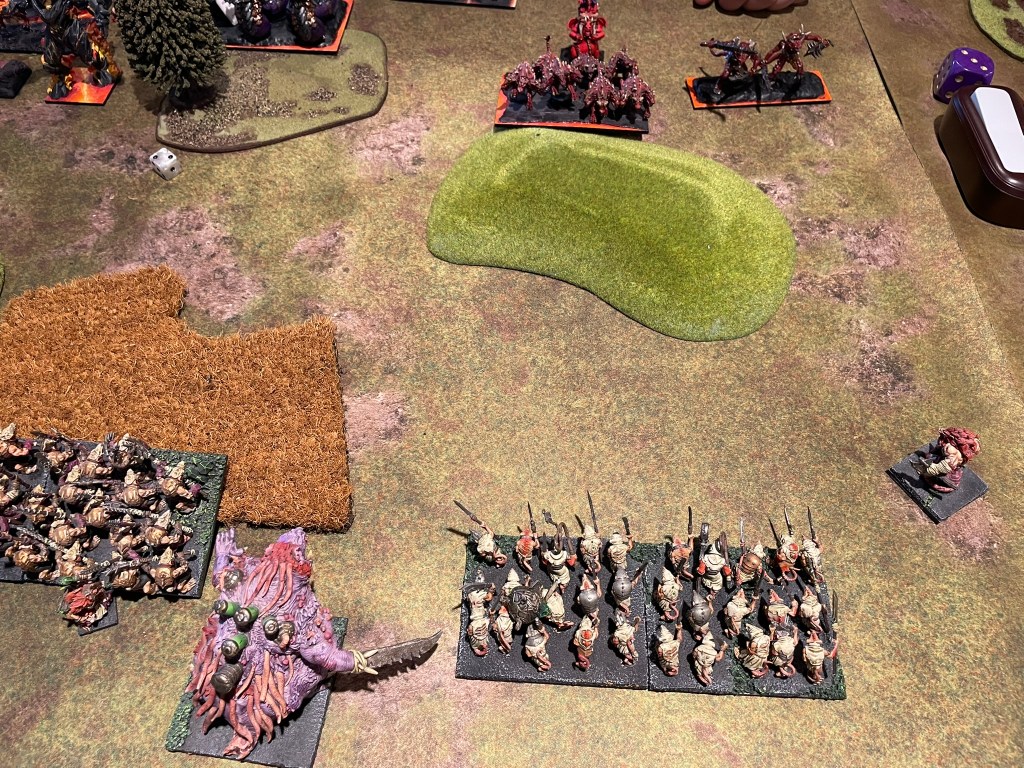
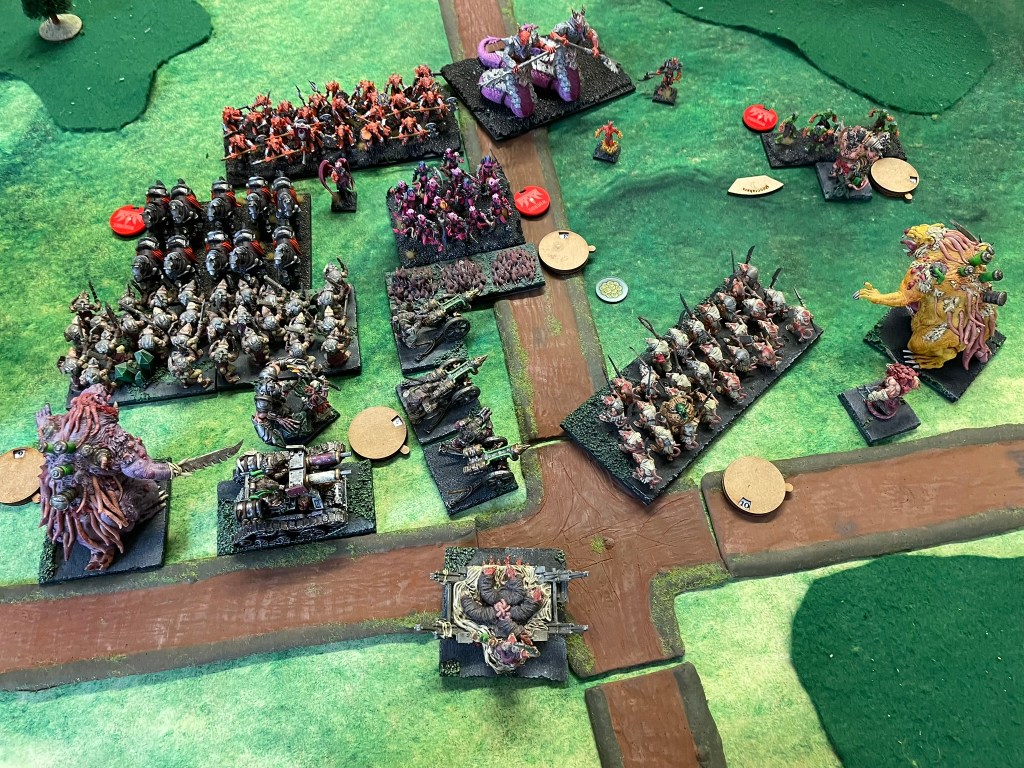
I think it’s fair to say the poor coral giant certainly didn’t have the best game, following up the first round waiver with a round of combat that would have been worthy of a sleeping regiment of goblins. Given the opportunity of stomping all over an injured Greedyguts and then being able to trash a regiment of grenadiers, all in the same turn the poor creature manged to roll a double one for extra attacks and then proceed to miss with all of them except one. Greedyguts shrugged off the damage and held the giant in place giving the troll captain, Juggers and The Pride of the Shires a flank charge which polished off the hapless creature.
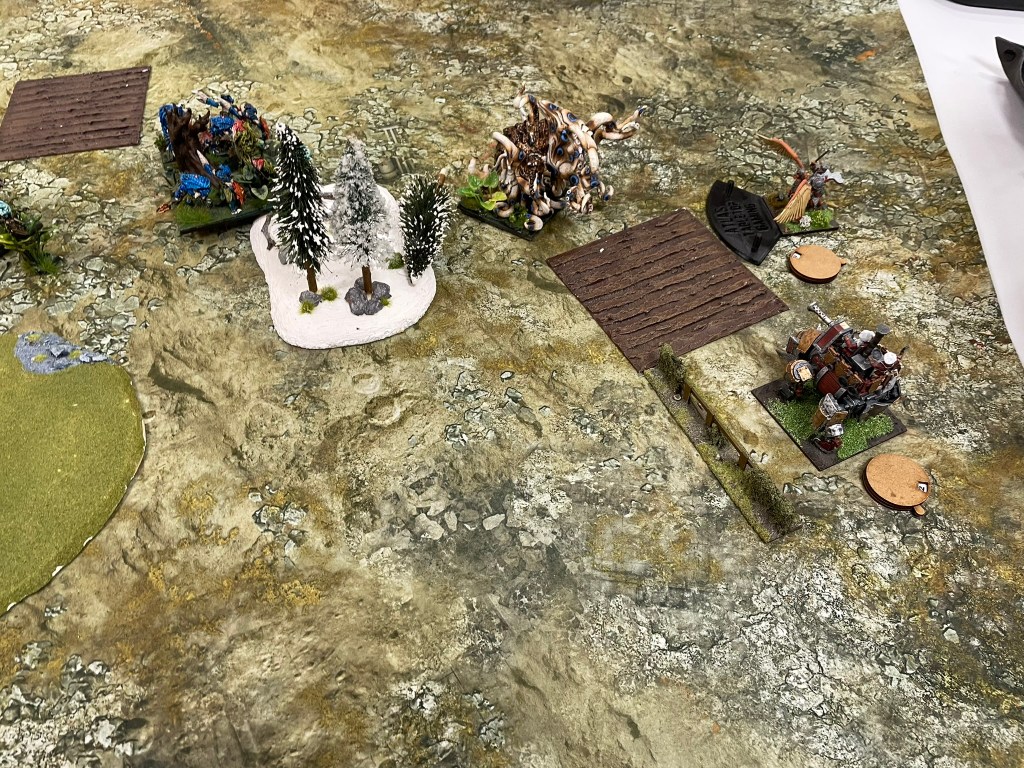
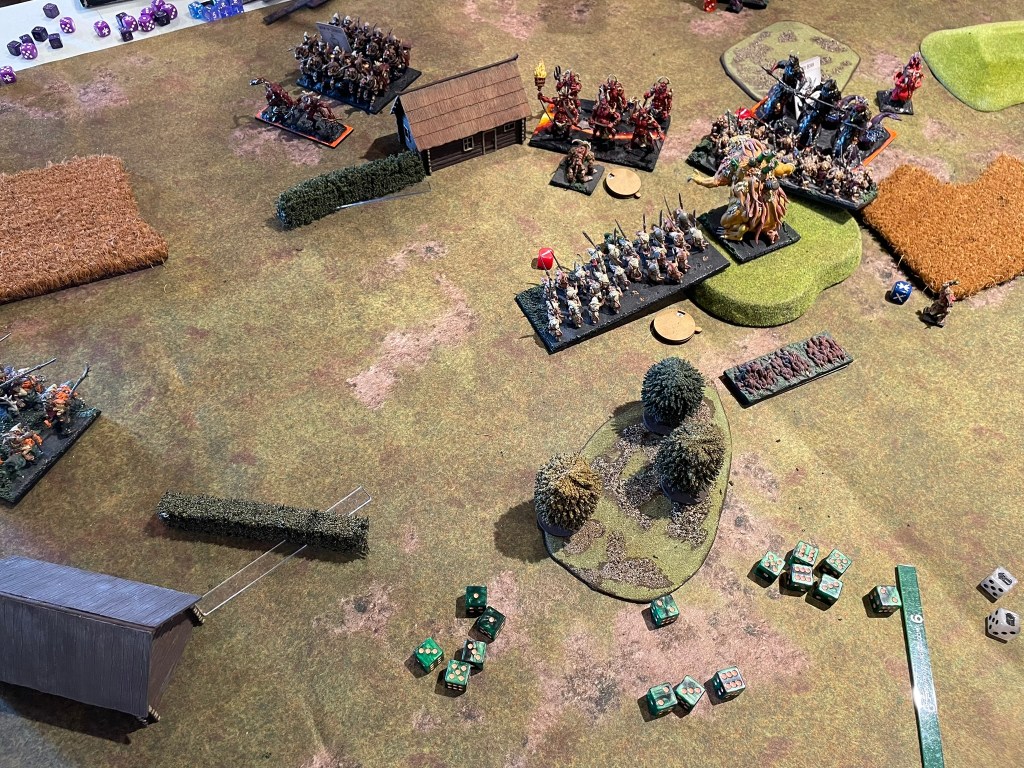
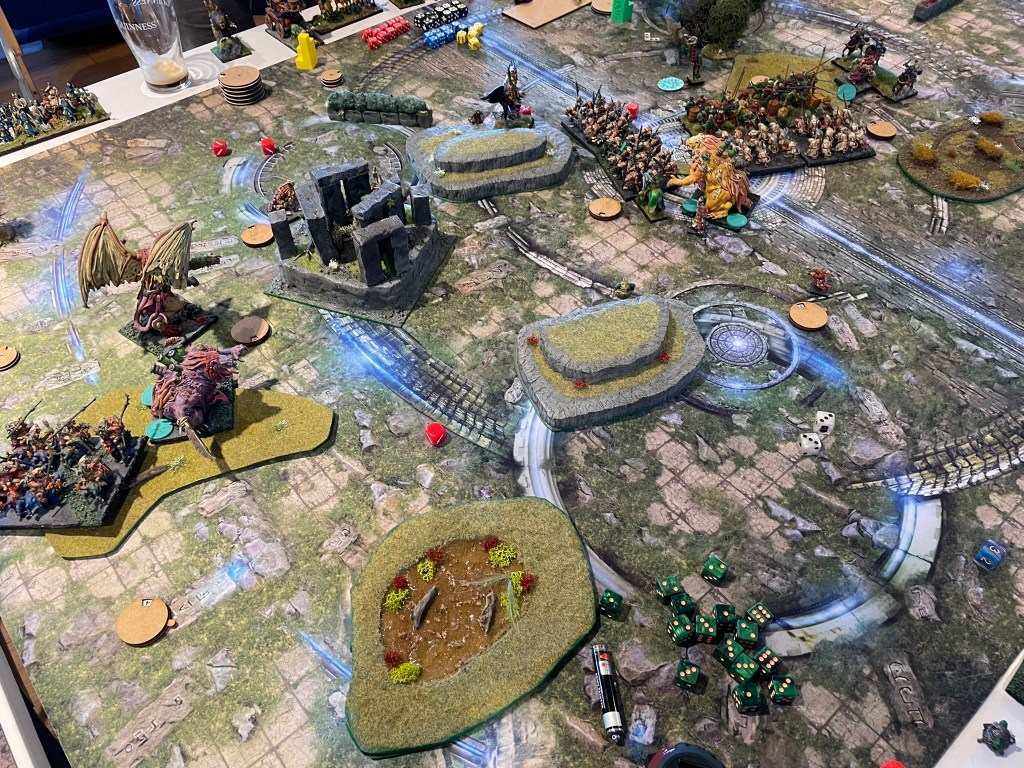
Not everything went the Halflings way. A horde of trolls got devoured by a Kraken in the process of securing an objective. Meanwhile the units deployed on the right-hand side of the table got tied up in an extended combat that saw most of them leave the table, denying them the chance to grab an objective carefully guarded by some Gigas.
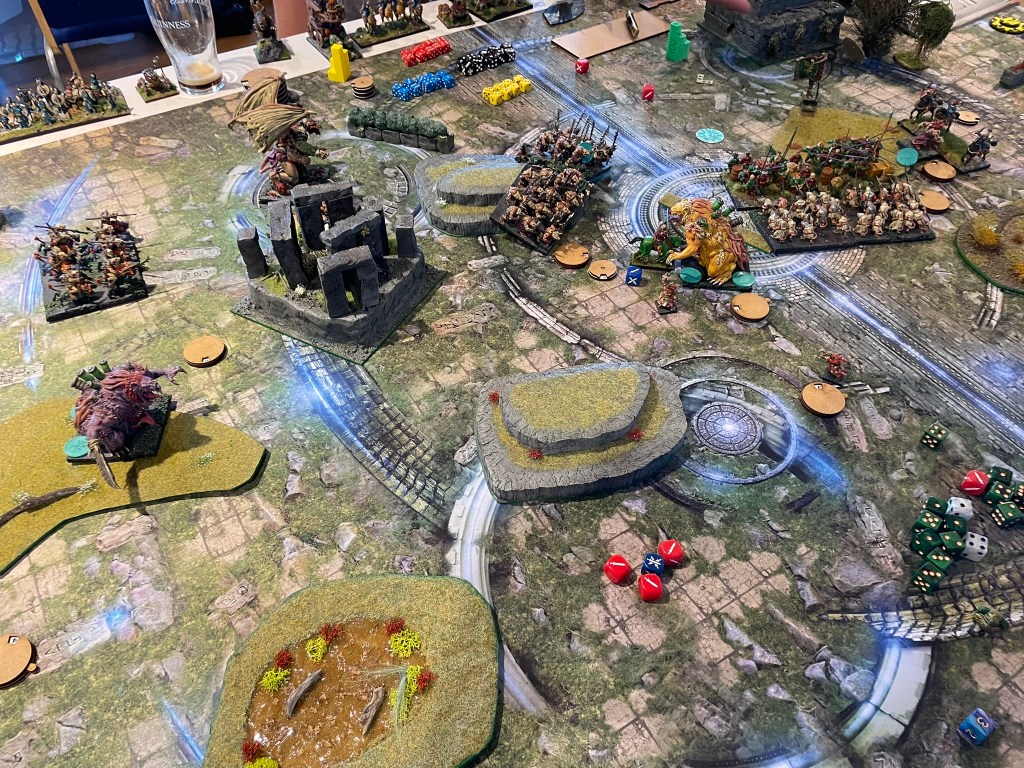
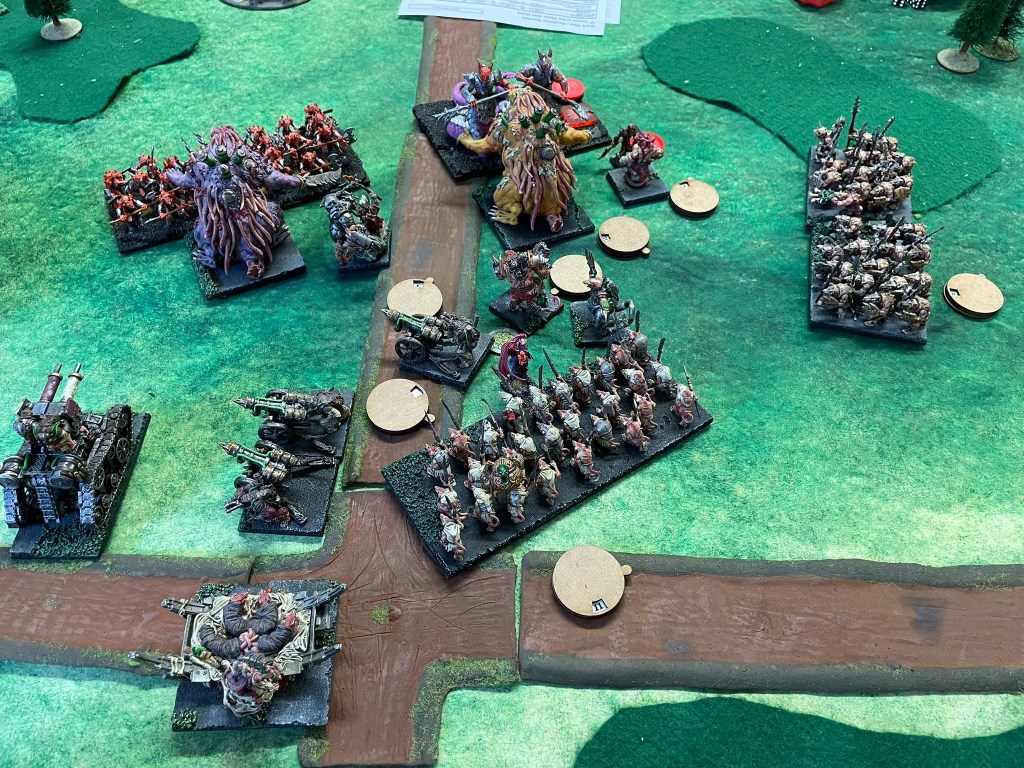
Whilst the Halflings managed to sweep away many of the creatures of the sea the game still came down to a tense final couple of turns as Dambuster toad riders and Gigas valiantly held onto two objectives in the centre. By this stage the Trident Realms had collected three objectives, and the Halflings held two. When the coral giant fractured and collapsed the momentum of the victory crashed into the toad riders sending them running, securing a third objective, but could they take a fourth to win the day.
It would all come down to the roll for turn seven… alas there was to be no victory for the halflings that day and the game ended at the end of turn six, denying the halflings a win and making them share a well fought draw with their opponents. An absolutely great outcome.
With two test games under my belt and a final one this Sunday, I’m rapidly reacquainting myself with the little people and thoroughly enjoying it.
Have a great week.
If you don’t want to miss the next post, drop your email below to subscribe.
Well, the halflings have suddenly become the focus of my very particular set of skills. The poor little people had been happily minding their own business for a few months on a shelf with a great view of the garden, and then I got a ticket for Clash of Kings.
Clash (of Kings) (the event not the book) is an annual gathering of Kings of War players from across the world in Nottingham for a couple of days of games, beer and general toy soldier related excitement. This will be my third time attending, and I’m really looking forward to it. The UK tournament scene is a generally enjoyable experience and this event really crystalises the best of it. The event is run by players, rather than Mantic, and is a celebration of a bloody good game.
Although there’s no requirement to take a fully Mantic army, I decided I really want to. Unfortunately, the list that I wanted to take for my rats would have meant painting up 60 infantry models, which really didn’t appeal given I have about three weeks to get everything ready and continue to uphold my end of the deal with reality (I realise I’ll probably come off worse if I don’t). That left Basileans and halflings, and frankly I’m not on talking terms with the Basileans (of course it’s all about me and not them), so the halflings it is. The army is far from finished, but it’s a lot more finished than the rats and I’m currently working out what I can scrape together before the middle of September, and whether I have the time to make a couple of improvements.
Is now a good time to talk about full model count?
I have managed to get a refresher game in with them, and have another two booked in. Happily, they seem to be more fun than I remember, and Greedyguts is just about the best character in the game at the moment from both a performance and entertainment point of view (based on a sample of halfling, rat and Basilean characters). The game was massively enjoyable and I’m now quite excited about my immediate gaming future.
Further on the horizon though is the fabled fourth edition of Kings of War. At the moment it seems you can’t venture into Kings of War Fanatics (the main Facebook group) without someone postulating on what might, or might not, make it into the next evolution of the game, and when it’s going to land. Frankly I’m actually quite happy that there isn’t too much being said about it by Mantic at the moment. It’s giving me a bit of time to catch up on my painting, knowing that now is probably the least useful time to start thinking about my next faction.
I’m really keen to do something with knights, that isn’t Basileans, although the Basilean adjacent Brothermark have always appealed to me, and I’ve found myself becoming increasingly Rhordian curious. As a result, the spectre of fourth has banished any motivation to start on either of these factions as I simply have no idea what they will look like, which is giving me the head space to get on with the halflings.
And in case anyone is interested about what I want from fourth, I have no greater wish than they simply improve on what we already have. It’s a great game and most importantly the halflings wear boots (this above anything else makes them a playable army in my book).
Have a great week.
If you don’t want to miss the next post, drop your email below to subscribe.
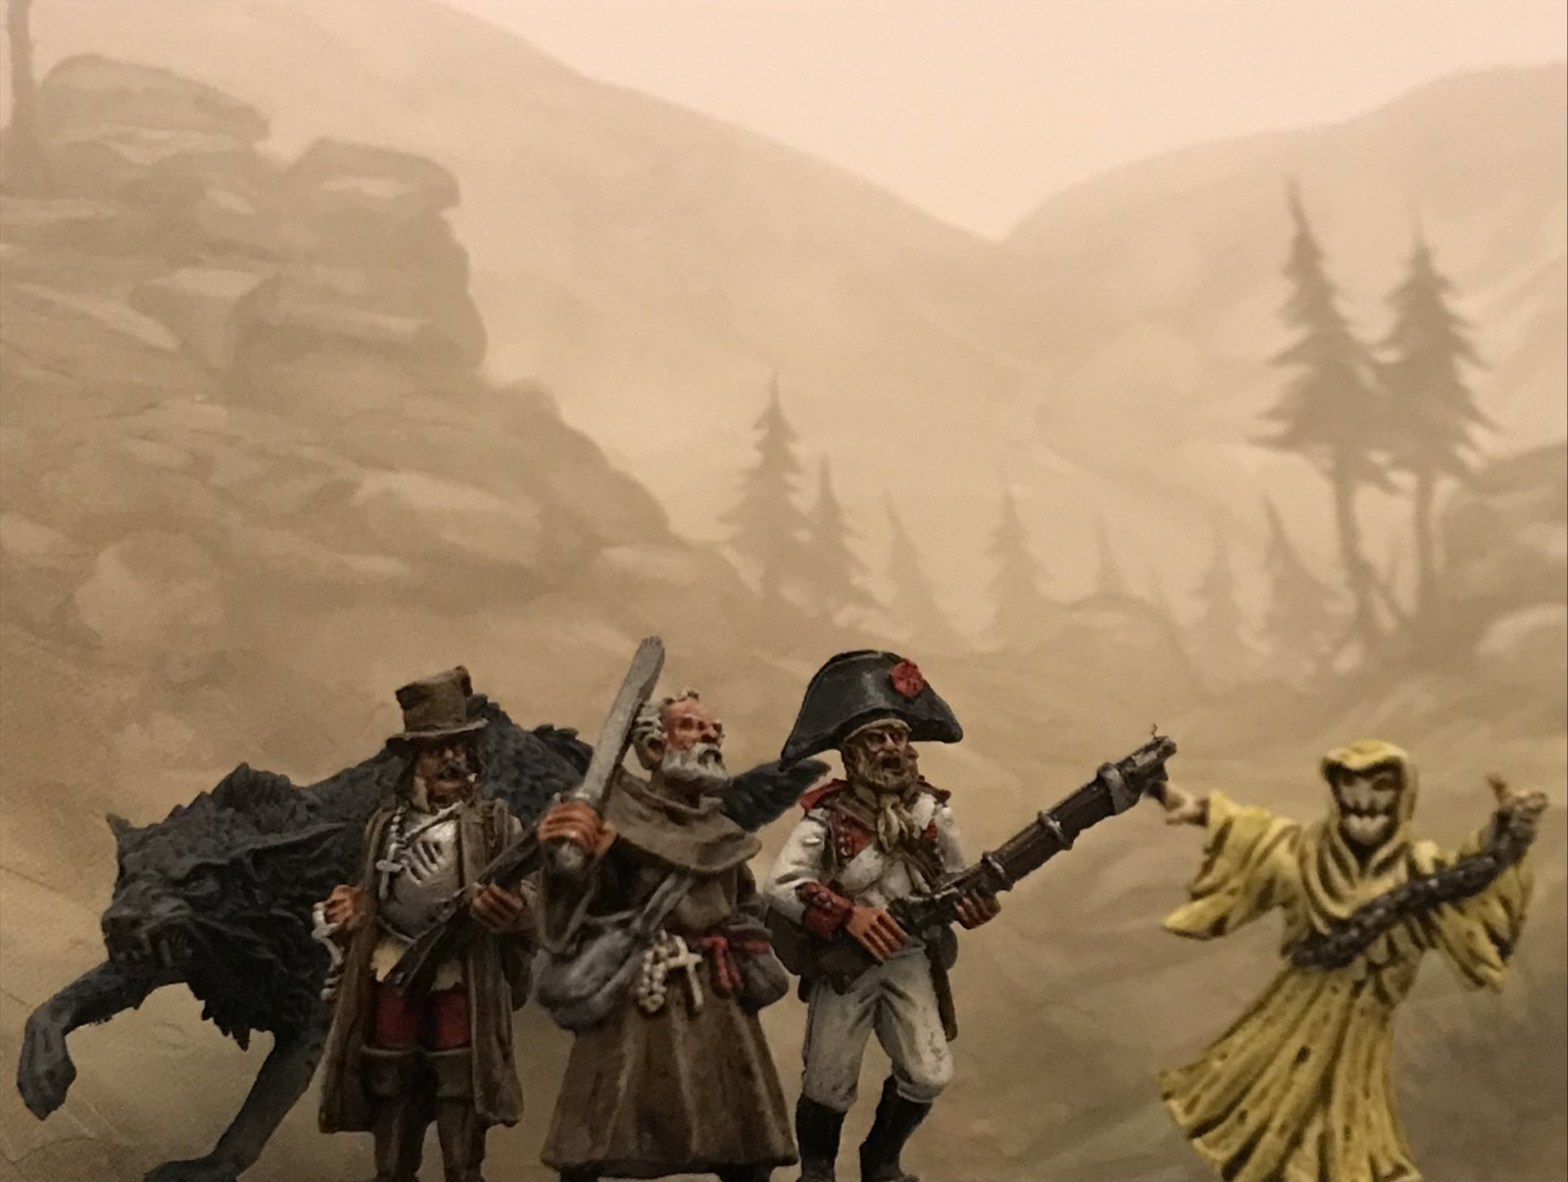
Despite the translucent moon’s presence, the thick golden light of the evening coated the sky. Sweat continued to roll down the back of Isobel’s neck and soak into the course black shawl that protected her shoulders from the Spanish sun and the glare of God. She stared across the dusty field towards the house at the centre of the small village. In the relative cool of the evening the villagers had started to stir, doors and wooden window shutters that had kept the heat out during the day were now open, except for that house.
Its walls were crumbling, although in fairness it looked in no worse repair than any other property in the small town. Only the closed shutters and a slight shiver that rolled through her body when she looked at the building told Isobel that the mishappened hobgoblin was there. Her hands went through the motions of loading her musket as she silently mouthed the Our Father, her faith as important to her as the weapon she raised to her cheek.
The white uniforms, made grey by the gathering dusk, of the regular infantrymen who accompanied the wholly irregular company, were moving forward cutting men shaped silhouettes in the orange gold streaks of the waning light. A sapper moved further ahead, lowering his great axe to poke gently at a pile of something just beyond a distance where Isobel could make out what it might be. An instant later she watched the massive hulk of a man recoil in clearly telegraphed disgust. Three months ago, when she had been press ganged into the company, she had believed the scarred veterans who made up the unit simply didn’t have the cojones for their work when she had first seen them turn their faces from the horrors they faced. She now understood there were things that a God-fearing human would never get used to… should never get used to… should never have to see in the first place.
As the sapper recovered his composure and pushed again at the thing that lay in front of him two shots rang out. They came from the other side of the field. Isobel watched as the sapper went to ground, she prayed of his own volition. Crouched behind an olive tree she allowed a short breath to escape as she felt her heart skip a beat. She steadied her musket, scanning the field to the left of the house. In the failing light it was not possible to make out where the shots had come from, let alone who, or what, had fired them.
It’s been a busy week, but amidst the chaos I’ve been trying to build some good habits and find a bit of time everyday to get a bit of painting in and a bit of reading.
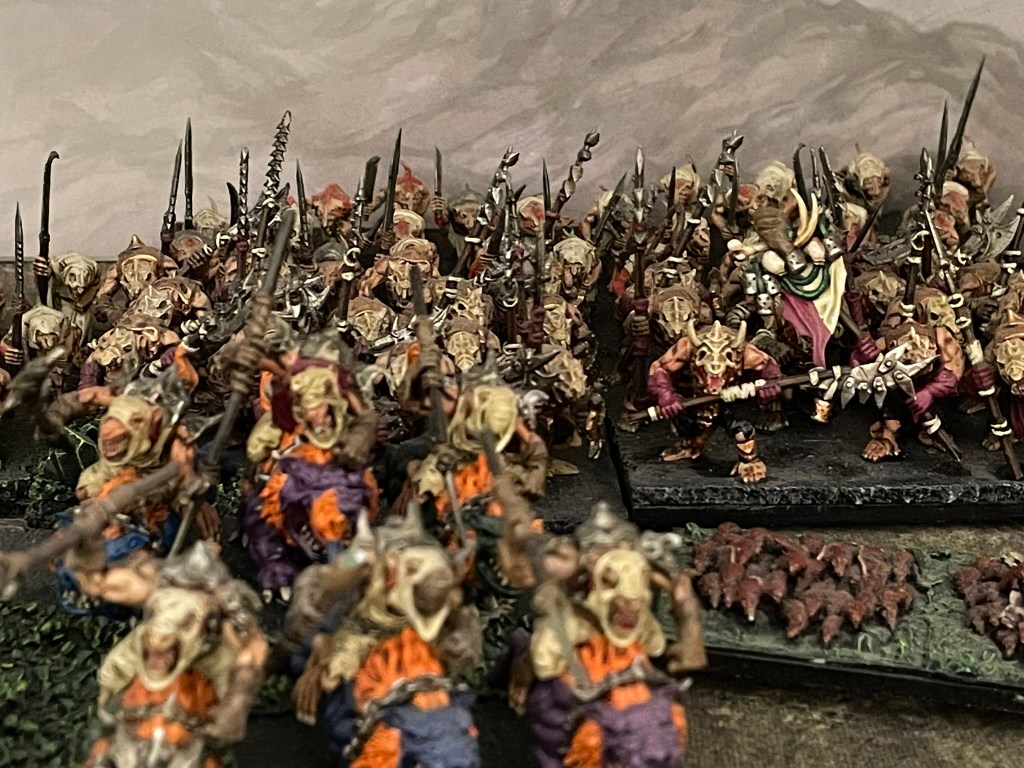
For the last year I’ve been using quite a few spear rats in my games of Kings of War. My hordes have been made up of GW models, which in itself isn’t a bad thing, but all the travelling has been taking its toll on these delicate rodents. Spears and models have been breaking all over the place.
You can say what you want about Mantic models, but something I love about them is their durability. I painted up my Shock Troop and warrior horde over four years ago. They’ve travelled with me to virtually every event I’ve been to during that time, and they are still going strong, with minimal damage. So, as my spear troops have become a bit of an auto-include I’ve been busily painting up Mantic spear rats and I’m happy to report the first horde is ready to go.
Durability hasn’t been the only motivation. I’m also off to a small one-day tournament at Mantic HQ tomorrow, so I wanted to field a fully Mantic army. There’s no requirement to, but it feels fitting. Because of the Mantic only decision, the list has become a bit of a “one of everything list” as I still have some GW units in the infantry heavy lists I’ve been fielding recently, but I’m planning on fixing that, hopefully in time for November.
In between rats I’ve been trying to commit to reading ten pages of Burrows and Badgers every night. I’ve been intrigued by the second edition and I’m now getting more of a feeling for it. I have to admit, I’m quite excited about the prospect of getting a campaign together. In the couple of years running up to the new addition there were loads of cool new factions, rules and ideas in the journals, some more balanced than others. These made for some really fun games, although it sometimes felt there was a lot to get your head around.
So far, the changes I’m seeing look really positive, and seem to give even more opportunities to personalise warbands, whilst allowing space for more non-combat activity. Once I’ve read through everything I’m definitely going to be getting some miniatures out for a game, I like the idea of my Witch Hunters taking on an Arcane Conclave on the moors or chasing them through city streets.
Quite apart from a sense of profound oh-my-god-wow-ness, having a badger amble across a country lane a couple of metres in front of me this morning whilst walking the dog, seems like a sign I need to pull my finger out.
Don’t want to miss a post? Drop your email below to subscribe.
On Saturday, 12th July, I packed up the rats and headed off to a very sunny Oxford for the Hodenburg Hoedown. This is the fourth annual instalment of Si Brand’s highly enjoyable Pride of the Shires events. Happily, they’d managed to find a few fans, which after a relaxed second breakfast managed to keep the worst of the day’s heat at bay.
For this event, I was taking a list based on my second edition tournament roster, tweaked for third edition with an extra command dice thrown in for good measure. The exact details of the event tend to vary from year to year with different points values and/or special characters. What remains the same are round based table maps, so everyone is playing with the same scenery set up and a rather novel way of picking scenarios which means players get a choice of three in each round.
Unfortunately, I didn’t read the pack properly and didn’t notice there was a special character until after I’d submitted my list. All that meant I didn’t have time to paint up a model that would have been perfect for the Beatmaster. More than that though the Beatmaster provided the army with an additional blue command dice which meant I wouldn’t have bothered with the extra dice I’d paid points for in my list, although as I quite like the Ratkin command abilities I certainly wasn’t unhappy about it.
Game 1 vs Forces of the Abyss, Hold the Line
The first game was against the Forces of the Abyss. Hold the Line is not my favourite scenario and it’s one I’ve found myself having a few challenges with at recent events. Happily, though, I knew I was going to have a relaxing game because I was facing off against a player who I had played the year before. It had been a very laid-back game and we both timed out around turn four. So, the mission, as far as I was concerned for game one was to simply play a full game.
The Abyssals set up with a refused flank going from the centre to my right flank. I decided because I had a few fast units, which I hadn’t played with for a while, that I would spread myself across the whole table putting Scud, the Night Terror and the Hackpaws on the far left with the rest of the army spread from the centre through to the right flank.
I was a little bit worried about the aggressive units that were on either end of the Abyssal line. There was a berserker regiment at each end of the army with Abyssal horsemen supporting the centre and on the right-hand side he had Hellhounds. These units could easily chew through my flanks if given the chance. For that reason, I held my right flank back and pushed my left flank forward as far as I could without giving any charges to the Berserkers or Abyssal horseman and let my centre creep very slowly forward. The demons pushed forward more aggressively in the centre, which you’d kind of expect them to do, and inadvertently opened up an opportunity that allowed me to get Scud and the Night Terror into a warlock in the centre of the table. Smashing the evil sorcerer to a pulp allowed Scud to reform to a position where he would be able to jump into the back lines of the demons and start causing problems. Which he duly did.
In the next turn he took down a troop of gargoyles before turning to face back over to the right flank. And at that point I started to feel a little bit more comfortable about winning on the right. That being said, the demons weren’t going to make things easy for me. The seductress was able to charge Scud and started knocking wounds off him, but because of the positioning, the rat demon was still able to charge the Hellhounds.
In the centre, Chroneas and the Tortured souls went into the into the spear rat horde but didn’t really do very much. That set up a flank charge on Chroneas with the Shock troops and let a Mutant Rat Fiend and the spear horde take care of the Tortured souls. This really opened up the centre and meant that the Molochs and the Nagarri got pulled into the melee that was starting to erupt there. By about turn 4 Scud had managed to remove the Hellhounds from the right flank, and with the exception of one minor moment of discomfort where I realised that I had given a flank charge on a Mutant Rat Fiend to Berserkers and a rear charge to Zaz’u’uszu. Fortunately, the demon dice underperformed, and the Mutant Rat Fiend managed to survive, killing the Berserkers in the next round.
By turn 5 the rats had full control of the centre of the board and full control of the right flank, only the left flank was still to be contested. For most of the game the Hackpaws had managed to keep the Berserkers and Abyssal horseman back. But in the dying rounds, the Berserkers managed to get into rat riders, drive them to ground and move forward to claim the flank, giving the rats their first win of the day.
Game 2 vs The League of Rhordia, Stockpile
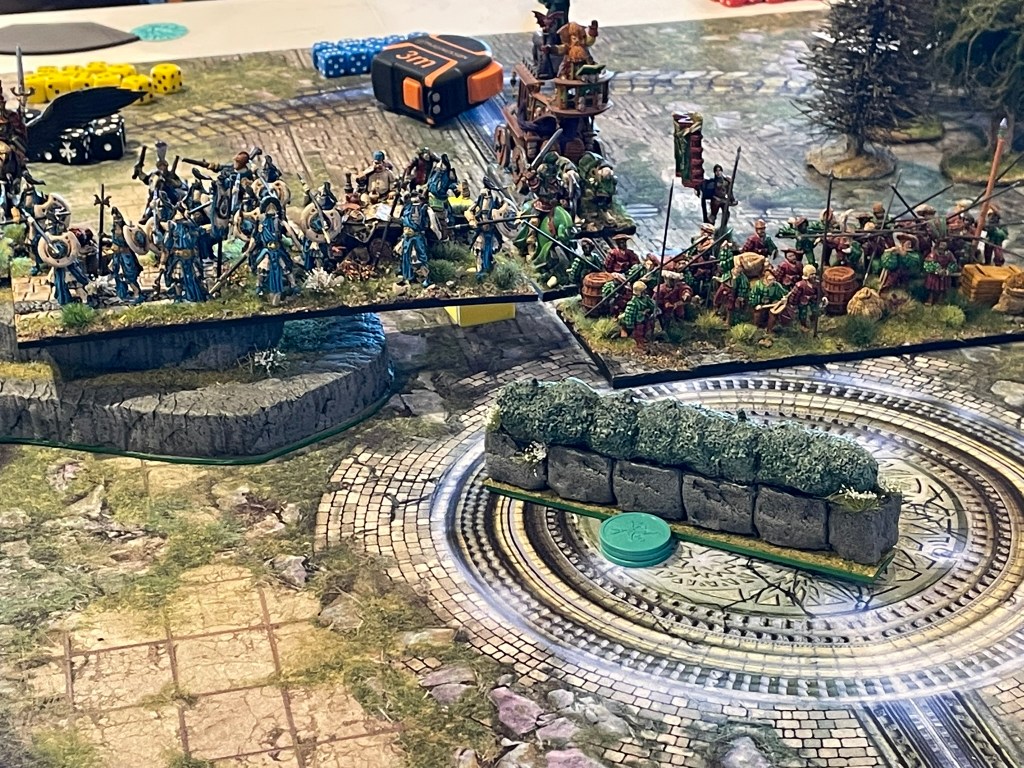
I haven’t played against Rhordia for a while and thought this would be an interesting matchup because there are some similarities between the two factions, such as a liberal use of rally and ensnare. Not only that, but our set ups mirrored each other. Our infantry hordes were placed centrally with our faster units on my left flank.
The amount of shooting in the army made me a bit nervous, so in the first turn I decided to try and dampen it down. I brought Scud over to lightning bolt one of the organ guns, hoping for a cheeky waver, and used Twitch to try and hex the War Shrine. Unfortunately, across the nine dice I rolled to hit none made it above a 3, leaving me with a sense of foreboding. Then, to add insult to injury, the volley gun that I had tried to waver shot back at Scud and managed five wounds on him.
In the centre, I was trying to balance moving forward with also keeping my Shock troops away from too much shooting, which the hill in the centre of the table really helped with. I knew at some point the armies were going to have to engage and frankly, I didn’t fancy my chances against either of the hordes of dogs of war the Rhordians had brought with them. I decided that my best bet was to break through on the left flank. As Scud had taken a fair amount of damage, I decided to just go for it, and charged the rat demon and Night Terror into the Honour guard. The Hackpaws dropped their boots and their plague pots to go into the Mounted scouts.
The rat riders did brilliantly and took the Mounted scouts down, whilst the Night terror and Scud outperformed all expectations and wiped out the Honour guard in one round. All looked like it was going smoothly until the Knights managed to waver the Night terror. This caused a bit of a blockage, denying the multi charges I had hoped would let my beasts turn their attentions to the centre in the next turn, although the next turn would see the flank collapse and the rats win the stockpile.
In the centre battle had been joined. The regiment of Vermintide had managed to avoid a volley from the volley guns and overrun one of them, which worked wonders for my confidence. I had sent a horde of spears into the Shields of Hetronburg and my opponent had been really keen to clear them out, so much so he put his heavy hitters, the Razors of Berlonviche, into their flank. Not surprisingly, the rats disappeared, but the reform meant that the Razors would end up having to take a charge from a Mutant Rat fiend and the Shock troops in the next turn, which led to their very rapid demise. The Mutant Rat Fiend was then able to start collecting the stockpile from the centre of the table whilst the Shock troops made themselves useful mopping up the War Shrine and the Wizard on Pegasus, and generally clearing away the support units.
While all this was going on, my Brute Enforcer had been busy collecting tokens and hiding in the woods as the Mounted scouts had been shooting at him. In the final turns, the Mounted scouts decided to try and get up close and personal, but the brave rat managed to survive. However, unfortunately, because of the combat, he wasn’t able to hand off one of the two tokens that he was holding. So that meant at the end of the game, although the rats were holding all seven tokens, we were only able to score six of them, giving us a second win.
Game 3 vs The Order of the Green Lady, Control
For the final game, I ended up facing off against the amiable, but formidable, Chris Lynch and his rather perfectly formed Green Lady army playing control. Chris’s list was simple, straightforward and to the point consisting of four hordes of cavalry and two Pegasi. Going into this game I knew I didn’t have much of a chance of winning, so instead I decided to give myself a bit of a personal challenge, namely to keep something alive, score at least one point and kill one of the hordes, I figured this would keep me focused on something that felt achievable.
The game opened up with me playing a refused flank. The fast stuff went on the left flank and everything else went into the centre. I was hoping that if I didn’t move forward very much, and he sent one of his hordes in, I might be able to get enough units around it to be able to take it down.
Chris deployed with one horde on either flank and two in the centre. On the left, I moved forward because I figured, given that I had the Night terror, the Hackpaws and Scud, that are all faster than the knights, I would be able to pin down the horde on the flank and maybe get a kill. I was aware there was quite a bit of healing in Chris’ list, which meant I couldn’t rely on chip damage to weaken the hordes. They had to be taken down hard and fast, which rats aren’t great at.
The first opportunity to take down a horde came as a result of the sharpness knights charging into a Mutant Rat Fiend and absolutely wiping it out. That allowed me to put Shock troops and spears into the front of the horde. Some damage was done, but not enough to take it off. The spear horde then got flank charged by one of the other knight hordes, so that didn’t hang around, but fortunately, a combination of plague pots and phalanx kept the Shock troops alive and importantly, unwavered. Between the Shock troops and a flank charge from the Brute Enforcer, the sharpness knights eventually went down. Unfortunately, the Shock troops then got absolutely massacred in return by the horde that had taken out the spear rats in the previous turn. All was not lost though, as the Brute Enforcer managed to escape and leg it towards the right-hand corner of the table, dodging lightning bolts as he went.
Originally on the left hand of the table, I thought I would be taking on the knight horde that had started opposite me. However, the second horde from the centre had made its way over and I was presented with an opportunity where I could get a multi charge from Scud, a Mutant Rat fiend. a horde of spears, and the Vermintide regiment. The Hackpaws very bravely held up the knights on the left, whilst everything else tore into the other horde and by some fluke managed to destroy it.
At this point I was in a really good place. I had managed to take two hordes off the table and coming in to turn five it actually looked like I might have enough stuff on the table that at least one or two things might survive. And sure enough, in turn six, I had Scud scoring in the left and the Brute Enforcer scoring on the right with Chris spreading his remaining troops across the other four zones. Unfortunately, there was a turn seven. And as is always the way with these things, the Pegasi lightning bolts, which had been frankly a little bit rubbish for a couple of turns, hit with a vengeance and the Brute Enforcer was lost. Whilst it might have been a loss, I couldn’t be happier with my performance and ended the day in ninth place. Not bad for a list that I hadn’t taken to a tournament for the best part of five years.
Final thoughts
Another excellent event, so a massive thanks to Si, and of course my fab opponents for really enjoyable games. I have to admit I was surprised by just how well the list functioned, and I forgot just how satisfying giving Shock troops the Brew of Sharpness is. The Hackpaws with boots and plague pots were really good fun, and I’ve already included them in my list for The Forlorn Hope next week. The only thing I have to mull over is whether to include the Birthing Daughter Mr. Brand was recommending…
I hope you enjoyed the report and if you don’t want to miss anything in the future, drop your email below and subscribe.
Back in 2018 I was just finding my way back to wargaming and into Kings of War. In 2019 I settled on Ratkin as my army of choice and attended my first tournament. It’s fair to say I didn’t really know what on earth I was doing, and had a very poor grasp on the rules, but I just wanted to play a fun list with some cool models.
December 2019, when Scud was on a smaller base…
From my point of view, I definitely achieved that. I was excited about the titan heavy army I carted along to the first four tournaments I went to. That list didn’t survive the transition into third edition. There were several reasons for that, but I suspect a large part of that resulted from a lack of understanding on my part of how to adapt new rules and unit swaps to the new edition. Since third edition arrived I’ve played many of the elements from this army at different events, but this is the first time I’m sticking them all together, and I’m looking forward to it.
What changed?
My final list in 2019 looked something like:
Shock troop horde with Brew of Sharpness
Nightmare horde with Caterpillar Potion (for newer player this used to give the unit pathfinder)
Blight horde with Brew of Haste (Blight were essentially a warrior unit with stealthy and ensnare)
Vermintide regiment
Hackpaw regiment
Night Terror
2 Mutant Rat Fiends
Scud
Enforcer with Inspiring Talisman (an individual that provided rally 1)
Warlock with Lightning Bolt and Banechant.
With 11 drops this was a pretty compact rat list and probably the biggest change between then and now (for this list specifically) were the changes to the Mutant Rat Fiends. In third edition their melee 4 would become melee 3, they would also gain Radiance of Life, gain Rally 1, lose Thunder Charge +1 and their base size would increase from 50mm to 75mm.
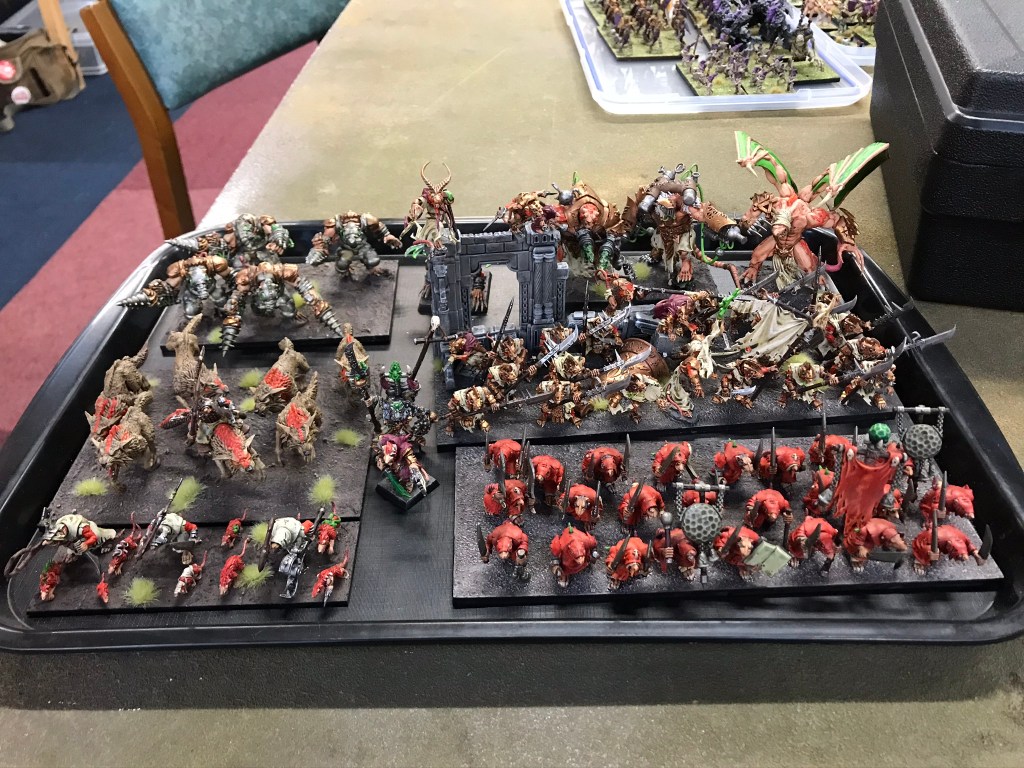
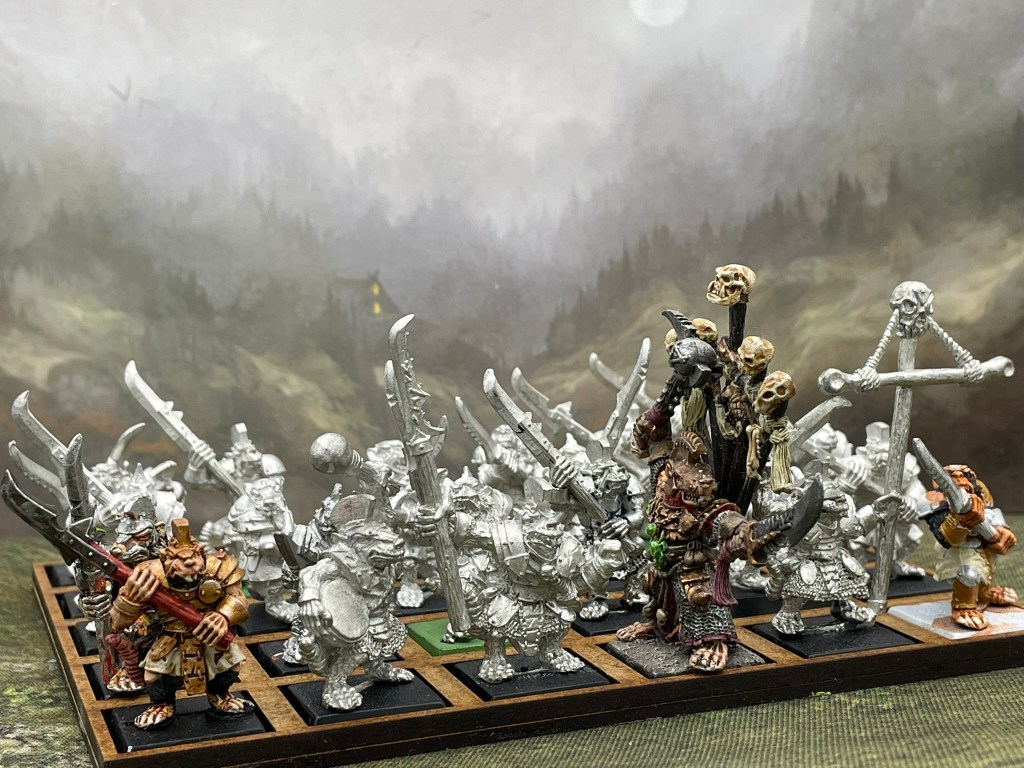
The big beasts, the bosses and the rabble. This army has done some miles and has the broken weapons to prove it.
Overall, it was a pretty decent glow up for the fiends, but the new base size felt as though it fundamentally changed how the beasts worked. Also, the inclusion of Rally 1 hinted at them having a different role within the army.
There were a handful of other changes as well. Blight were retired, but from them (I like to believe) the plague pot emerged, and other point of note was the Enforcer also grew a bigger base and renounced its individual status. The bigger Brute Enforce has turned out to be one of the best loved Ratkin characters in third edition, arguably only rivalled by the Brood Mother, so it had to stay. Blight were relatively easy to replace with spear warriors, and plague pots were given to everything that could have them!
As a result the revamped list has seen some changes just by virtue of moving through editions, but I also wanted to make a couple of further tweaks, one in the name of functionality and one in the name of fun. Whilst I think Nightmares are a solid unit, they just don’t seem to work for me, so I decided to replace them with more spear warriors. This is the one change I feel there’s lots of arguments for and against, and I think only time will tell, but the other benefit of this is that it freed up points for fun things like plague pots on the Hackpaws. The final change was to swap out the Warlock for Twitch Keenear. I think Twitch is such a super fun character I couldn’t resist including him just in the spirit of the list. It has just struck me that losing the shooting from the Nightmares and the Warlock does change the army dynamics slightly, but I think there are plenty of other changes that will have had far bigger impacts. All this means the final list looks like this:
Shock troop horde with plague pot and Brew of Sharpness
2 Spear hordes with plague pots
Vermintide regiment
Hackpaw regiment with plague pot and Sir Jesse’s Boots of Striding
Night Terror
2 Mutant Rat Fiends
Scud
Brute Enforcer
Twitch Keenear.
If you don’t want to miss the next post, drop an email below to subscribe.
There seem to be a lot of nostalgia projects around now a days. Maybe there always have been, or maybe there is a healthy perception bias impacting my judgement, but it does feel as though there is more than the odd person revisiting a game or an army they loved in their youth.
The venerable Mr. Headtaker and friends
I feel that The Old World is one of a number of elephants that are sat in the corner of my writing room that I want to say something about, but don’t know what. Maybe it’s been a jumping off point for some people, for me though, not so much. In fact, because Skaven aren’t included in the main factions it’s been of very little help at all.
That being said, seeing more metal figures in peoples’ social media definitely transported me back to a time when things were a bit simpler. I’ve also found myself at a bit of an impasse when it comes to deciding which projects to pursue. I might not be the fastest painter, or the most willing, but I do like a vague sense of direction (so I can measure exactly how far from it I’m straying). With fourth edition Kings of War somewhere in the distance I’ve not been motivated to start a new army, and I’m really enjoying playing the rats I have at the moment (although travel is starting to take its toll and I think a serious conversation about a new army is required). All this has resulted in a bit of a creative gap which got me thinking about Skaven.
GW’s ratmen were the faction that really called out to me when I flicked through the third edition Warhammer Fantasy Battle army lists. I loved the unit illustrations and in particular those of Clan Eshin. As I tentatively started to build a small army fourth edition arrived and the generic army list just didn’t appeal. It couldn’t compete with the Empire and all their shiny knights.
That’s not to say I lost interest in Skaven, I dabbled with the odd model here and there, and the army list books, when they arrived, were my favourites. In a weird twist of fate, the first time I would ever play using a Skaven army would be in second edition Kings of War. During some time off work I got bored and started painting some rats, a collection that would grow massively out of hand, and would contribute to my return to wargaming in 2018, some many decades after I had abandoned my Empire army (massive regrets). Since that time, I have built two more rat armies, the most recent being my Mantic force, and whilst I like many of the newer models they just aren’t quite enough.
A couple of decent ebay finds, and a small number of models I had in a bits box have given me a great starting point, so now it’s just a case of seeing where it goes next.
As I reflected on this, I began to think about what I thought my favourite rat models were. Of all the models that have been created by different companies which ones were the gold standard. The answer, which may come as a surprise, were the rats of fourth edition Warhammer fantasy battle. More than that I think the army list was also one of the best. Over the years the races of WFB have seen their rosters grow to unwieldy sizes, with all sorts of weird and wonderful things added. In Kings of War Ratkin have a decent number of choices, and yet the last couple of months I’ve massively enjoyed playing with a fairly basic list of infantry, big beasties and weapons teams (not dissimilar to warpfire throwers). All this made up my mind for me, and I’ve embarked on a mission to build a collection of metal models that will allow me to take anthropomorphic rats in any game I choose.
Don’t want to miss the next post? Drop an email below to subscribe.
I’ve probably spent more time than is healthy thinking about Kings of War tournaments. There’s a fairly wide range available, with different ways of rewarding everything from hobby skills to smashing your opponents. I have no problem with a day of games, it’s convenient and straight forward, and given tournament organisers for Kings are doing it for the love it’s also eminently sensible. You also don’t have to read the tournament pack.
There are though those organisers who go above and beyond, who have events that I would file under cult classic. Steve Hildrew’s Bullrun series (that has some of the nicest trophies going), Mark Cunningham’s Shroud of the Reaper (my Christmas is no longer complete without a visit to Bexley) and The Rushden Rumble (some seriously engaging scenarios). There are others that I’ve not had the pleasure of attending, such as Battlemasters and The War of The Roses, but these are the events I’ve had some great memories from.
So much have I enjoyed the variation and twists these events introduce, I’ve really wanted to find a way of bringing something new to my own events. The thinking process began before Christmas, and a couple of failed attempts later I’ve just opened the entry gates to The Field of Kings, and I’m nervous, so I’d thought I’d share a bit of the thought process behind it.
My starting place was asking myself what sort of event would I really want to attend. I love a good themed event, something with a story. One of my favourite events last year was Roll Out The Barrels where we brought two separate factions, played the first game with one, the second with the other and the final game with both. Trying to find the tenuous link between my Ratkin and Halflings led to the birth of my Halfling’s back story as The Grand Mercenary Company of Mimos.
The next thing I wondered about was the scoring system. What was I going to reward and how? There is so much debate as to how to score various aspects of gaming and crafting excellence I decided to stop listening and sit down in a dark room with a fresh piece of paper. Eventually I turned the light on and decided a new piece of paper would be helpful. Slowly it dawned on me that regardless of what anyone else was doing, I wanted to reward based on how people reacted to the theme of the event and that opened up so many new ideas (at least to me). As I picked through each one it became apparent that I could create an event scored equally on game play and hobby skills, but there was a down side, it meant I would probably have to throw out the traditional game scoring and there wouldn’t be any points on offer for those attendees wanting to increase their standing in the masters rankings.
There is a logic (or so I’ve heard) which says this is the fastest way to stop people attending, but I feel, based on what I hear from podcasts and read on blogs, that there is thirst in the Kings community for something a bit fluffy. More than that, I’m not trying to rival Clash of Kings (well not this year at least) in terms of numbers. If I can get a few like minded souls together, that works for me.
Central to the idea around the scoring is that it’s more about enthusiasm and engagement, particularly on the hobby side of things. Read through the pack, create a couple of units that really fit the theme, and anyone could grab max points. The scoring for games is a little different, but I’ve tried to reward behaviours that contribute to telling the story, so I’ll be really interested in seeing how that’s received. Genuinely, I think it will make for a massively fun day, the biggest risk though is whether anyone will read the pack…
Fortunately, since unleashing the pack on Saturday night I’ve had some great feedback and a third of the spaces are gone. What’s more everyone seems to have read the pack… there is hope.
Over the next couple of months, I’m going to do some follow up articles going a bit more into the hobby scoring and providing some hints and tips on how to make the judges happy.
Don’t want to miss the next instalment? Drop your email below to subscribe.
Command dice have become a pretty interesting proposition for me at this point. Based on the games I had in Gloucester, I don’t think everyone agrees. I play three factions reasonably regularly which all have a faction specific ability that gives them access to +1 thunderous charge. Over the few command dice games I’ve had I’ve quickly realised just how useful being able to add this is to a unit anywhere on the table is. As a result of this I always make sure to spend 20 points on a white dice which means most turns I will get the requisite 4 points required, but freeing up the points for this meant having to play around with the horde heavy list I took to the last event.
The changes weren’t drastic, one of the Mutant Rat Fiends was dropped, a spear horde got promoted to shock troops and a troop of scurriers was recruited. The scurriers were the experiment for this event. I was hoping the large amount of rallying in the army would keep them reasonably alive and their shooting would nicely support the war engine teams.
Game 1, Compass Points vs. Forces of the Abyss
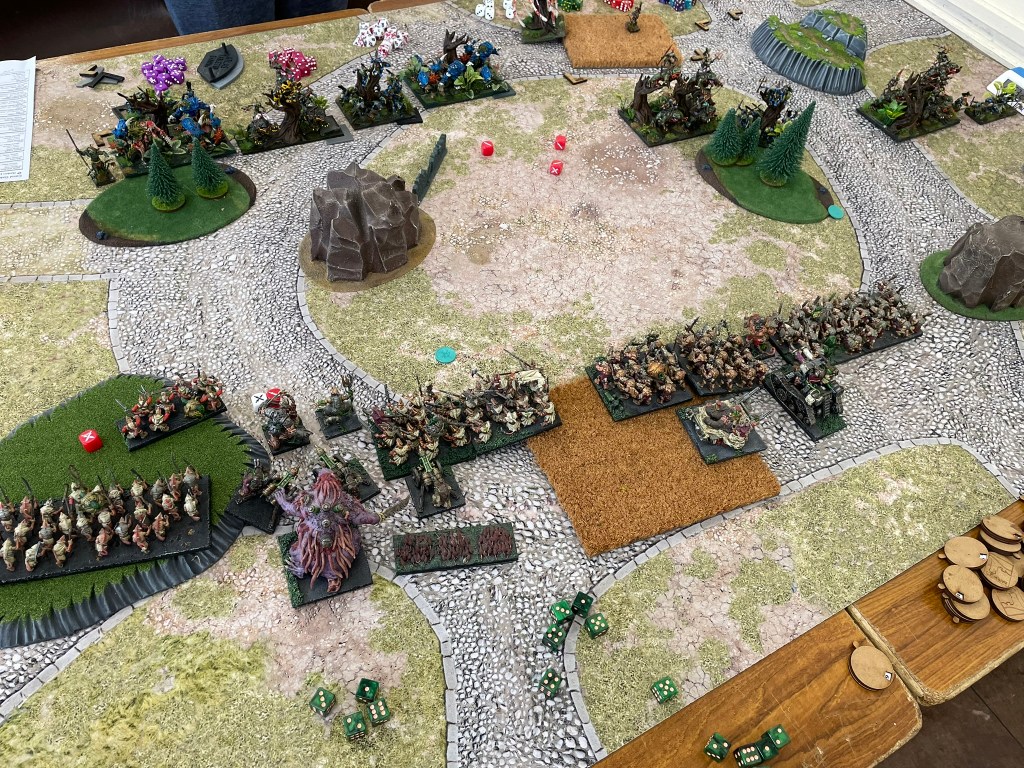
At first glance I was very nervous about this list. Loads of berserker hordes and a couple of flying archfiends massively concerned me. I had visions of flanks being found and rats being torn apart by blood thirsty demons. After a bit of reflection though I started to wonder if the demons would have it all their own way. My phalanx could limit the effectiveness of the archfiends and, whilst it’s important not to underestimate 30 attacks with crushing 1 from melee 4 or 5 troops, it occurred to me that my weight of numbers could also create more than a few problems for the denizens of the abyss.
Compass Points didn’t feel like the best scenario for me. The big points are won by crossing the table, and with nothing faster than a speed of 7, against an enemy that could threaten me from any number of directions there was a real concern that I might get boxed into my half of the table for the duration of the game.
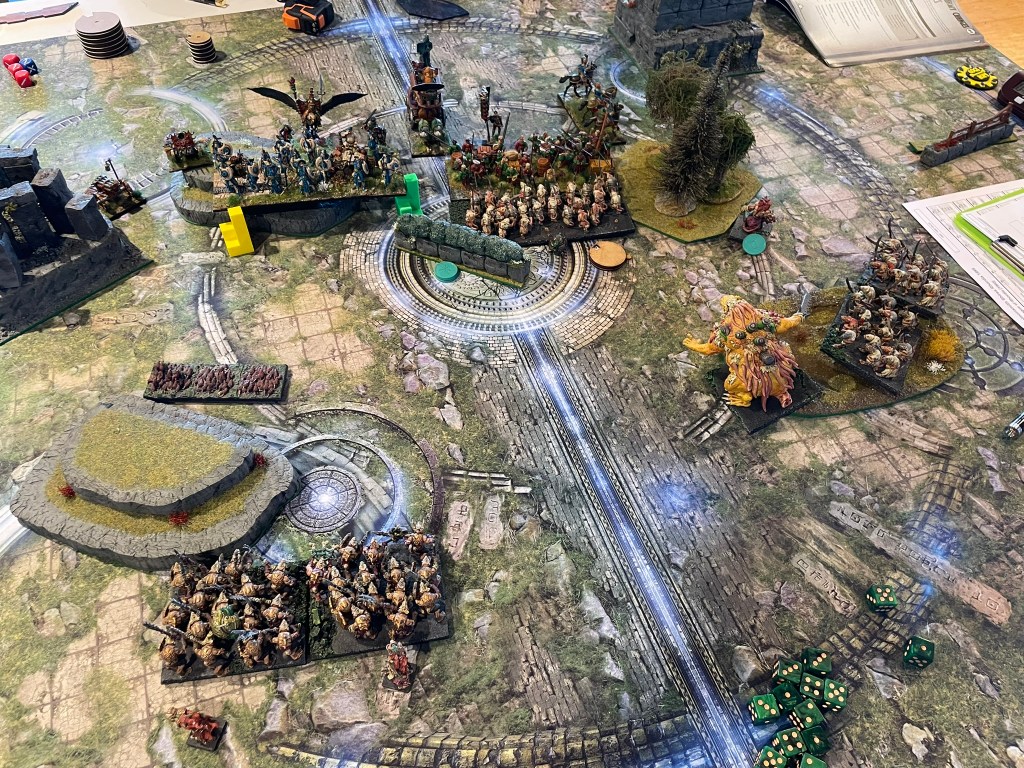
I was slightly relieved when my opponent split his forces equally on either side of the table. Two hordes of berserkers, archfiend and support went on either flank with the lower abyssals and the warlock holding the centre.
I set up everything going from my left flank to the centre, with spears defending the ends and shock troops in the middle. My scurriers and the death spewer went into the centre with the war engine teams. I decided I would try and shoot the lower abyssals out the way, get the scurriers onto their objective whilst the hordes did their best to hold out against the rest of the demons, hopefully securing my own objective long enough to stop my opponent scoring on it.
By about turn 2 it was evident that the plan was not going well. I had badly underestimated the enemy shooting (including the fireball command dice ability) and the scurriers had been shot off the table. What was more, the demons on my right were readying for a charge against my spears, whilst trying to sneak their agile units around the back of my lines.
On my left, a strike was looking imminent. The sharpness wielding beserkers with their vicious aura creating apostate were hauled up in the woods and things looked a bit grim. My plan was rapidly being recalculated to just holding onto my own objective in my half for as long as possible.
One of the berserker hordes to my right charged my spears, where a brute had been positioned to prevent a double charge against the rat warriors. As the demons went in the other horde broke off and headed around the rock with the arch fiend in support. I braced myself for impact. The slaughter just didn’t materialise. Not only did the beserkers fail to rout the spears, but their fight back, together with the brute that was now in the demon’s flank, quickly took the unit out of action. To make matters worse the war engine teams, and the Tangle converged on the creatures sneaking around the rock and reduced them to a stickly mess. Only the archfiend remained, and a failed attempt to destroy the Tangle left him at the mercy of the guns.
As the smoke on the right was clearing, very much in the rat’s favour, the left flank was strangely lacking in smoke. Part of the abyssal contingent on the left had been distracted by a horde of shock troops making their way down the centre of the table, emboldened by the collapse of the demon’s right flank, but the remaining berserkers were not to be sniffed at.
Taking an opportunity, I sent a brute enforcer into the sharpness horde in the woods to keep them there for another turn. This was followed by vermintide, and then anything else that would keep them away from the objective and the spear horde I was hoping would win the flank.
In the centre, the demon attackers were being thwarted by a combination of terrain, plague pots and phalanx. Unit after unit was pinned and killed until the shock troops held the objective in the enemy’s half. All that remained now for the demons to try and claim was the left flank objective, but just as everywhere else on the table the demons had failed to break the rats, their only saving grace was the fight back had begun so late in the day the rats may have stopped the demons in their tracks, but they ran out of time to finish them off. The game finished with a victory for the rats.
Game 2, Stock Pile vs Ogres
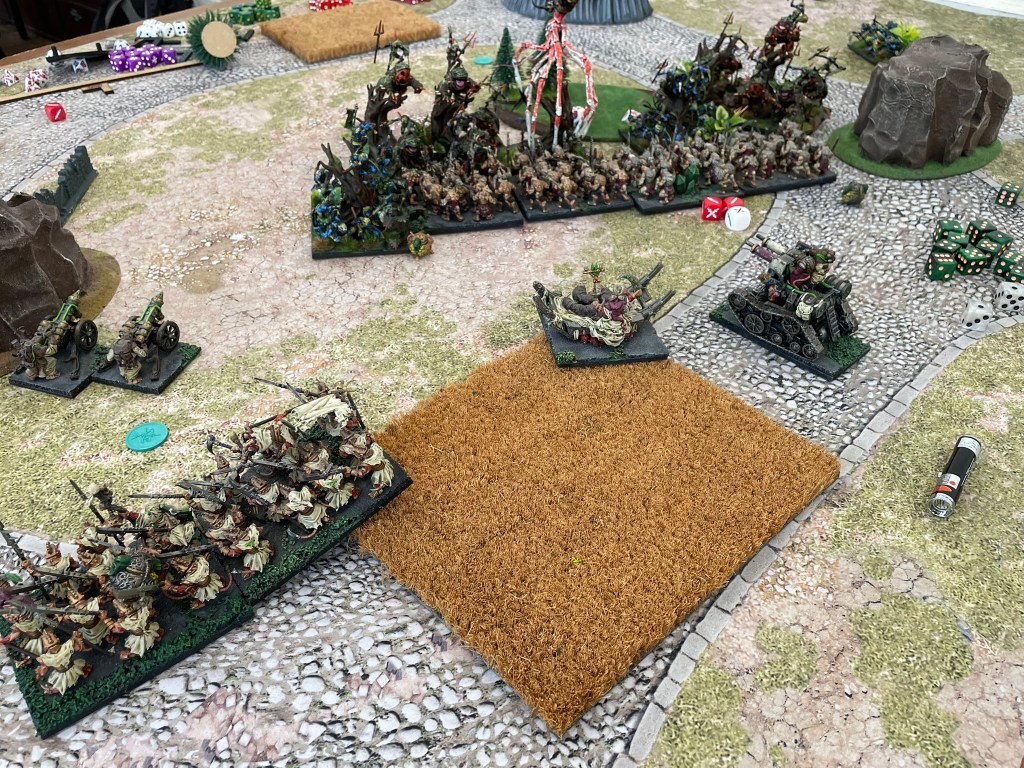
There suddenly seems to be a lot of ogre legions in my world! Let’s not beat around the bush, they are horrible. Not only are they incredibly destructive, but they can also take quite a bit of damage. The legion, the Big Deal and boomers all stood in the centre of the table looking very menacing, whilst the rest of the ogre forces stretched over to my left flank with the siege breakers, Nom and Grok anchoring the line to the table edge. This felt like it would be an uphill struggle.
Goblin sniffs shot forward from the line to secure the first loot counter on the left of the table. With Nom they managed to waiver one of the war engine teams, but that did not stop Cryza, the remaining weapons teams and the scurriers removing both troops over the next couple of turns, and waivering Grok. Despite the chaos from the shooting the siege breakers managed to force their way forward, steal an objective and start slowly moving back towards their own lines.
In the centre things were a little more circumspect. The presence of the legion and the Big Deal put off any rash charges and the ogres were gathering tokens in relative peace, until an opportunity presented itself. The opportunity in question was a set of charges that would tie up the legion and allow the rats to deal with the warrior horde and paymaster protecting it’s left flank.
Shock troops dismantled the warrior horde swiftly before turning to face down the flank of the legion. However, in their haste they hadn’t realised they would end up presenting their rear to Nom. The evil ogre warlock threw himself, with just a little too much glee, into the charge and shock troops started dying. Fortunately, the scurriers were on hand, and just as Nom had found a cheeky rear, so the scurriers found a cheeky flank. Their melee 3 attacks came into their own, and by the time the shock troops had turned to face their attacker several poisoned daggers already protruded from him from various awkward angles.
Whilst the shock troops had blasted through the ogres, the mutant rat fiend had struggled removing the paymaster, unlike the ogre legion which had cut through rats like butter and were now able to turn and face the wave of vermin that had been hoping to get into the unit’s flank. A moment of quiet spread over the battlefield as the rats charged, the long front of the legion accommodating shock troops, scurriers, the mutant rat fiend and the brood mother. Blades struck out and seconds later the ogres were put to flight and the wave crashed forward, washing away the Big Deal.
The last bastion of ogre hope were the siege breakers, desperately trying to depart the battlefield. Unfortunately, in their rush they exposed their vulnerable flanks to the weapons engine teams, and Cryza darted between the burning bodies to secure the final loot counter and a second win.
Game 3, Hold the Line, vs Trident Realms
Trident realms have to be one of my least favourite match ups because of the ensnare. That being said, most of the army I found myself against had fly, which did mean my phalanx was going to come into play. Of course, the amount of nimble that was also coming for me meant I had to be very careful of my flanks, for a second time this event.
Having played Hold the Line at a number of events this year, I’m starting to realise that it’s probably the scenario I seem to play most poorly. Even with counters down to show the scoring zones I just didn’t quite get my head around my positioning. The game felt very close all the way through as both myself and my opponent struggled to inflict meaningful damage in the early rounds. The war engine teams, and the spewer were instrumental in removing giggas, by shooting into their flanks, whilst a flying flank charge from a frog regiment consigned one of my shock troop hordes to the bin.
Frustratingly though a combination of timings and wavers took their toll. I had forfeited the right flank early in the game, preferring to focus on the centre and the left. An unfortunate series of waivers in the closing turns on the left kept a full horde of spears out of the scoring zone, whilst a turn 5 and 6 that consisted of literal seconds mean the weapons engine teams lost out on a couple of turns of shooting. The game ended in turn 6, but with a turn 7 and a bit of time there was a chance, things could have worked out differently. Regardless of all that though it was a really great game, and the rats held up a lot better than I expected.
Final thoughts
The day was brilliant, the food was fantastic, and the games were brilliant fun – all you could ask for really!
In terms of the rats, well I’m still loving this structure of army. I’m finding the hordes pretty easy to play, they just move forward, so the smaller units in the army become the interesting ones. There are definitely some learnings to be had from the third game about how I space out my chaff, and manage Hold the Line, but overall, I think it’s a solid list.
The death spewer has to be the most interesting thing in it and I’m not really quite sure what it’s great at, but it seems to contribute in every game, just never in the way I want it to, or think it should. It’s definitely staying. I think there’s about 200 points now that I’m not sure about, but to be fair I think that’s quite exciting in it’s own way as it gives me opportunities to throw some different things into the mix. At the moment I’m torn between a couple of hackpaw troops and a couple of spear regiments. Hey ho, only time will tell…
You can catch up with the next blog post by dropping your email below and subscribing.
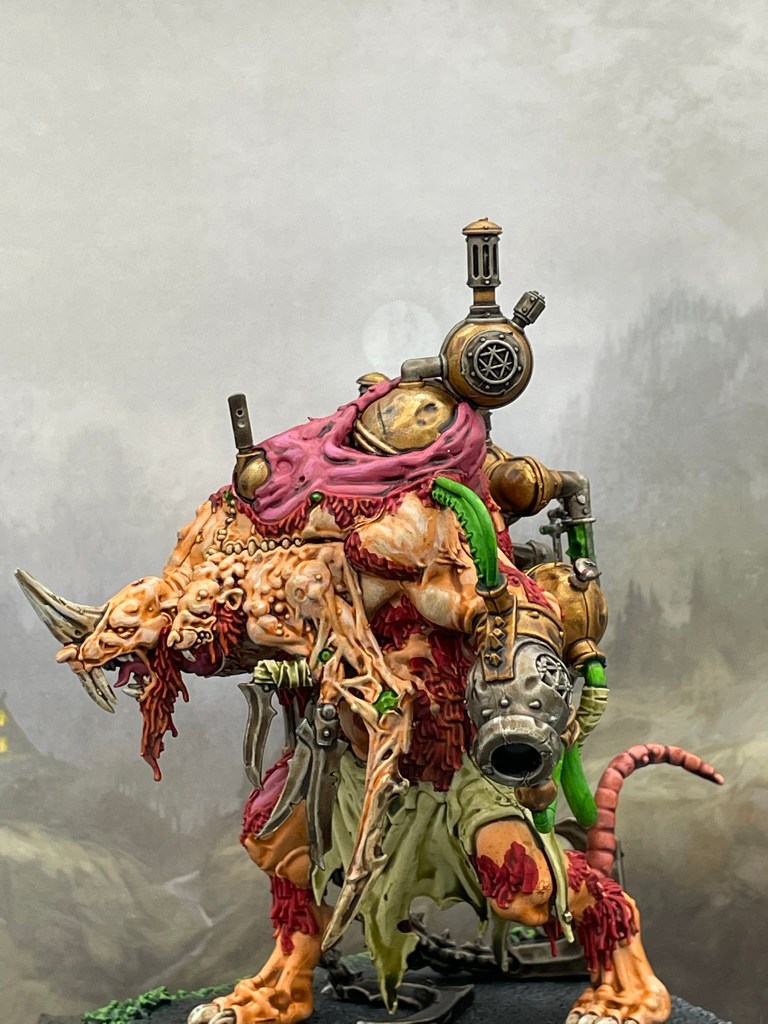
When I signed up to the Rushden Rumble I had no idea what I was getting myself into. Two weeks before the event I had a quick read of the event pack and all of a sudden I had questions… a lot of questions. The first revelation was that I needed a giant as a special character. This created an immediate problem as I had to secure one and paint it, it the sort of timeframe I would usually just about manage to build and undercoat a solitary Basilean man-at-arms. Fortunately, I’d already decided to use my rats, so when I happened upon the misshapened creature pictured below I only had to squeeze in a bit of painting (which for a GW model wasn’t too faffy).
The next discovery was that the event didn’t use standard scenarios, which then led to a flurry of emails to the organiser to check my understanding of what was going on. The TO, Warren, was brilliant with his engagement and by the time Saturday rolled around I was fairly confident I knew what I was doing… ish.
The list
Warrior Horde with Plague Pots
Spear Hordes with Plague Pots (2)
Shock Troop Horde with Heavy Halberds and Plague Pots
Vermintide Regiment
Death Engine Spewer
War Engine Teams (3)
Mutant Rat Fiends (2)
Brute Enforcers (2)
The Tangle
Brood Mother
Mother Cryza
For a while now I’ve been trying to play with more infantry. I love the look of massed infantry ranks and since I’ve managed to make up five hordes, I really want to be able to use as many of them as possible. The other thing I’ve been playing with are the Mutant Rat Fiends. Since the restriction was removed on their D3 Radiance of Life and they get to use it as well I’ve been keen to test them out in a competitive environment. I’ve always thought the fiends were great conceptually, fragile due to their defence of 4, but kept alive through their high nerve and regeneration. The problem I always had was the regeneration just wasn’t reliable enough. Would Radiance of Life going to D3 change that?
I also enlisted a Brood Mother, which I know is considered a must have in most Ratkin circles, but this is my first time taking one to a tournament. Unusually for me the list doesn’t feature anything faster than movement 7, which is possibly the most nerve raking feature of all, greater even than the inclusion of the almost universally panned Death Engine Spewer. How bad could it go?
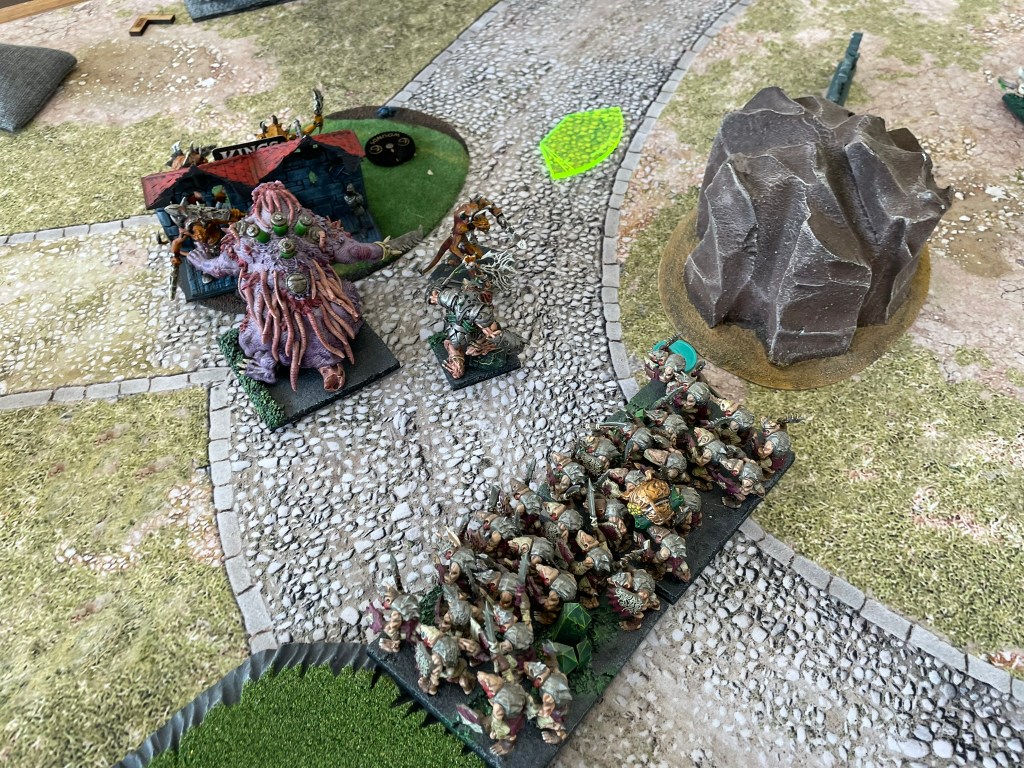
Game 1 vs The Forces of The Abyss, Awakened Giants
Where to begin describing this scenario! The aim of the game was to kill the giants, which moved randomly and could only be attacked from turn two. You also needed to secure an objective counter in the centre.
I thought facing the Forces of the Abyss would be a really good test for my army. Given my rats will normally have to take punches before they react, testing them against such an aggressive army would give me a good idea of what the rest of the day was likely to bring. The rats went first, and I did my best to organise my lines so that if any of the giants came my way they would face multi charges that would get them out of the way as quickly as possible. Unfortunately, one giant headed directly towards the Abyssal ranks (happily taking down a troop of Lower Abyssals), and the second giant ran past the end of my right flank, out of sight of my units. Since I wasn’t going to be able to fight the giant in turn two, I wondered if I was going to be able to keep it alive. This was the first moment the lack of mobility in the army really hit home. With a horde of nimble berzerkers staring at the rear of the Giant I realised there was nothing I could do to protect the creature, all I could hope was that the demons fluffed the charge and I then got a chance at removing both the giant and the berzerkers the next turn.
Not surprisingly the demons did not fail in their task, and the second giant fell. This mean that the game had now essentially been won. My opponent scored four points for downing the giants and there was only one remaining point up for grabs by occupying the centre.
With that in mind I decided to throw my rats into the demons to give them the best road test they were likely to get. How they responded really surprised me. Shooting took down two of the Tortured Soul regiments and the Chroneas. Whilst a solid combination of plague pots and weakness from the Tangle blunted the demon attack and set up plenty of flank charge opportunities which saw unit after unit returned from whence they came.
A couple of times I noticed the healing in the army really shone through, with the Brood Mother’s Drain Life bringing the central spear horde back from the brink of destruction. As the battle raged on the army swept towards the centre, flooding it with vermin, and pushing the Abyssals back. When the fighting ended it became apparent that the rats had passed the test with just two hundred and twenty-five points leaving the table, compared to the massive losses sustained by the demons. It was quite an interesting outcome.
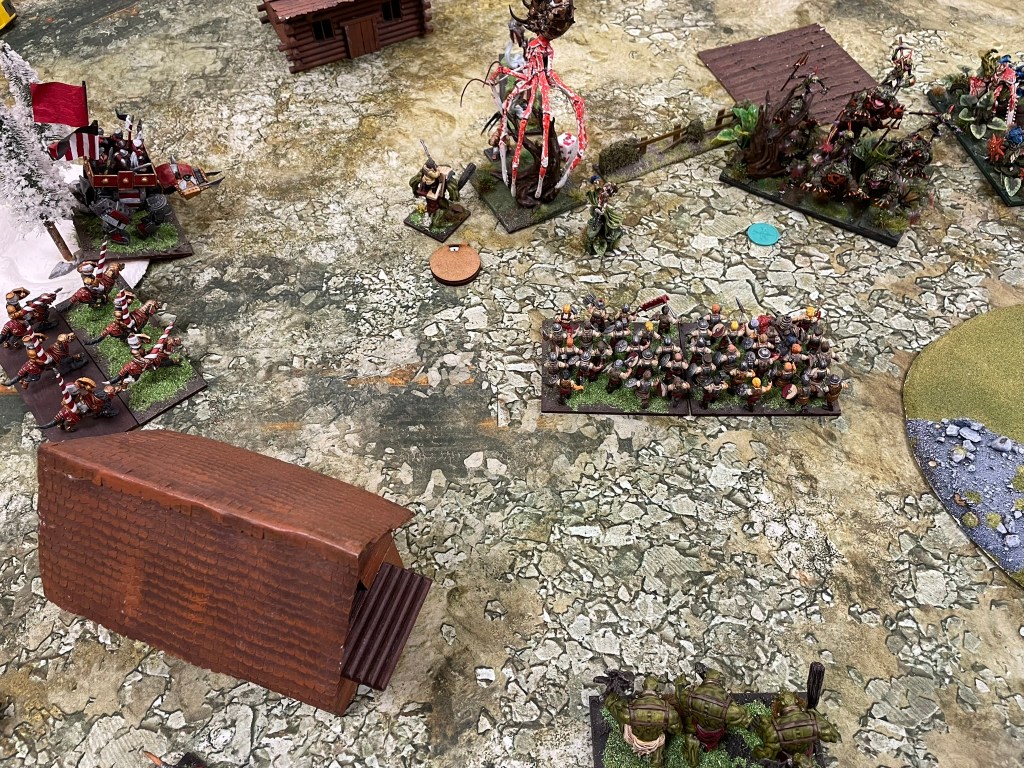
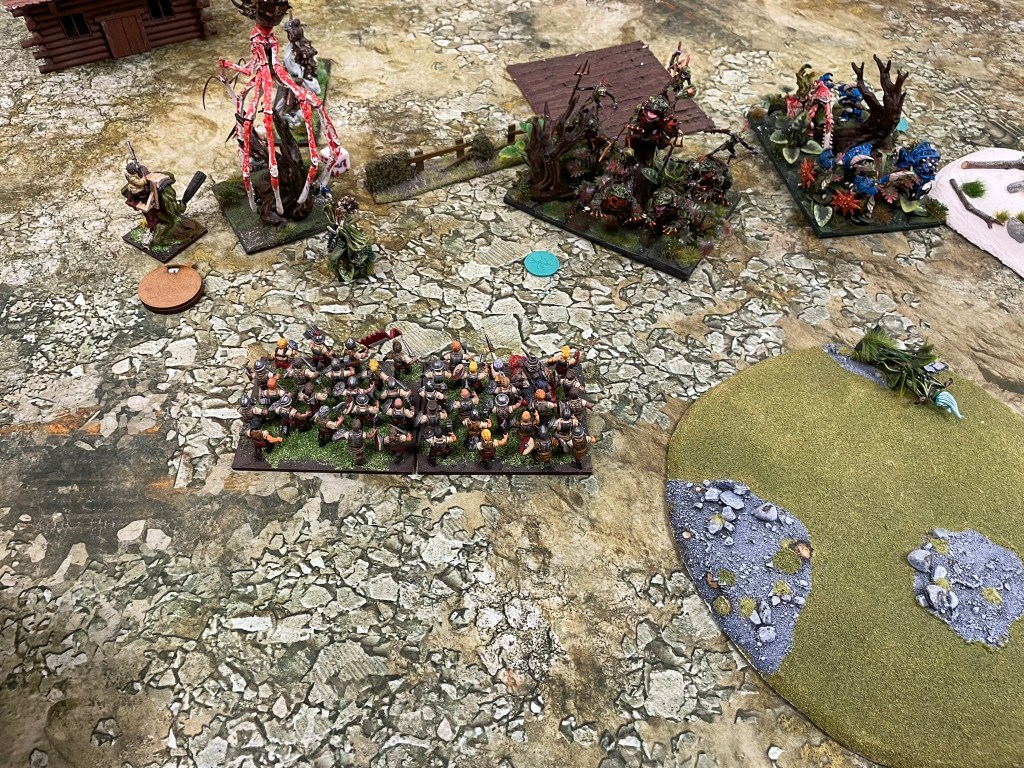
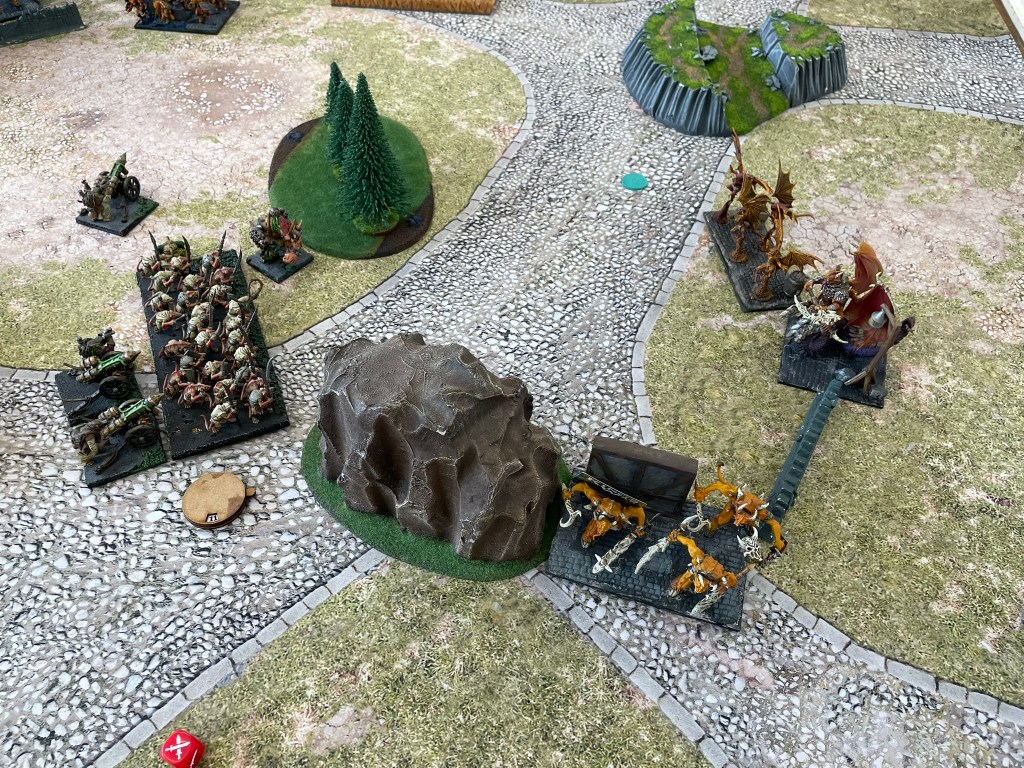
Game 2 vs Halflings, Something… something… loot counters in woods… angry spirits
The scenario involved four woods, each with a loot counter at the centre that had a randomly determined value. Picking the counter up could also result in the spirits of the wood attacking you. There was also a loot counter in the centre of the board worth three points.
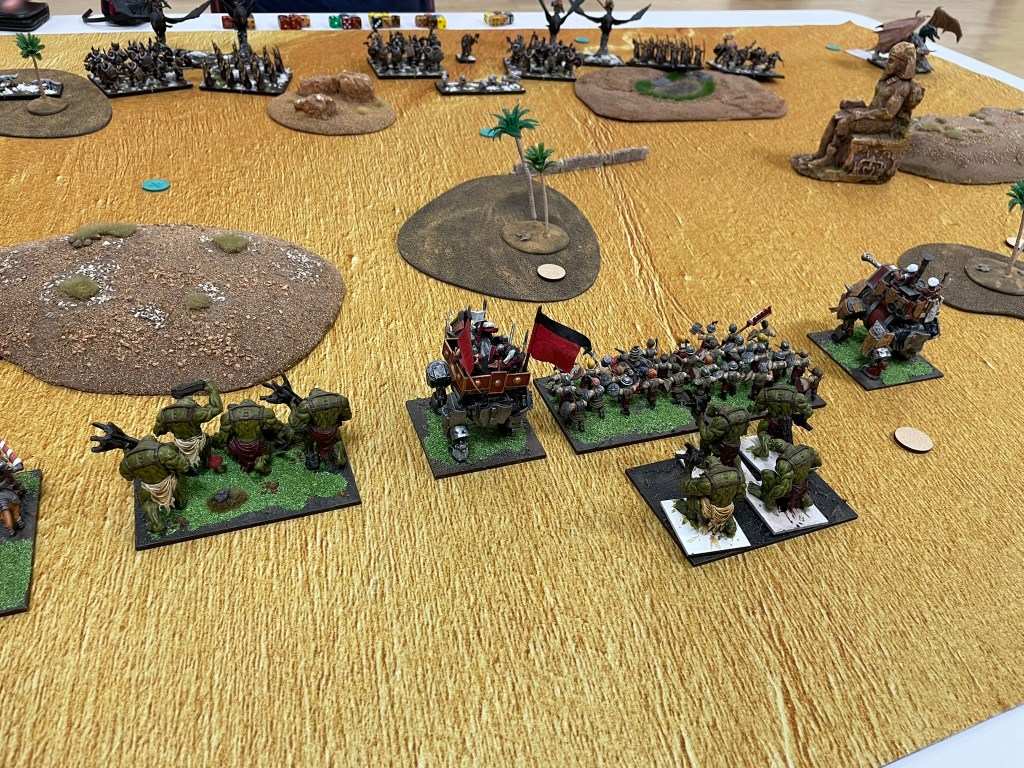
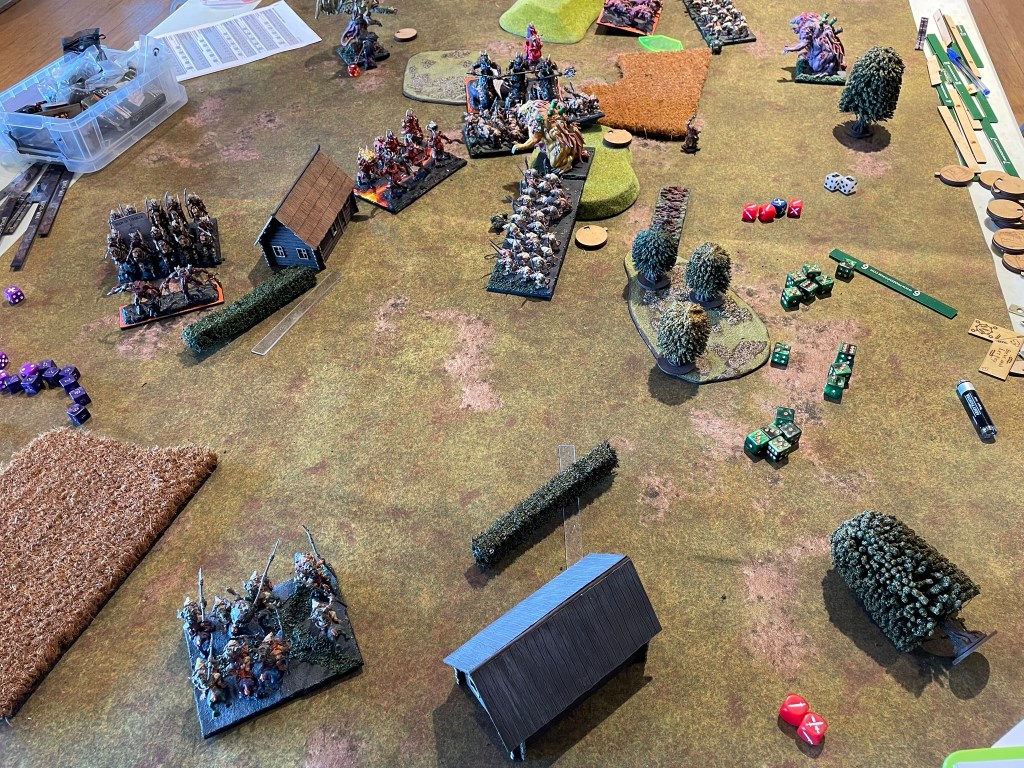
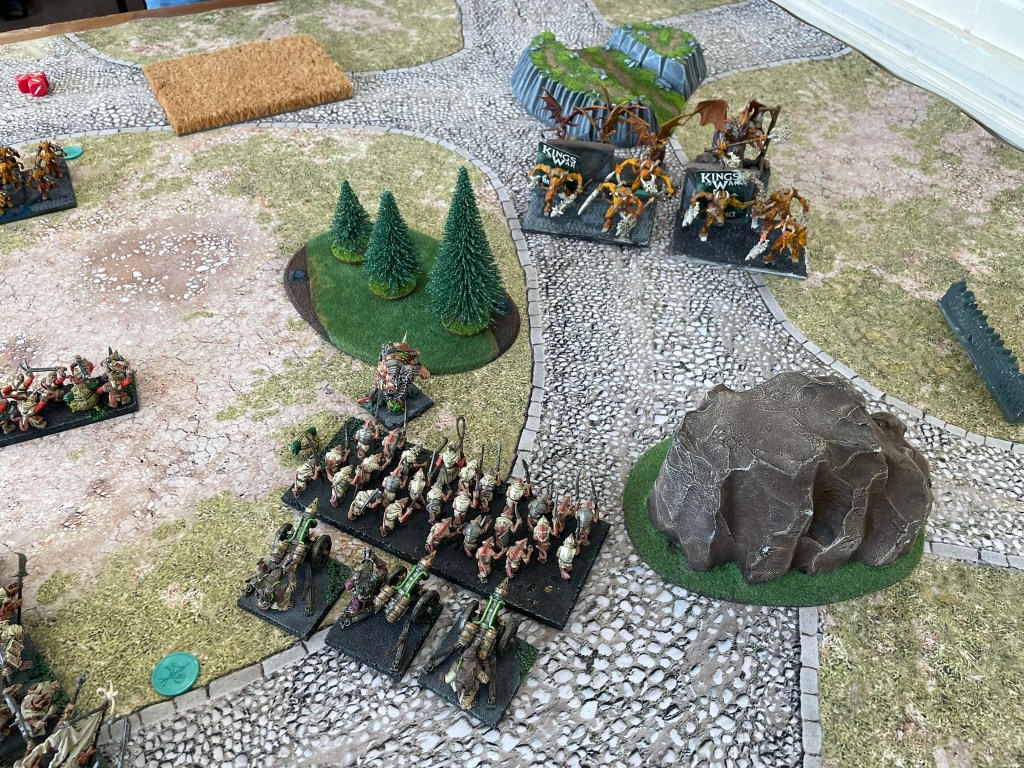
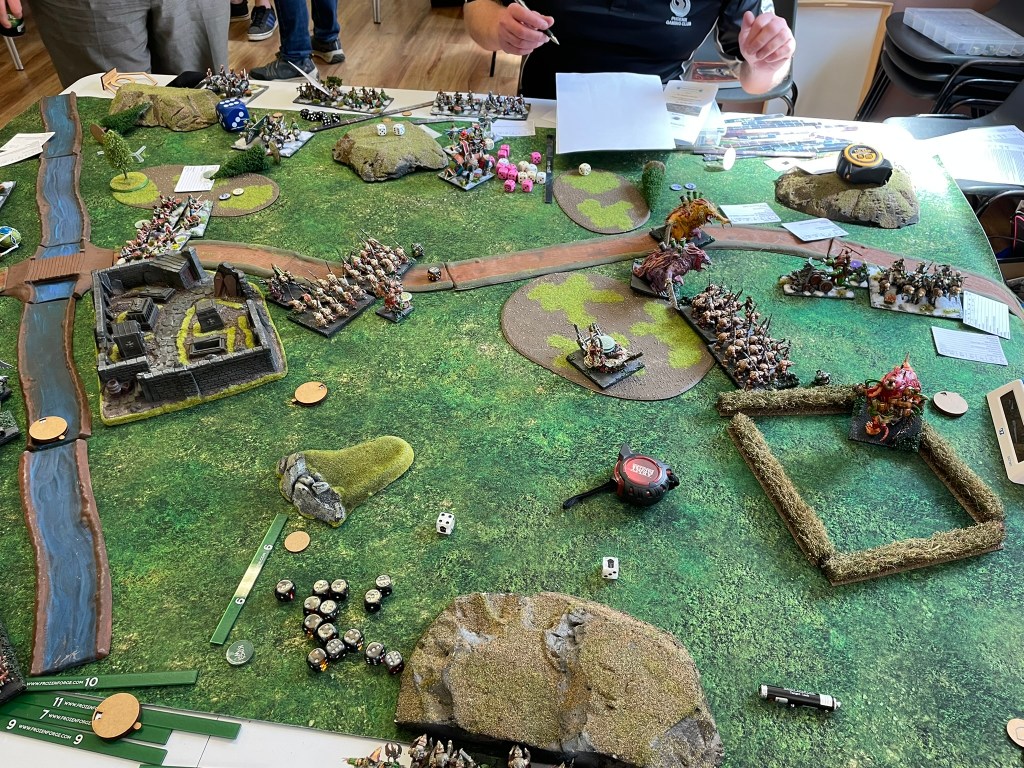
The Halflings had a bit on an advantage going into the game as both of the tokens on their side of the board were in their deployment zone, which meant they were quickly picked up. The rats had one in the deployment zone on the far-left flank, whilst the other was more central.
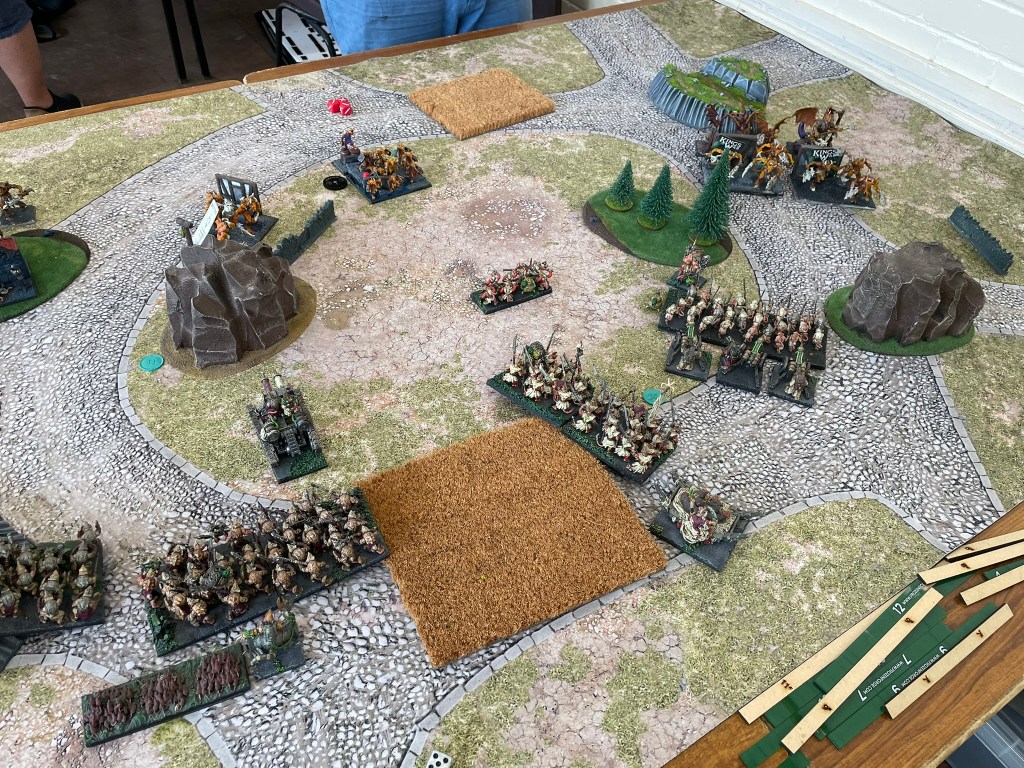
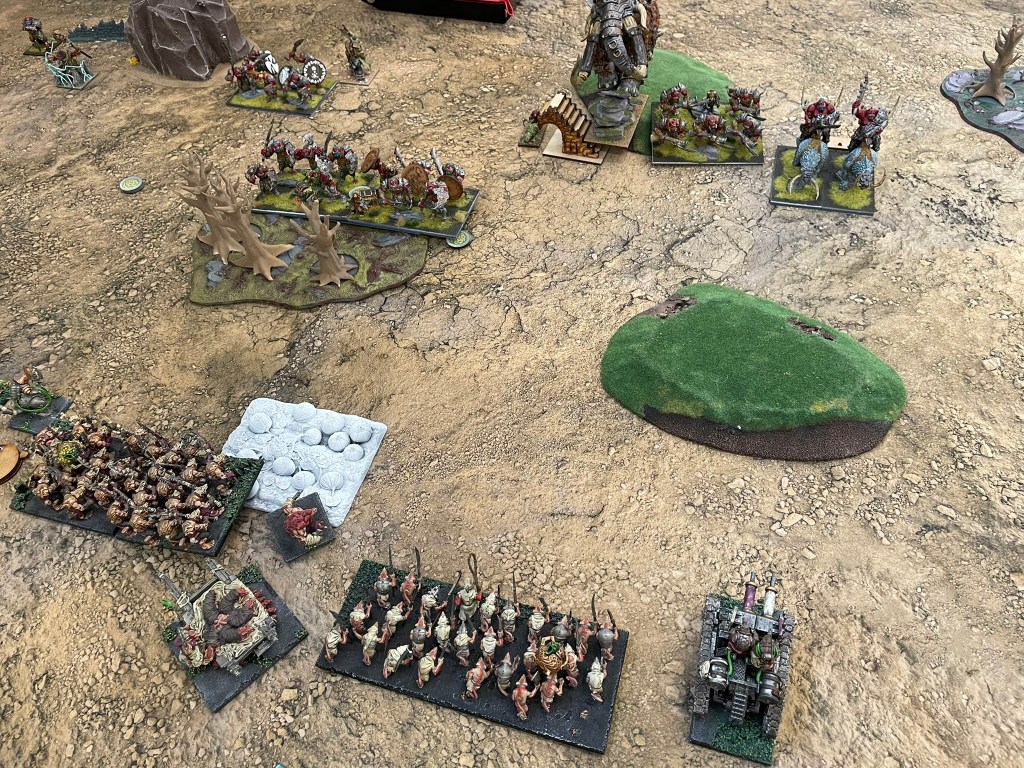
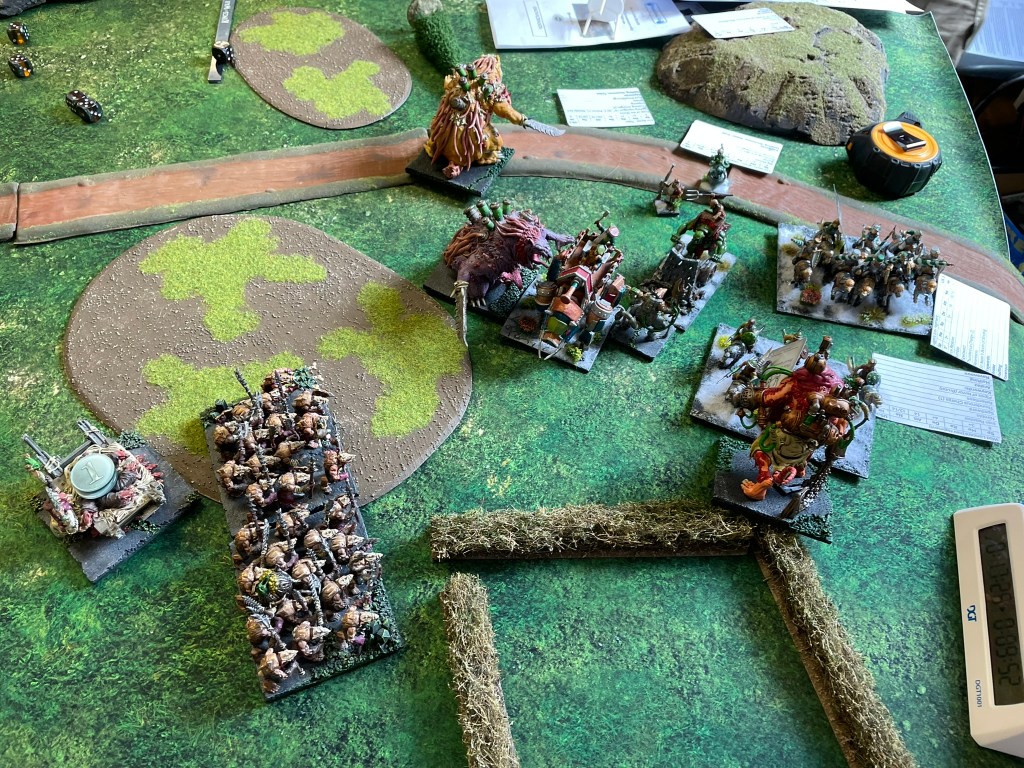
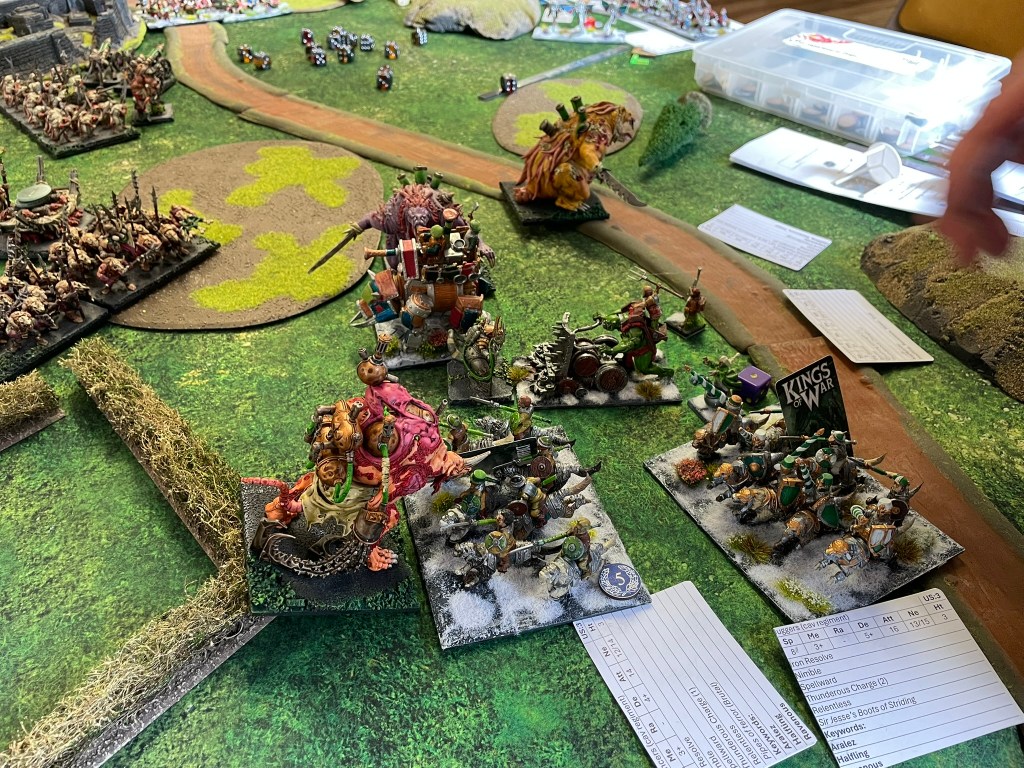
The halflings put their flyers and the giant on the left flank, their infantry hordes in the centre with the Iron Beast and cavalry on the right. As I deployed, I wasn’t sure whether the best approach was to try and hold the left flank or abandon it in favour of deploying for a refused flank. After a little back and forth I decided I would put a token force on the left consisting of the warriors, an enforcer and Mother Cryza. My shooters deployed in the centre, behind a spear horde. The second spear horde went on the right with the giant, and everything else went in between.
In the first couple of turns the Halfling’s shooting was starting to make a dent. The rifles and the Wild Riders knocked three wounds off the Spewer and eight off the central spear horde. The Spewer managed to take down the Wild Riders whilst the War Engines dispensed with the Braves, but these were relatively minor skirmishes compared to what was happening on the flanks.
On the left Cryza attempted to lightning bolt the balloons, hoping for a lucky waiver to hold one of the units up, but it never came. The two regiments of floating menaces drifted into the warriors, and I held my breath as they hit. Fortunately, the balloons performed as well for my opponent as they did for me when I used to use them, and the warriors took a handful of wounds, but otherwise stood their ground. The warriors fought back against one unit, whilst Cryza, now supported by the Spewer waded into the other regiment. Despite their best efforts both units survived, although Cryza managed to waiver the regiment she was facing. By some miracle the waiver became the turning point for the fight for the left. In the following turn the rats pulled down the waivered regiment before creating a wall of bodies around the enforcer carrying the token, by luck more than judgement the warband managed to fend off the Halflings long enough to keep hold of the loot and stop the Muster Captain on the winged aralez jumping into the centre of the board, behind the Ratkin lines.
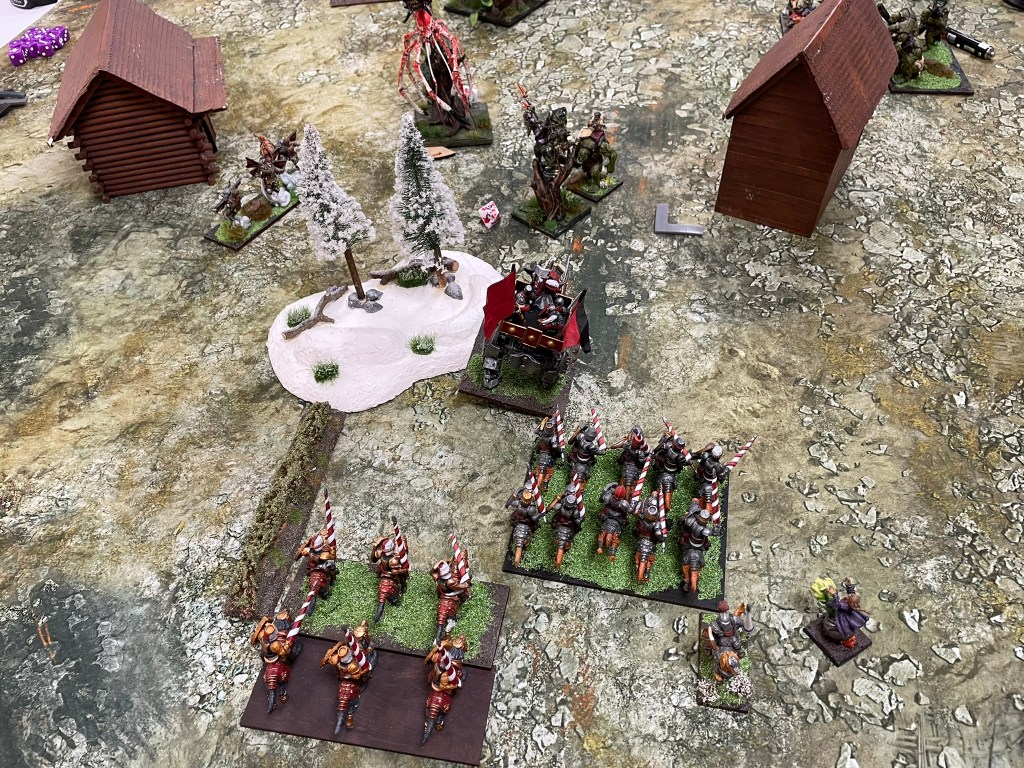
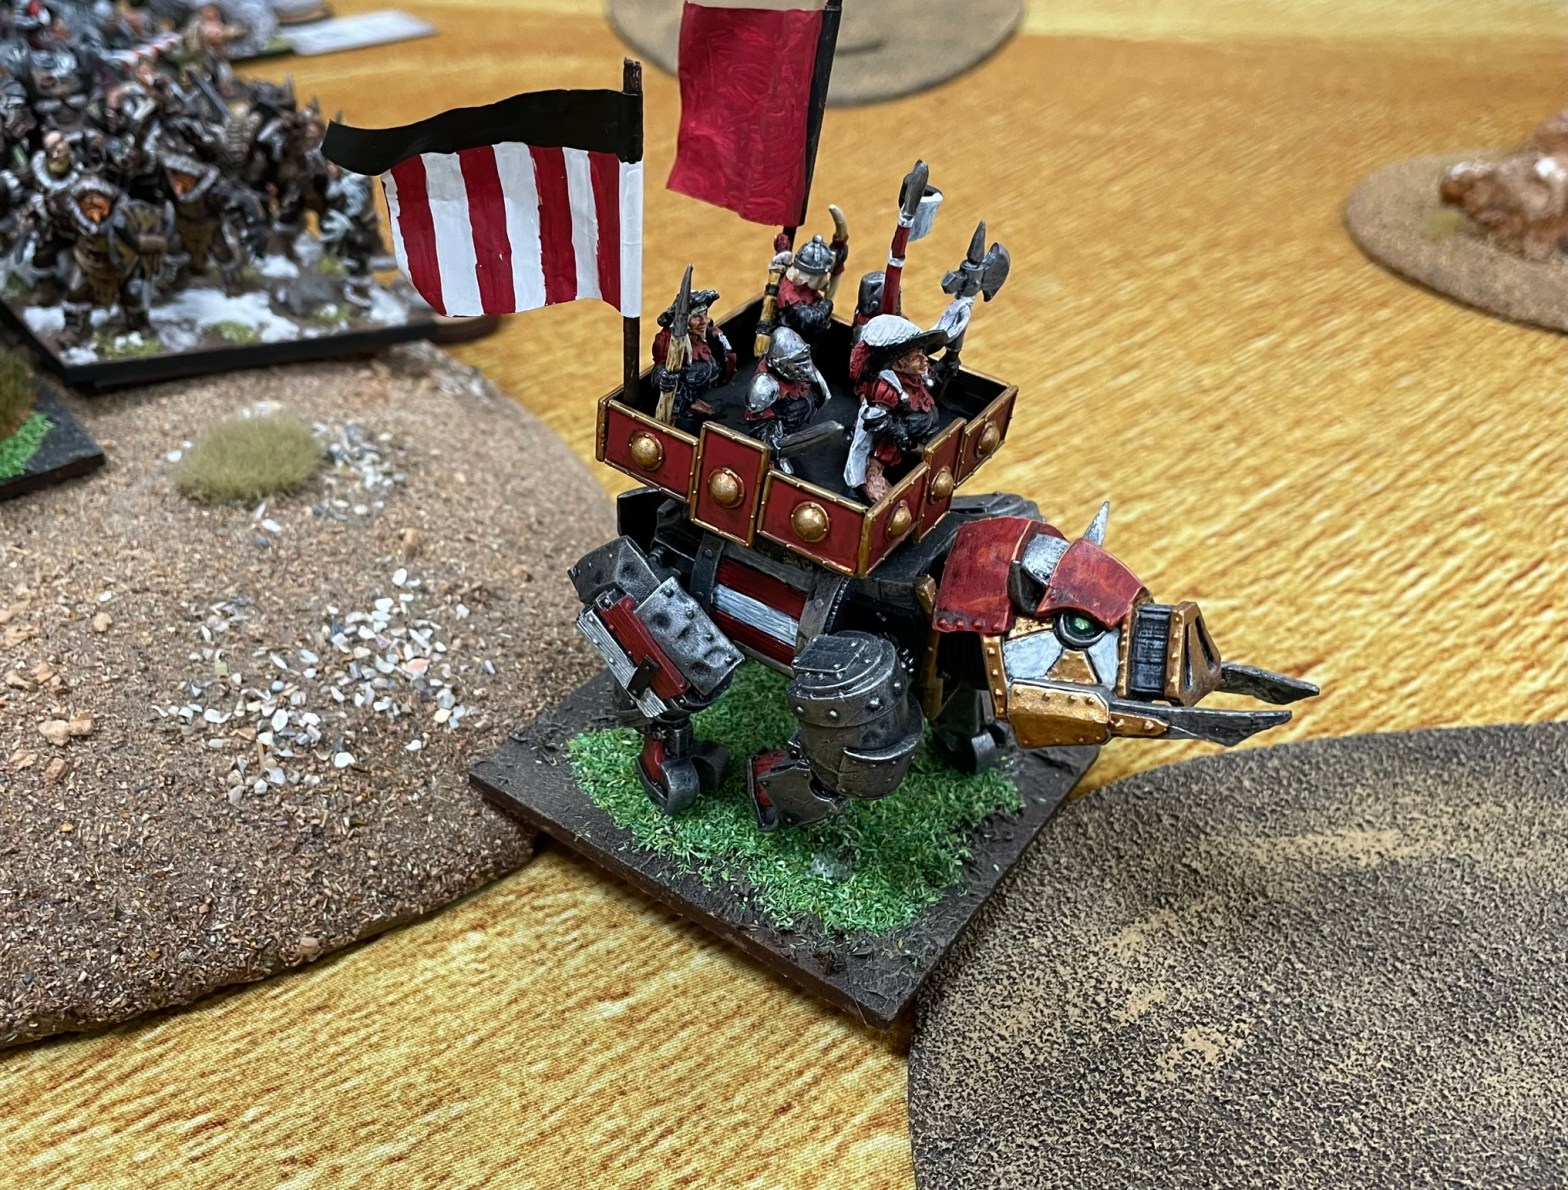
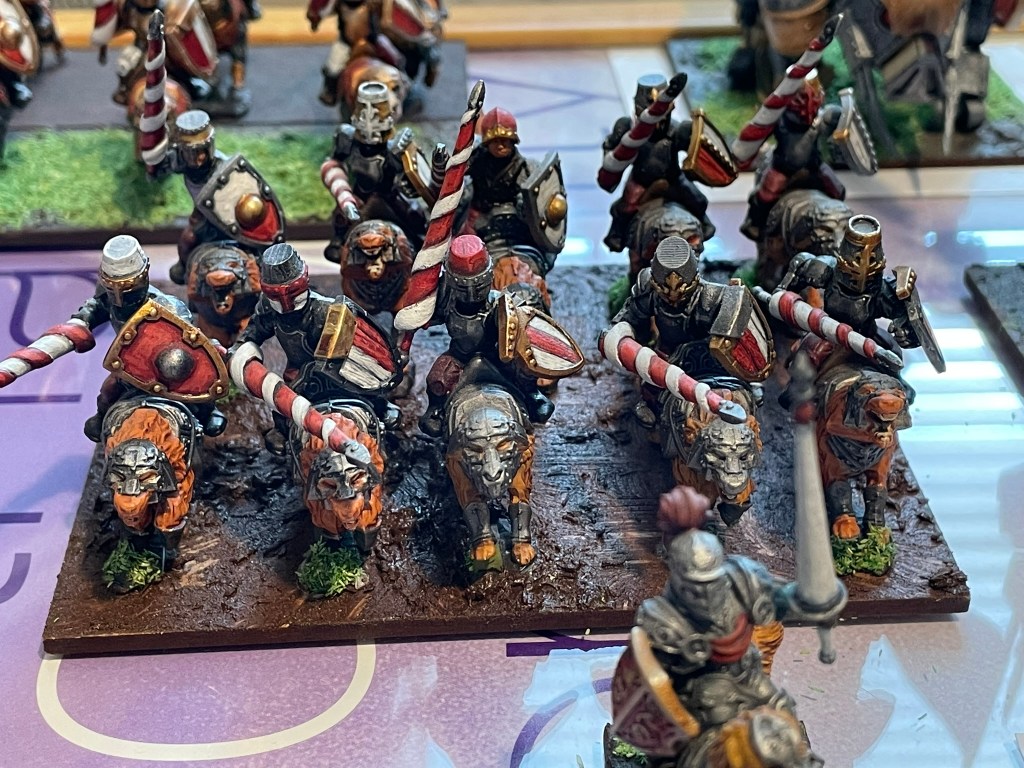
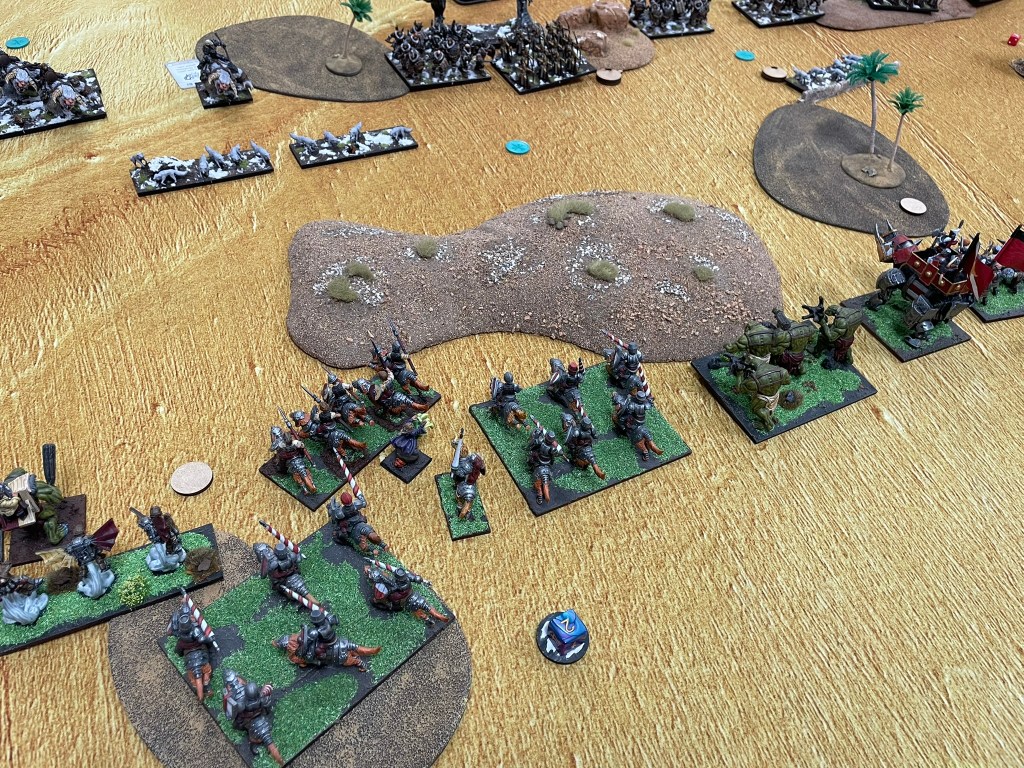
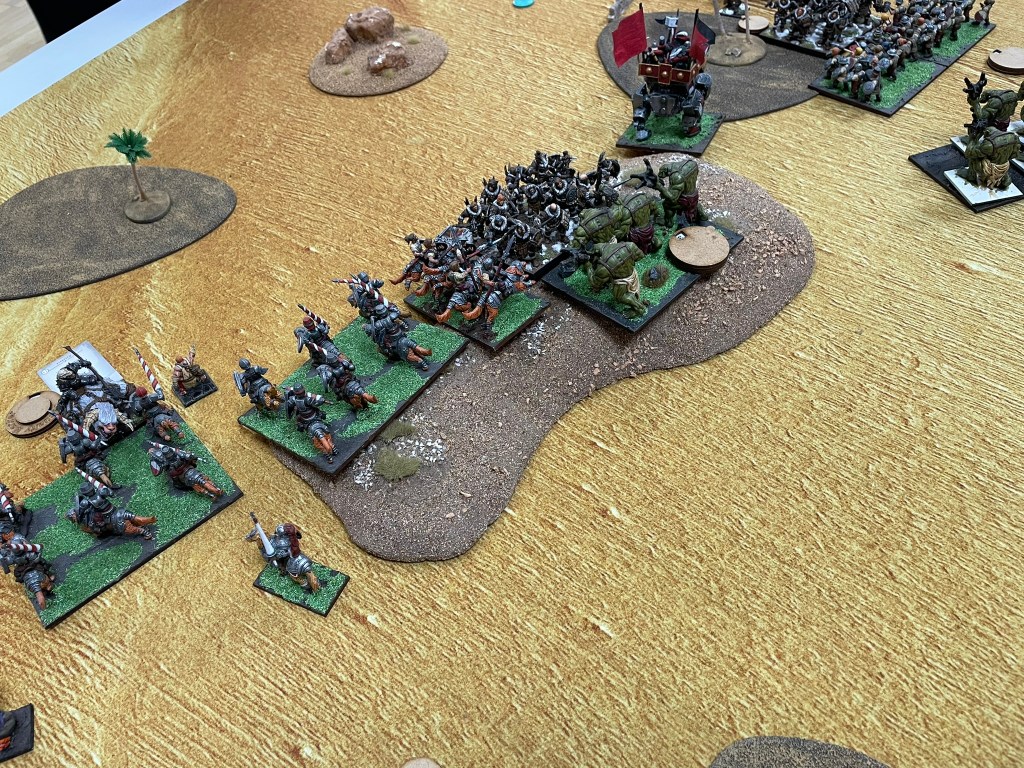
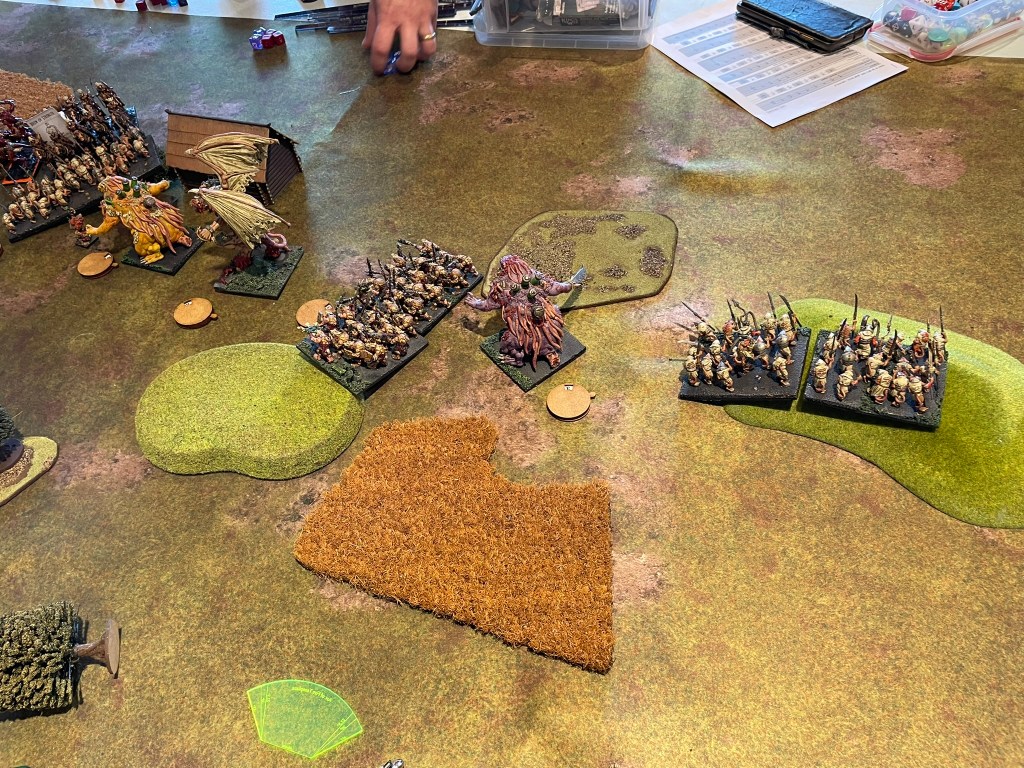
On the right flank the Halflings had their heavy hitters, and it was here I envisaged there being problems. If the Stalwarts and the Iron Beast could hold the centre long enough, the Wild Lancers and Juggers stood a good chance of sweeping around, catching some flanks and potentially breaking into the middle.
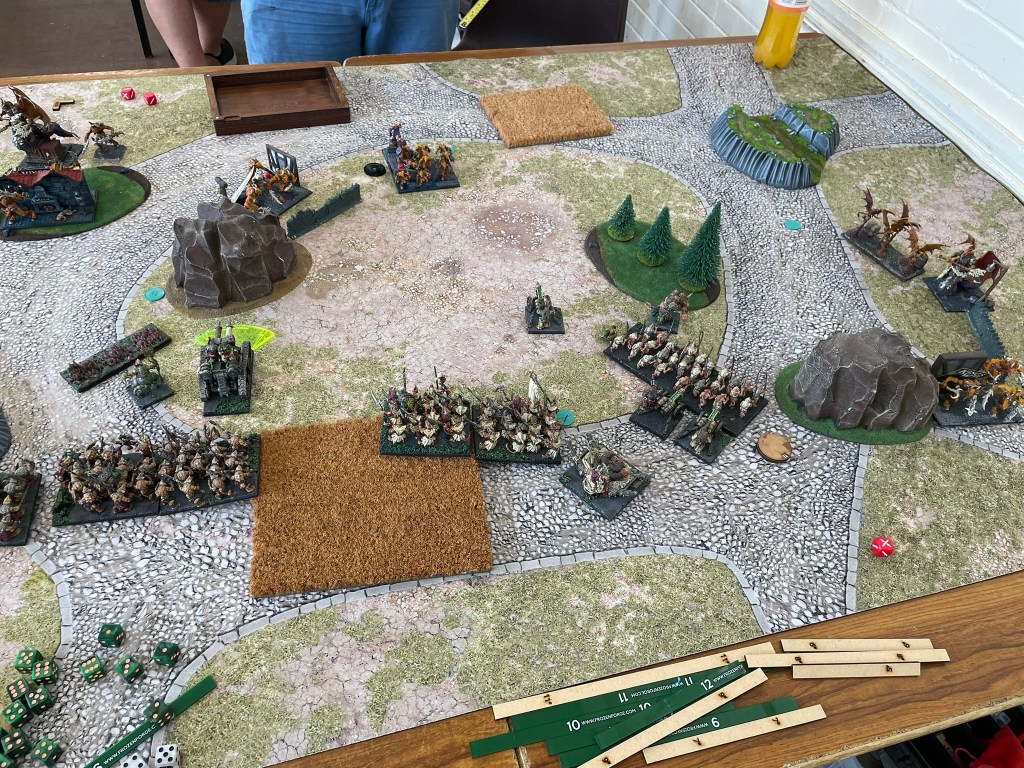
The Stalwarts made a play for the loot in the central forest, charging into the vermintide that had picked it up and wiping them out. Unfortunately, the response from the Ratkin was immediate and deadly. A Brute Enforcer and both the Mutant Rat Fiends charged the heavily armoured Halflings and tore them to shreds, picking up three points worth of loot counters in the process. The spear horde charged the Iron Beast, but failed to wound it, resulting in it becoming the target of a number of very angry people. The spears were surrounded by Ej Grenadiers, the Beast, the Harvester and the Wild Lancers. The Halflings would have their revenge. However, as the Halflings repositioned it became clear that the Ratkin had managed to sneak the loot counters behind their own lines, out of the Halflings’ reach. The Tangle had secured three points, whilst a Brute Enforcer had picked up the counter from the centre. As this happened the infantry hordes and fiends pressed forward, tearing the grenadiers from the sky and dismantling the Pride of the Shires. It was a dark day for the Halflings and a triumph for the vermin.
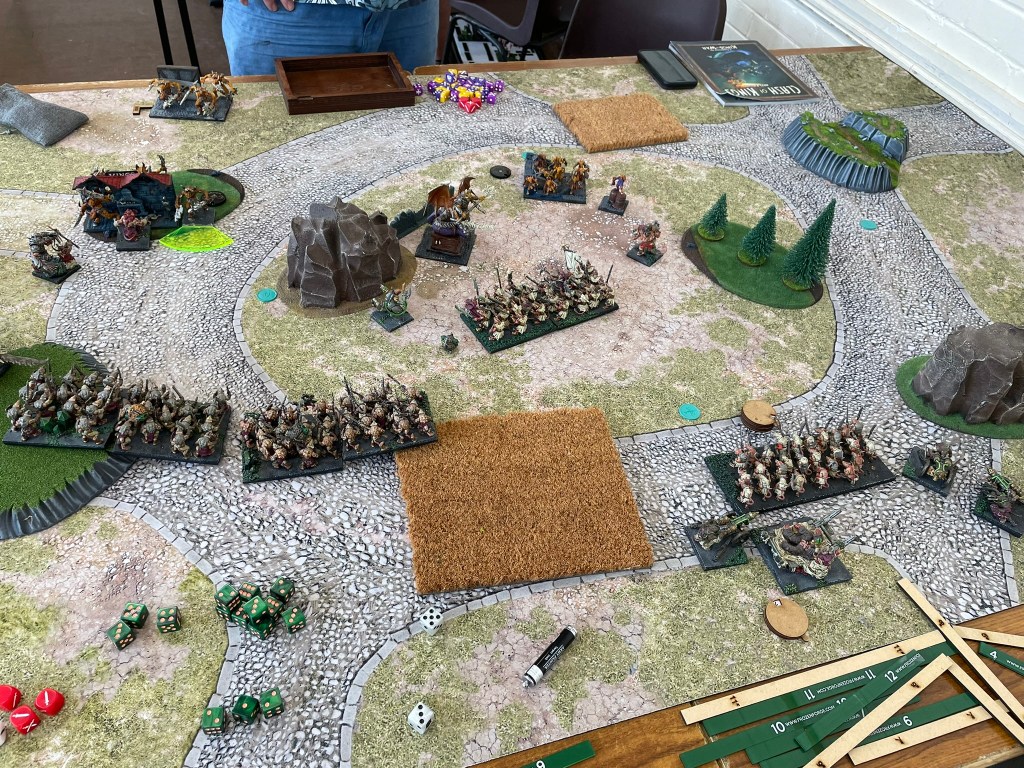
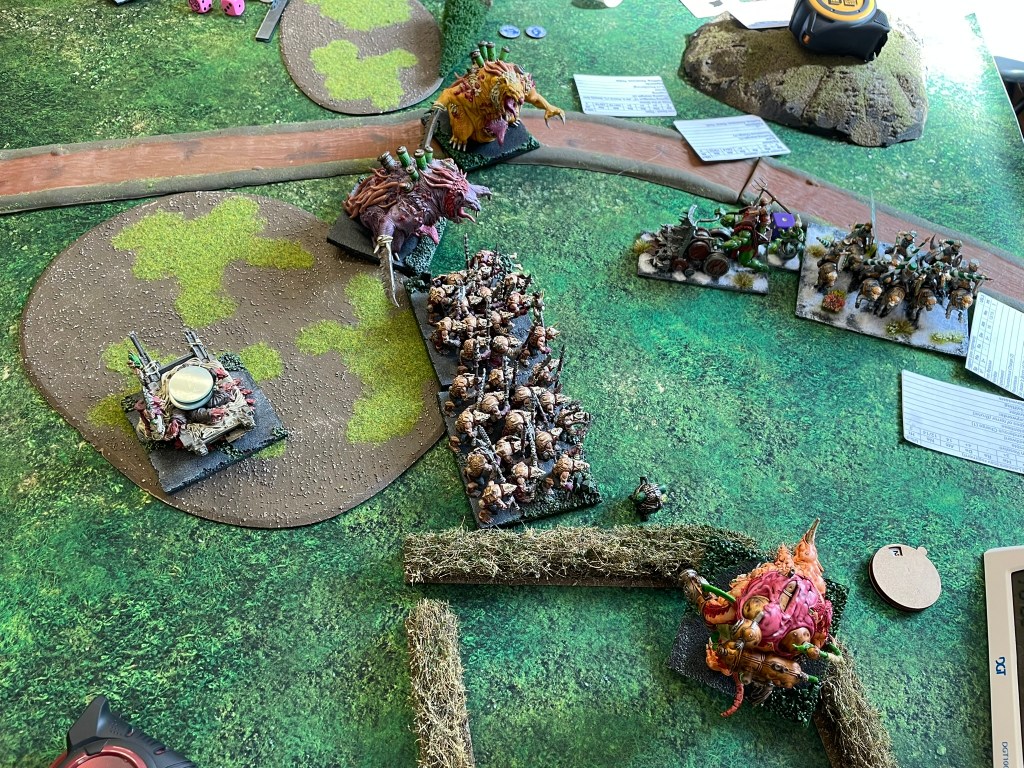
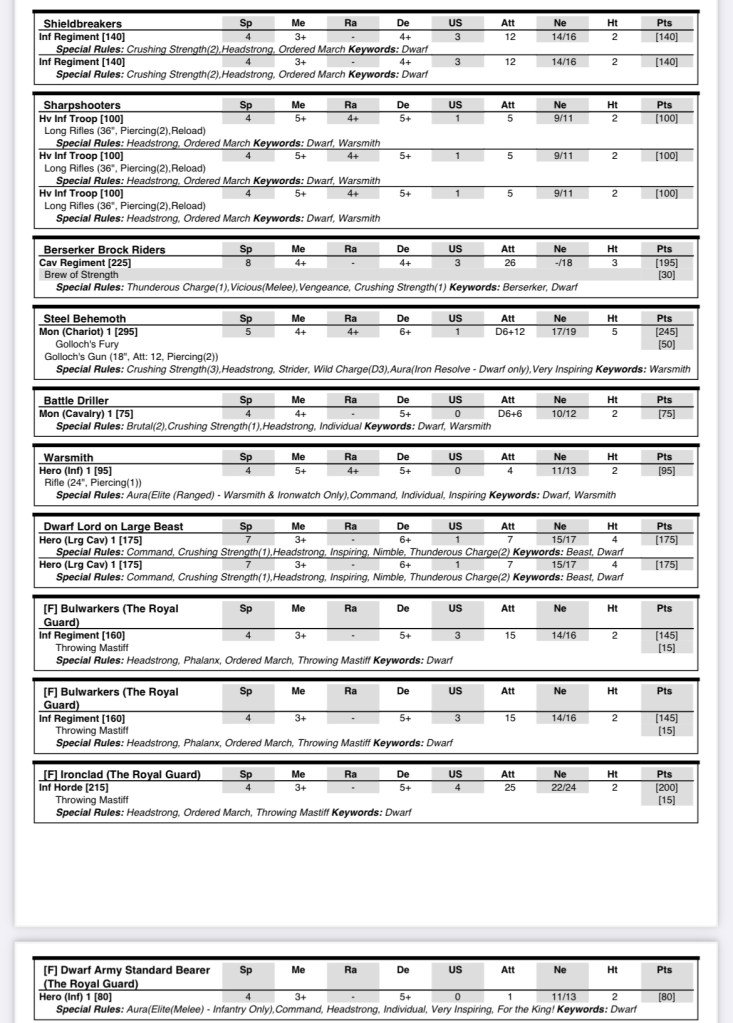
Game 3 vs Dwarfs, Hold the Line (the actual Hold the Line Scenario without any extras)
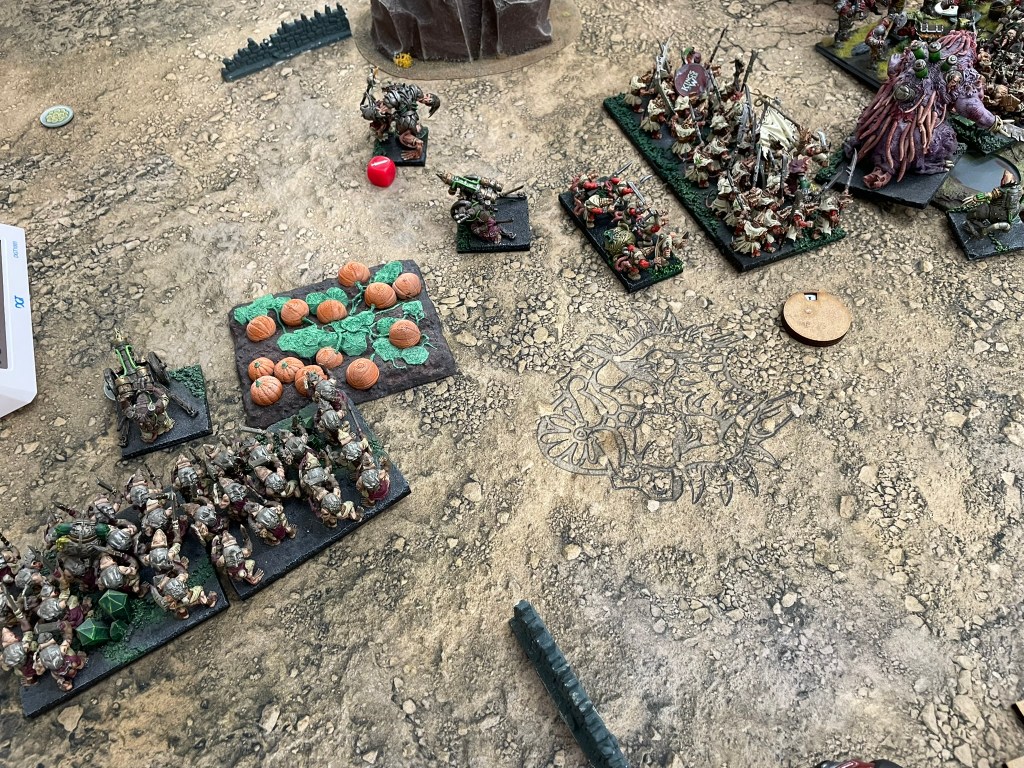
Dwarf armies these days seem to be delivered in a pretty standard package. There’s the formation, Golloch’s Fury, two Lords on Beasts, two infantry regiments (to taste), a brock regiment with a magic item, and some shooting of some type. On the plus side it means you know what you’re getting yourself into, on the not so plus side you also know what you’re getting yourself into.
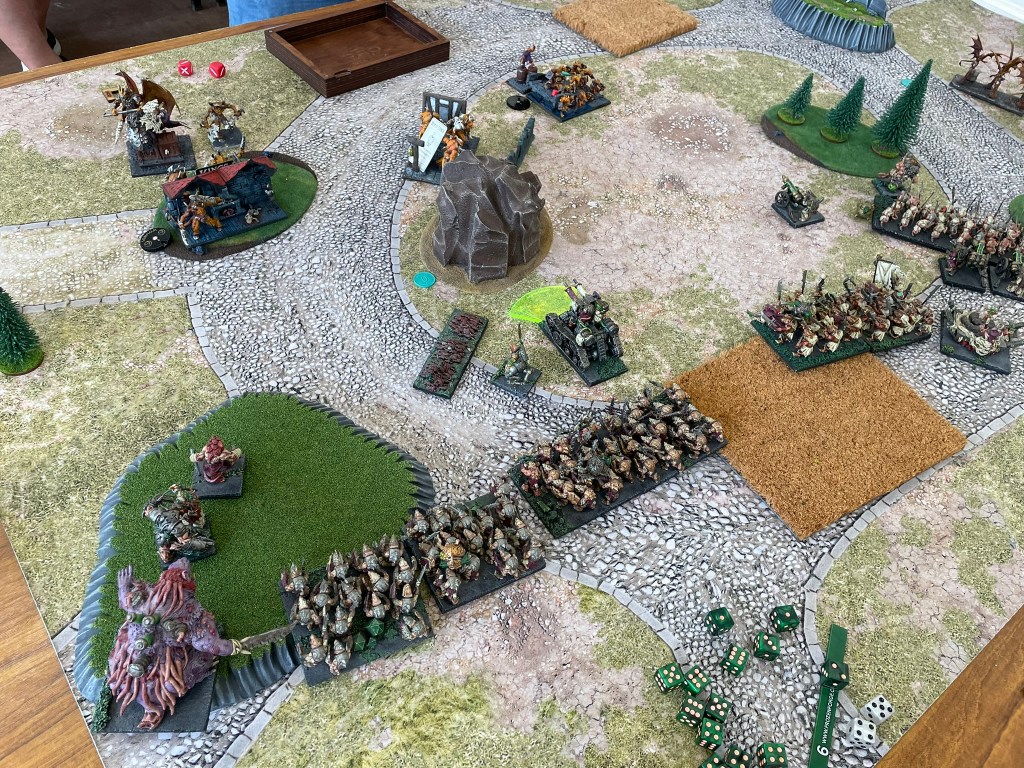
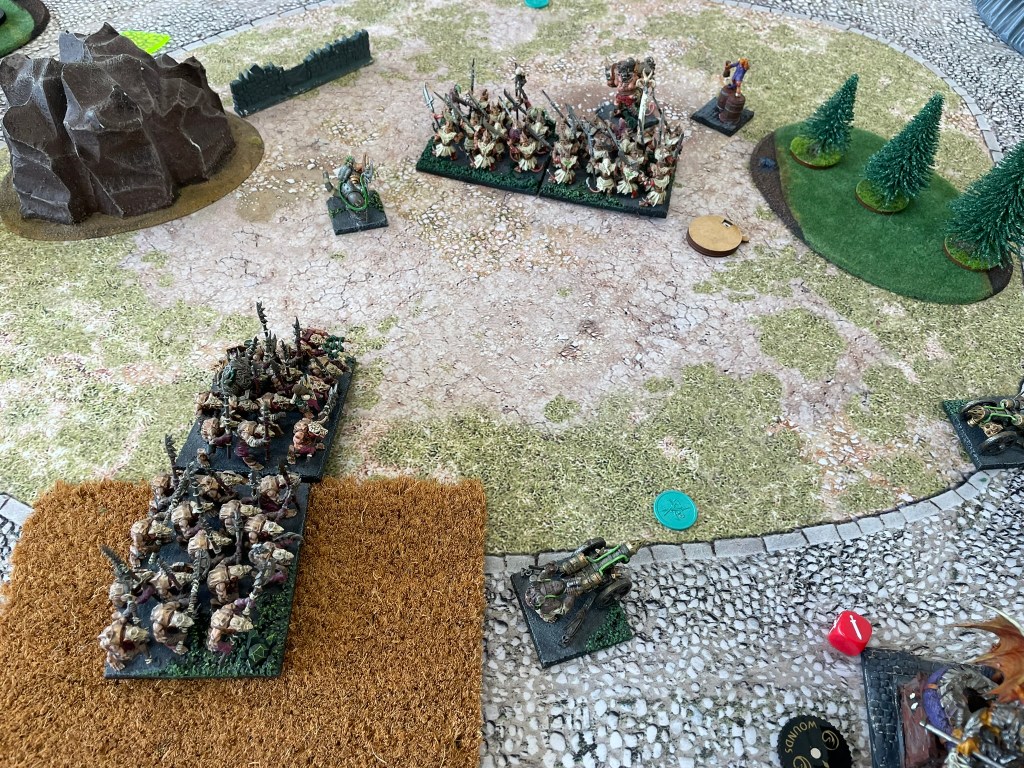
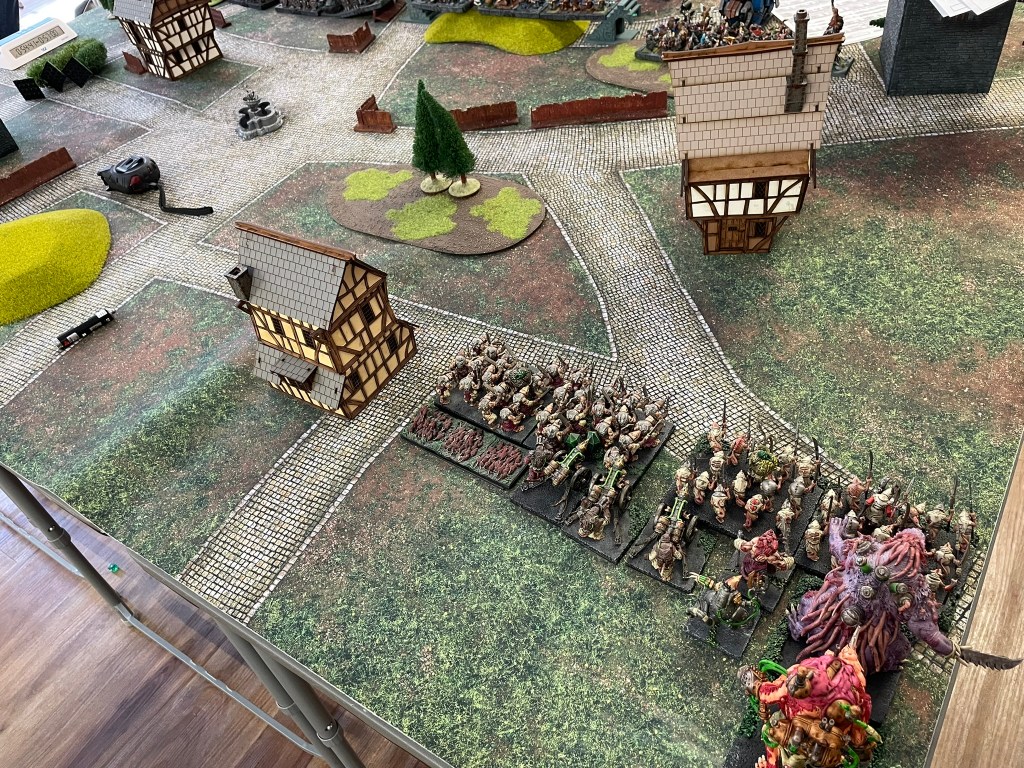
In this case the shooting came from three sharpshooter troops, which happily were mounted on a hill, that happened to be in the middle of the Dwarf deployment zone… and… had a load of walls in front of it. This was the second time in the day where I wished I’d brought some speedier units (or Scud). Shutting the shooting down was going to be hard, so after a bit of a thought I decided I wasn’t. As I looked at the table I realised that the four houses on the table created reasonably well protected channels at either end of the table and so I did the unthinkable (for me) and split the army into two halves. I placed one half on the far-left flank, with the giant, and the other half on the far-right flank. I then took a deep breath and hoped for the best!
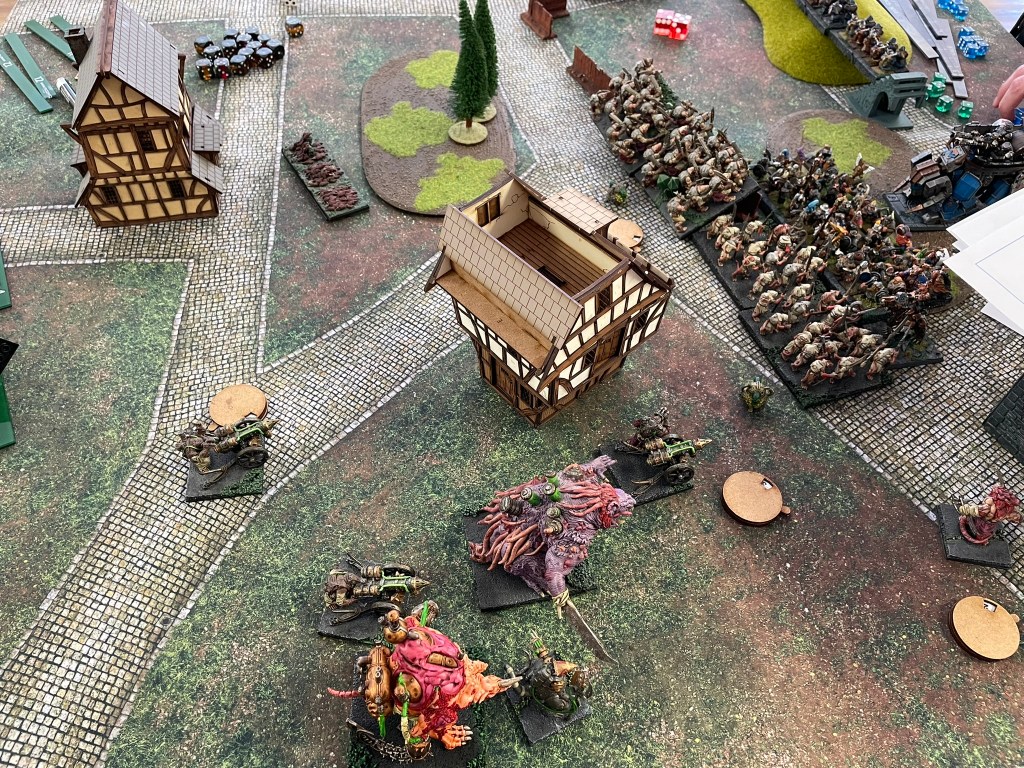
On the right flank the spear horde and Cryza led the advance. The houses shielded them from the shooting. Directly in front of them was the enemy rumble giant and the brock riders. Between the cavalry having to take a hindered charge, phalanx and a plague pot I wasn’t overly worried about the brocks. The giant though, that was a different matter. I was well aware there was a Dwarf Lord on a beast and a regiment of Shield Breakers making their way down the centre towards the channel between the two houses, so if I didn’t remove the giant quickly, I could find my flanks under a lot of pressure. Cryza’s lightning bolt promptly removed the battle drill hiding in the Dwarf ranks and a brute charged forward to start grinding down the giant.
I think it’s fair to say half the plan worked. The brocks didn’t make an easy task of dealing with the spear horde, and after the giant had removed the brute the Mutant Rat Fiend that replaced it easily soaked up all the damage dealt. Unfortunately, I underestimated the speed with which my troops could remove the enemy, and the damage just didn’t land. As a result, the fiend found itself pinned by the giant, allowing the beast mounted Lord a cheeky flank which brought the beast down. Eventually though the chaff of the ratkin warriors were removed and the shock troops pushed to the fore, smashing a regiment of Shield Breakers to pieces, before turning on the beast mounted Lord and removing him. Cryza kept the Bulwarkers out of the scoring zone whilst the Tangle cleared out the brock riders with a well time fireball. The rats had won on the right, and there was the sweet stench of hope in the air.
The centre of the table was a much quieter affair. By moving between the houses, the sharpshooters spent most of the game chipping away at whatever target they could find, which tended to be the odd war engine team that didn’t quite make it into cover. By turn five they had given up on shooting and had moved off the hill to claim the centre.
That meant the left would decide the game. The rats slunk around the buildings, towards the enemy lines. The dwarfs held still. In an usually bold move the warriors broke cover and charged, with a spear horde, into the Ironclad horde. I figured that if I could wear it down I might have a chance of holding onto the scoring zone just by weight of numbers. I probably shouldn’t have been surprised that the double charge barely scratched the horde, but it’s really easy, once the game is done, to step back and realise just what you should have done. Despite the failure of the charge, I continued to press my troops, sending the Mutant Rat Fiend into the beast rider, before setting it, together with the giant, on Goloch’s Fury. The dwarf lords fell, but the horde endured, and whilst I had lost my infantry, I still had a solid amount of unit strength floating around on the left side. Unfortunately, it wasn’t in the right place. I’d let myself get carried away and lost focus on the scoring zone. Any thought of a win was dismissed in the seventh turn when the second Bulwarker regiment entered the right flank scoring zone and took if for the Dwarfs.
For a game that I had gone into thinking I was the underdog, it had ended up being incredibly close. With the benefit of hindsight I think I could have played much better, sending the giant and war engines forward first, followed by the characters and the infantry hordes to sit in the scoring zone, forcing the Dwarfs to come to me. I would like to think that things might have turned out a little differently. However, one of the joys of this game was facing a situation I had never faced before with an army list that I’m still getting my head around.
Final thoughts
What a massively fun day, with three great games. The scenarios were really engaging, although I have to admit playing Hold the Line for the final scenario was a nice wind down before the drive home. I will definitely be keeping an eye out for the Rushden Rumble next year.
In terms of the list. With the benefit of a few hours driving home, and a bit of decompression I don’t actually think I could fault it. I faced three very different armies, and the list had ways of dealing with all of them. The Mutant Rat Fiends performed brilliantly, with the extra Radiance of Life making them work the way I always imagined they should. Not only do they have great models, but they now have a stat line to match.
The other new joiners were the Spewer and the Brood Mother. I have a bit of a hot take on these and it’s something along the lines of: rats, in gaming terms, are a bit below par when it comes to comparing their stats to the equivalent Kingdoms of Men from which all other units are derived. Yet for some reason I expect great units to achieve great things, and when it comes to the Brood Mother I’ve just never bought into the hype. I definitely wouldn’t say that she was an MVP, in fact I would find it difficult to describe her as a VP. Now in part I will absolutely accept that I may not have played her as well as other players would have but looking back on the day I can honestly say that there is no other unit I can think of that would be a better fit for this list. She brings a little bit of everything to the table, and it’s the capacity for rat units to be equally okay at a number of different roles that make them so interesting to play. I’ll definitely be taking her next time.
This theory also explains my view on the Spewer. I fear it’s been unduly maligned for a few years now, despite the fact that it does both shooting and combat quite well, and all because it doesn’t have Steady Aim. Whilst it is a little unpredictable at times, it is a beautifully flexible addition to a mixed arms list, which I look forward to playing with again.
Until next time, take care. Don’t want to miss the next post? Pop your email below to subscribe.