
Flushed with victory from Game 1 against the Forces of the Abyss, the Halflings found themselves facing off against the might of the Imperial Dwarfs. Until the end of last year I hadn’t played against Dwarfs that much, but I’ve now found myself facing off against them in three of the last four events (including this one).
What’s been nice is that aside from two Lords on Beasts the armies have all been sufficiently different that it hasn’t felt like playing the same list over and over again. Although this list brought the formation, Big G’s Fury and the aforementioned beasts neither of the special characters were there, which made a nice change.
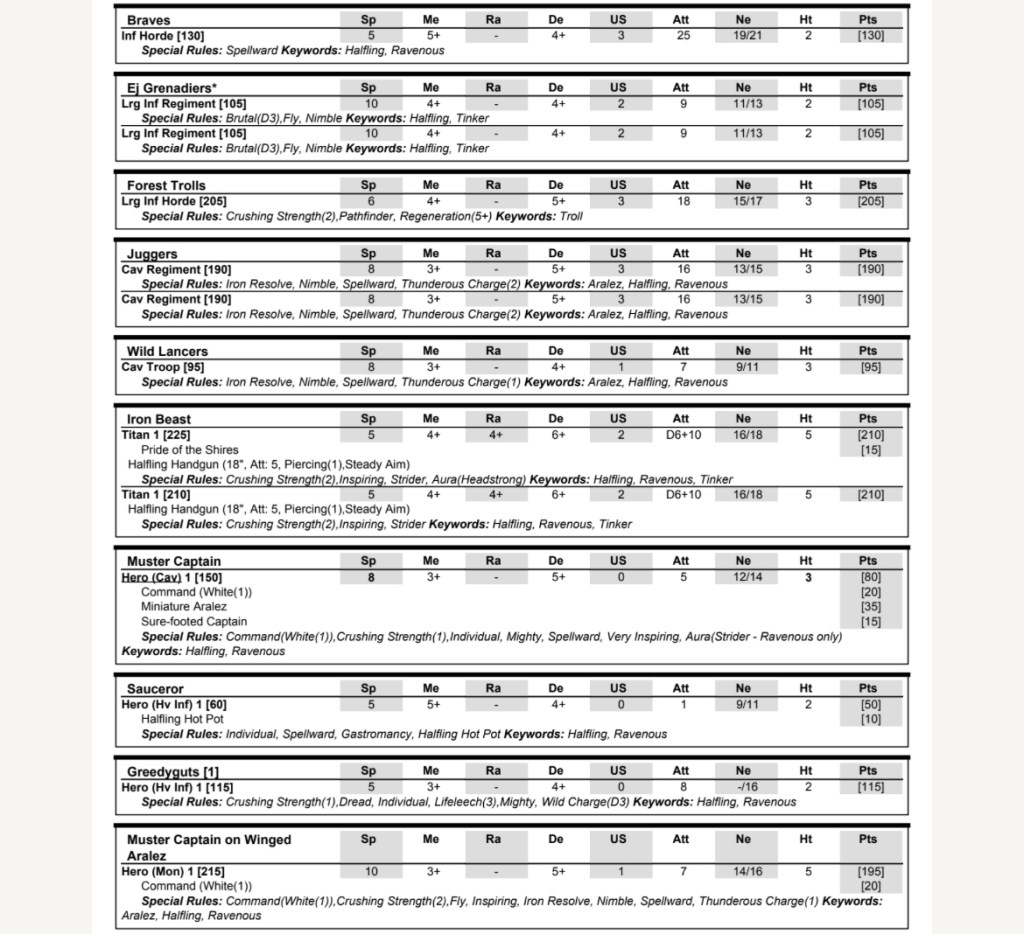

The scenario was Stockpile. My instinct with this scenario is always to try and stretch the objectives out (because I have a few speed ten units I make the mistake of thinking my army is an alpha strike force, when in reality it absolutely isn’t). As a synergy-based army Halflings benefit from being closer together from the outset, and knowing how much punishment a Dwarf army can take I was really happy that the objectives landed where they did as it encouraged me to keep my units closer.
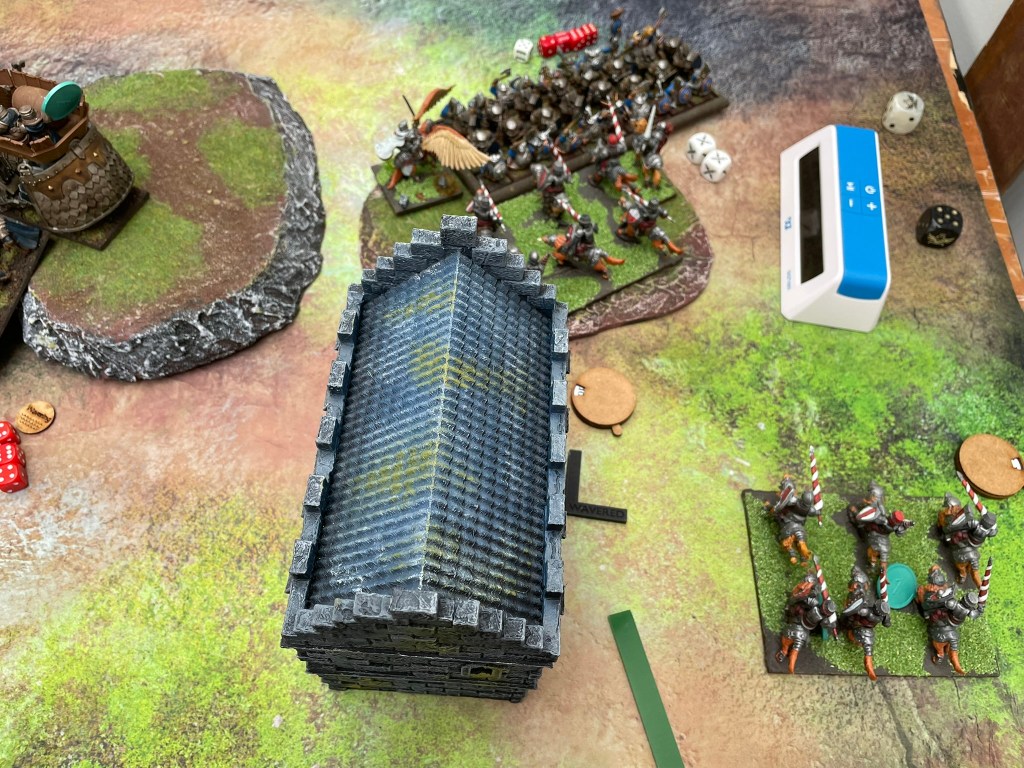
My Juggers and Greedy Guts went on the right flank, whilst the Iron Beast, trolls and braves went in the centre. Fully expecting there to be a beast mounted Dwarf Lord and phalanx regiment at either end of the Dwarf line I did commit the flying Muster Captain to the left, with a regiment of Grenadiers to, at the very least, keep the Lord busy for a short period of time. As it happened the Dwarfs didn’t disappoint with Big G’s Fury in the centre, a horde to either side, the Brock riders in reserve and of course a spear regiment and beast lord on either flank.
Getting started
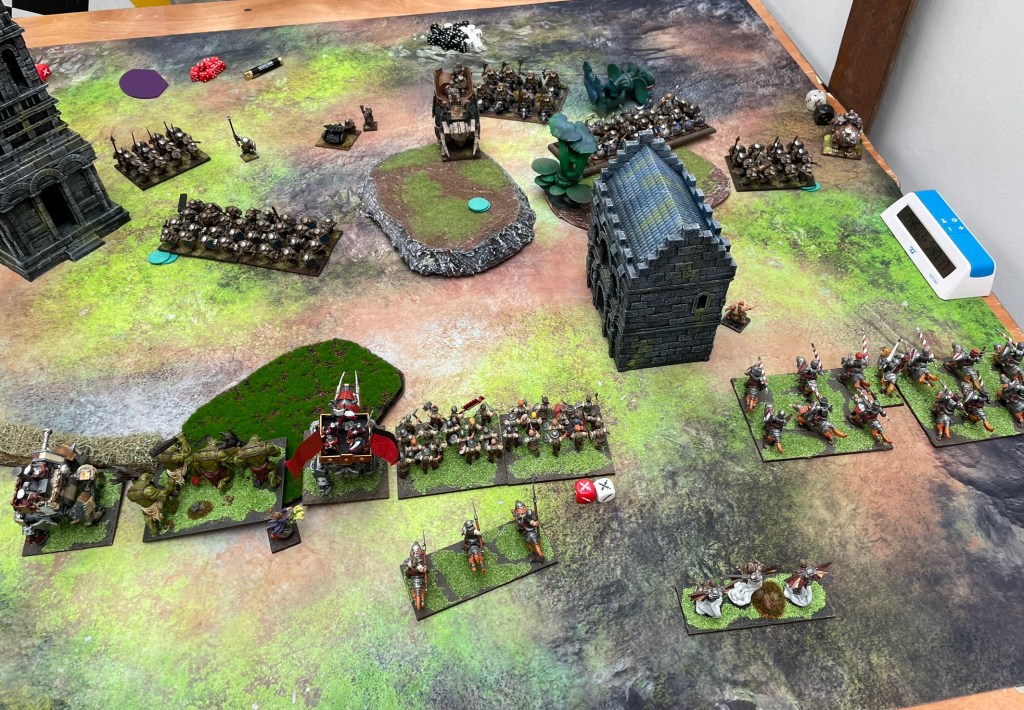
On my left of the table the aim of the game was simple. I wanted to keep the Dwarf Lord on his bear busy long enough that he couldn’t make an early entry into the centre of the table. The flying muster captain and the Grenadiers made a good start, jumping around the flank and applying pressure on the creature with the threat of highly uncomfortable charges. Through this process the muster captain also found himself with opportunities to jump into the Dwarf’s back field, although the presence of the flame belchers dispelled any thoughts of hopeless heroics.


In the centre, the Iron Beasts and the infantry advanced cautiously, also keen to avoid the flame belchers, as well as early charges from either the brocks or Golloch’s Fury. On the right, similar caution was exercised. I was comfortable that there were more than enough units to manage the beast lord, the spear regiment and the horde of Shieldbreakers, but it had to be managed carefully.
As the Dwarf spears moved forward, Greedyguts broke ranks and charged, putting about four wounds on the unit. Often underestimated, my opponent responded by throwing the beast lord into the Greedygut’s flank. I was more than happy to trade Greedyguts for a combined charge with my Juggers on the defence six lord in the front, but the mighty Halfling survived the charge (far from inconceivable), and my Juggers got a combined flank charge on the beast, taking it down and putting the spears in an uncomfortable position, especially as Greedyguts proceeded to take another four wounds off them and waiver them. Unfortunately, the spears passed their headstrong roll and took their revenge on the cursed creature.


An opportunity presents itself
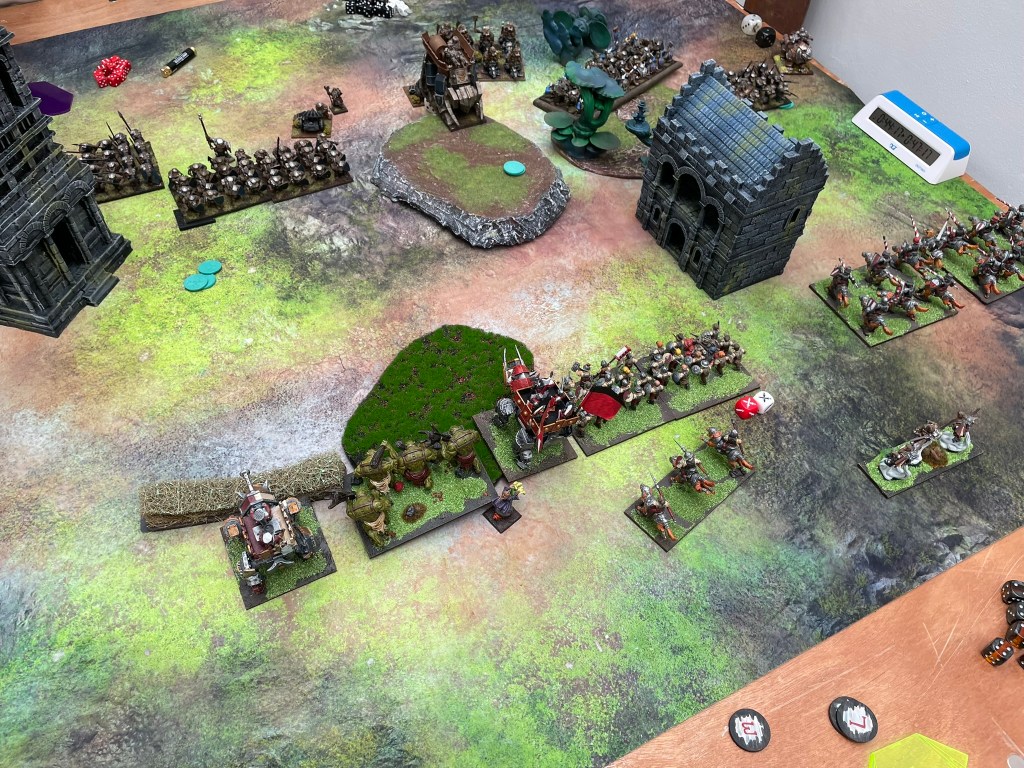
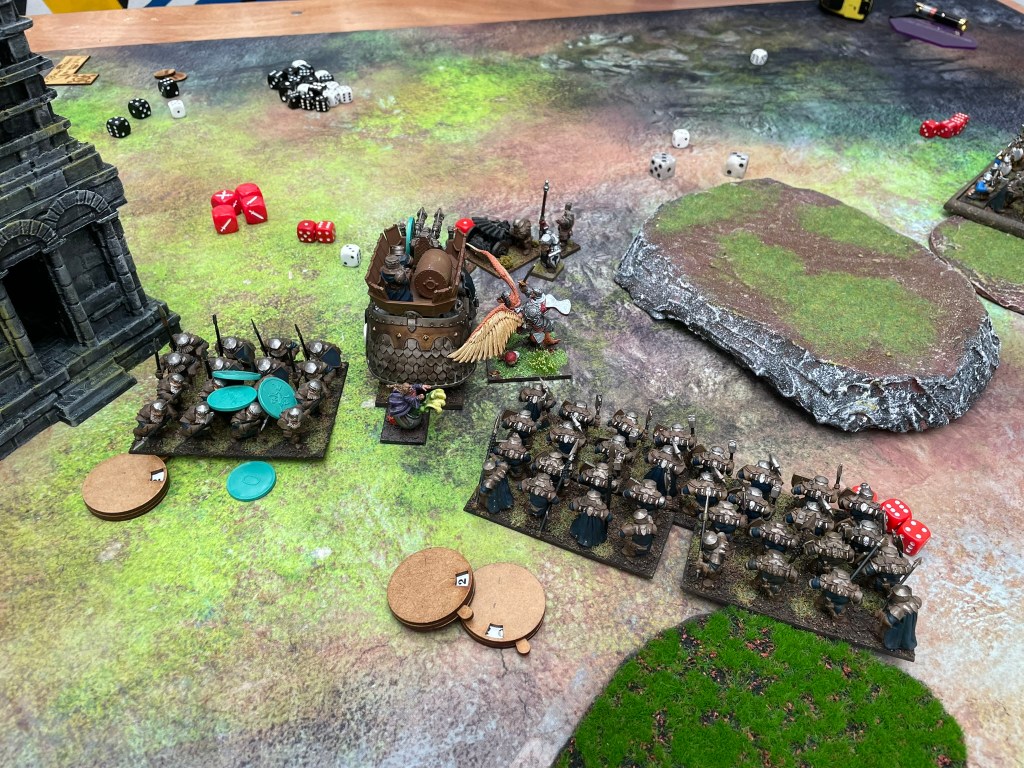
The flying muster captain and the grenadiers were doing a great job of keeping the other Dwarf Lord away from the fray. By now the poor creature was a bit out of breath and facing the wrong direction to be helpful for a couple of turns. The Grenadiers realised they had a flank charge on the Ironclad horde. They jumped into combat, but the performance was along way from what they had hoped. This started a series of tit for tat combats as the Ironclads and Golloch’s Fury smashed through Wild Lancers that had advanced towards the central hill, and the Brock Riders took down the Grenadiers. Needing to extract as much advantage from the situation as possible the flying muster captain, one of the pigs and the trolls hit the Brock Riders, whilst the Pride of the Shires and the braves took on the Ironclads. Millimetres and dice rolls mattered as the tired bear was turning back towards the centre and the run around it had been forced to undertake had made it angry.


Fortunately, the brocks were run to ground and the pig and the trolls turned to face the bear, whilst the muster captain prepared to jump to the far right of the table, using some command dice based stealthy to deter the flame belchers from wasting their shots on him. Instead, the belchers turned on the trolls and waivered them, and the bear mounted Lord charged the closest Iron Beast.
Into the grind
A successful headstrong roll on the trolls gave the Halflings a glimmer of hope. The trolls flanked the beast mounted lord, whilst the Iron Beast went into its front. Many dice rolls later the Lord had gone and the Iron Beast was bearing down on the Bulwarkers who had been busily collecting counters. On the right flank one regiment of Juggers and their muster captain routed the other spears and claimed their two loot counters, whilst the flying muster captain flanked the Shieldbreakers and the other regiment of Juggers charged them in the front. As the flying muster captain was hindered the double charge was never going to be a sure thing, and in response the Shieldbreakers fought back and waivered the Jugger regiment. In the next round though the flying muster captain put a decent round of wounds onto the dwarfs, but a double one kept them in the fight and kept the muster captain away from the centre for another turn.


In the centre the Halflings also benefited from a double one that kept the Pride of Shires in the fight against the Ironclads. Sadly, the steam powered contraption could do little to hold up the inevitable erosion of the centre ground. If only there had been a flying muster captain and Jugger regiment on hand to help out…
With the Halflings reduced to one Iron Beast in the centre things were looking grim, despite the Halfings holding four of the seven tokens. The pig couldn’t quite kill the Bulwarkers fast enough and received a flank charge from Golloch’s Fury for its trouble.
The flying muster captain slashed at the Shieldbreakers again, this time sending them running, before turning to the centre and driving his golden furred aralez into the flank of Golloch’s Fury in a last ditch effort to recover the tokens stolen from the now destroyed Iron Beast, but it was too little too late and the Dwarfs won the day 4:2.
Final thoughts
This was an absolute cracker of a game, probably the best of the three (and the standard was incredibly high). Whilst Halflings aren’t an alpha strike army they can hit incredibly hard, and their command dice abilities are very useful in supporting the style of play I enjoy with them, which made the Dwarfs far more manageable. I’d also like to add that this Dwarf army went on to win the battle scoring, so really happy to have done so well against it.
Two down… one to go!
Make sure you don’t miss game three… drop your email below to subscribe.
