With Clash looming in the UK I managed to squeeze in one last practice game. This is my third game with clocks, which I need because I am horrendously bad when it comes to timing. Fortunately, I’ve managed to get through the last two games without timing out, so practice has indeed resulted in progress. That means I just need to work on plans, tactics and strategies!
Points: 2,300
Scenario: Raze
The armies
Ratkin
1 – Warchief on Fleabag with Blade of Slashing
2 – Master Scurrier with Boots of Levitation
3 – Warlock with Boomstick
4 – Warrior horde with Plague Pots
5 – Shock Troop horde with Brew of Sharpness and Plague Pots
6 – Hackpaw regiments (2)
7 – Vermintide regiment
8 – Tunnel Runner regiment with Caterpillar Potion
9 – Weapons Teams (2)
10 – Mutant Rat Fiend
11 – Tangle
12 – Scud
The Order of the Green Lady
1 – Unicorn with Lightening Bolt and Heal
2 – Unicorn with Lightening Bolt and Heal with Boomstick
3 – Beast of Nature with wings and extra attacks
4 – Men-at-Arms Retainer hordes (2)
5 – Order of Redemption
6 – Order of the Forsaken (2 – one with Helm of Confidence)
7 – Order of the Brotherhood regiments (3 – one with Mead of Madness and one with Brew of Haste)

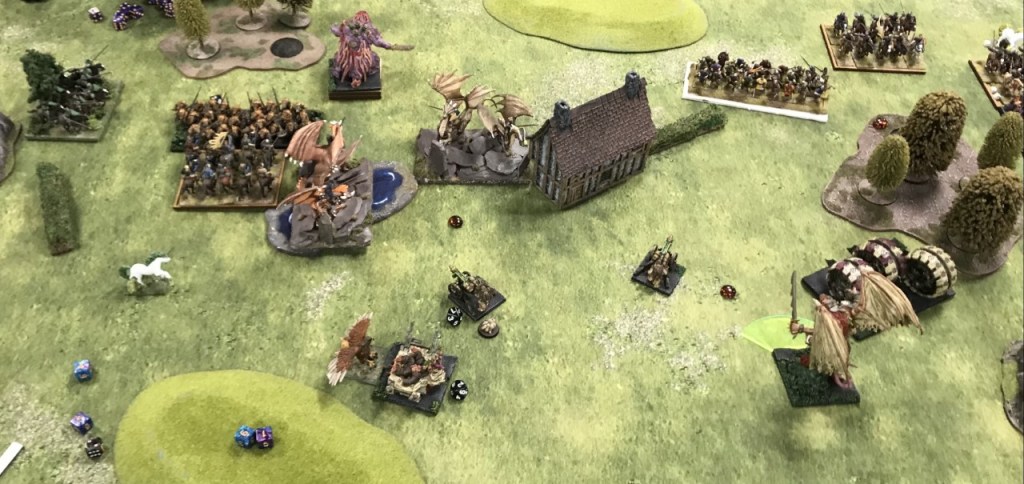
Turn 1
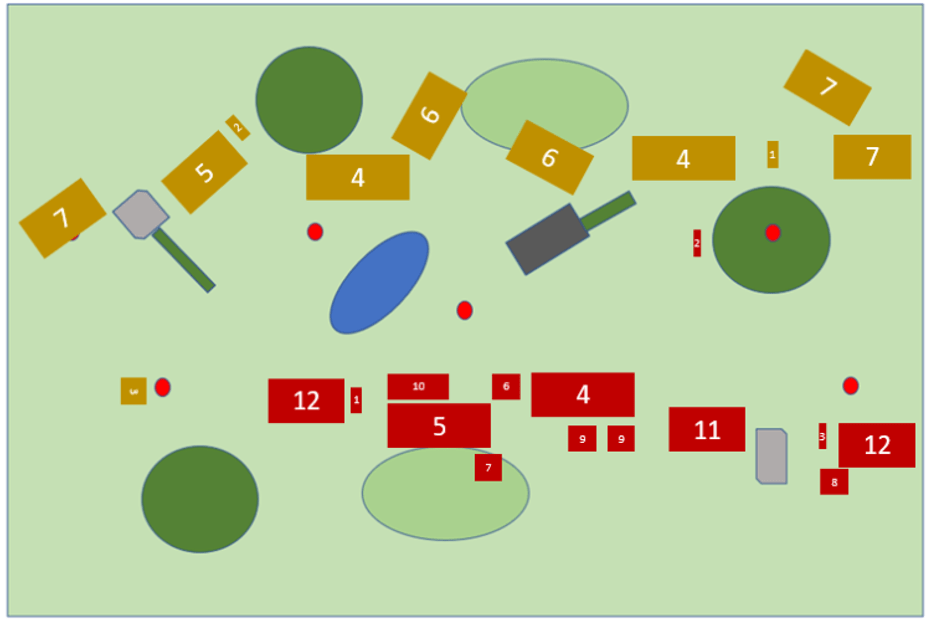
I won the roll off and decided to go first. Facing such a fast opponent I felt I needed to if I was to have any chance of getting into his half to start scoring. With the exception of some lightening bolts from the Warlock and Scud at the knights facing them the rats managed nothing more than a slight shuffle forward.
The Order of the Green Lady sallied forth in a guarded way, but with so many long charge ranges there wasn’t much required to start putting pressure on my little bundles of cuteness. The Beast of Nature predictably flew up to growl down my flank, however I had intentionally positioned the Hackpaws and Warchief so they could benefit from rallying and use their speed to respond to a wider variety of threats.
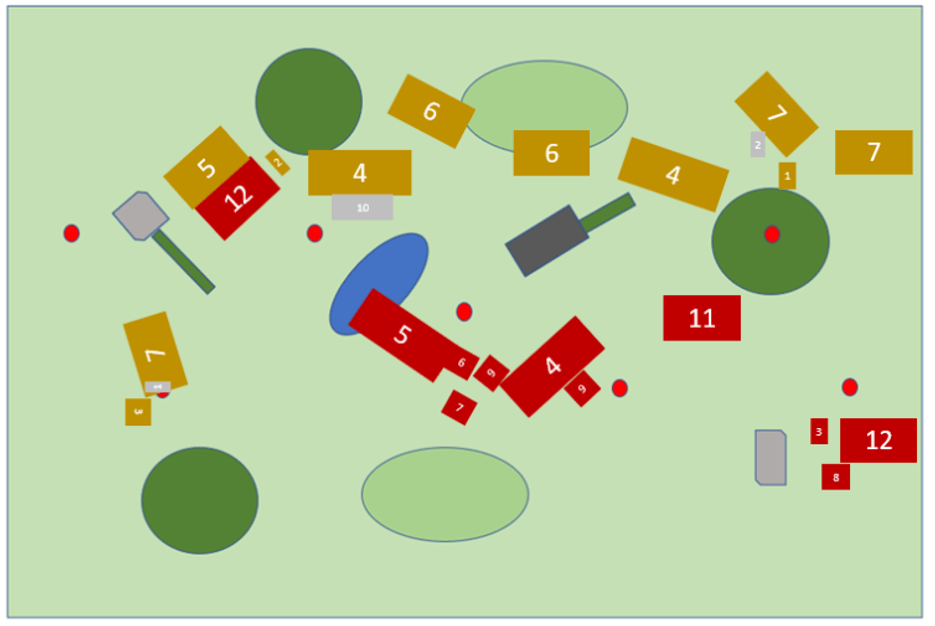
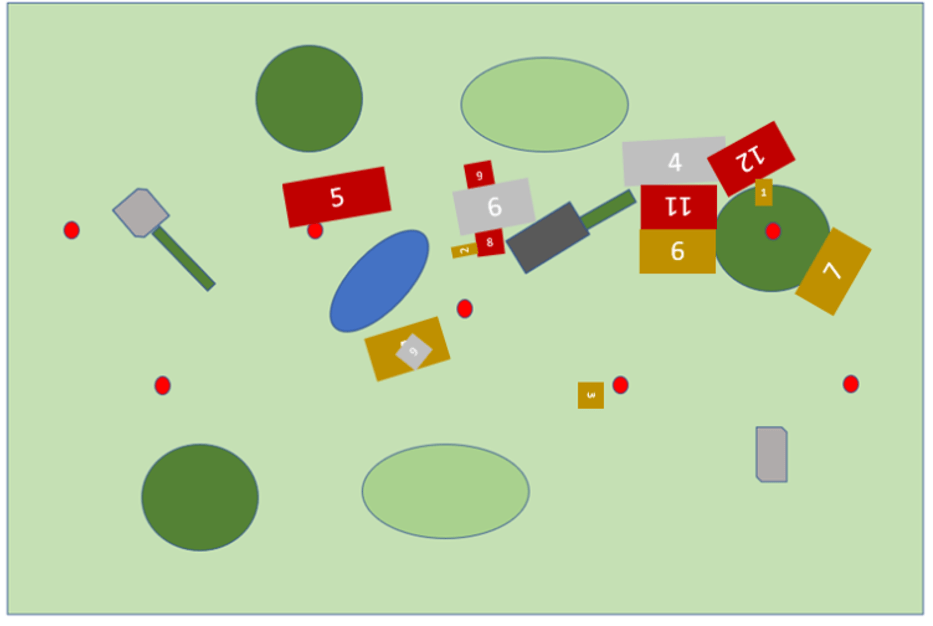
Turn 2
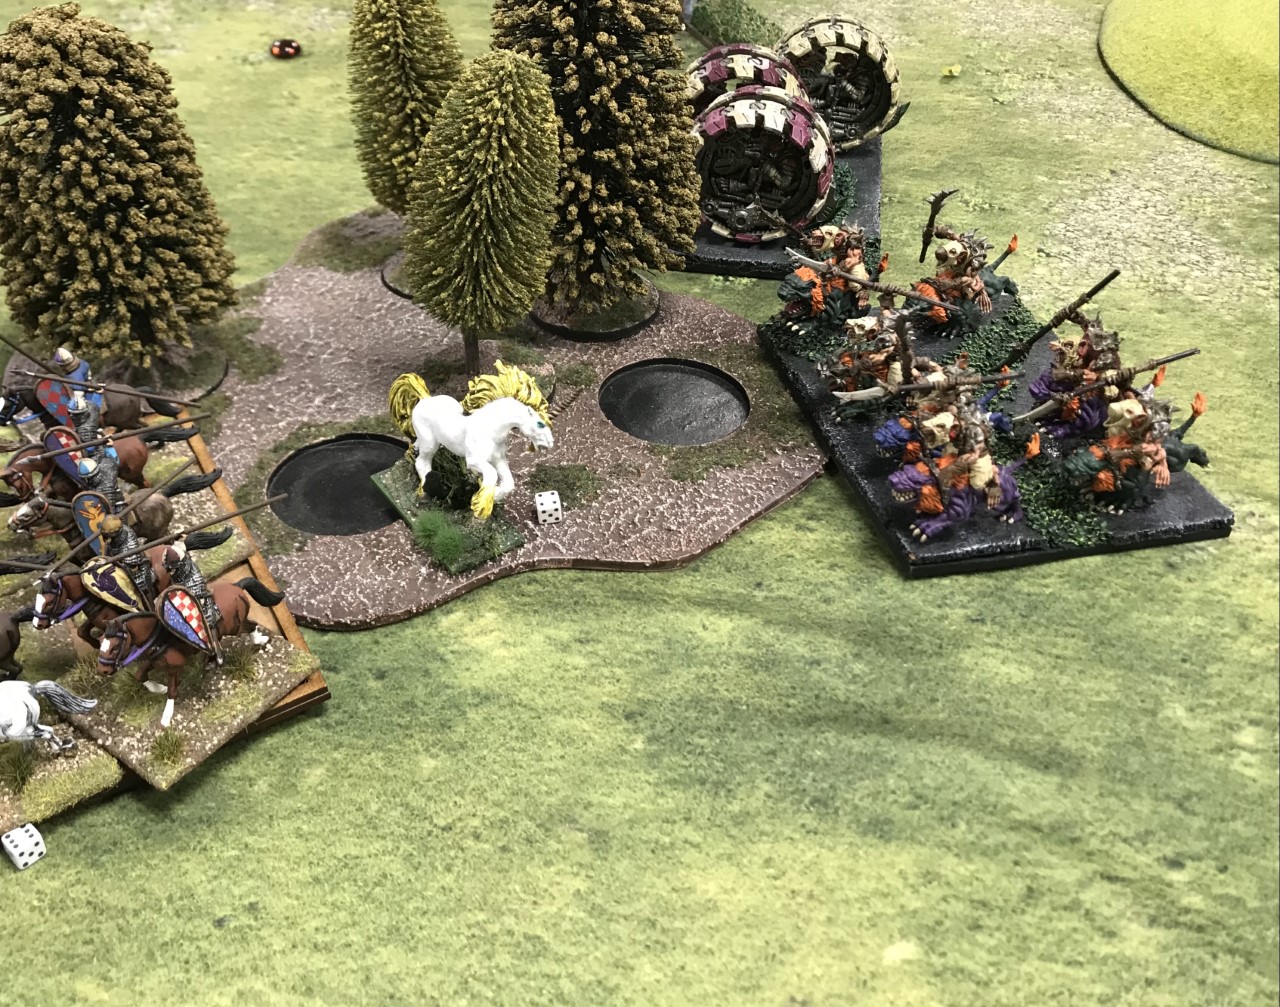
Alpha strike armies tend to get you thinking hard from the very beginning of the game, and already the left flank was giving me a bit of a headache. My Hackpaws could either charge into the Order of the Brotherhood or the Order of Redemption. I knew they weren’t going to be able to kill either, but they are intended to be a delaying unit, and on that basis the most important unit to delay was the Redemption Knights. I charged them into the Order of Redemption hoping to hold them up for a turn to allow my Shock Troops to move forward without being in too many charge arks. With the Beast of Nature staring at me down the flank there was only one response, so the Warchief charged in wounding the Beast, preventing it from flying. The Vermintide charged into the Men-at-Arms, whilst the rest of the units in the centre ordered themselves to make receiving charges from the Foresaken as comfortable as possible, with the Shock Troops dropping their pots to really discourage any charges at this early stage in the game.
The Master Scurrier charged into the Unicorn and managed 4 wounds, failed to kill it, but disordered it ensuring there would be no casting from it in its next turn. Finally, the Warlock and Scud zapped away at the same unit of Knights.
The Brotherhood’s response was rather limited. On the left no chances were taken with the Warchief. Knights and the Beast of Nature charged into him and took him out. The Order of Redemption struck back at the Hackpaws, showing just what a difference knocking thunderous off a knight unit makes, and failed to even waver them.
The Unicorn with the Boomstick plinked a couple of wounds off the closest Weapons Team and the other Unicorn backed away from the Master Scurrier to allow the last knight unit to charge him, killing him instantly.


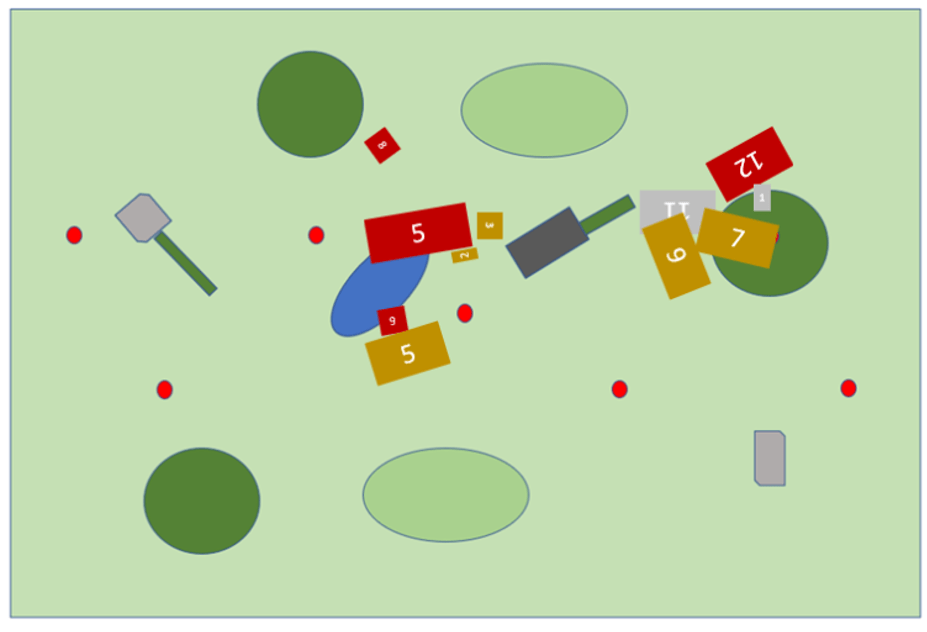
Turn 3
This turn started with one of those very painful moments where you realise you’re likely to end the turn offering rear charges on a couple of your best units. Fortunately, luck smiled briefly (I want to take credit for this next bit, I really do). My Shock Troops and the Mutant Rat Fiend charged the Men-at -Arms and routed them. I decided to move my Fiend forward, and fortunately rolled sufficiently high so the beast could, with some tactical wiggling of the Shock Troops, block the Foresaken’s line of sight to them. The tactical wiggling extended to a turn that meant the knights on the left flank now had a front charge which would be hindered (for good measure I had also cast weakness on them using the Tangle) and unlikely to go their way. Sighs of relief were breathed by the rat warriors.
On the right flank one of the Weapons Teams fired at the Men-at-Arms, further chipping away at them, and Scud moved up to cast an eye on the centre. The knights on the far right had moved up slightly to bait the Hackpaws, and as they were now quite badly wounded from the shooting the mounted rats went for it, but only managed to waver them. Finally, the Warlock chipped away at the remaining unit of knights with his lightening bolts.
On the left and in the centre the Brotherhood now went in for the kill. The Redemption knights finished off the Hackpaws, turning to threaten the flank of the Shock Troops and Fiend. The Brotherhood Knights charged the Shock Troops and managed a grand total of 2 wounds. The two hordes of the Foresaken launched themselves at the warriors and tore them apart, whilst the Beast of Nature charged the Tangle, determined to shut it down. The Unicorn with the Boomstick again lashed out at the Weapon Team, wavering it once again. On the right the unengaged knights repositioned to be able to offer support to either the Men-at-Arms or their wavered bretherin.

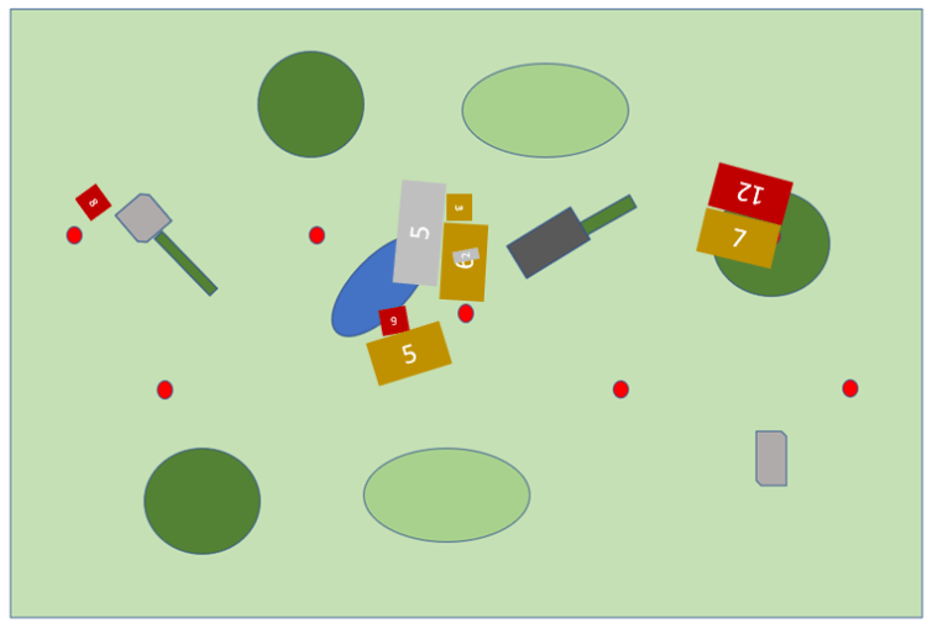
Turn 4
The rats turn to do some damage (kind of). The Shock Troops destroyed the Knights and turned to face the Order of Redemption in such a way that if the knights charged them they would be hindered. The Tangle struck back against the Beast of Nature but failed to wound it, annoyingly making flying an option in the next turn. Scud charged a horde of the Foresaken, hurting them but not getting the kill, and the Hackpaws on the right finally killed the knights. In a final act of preparation the Fiend turned to face the back of the Foresaken.
Deciding a hindered charge into reasonably fresh horde of Shock Troops was not the better part of valour the Knights of Redemption cantered past the elite rat warriors. The Foresaken fighting Scud struck back, but failed to make a significant impact. The remaining horde of Foresaken charged into the flank of the Tangle, fighting with the Beast of Nature to destroy the delicate mobile monument to Rat Life.
On the right the remaining knights made a dash for their loot token, riding down the Warlock in the process, whilst the unicorn knocked a couple of wounds off the Hackpaws with its lightening.


Turn 5
The race was on. At this stage both sides had secured two objectives each and things were looking promising in the centre (for the rats). Things looked good. I turned the Shock Troops to bring them back in for turn 6. The Fiend rear charged the Foresaken with Scud and wiped them out before turning to face the threat from the Redemption Knights. Finally, Tunnel Runners charged into the front of the Men-at-Arms, with the Hackpaws going into their flank, driving them from the field. Both units then turned to face the threat form the Foresaken and the remaining knights.
Looking for an easy fight the Redemption Knights destroyed the final Weapon Team, the Unicorn charged Scud to stop him flying off to claim the objective on the far left, and the Beast of Nature claimed the final Brotherhood objective. The remaining Foresaken charged the Tunnel Runners, but failed to break them, whilst the final knight unit turned to face the combats in the woods.
Turn 6
With Scud unable to fly there was no chance of me getting the win, so it became about salvaging the draw. The Shock Troops charged the unicorn but failed to kill it. The Fiend charged the Redemption Knights, wounding them and robbing them of their thunderous and most importantly wavering them (which stayed after a failed headstrong roll) ensuring its survival if there was a turn 7. Scud turned away from the Unicorn and walked towards the woods from where, if there was a turn 7, he could fly to the final objective. The Tunnel Runners struck back at the Forsaken, but despite some hefty wounds weren’t able to shift them. Finally, the Hackpaws killed the Unicorn.
With few options open to them the Brotherhood also prepared for a potential last turn. The Beast of Nature flew to threaten the Shock Troop’s flank. The remaining knights joined the Foresaken against the Tunnel Runners, wiping them out. The units then turned so the Foresaken could see my Shock Troops and the knights prevented a rear charge into the Foresaken from the Hackpaws.
By this stage the Brotherhood had claimed all three of their objectives, whilst I had two of mine and superior unit strength in the centre. We rolled…


Turn 7
Scud flew to the far left objective and claimed it, landing just within the 3 inches. The Fiend bashed up against the Redemption Knights, but failed to do anything useful and the Hackpaws charged the knights for a final bout of fisty cuffs. Finally, the Shock Troops killed the Unicorn and turned to face the Foresaken and the Beast of Nature. Having taken only two wounds and facing hindered charges I liked my odds for a draw.
When the Redemption knights failed to kill the Fiend I liked them even more. When the flurry of blows subsided my opponent needed a 9 or more on the nerve check for the win. I liked my chances. The dice fell. 9.

Final thoughts
What a close run game! I’m really not a fan of playing alpha strike type armies because they have the potential to pile the pressure on from turn 1. For a timed game I was really happy with how it went, and regardless of outcome, I always think when a game is as tight as this one it’s so much more enjoyable than a relatively easy win. That’s why I’m looking forward to Clash, a chance to spend a couple of days playing against some great competitors.
This game reinforced a couple of areas where I need to put some focus. I’m really happy with my list, so that’s a win, but I really need to get better at using the Weapons Teams. I’m not entirely sure why I thought it was a good idea to put one in front of the warriors in turn 2 to get shot at and wavered for half the game. I should have moved them both down to start wearing down the Men-at-Arms. This might have freed up either my Tunnel Runners or Hackpaws to run interference on the Brotherhood objective the Beast of Nature picked up. The other mistake I made was there was an opportunity to shoot at the Foresaken in turn 4 that I just forgot to take. Just one wound would have meant they would have left the table at the hands of the Tunnel Runners in turn 6 (all other dice rolls remaining the same) which would have given me the draw in turn 6 and a win in turn 7.
The other issue is deployment. I’ve noticed this in my last couple of games I don’t seem to have quite the right things in quite the right places so I’m hoping having some back to back games at the weekend will help me work out what’s not quite right.
All in all though, a great game and I can’t wait until the weekend.
