I tend to write narrative battle reports. Partly because I enjoy writing stories, and partly because I’m not one of the best players in the world. I’ve found over the past year, or so, that writing battle reports has improved my game. Even writing a narrative report I refight the battle through the pictures, and find myself fairly regularly asking myself why I did something, or why I didn’t do something else.
Last night’s game was great fun, and very close. Looking through the pictures over a coffee this morning a few things occurred to me. So, I thought rather than put them to one side I’d do a bit more of a traditional battle report, focussing on the game rather than the narrative.
Scenario: Salt the Earth
Since the return of gaming in the UK I’ll admit to have been taking things easy with lots of games using scenarios like Dominate or Invade. Salt the Earth is one of those scenarios I think you need a game plan for, and I just didn’t have one. Fortunately, neither did my opponent. When it came to objective placement my opponent went random, whilst I tried to cobble together some form of strategy. Because the Herd are so obscenely fast I expected the majority of the fighting to end up in my half. I definitely didn’t see me making it all the way to the enemy deployment zone. So I kept my scoring tokens as close to the centre as possible. My one tactical placement was a 1 point token behind the house in the Herd’s deployment zone in the hope he would send a unit over to baby sit it, taking the unit out of the game, giving me less to deal with in the centre, where I expected at least another 1 point token to be.
Points: 2,300 (yes, Clash is very much in my thoughts)
Army lists
I’ll let you judge the lists yourself. The one thing I would say is that as a Ratkin player with lots of defence 4 Herd makes me very nervous. With most of their units having melee 3, high attacks, some sort of strength enhancement, pathfinder and lots of speed getting charged by hordes tends to be a terminal experience. It’s also worth noting that all this nastiness is largely neither cavalry or flyer based, making Phalanx pretty irrelevant. It’s built into my list because it’s an all comers list rather than a specific anti-Herd affair.
Ratkin
1 – Master Scurrier with Boots of Levitation
2 – Warlock with Boomstick
3 – Mutant Rat Fiend
4 – Tangle
5 – Weapon Teams
6 – Night Terror with Talisman of Inspiring
7 – Scud
8 – Hackpaw regiments (one has Mace of Crushing and one has Blade of Slashing)
9 – Tunnel Runners regiment with Caterpillar Potion
10 – Shock Troop horde with Plague Pots, Phalanx and Brew of Sharpness
11 – Warrior horde with Plague Pots
Herd
1 – Spirit Walkers hordes
2 – Beast of Nature with wings and extra attacks
3 – Moonfang
4 – Minotaur Chariot horde with Brew of Haste
5 – Centaur Bray Strider regiment
6 – Guardian Brute horde with Brew of Sharpness
7 – Lycan horde
8 – Harpies
9 – Druid with Bane Chant


Turn 1
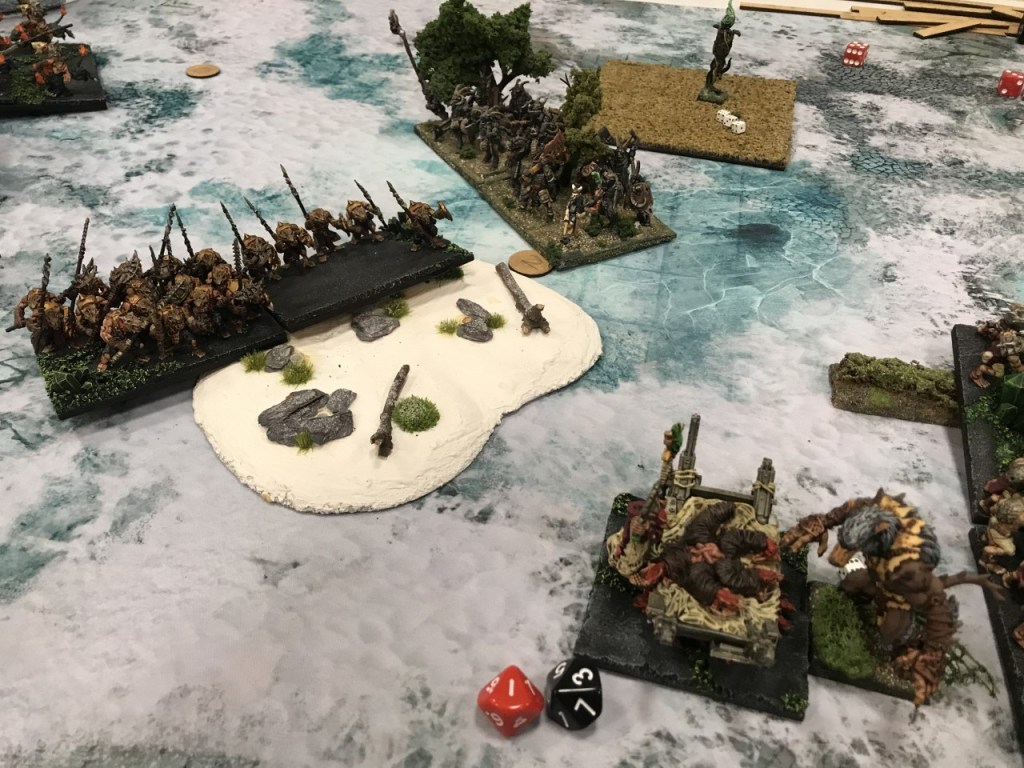
I won the roll for this and opted to go first. The Master Scurrier had already scouted forward, hence why he’s not in line with the rest of my deployment.
This turn was pretty uneventful. I moved the left flank forward in such a way that the beast of nature would not be able to sneak past me without getting charged by something.
Scud lightening bolted the harpies behind the centaurs, taking them out of the game.
The centre and the right flank crept forward as I didn’t want to give the Herd any charge opportunities just yet. I was also hoping I would be able to shoot off one of the hordes in the centre before combat started, because each of them could reasonably be expected to one shot anything I had in my centre, and could win the charge. I decided to go for the Guardian Brutes because with crushing strength 2 they represented the greatest threat. The Warlock shot at the Brutes, wounding them, but not killing them.
The Herd’s response was fairly conservative on the left and in the centre, moving to be outside the charge ranges of my fastest movers. On the right, things were a little different, and the entire flank surged forward. This would leave me with loads of charge options for the next turn, none of which would be that appealing.


Turn 2
This turn was all about sacrifices and shooting. On the right I felt the best option was to try and hold things up for as long as possible. Whilst neither the Night Terror or Hackpaws are that terrifying at front charges, they can be a pain if they find their way around flanks or rears so I knew my opponent would want rid of them. The Hackpaws went into the harpies as these troops are ideal for grabbing late stage objectives so I figured if I could get rid of them now it would be one less thing to worry about, and the Night Terror went into the Werewolves on the basis it had the potential to do the most damage, but in reality it had no real chance against anything.
The rest of my movement was really about positioning shooters and ensuring the Beast of Nature couldn’t get behind me. Scud, the Warlock and the Master Scurrier were positioned to shoot at the Brutes, successfully taking them off the table.
The Master Scurrier was positioned so that it was more than 6 inches from any of my units. Whilst I was happy for something to charge him I didn’t want any follow up moves bringing the Herd into my centre.
Finally, the weapon teams fired at the chariot horde in the hope of chipping some damage off.
The Herd went all out to wipe out the Hackpaws, putting Moonfang and Minotaur Chariots into them – it worked, no surprise. Happily, the Night Terror survived (albeit waivered), which meant the Lycans would have to wait until the next turn to to catch up with their buddies.
In the centre the Herd started a mini reform with the beast of nature moving out of the left hand corner and the remaining harpies heading off to claim the 1 point objective that had been revealed on the right.

Turn 3
This turn saw my attempts at cunning movement start to come together. The Master Scurrier charged into the Spirit Walkers on the right. Although he isn’t mighty 4 attacks at 3s to hit, 2s to wound and vicious was going to get him there and block up Spirit Walkers so I could start to get my infantry and the fiend within charge range. The attacks hit, but not surprisingly weren’t enough to do anything of any note.
The left flank positioned itself to get as many charges into Herd units as possible the next turn, and lightening bolts hazed the Spirit Walkers on the left, not doing much, but every little would help next turn.
On the right the weapon teams had another turn of shooting at the minotaur chariots, before one got charged and completely wiped out.
The Lycans removed the Night Terror and tried to catch up with their comrades, and Moonfang moved as close as he could to the remaining weapon team, unable to charge him because the minotaurs had been blocking his line of sight.
The only other significant action of the turn was the horde of Spirit Walkers backing away from the Master Scurrier to stay out of charge range of anything more substantial. This would reduce my options for next turn.

Turn 4
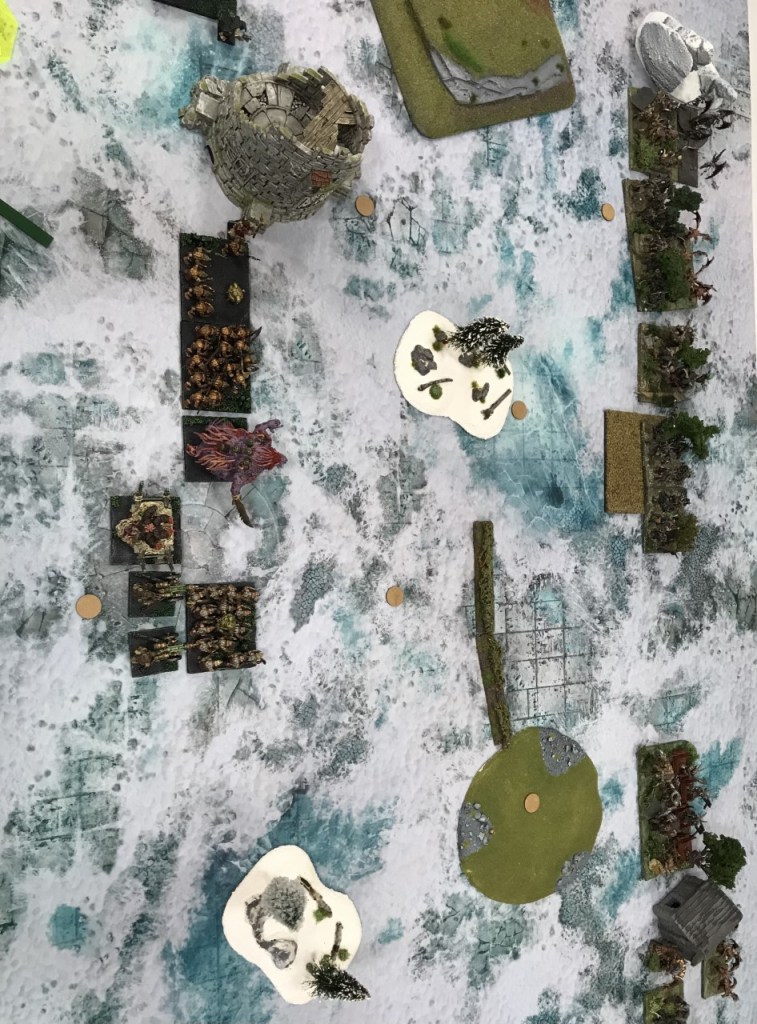
Turn 4 finally saw the Ratkin join battle on their terms. The Herd had carefully manoeuvred to offer one meaningful target and so I charged it with everything that could reach. Spirit Walkers are very dangerous, but with defence 3 they are real glass cannons, I had to take the unit off the table in one go or there was a high likelihood I would lose a unit. Unfortunately, the Shock Troops were out of reach so the honours fell to the unholy coalition of the fiend, Scud and a regiment of Hackpaws. A few dice rolls later the walkers were gone and I was a little bit more relaxed.
The combination of the multi charge, the presence of the beast of nature and the centaurs meant I wasn’t going to have this all my own way and consequently the only real option in terms of reforming was to back off.
The Master Scurrier went into the other walkers again, this time hindered, but still managing to hold them up.
With so much combat going on the Warlock was deprived of worthwhile targets, and so headed over to the centre to provide some support to the weapon team targeting the Minotaur. Fortunately the shooting attacks came off and the chariots disappeared.
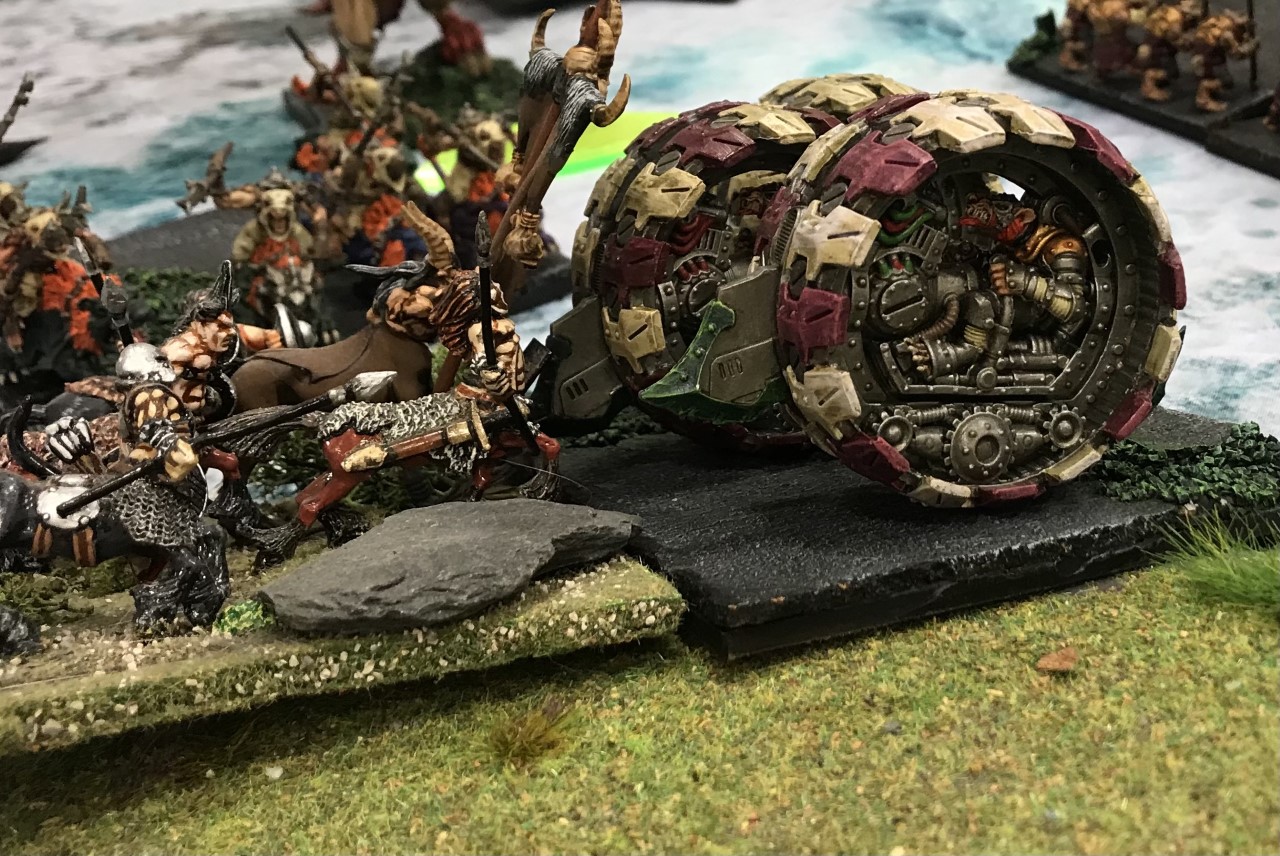
The last weapon team breathed a sigh of relief as Moonfang found an opportunity for maximum shenanigans. Using a combination of height and nimble he was able to get a flank on the Tangle that had been facing the walkers and the Master Scurrier. Despite his best efforts the Tangle remained in tact. Finally, the Lycan horde charged the weapon team and crushed it underfoot.


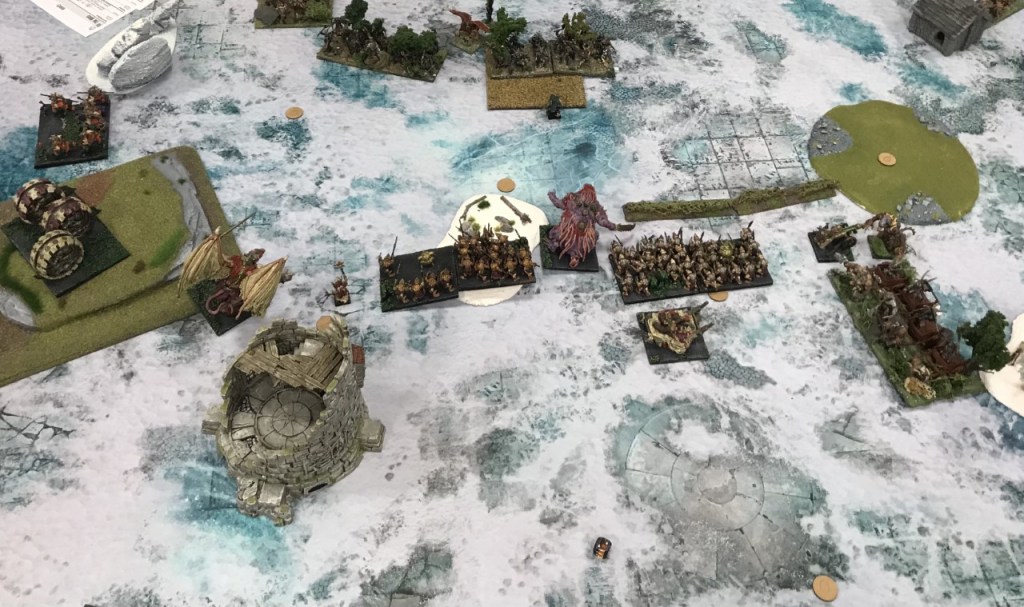

Turn 5
By the end of turn 4 I was feeling pretty confident, and I had made a pretty important decision. I decided not to use my Shock Troops to attack the remaining walker horde. That decision was based on us deciding to limit the game to 6 turns due to time restraints and, mainly, because I was worried that if I took the Shock Troops out of the centre they wouldn’t make it back in time to secure the objectives.
With the beast of nature clearly on its way to secure the 2 point token I therefore needed 4 points to win and this is probably where I stopped thinking quite as clearly. I had, to be honest, largely forgotten about the beast so my reaction was a little less thought through than it should have been.
I decided that I would try and lightning bolt the beast, whilst using the fiend to tie up the walkers. At this point I seriously underestimated just how good they are. In order to hit the beast I needed to turn Scud (and the Warlock) to face it. Not surprisingly the shooting was not enough, the beast would make it to the objective and the centaurs were perfectly placed to tie up my Tunnel Runners and Hackpaws.
I had hoped that by getting the charge off with the fiend the walkers would be stripped of their thunderous charge, and so wounding on 4s would give him a chance of survival, but the Druid’s Bane chant went off, and wounding was back to 3s. The walkers managed about 14 wounds and even with Scud’s rallying and inspiring the fiend went down.
Things were starting to look pretty good for the Herd, so naturally we got the first meaningful double 1 of the game, followed in short order by the first double 6 of the game.
Moonfang had done about 12 damage to the Tangle and was ready to move on with the aim of reaching the centre to add his unit strength to that of the walkers. Double 1 meant the Tangle stayed in the fight. In what could be politely be described as an unfortunate sequence of events, the Lycans rolled a double 6 to waiver the warrior horde. The warrior horde was of course affected by the aura of fury from the (you guessed it) Tangle, keeping them in the fight as well (although this fight was not as critical).
Its fair to say I ended the turn on something of a reflective note!!

Turn 6
After a bit of mulling stuff over I decided the best/only course of action was to see if I could shoot the walker horde off the table. It had already sustained some damage from the Master Scuttler, although it was still a reach. The first nerve test went my way, but the second one didn’t – and that’s the one that counts.
Fortunately, I had positioned Scud so the walkers couldn’t charge my Shock Troops. That meant they could sit tight and hold the 2 and 1 objectives to either side of them. After the Tunnel Runners and Hackpaws had finished off the centaurs the Tunnel Runners managed to reform sideways and claim the 1 point objective on the hill on the left.
Of course, I was far from out of the woods. Moonfang was within easy lopping of the centre and the failure to stop the walkers with shooting now meant Scud was literally the only thing standing between the walkers and the central 2 point objective. If they killed Scud and followed up they would equal the unit strength of the Shock Troops rendering the objective void. If they killed Scud and Moonfang turned up Herd would win the objective, and the game.
There was of course the small matter of the Tangle vs. Moonfang to be resolved. Tangle struck, and miraculously wavered Moonfang taking him out of the equation. So the deciding combat got underway.
At first I felt reasonably confident Scud could survive as he has a higher defence than the fiends, however the shooting meant the horde still had its thunderous charge benefit, and a successful Bane chant sealed the deal.
I think it was Einstein who said the definition of madness is to do the same thing and expect different results, he just might have a point! So the walkers moved up to share the 2 point objective with the Shock Troops, the beast held the other 2 point objective, the harpies held the 1 point by the house whilst the tunnel runners and shock troops managed to hold their respective 1 pointers leaving the game in the hands of the Herd, 3 points to 2.


Final thoughts
Stick to the plan – this might sound a bit weird, but I was really going for a draw on this as I’d only planned to hold 4 points of objectives. My plan had been to fight in the centre knowing I had place 3 points of objectives there, and expecting at least one more to appear, which it dully did. I think seeing the 2 point objective turn up on my door step and getting to turn 4 without being wiped off the face of the earth might have got me a bit excitable. Had I ignored the 2 point objective the beast claimed and turned Scud to face the walkers instead quite a few options would have presented themselves – for one thing a double charge with Scud and the fiend. This would have delivered more wounds in the first round of combat, removed the thunderous charge and given the Herd player a difficult choice (even with Bane chant) as to who they went for when/if there had been a second round of combat.
Another option would have been for Scud to shoot at the Druid in turn 5, potentially removing inspiring and Bane chant which again would have changed the dynamics of both turns regardless of whether he chose to shoot or fight.
Remember your heights – height is probably one of my favourite dynamics in the game, and whilst it can be quite an easy thing to remember early on in the game it can be quite a different matter as time grinds on. Height played quite a big role in what was happening on the right flank especially the charge on the Tangle which could have really gone either way, and genuinely surprised the hell out of me. Being honest I think I forgot about heights when it came to assessing the walker situation. I don’t think I had fully realised that the Druid was a viable target in turn 5 due to Scud being considerably taller than the walkers.
All in all it was a great game and a great way to get back into rats having spent a few weeks playing Basileans and Abyssal Dwarfs, and I’m definitely looking forward to a few more rat based games in the coming weeks.