
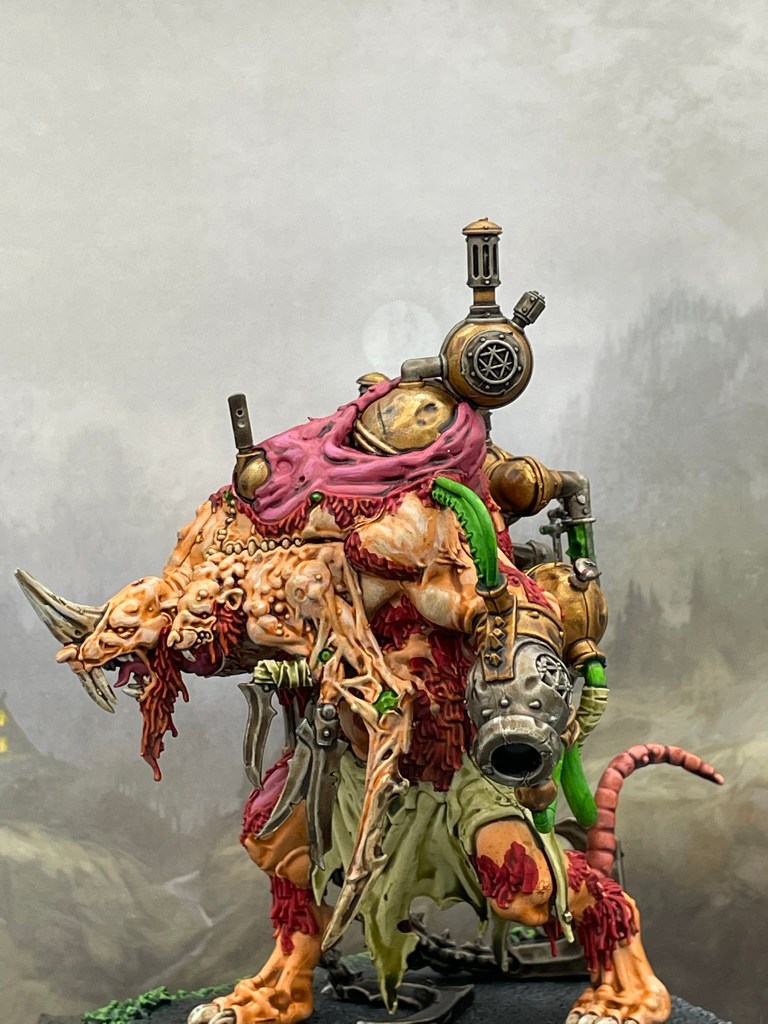
When I signed up to the Rushden Rumble I had no idea what I was getting myself into. Two weeks before the event I had a quick read of the event pack and all of a sudden I had questions… a lot of questions. The first revelation was that I needed a giant as a special character. This created an immediate problem as I had to secure one and paint it, it the sort of timeframe I would usually just about manage to build and undercoat a solitary Basilean man-at-arms. Fortunately, I’d already decided to use my rats, so when I happened upon the misshapened creature pictured below I only had to squeeze in a bit of painting (which for a GW model wasn’t too faffy).

The next discovery was that the event didn’t use standard scenarios, which then led to a flurry of emails to the organiser to check my understanding of what was going on. The TO, Warren, was brilliant with his engagement and by the time Saturday rolled around I was fairly confident I knew what I was doing… ish.
The list
Warrior Horde with Plague Pots
Spear Hordes with Plague Pots (2)
Shock Troop Horde with Heavy Halberds and Plague Pots
Vermintide Regiment
Death Engine Spewer
War Engine Teams (3)
Mutant Rat Fiends (2)
Brute Enforcers (2)
The Tangle
Brood Mother
Mother Cryza
For a while now I’ve been trying to play with more infantry. I love the look of massed infantry ranks and since I’ve managed to make up five hordes, I really want to be able to use as many of them as possible. The other thing I’ve been playing with are the Mutant Rat Fiends. Since the restriction was removed on their D3 Radiance of Life and they get to use it as well I’ve been keen to test them out in a competitive environment. I’ve always thought the fiends were great conceptually, fragile due to their defence of 4, but kept alive through their high nerve and regeneration. The problem I always had was the regeneration just wasn’t reliable enough. Would Radiance of Life going to D3 change that?
I also enlisted a Brood Mother, which I know is considered a must have in most Ratkin circles, but this is my first time taking one to a tournament. Unusually for me the list doesn’t feature anything faster than movement 7, which is possibly the most nerve raking feature of all, greater even than the inclusion of the almost universally panned Death Engine Spewer. How bad could it go?
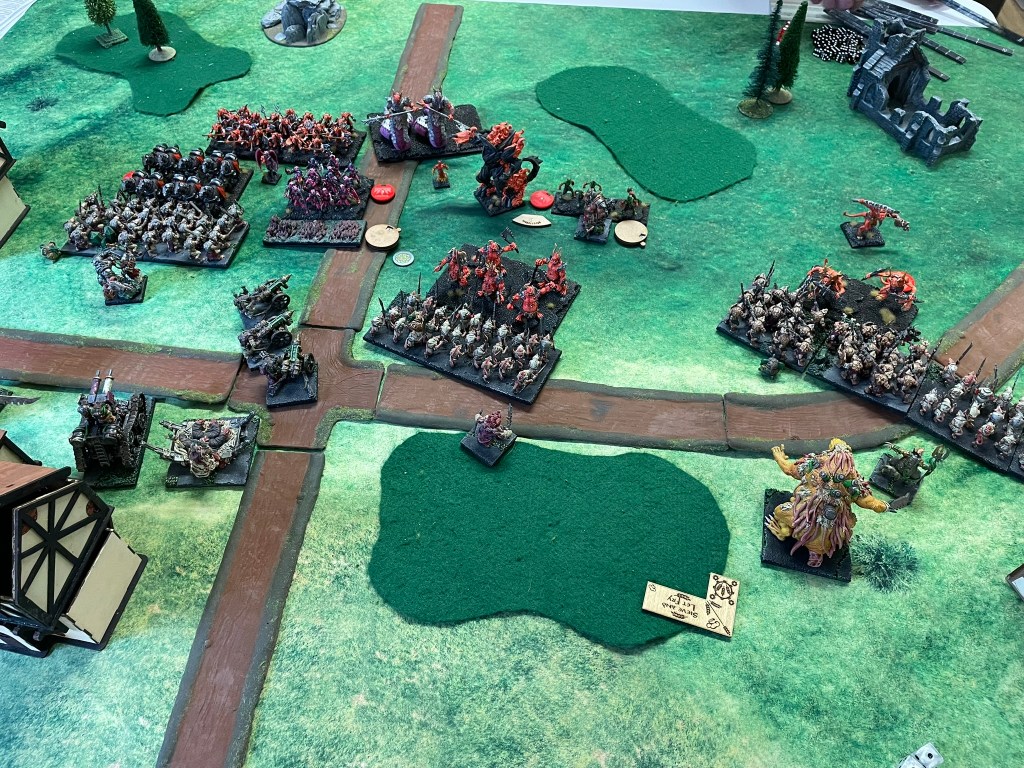
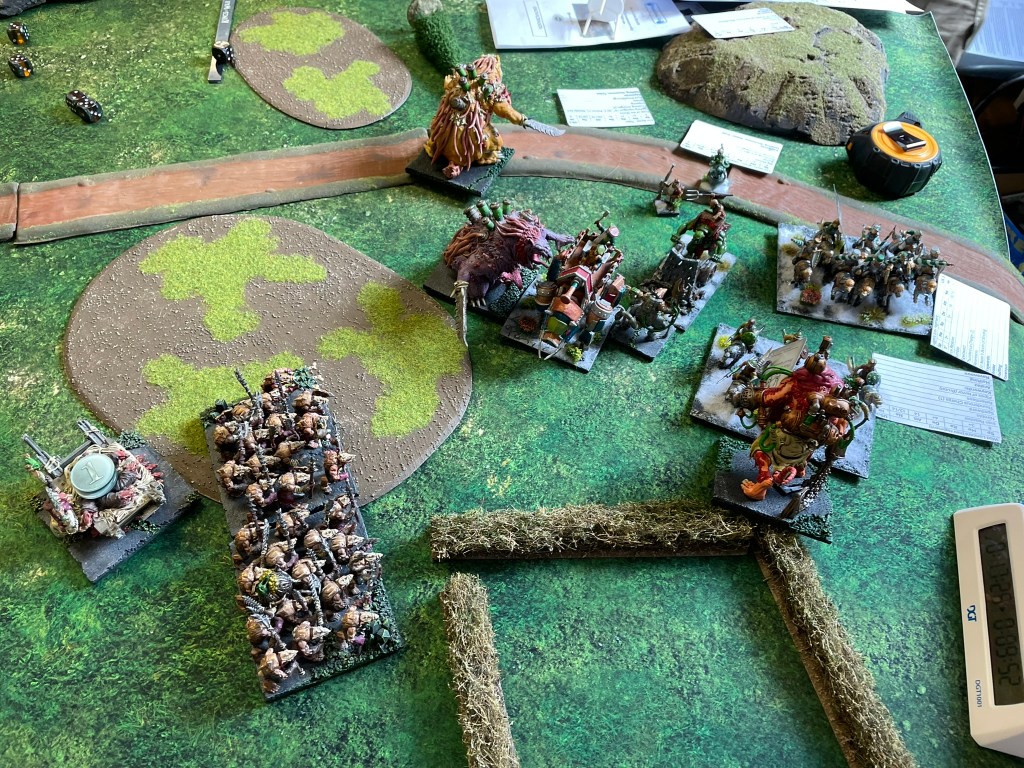
Game 1 vs The Forces of The Abyss, Awakened Giants
Where to begin describing this scenario! The aim of the game was to kill the giants, which moved randomly and could only be attacked from turn two. You also needed to secure an objective counter in the centre.


I thought facing the Forces of the Abyss would be a really good test for my army. Given my rats will normally have to take punches before they react, testing them against such an aggressive army would give me a good idea of what the rest of the day was likely to bring. The rats went first, and I did my best to organise my lines so that if any of the giants came my way they would face multi charges that would get them out of the way as quickly as possible. Unfortunately, one giant headed directly towards the Abyssal ranks (happily taking down a troop of Lower Abyssals), and the second giant ran past the end of my right flank, out of sight of my units. Since I wasn’t going to be able to fight the giant in turn two, I wondered if I was going to be able to keep it alive. This was the first moment the lack of mobility in the army really hit home. With a horde of nimble berzerkers staring at the rear of the Giant I realised there was nothing I could do to protect the creature, all I could hope was that the demons fluffed the charge and I then got a chance at removing both the giant and the berzerkers the next turn.
Not surprisingly the demons did not fail in their task, and the second giant fell. This mean that the game had now essentially been won. My opponent scored four points for downing the giants and there was only one remaining point up for grabs by occupying the centre.
With that in mind I decided to throw my rats into the demons to give them the best road test they were likely to get. How they responded really surprised me. Shooting took down two of the Tortured Soul regiments and the Chroneas. Whilst a solid combination of plague pots and weakness from the Tangle blunted the demon attack and set up plenty of flank charge opportunities which saw unit after unit returned from whence they came.


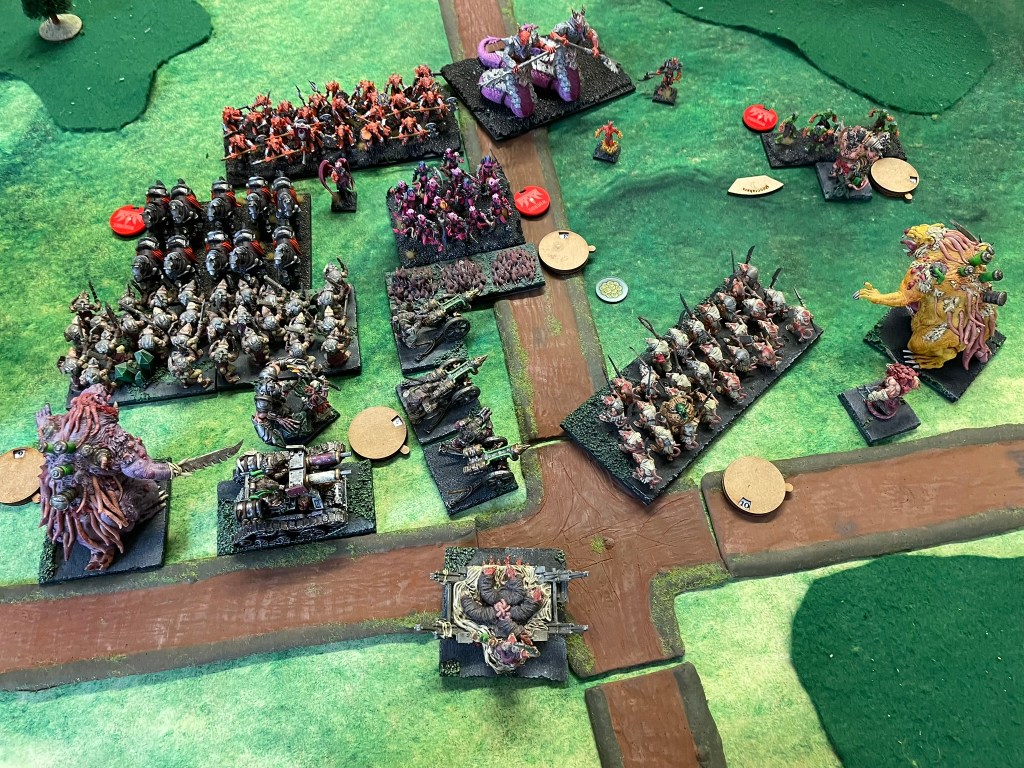


A couple of times I noticed the healing in the army really shone through, with the Brood Mother’s Drain Life bringing the central spear horde back from the brink of destruction. As the battle raged on the army swept towards the centre, flooding it with vermin, and pushing the Abyssals back. When the fighting ended it became apparent that the rats had passed the test with just two hundred and twenty-five points leaving the table, compared to the massive losses sustained by the demons. It was quite an interesting outcome.
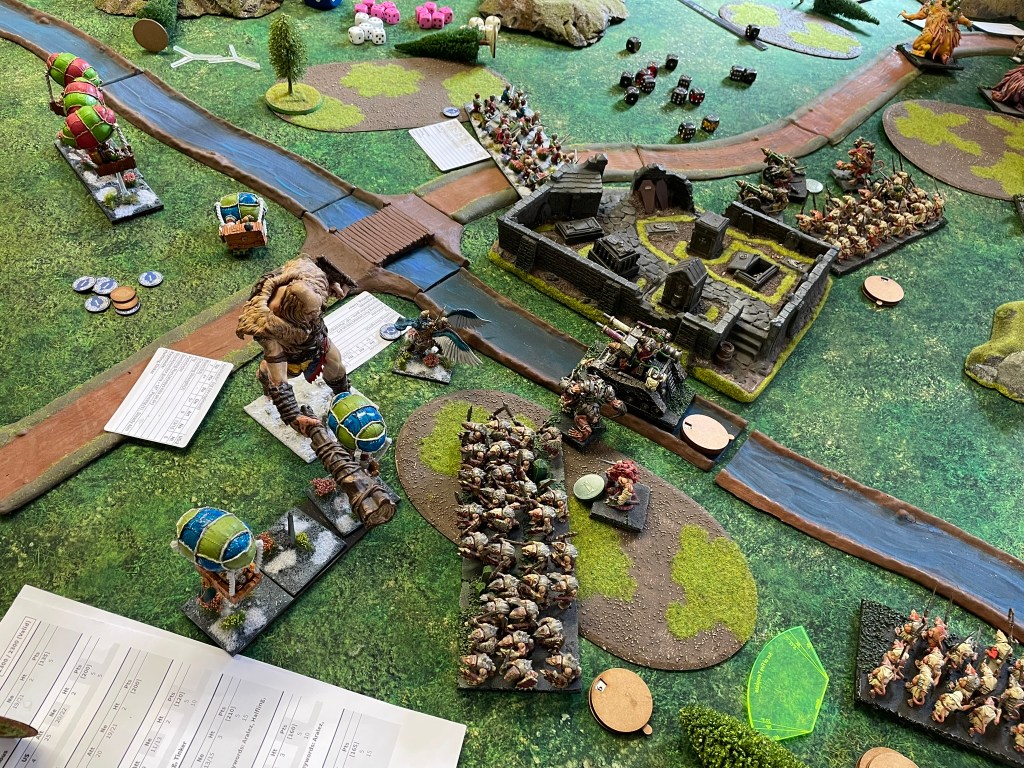
Game 2 vs Halflings, Something… something… loot counters in woods… angry spirits
The scenario involved four woods, each with a loot counter at the centre that had a randomly determined value. Picking the counter up could also result in the spirits of the wood attacking you. There was also a loot counter in the centre of the board worth three points.


The Halflings had a bit on an advantage going into the game as both of the tokens on their side of the board were in their deployment zone, which meant they were quickly picked up. The rats had one in the deployment zone on the far-left flank, whilst the other was more central.
The halflings put their flyers and the giant on the left flank, their infantry hordes in the centre with the Iron Beast and cavalry on the right. As I deployed, I wasn’t sure whether the best approach was to try and hold the left flank or abandon it in favour of deploying for a refused flank. After a little back and forth I decided I would put a token force on the left consisting of the warriors, an enforcer and Mother Cryza. My shooters deployed in the centre, behind a spear horde. The second spear horde went on the right with the giant, and everything else went in between.
In the first couple of turns the Halfling’s shooting was starting to make a dent. The rifles and the Wild Riders knocked three wounds off the Spewer and eight off the central spear horde. The Spewer managed to take down the Wild Riders whilst the War Engines dispensed with the Braves, but these were relatively minor skirmishes compared to what was happening on the flanks.
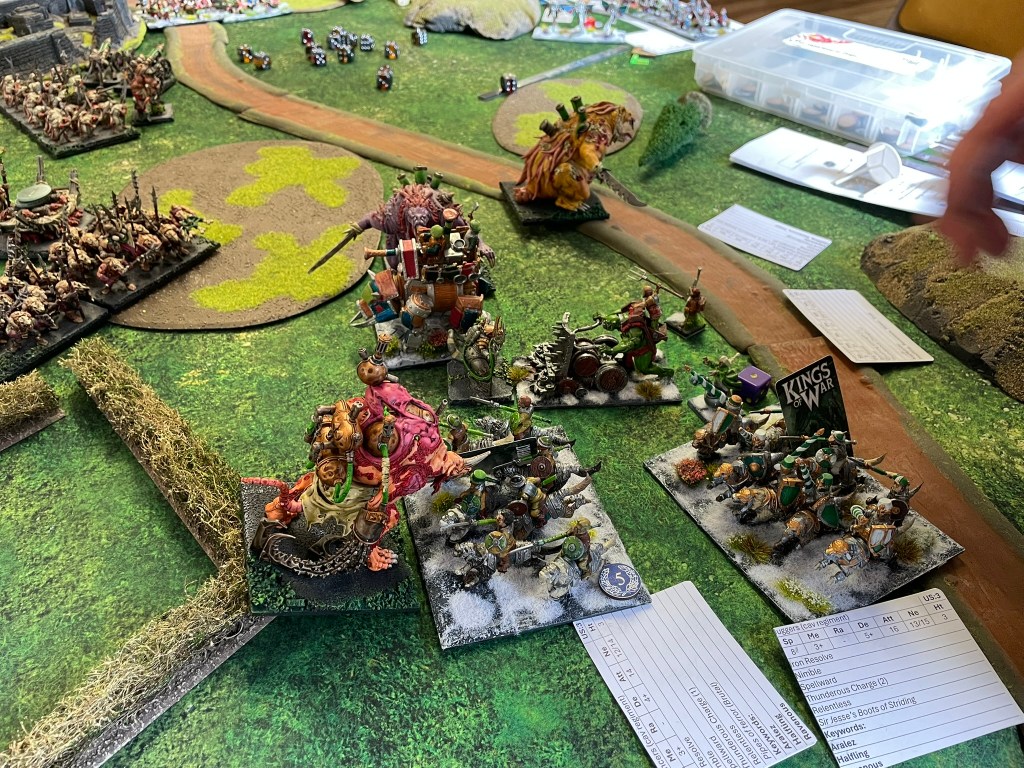
On the left Cryza attempted to lightning bolt the balloons, hoping for a lucky waiver to hold one of the units up, but it never came. The two regiments of floating menaces drifted into the warriors, and I held my breath as they hit. Fortunately, the balloons performed as well for my opponent as they did for me when I used to use them, and the warriors took a handful of wounds, but otherwise stood their ground. The warriors fought back against one unit, whilst Cryza, now supported by the Spewer waded into the other regiment. Despite their best efforts both units survived, although Cryza managed to waiver the regiment she was facing. By some miracle the waiver became the turning point for the fight for the left. In the following turn the rats pulled down the waivered regiment before creating a wall of bodies around the enforcer carrying the token, by luck more than judgement the warband managed to fend off the Halflings long enough to keep hold of the loot and stop the Muster Captain on the winged aralez jumping into the centre of the board, behind the Ratkin lines.
On the right flank the Halflings had their heavy hitters, and it was here I envisaged there being problems. If the Stalwarts and the Iron Beast could hold the centre long enough, the Wild Lancers and Juggers stood a good chance of sweeping around, catching some flanks and potentially breaking into the middle.


The Stalwarts made a play for the loot in the central forest, charging into the vermintide that had picked it up and wiping them out. Unfortunately, the response from the Ratkin was immediate and deadly. A Brute Enforcer and both the Mutant Rat Fiends charged the heavily armoured Halflings and tore them to shreds, picking up three points worth of loot counters in the process. The spear horde charged the Iron Beast, but failed to wound it, resulting in it becoming the target of a number of very angry people. The spears were surrounded by Ej Grenadiers, the Beast, the Harvester and the Wild Lancers. The Halflings would have their revenge. However, as the Halflings repositioned it became clear that the Ratkin had managed to sneak the loot counters behind their own lines, out of the Halflings’ reach. The Tangle had secured three points, whilst a Brute Enforcer had picked up the counter from the centre. As this happened the infantry hordes and fiends pressed forward, tearing the grenadiers from the sky and dismantling the Pride of the Shires. It was a dark day for the Halflings and a triumph for the vermin.
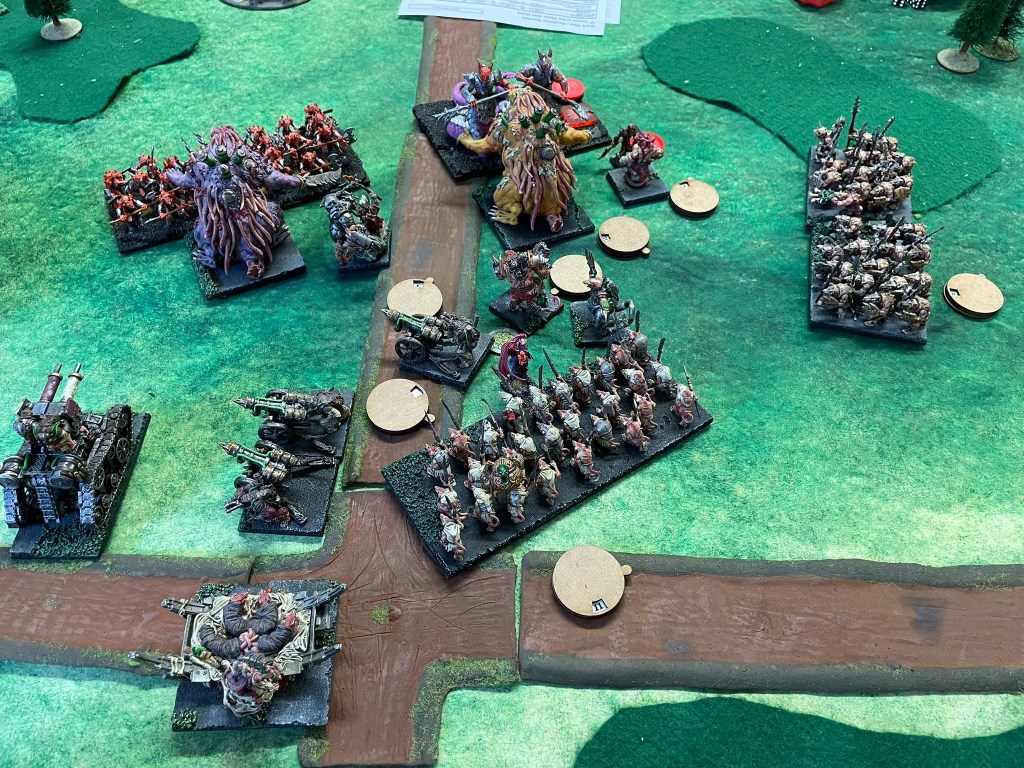
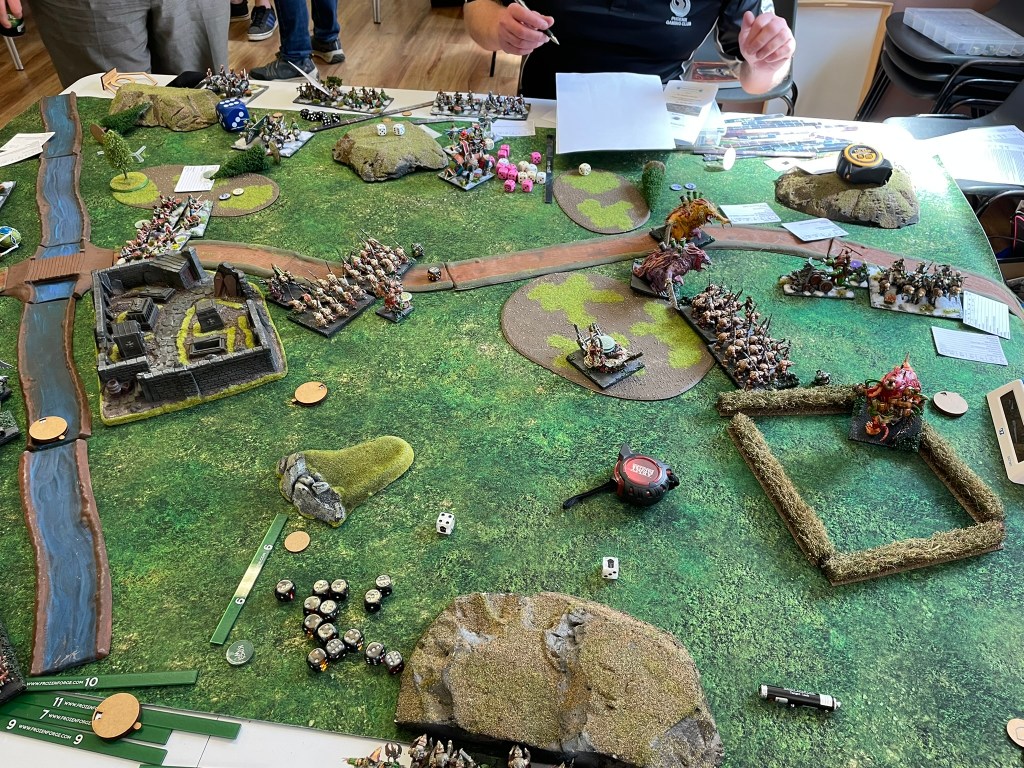
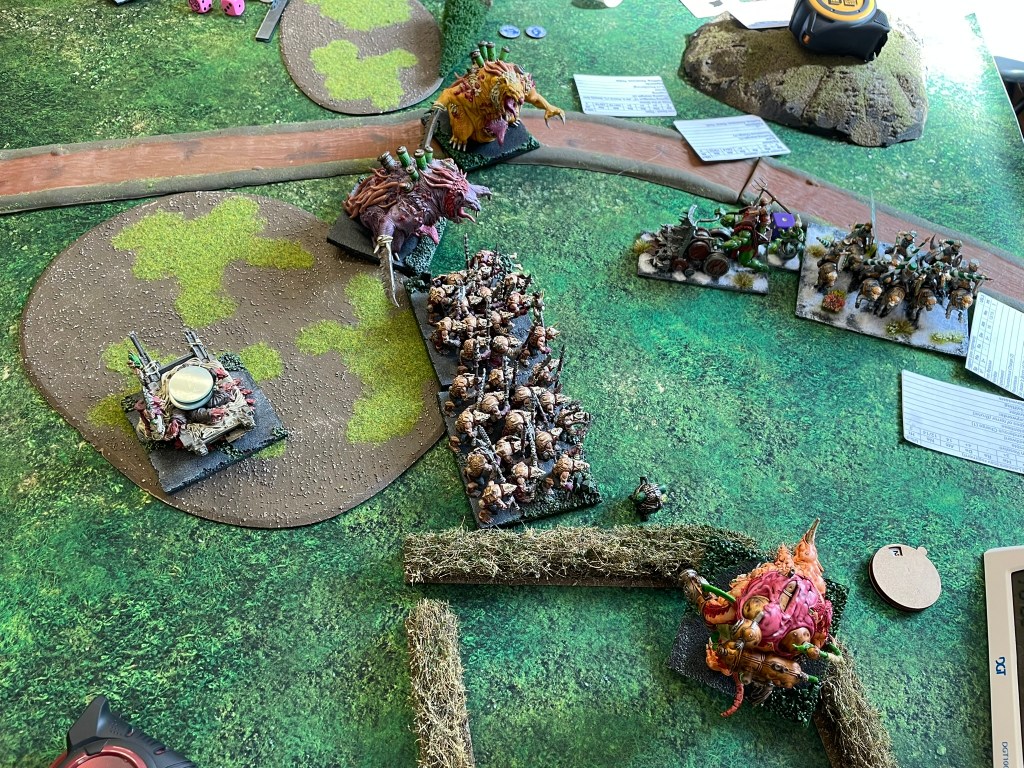
Game 3 vs Dwarfs, Hold the Line (the actual Hold the Line Scenario without any extras)
Dwarf armies these days seem to be delivered in a pretty standard package. There’s the formation, Golloch’s Fury, two Lords on Beasts, two infantry regiments (to taste), a brock regiment with a magic item, and some shooting of some type. On the plus side it means you know what you’re getting yourself into, on the not so plus side you also know what you’re getting yourself into.
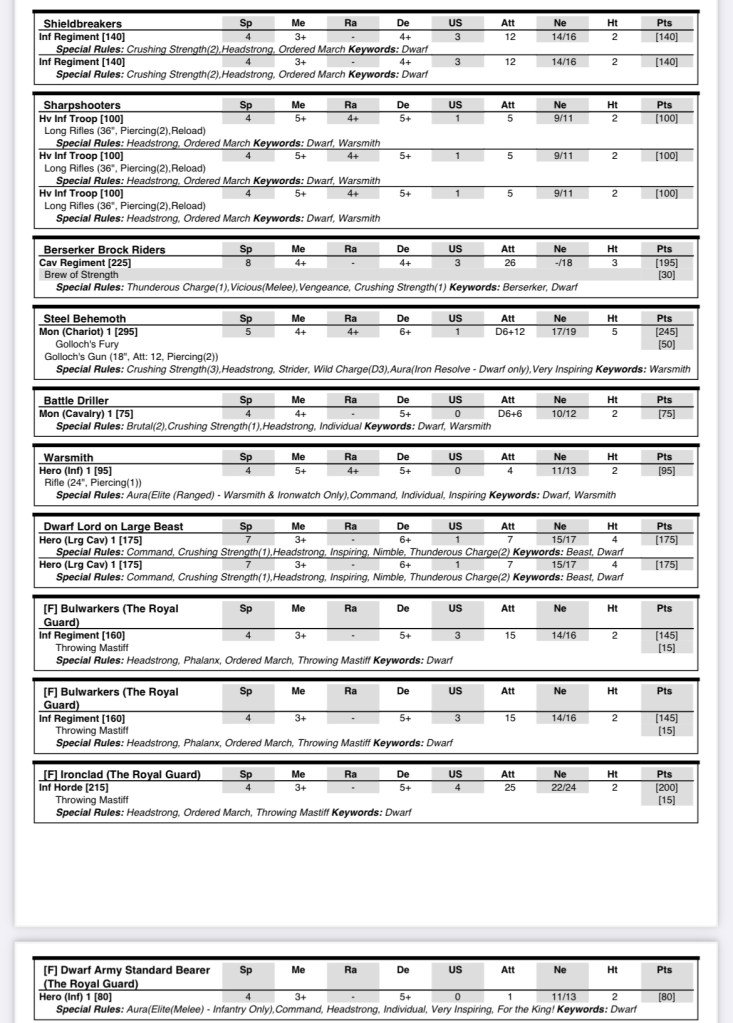


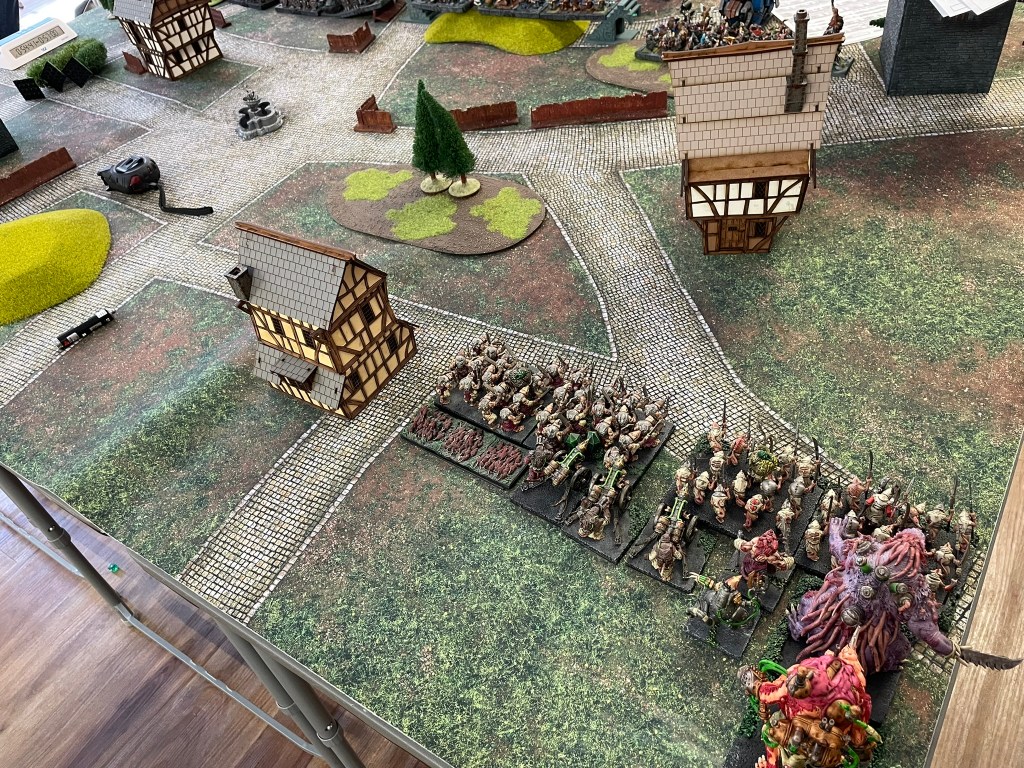
In this case the shooting came from three sharpshooter troops, which happily were mounted on a hill, that happened to be in the middle of the Dwarf deployment zone… and… had a load of walls in front of it. This was the second time in the day where I wished I’d brought some speedier units (or Scud). Shutting the shooting down was going to be hard, so after a bit of a thought I decided I wasn’t. As I looked at the table I realised that the four houses on the table created reasonably well protected channels at either end of the table and so I did the unthinkable (for me) and split the army into two halves. I placed one half on the far-left flank, with the giant, and the other half on the far-right flank. I then took a deep breath and hoped for the best!
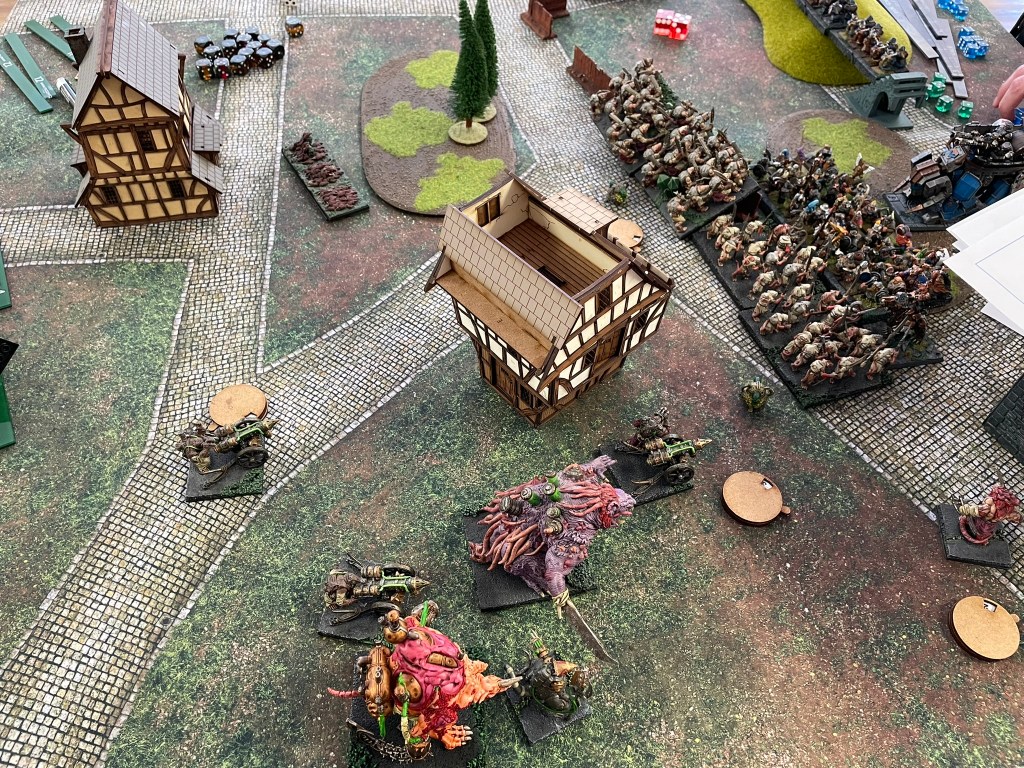
On the right flank the spear horde and Cryza led the advance. The houses shielded them from the shooting. Directly in front of them was the enemy rumble giant and the brock riders. Between the cavalry having to take a hindered charge, phalanx and a plague pot I wasn’t overly worried about the brocks. The giant though, that was a different matter. I was well aware there was a Dwarf Lord on a beast and a regiment of Shield Breakers making their way down the centre towards the channel between the two houses, so if I didn’t remove the giant quickly, I could find my flanks under a lot of pressure. Cryza’s lightning bolt promptly removed the battle drill hiding in the Dwarf ranks and a brute charged forward to start grinding down the giant.
I think it’s fair to say half the plan worked. The brocks didn’t make an easy task of dealing with the spear horde, and after the giant had removed the brute the Mutant Rat Fiend that replaced it easily soaked up all the damage dealt. Unfortunately, I underestimated the speed with which my troops could remove the enemy, and the damage just didn’t land. As a result, the fiend found itself pinned by the giant, allowing the beast mounted Lord a cheeky flank which brought the beast down. Eventually though the chaff of the ratkin warriors were removed and the shock troops pushed to the fore, smashing a regiment of Shield Breakers to pieces, before turning on the beast mounted Lord and removing him. Cryza kept the Bulwarkers out of the scoring zone whilst the Tangle cleared out the brock riders with a well time fireball. The rats had won on the right, and there was the sweet stench of hope in the air.
The centre of the table was a much quieter affair. By moving between the houses, the sharpshooters spent most of the game chipping away at whatever target they could find, which tended to be the odd war engine team that didn’t quite make it into cover. By turn five they had given up on shooting and had moved off the hill to claim the centre.
That meant the left would decide the game. The rats slunk around the buildings, towards the enemy lines. The dwarfs held still. In an usually bold move the warriors broke cover and charged, with a spear horde, into the Ironclad horde. I figured that if I could wear it down I might have a chance of holding onto the scoring zone just by weight of numbers. I probably shouldn’t have been surprised that the double charge barely scratched the horde, but it’s really easy, once the game is done, to step back and realise just what you should have done. Despite the failure of the charge, I continued to press my troops, sending the Mutant Rat Fiend into the beast rider, before setting it, together with the giant, on Goloch’s Fury. The dwarf lords fell, but the horde endured, and whilst I had lost my infantry, I still had a solid amount of unit strength floating around on the left side. Unfortunately, it wasn’t in the right place. I’d let myself get carried away and lost focus on the scoring zone. Any thought of a win was dismissed in the seventh turn when the second Bulwarker regiment entered the right flank scoring zone and took if for the Dwarfs.


For a game that I had gone into thinking I was the underdog, it had ended up being incredibly close. With the benefit of hindsight I think I could have played much better, sending the giant and war engines forward first, followed by the characters and the infantry hordes to sit in the scoring zone, forcing the Dwarfs to come to me. I would like to think that things might have turned out a little differently. However, one of the joys of this game was facing a situation I had never faced before with an army list that I’m still getting my head around.
Final thoughts
What a massively fun day, with three great games. The scenarios were really engaging, although I have to admit playing Hold the Line for the final scenario was a nice wind down before the drive home. I will definitely be keeping an eye out for the Rushden Rumble next year.
In terms of the list. With the benefit of a few hours driving home, and a bit of decompression I don’t actually think I could fault it. I faced three very different armies, and the list had ways of dealing with all of them. The Mutant Rat Fiends performed brilliantly, with the extra Radiance of Life making them work the way I always imagined they should. Not only do they have great models, but they now have a stat line to match.
The other new joiners were the Spewer and the Brood Mother. I have a bit of a hot take on these and it’s something along the lines of: rats, in gaming terms, are a bit below par when it comes to comparing their stats to the equivalent Kingdoms of Men from which all other units are derived. Yet for some reason I expect great units to achieve great things, and when it comes to the Brood Mother I’ve just never bought into the hype. I definitely wouldn’t say that she was an MVP, in fact I would find it difficult to describe her as a VP. Now in part I will absolutely accept that I may not have played her as well as other players would have but looking back on the day I can honestly say that there is no other unit I can think of that would be a better fit for this list. She brings a little bit of everything to the table, and it’s the capacity for rat units to be equally okay at a number of different roles that make them so interesting to play. I’ll definitely be taking her next time.
This theory also explains my view on the Spewer. I fear it’s been unduly maligned for a few years now, despite the fact that it does both shooting and combat quite well, and all because it doesn’t have Steady Aim. Whilst it is a little unpredictable at times, it is a beautifully flexible addition to a mixed arms list, which I look forward to playing with again.
Until next time, take care. Don’t want to miss the next post? Pop your email below to subscribe.
