It’s been a pretty awesome year for the rats. Traditionally I play them for the first half of the year, realise I have no idea how they work, flit between other factions before returning to them for the last event of the year. I then take 6th place in the faction listings in the UK. This year though things have been very different. I’ve not only managed to stick with them for the entire year, but also ended up on top of the Ratty charts (it’s at this point I feel it’s only right to thank Si Brand for only playing Ratkin twice this year to allow any chance of this happening!!).
To Scud or not to Scud
As I planned my list for the 2345 point event the first question I had to answer was whether Scud was coming out to play? After a bit of reflection, I decided to leave him at home as I wanted to maximise the number of drops I could put on the table, and I liked the idea of trying to swamp the opponent with a bit more trash than usual. I also felt the lists I played later in the year suffered for trying to include too many expensive unit choices that lacked reliable damage output because they still only hit on 4s over cheaper trash.
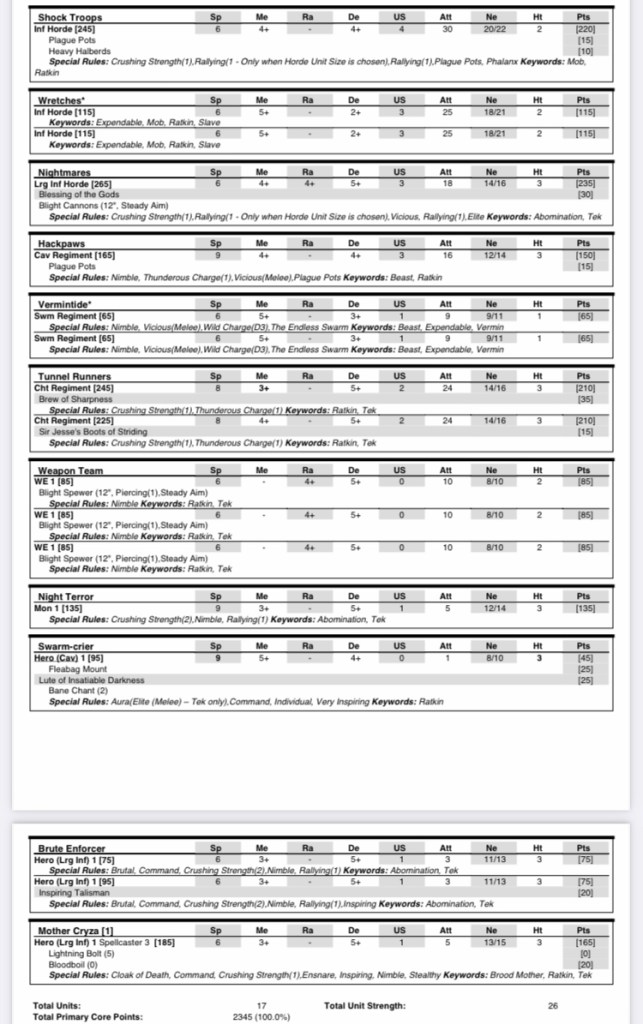
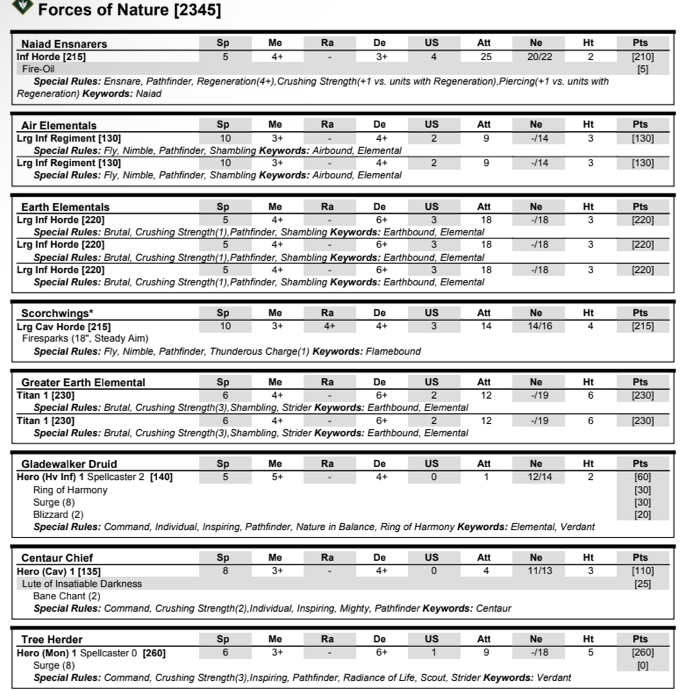
The removal of Scud meant I had the chance to add a couple of Wretch hordes with an inspiring Brute Enforcer to my usual choices. I also decided to include a Nightmare horde which was something of an experiment as I haven’t been blown away by their performance year to date, but I reasoned, they have also not had shooting support from no less than three weapons teams. Maybe this would be the key to getting the most out of this unit without painting up another horde or two. In the end I settled for the following list:
Game 1 vs Forces of Nature
The scenarios for Reaper events can be a little different. The first was a combination of Kill and a chase scenario. Everyone going to the event brought a special chariot-based Reaper character in addition to our armies. I’m not going to go into the details as the character didn’t have a massive impact on any of the games, with the exception of the first one. For the first game points were scored on whether we could keep the character alive and get them over to the opponent’s table side, as well as for the amount of enemy troops killed.
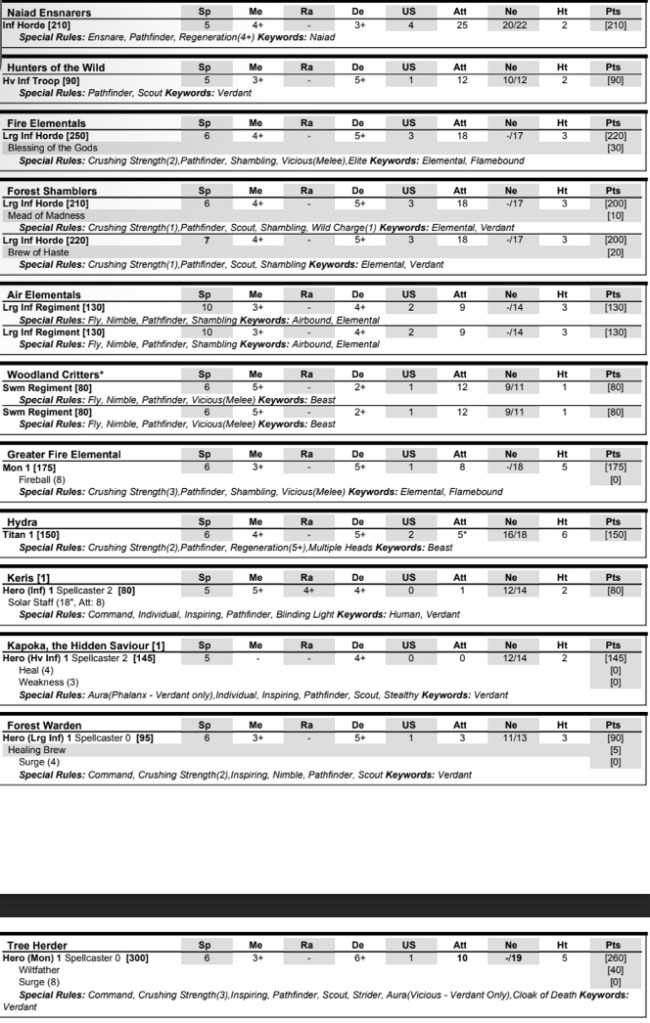
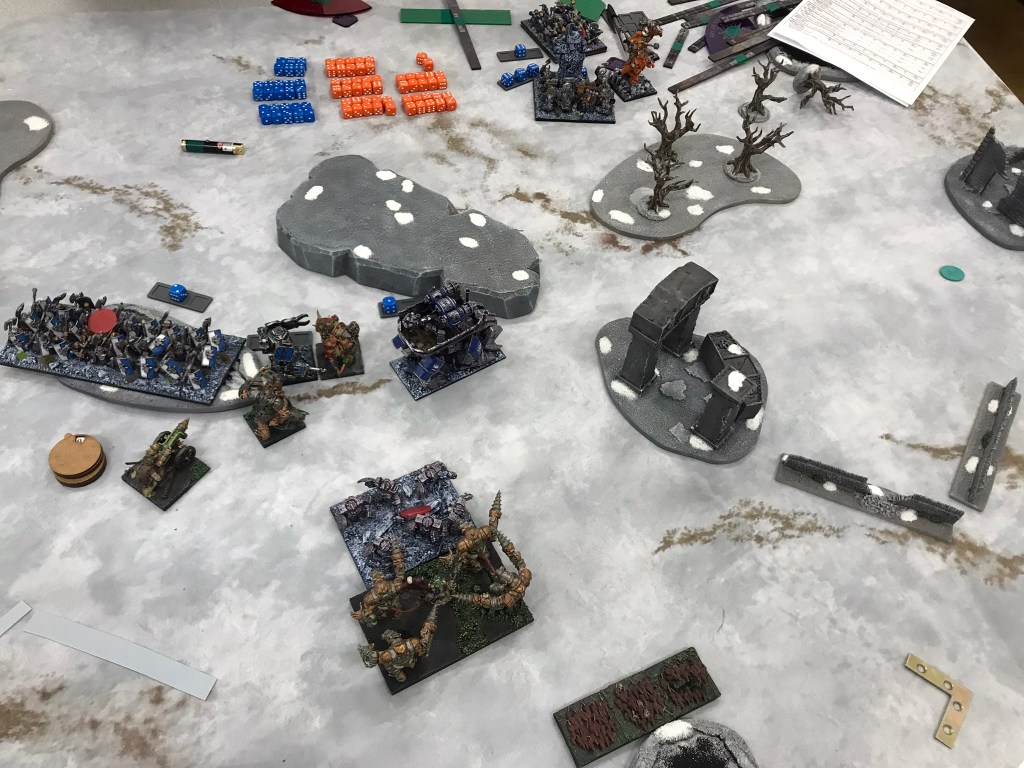
The emphasis of this scenario, for both me and my opponent came down to keeping our characters alive and getting them to the other side of the board. To that end we focused our forces at either ends of the table. My heavy hitters mustered on my right-hand side of the table, whilst my opponent had the bulk of their forces on my left, with what could best be described as token forces attempting to slow down and kill off the characters. In both cases our defending forces could do little to really break the onslaught charging towards them. On my left flank a horde of wretches, the shock troops, a brute enforcer and a regiment vermintide failed to make a particularly impressive stand against forest shamblers, the Wilt Father, air elements, and a whole host of other environmental nasties. Whilst on my right the tunnel runners and shooters easily cut through the resistance offered by fire elements, a hydra and a horde of naiads. There was a moment of high drama when I accidentally left my special character open to a charge from the naiad horde, but fortunately a spectacularly bad set of dice results left the character with only one point of damage. The sharpness tunnel runner regiment then had a flank charge on the naiad horde, which subsequently disappeared.
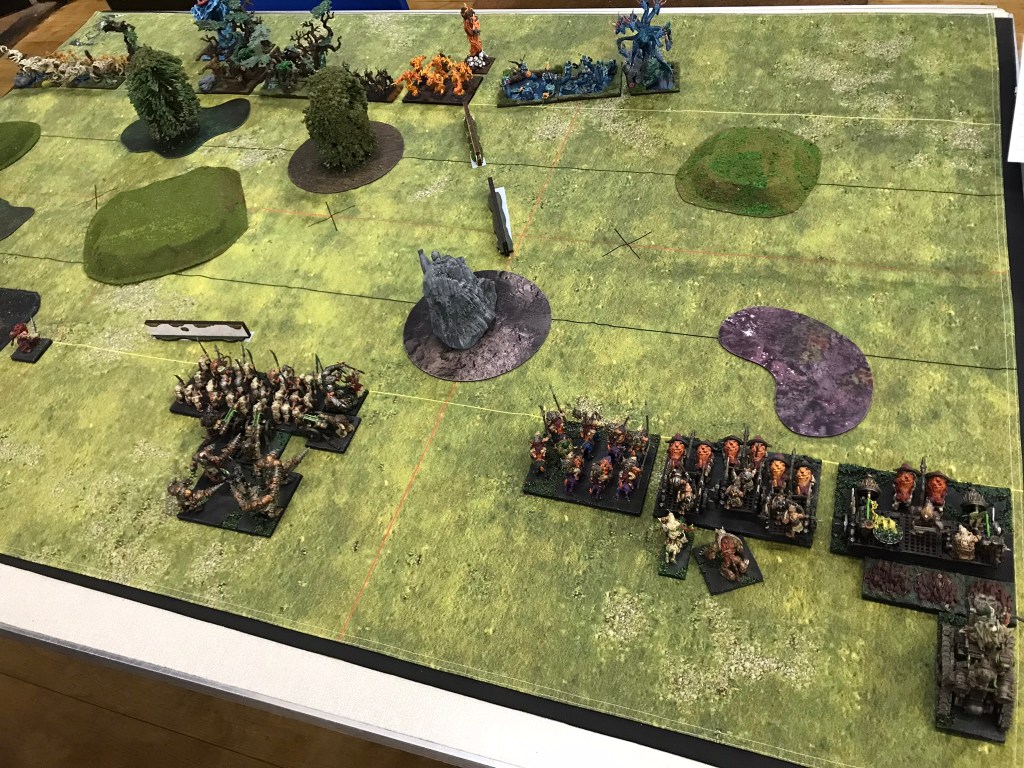


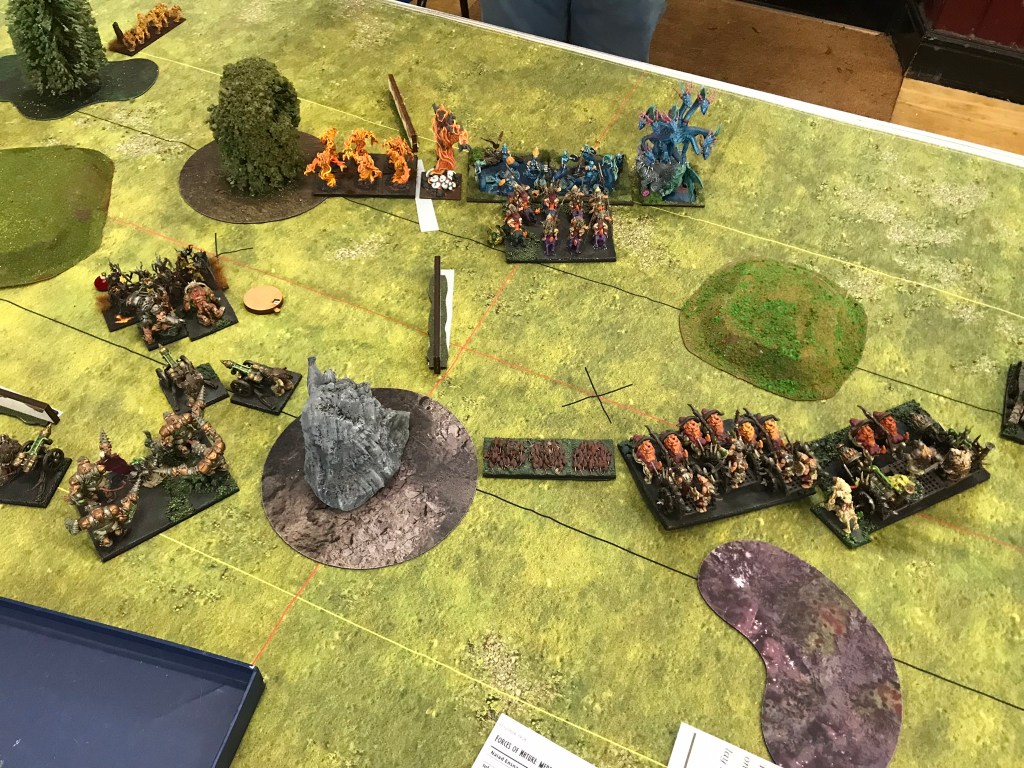


However, by the time the dust settled, our main fighting forces were too far apart from each other to have really caused sufficient damage to one another for there to be a clear winner based on kill points. I had taken off a little more of my opponent’s force than he had of mine, but it was not sufficient to break the impasse of a draw. All in all, though this was a massively fun game, and a great way to kick off my last event of the year.
Game 2 vs Dwarfs
The scenario for this game required each player to place a loot counter on the centre line. Grab the counter and carry it to a deployment zone. You got one point if you took it to your opponent’s deployment zone, and two for taking it to your own. Once you got it into a deployment zone the counter would then return to the centre line and could be picked up again.
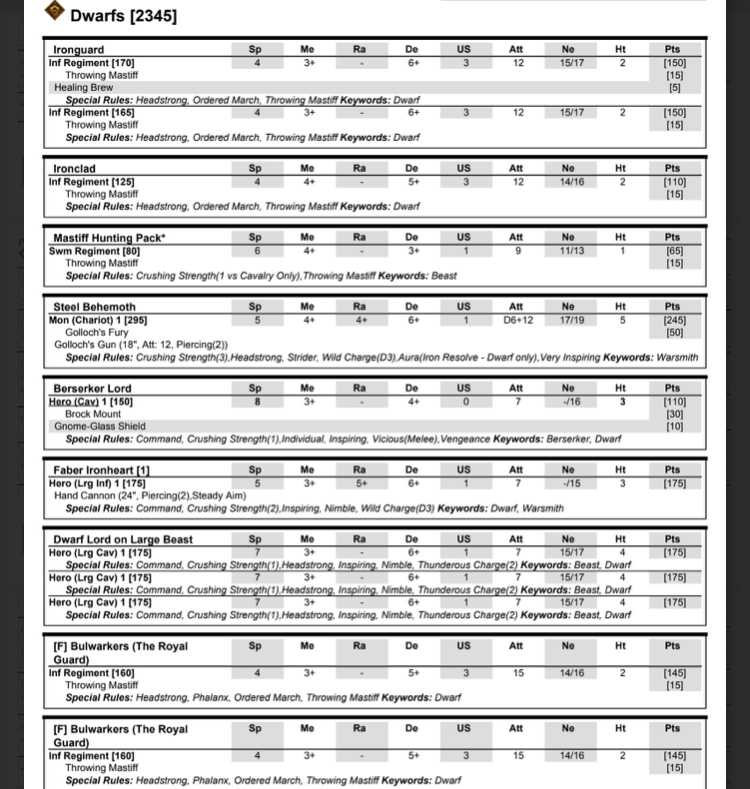
I was a little worried going up against the dwarfs. This was mainly because I felt I lacked sufficient crushing strength to quickly cut through all the defence 6 they had brought, in particular the three lords on big beasts. For some reason I ummed and ahhed before choosing to go first after winning the dice role to decide who should go first. My opponent nudged me gently into taking first turn though and I very quickly became glade he did.


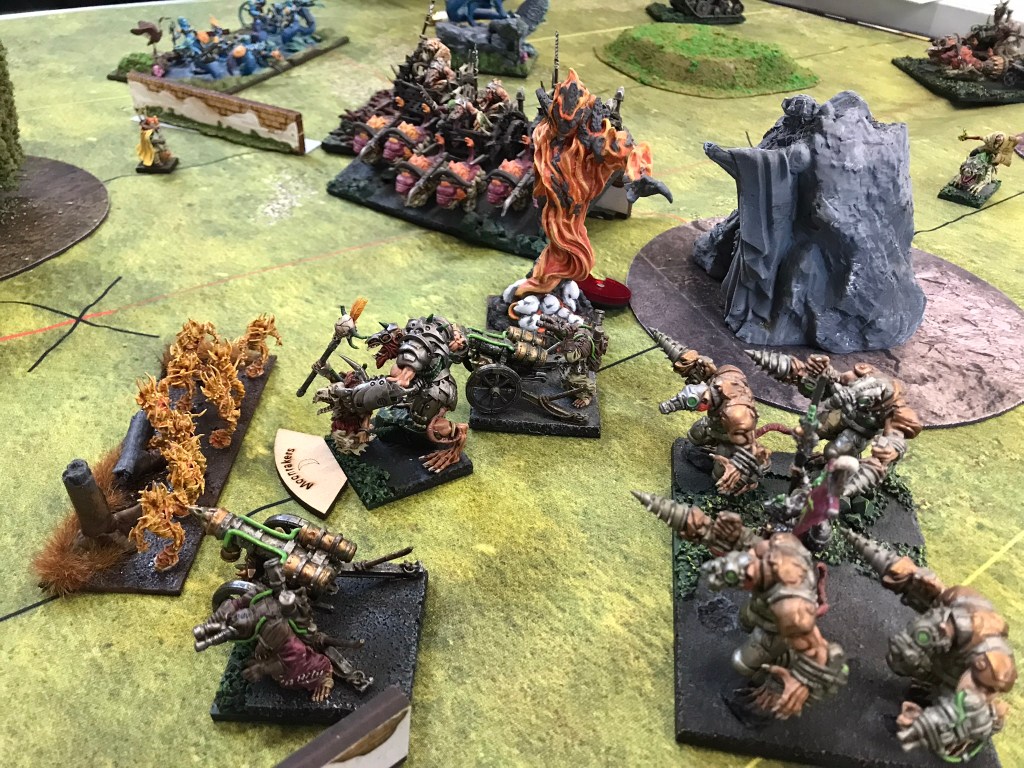
We had set up so we had similar capabilities opposite each other. On my left flank I had my tunnel runners, night terror and shock troops, opposite his beast mounted lords and infantry. In the centre I had focused my shooting units with the wretch hordes, against Goloch’s Fury and the iron guard.
In the first turn my night terror shot forward and secured the loot counter on my left flank whilst the remainder of the army hung back, ready to charge in if any of the dwarfs decided to charge into the wee beastie. In response the dwarfs moved forward trying to close the gaps between them and the counters without breaking ranks and offering potentially favourable charges to my toughest units.
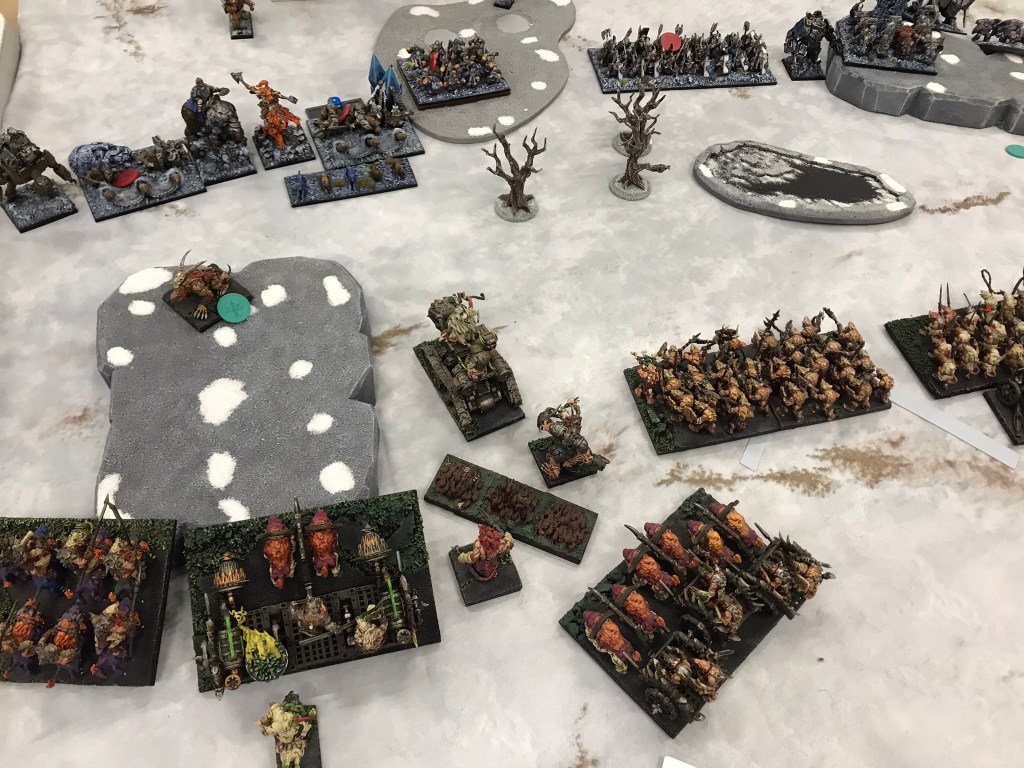
The result of this was that the night terror was able to start smuggling the first counter back behind my lines, towards my deployment zone. In the centre, the lack of dwarf speed resulted in my wretches being able to form a wall between the tokens and the dwarfs, allowing a vermintide regiment to grab the requisite token. Over the next few turns I slowly carried the counters back to my deployment zone to score four points, whilst using the rest of my army as chaff to block the pursuers. Not much of the rats remained by the end of the game, but it was a win none the less.
I spent a bit time talking through the scenario with my opponent afterwards, and whilst it is a really interesting concept we felt it wasn’t as balanced as it could have been, and gave a massive advantage to the player taking the first turn. I also believe that the composition of our armies made the scenario even more challenging. This is because we both has fast units that could claim counters from the first turn, we then had units perfectly suited to blocking the loot counter carriers on their journeys to the scoring zone. In addition to this neither of us had flyers or long-range shooting, which limited the opportunities to take out the counter carriers. The game certainly felt quite one sided from about turn three, so whilst it was a win a bit more consideration to get the scenario to a really good place would make it more fun. I would love to see a future iteration of this at another event.
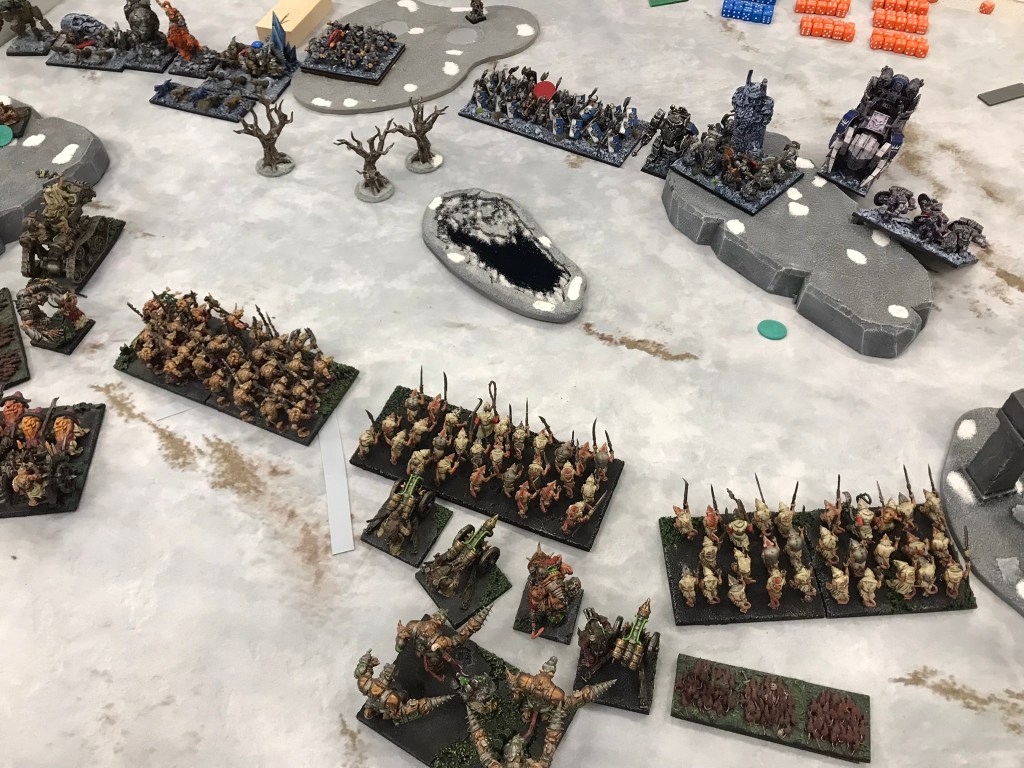
Game 3 vs Forces of Nature
The scenario for this game was Wrack and Ruin, an actual scenario from the book! Crazy!
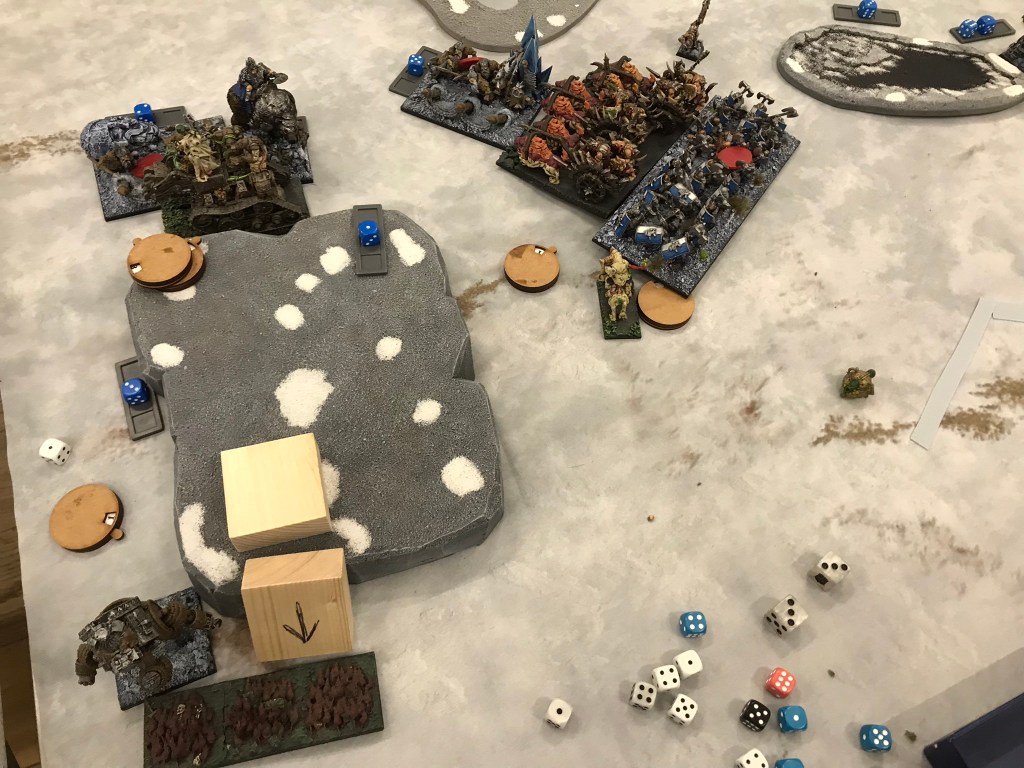
This game was my second game of the year against Forces of Nature and my second game of the event against a wall of defence six. Wrack and Ruin tends to be one of those scenarios I don’t particularly fare well in. I generally make a big mess of how I spread my forces, and this time around was no exception.
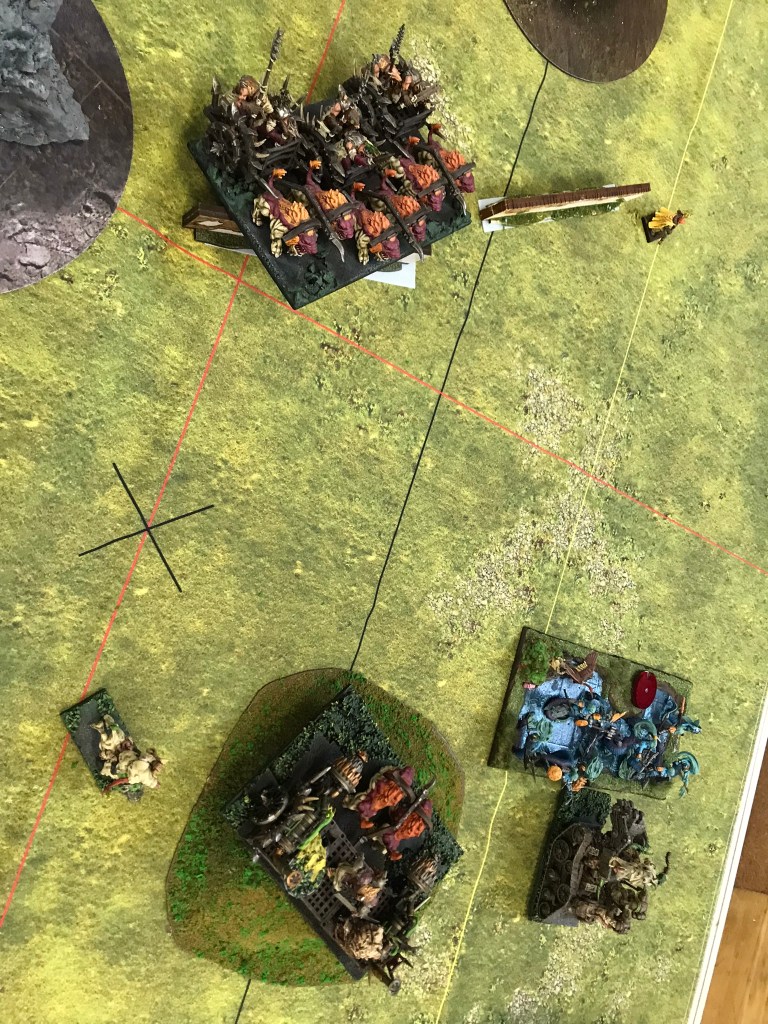
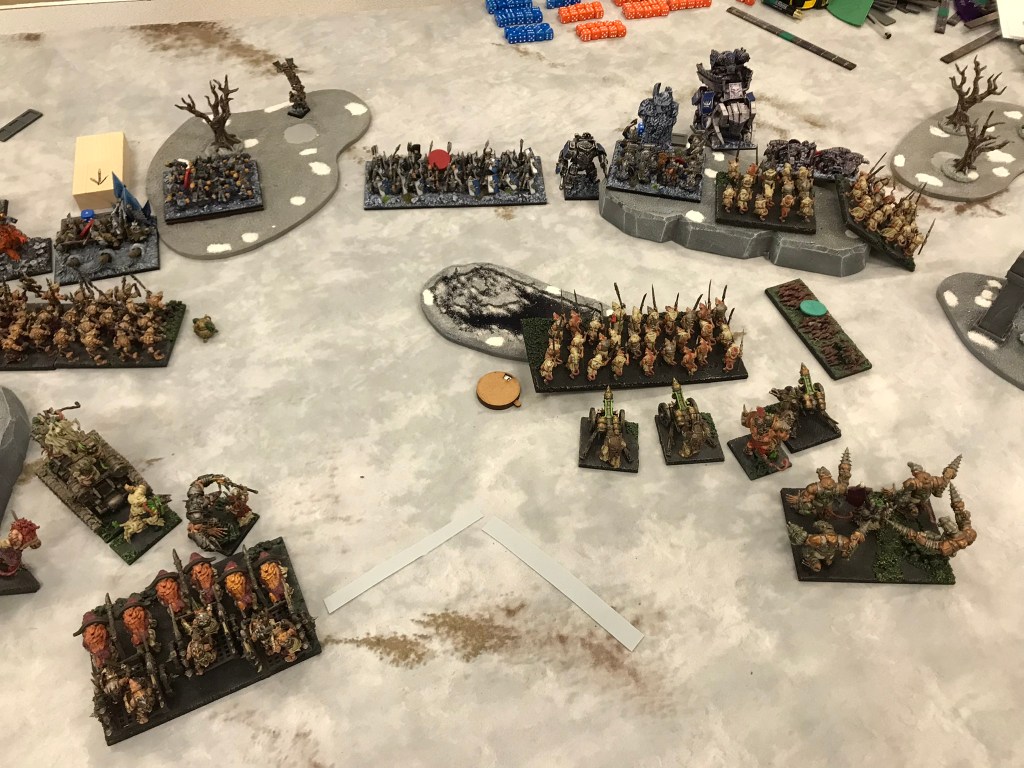
I decided to go in heavily on the left dominate zone, whilst leaving a solid distraction of unit strength on the right. So, the shooters and the wretches went to the right and the tunnel runners and shock troops went to the left. Moving slowly forward it looked like I might just have the balance about right, possibly even perfect as I managed to score in both circles in turn three. I hoped another round like that would clinch me the win and I wouldn’t need to worry about the attrition of the rats for the rest of the game as the maximum points my opponent could score would be three from turn five onwards. Sadly, I ended up being a little over optimistic as to just how quickly I could kill the durable elementals and naiads and slowly the tide turned, spurred on by a double one on a devastated horde of earth elements.


Unfortunately, the army just didn’t have the strength it needed to munch through the enemy, and with no healing nature ground its way through the brave vermin in both circles until a handful of rodents remained to see out turns five and six. However, despite the decisive victory for Nature the turns leading up to turn five were filled with some fantastically dramatic dice outcomes that saw scorchwings held at bay by successive waivers and mighty elemental one shotted by shock troops, dangling a glimmer of hope ahead of us, not to mention making an incredibly fun game and a great way to end a year of playing rats.
Overall, I believe I finished eleventh, but most importantly had a great day playing some fantastic games with some lovely people. It really is the best way to round off a pretty incredible year of gaming. This is my second year attending the Christmas Shroud of the Reaper event, and I would really recommend it to anyone wanting an event that’s a bit different. Now it’s time to pack the rats up and get on with putting the finishing touches to my halfings as it won’t be long until the new moon rises.
Oh, and as to whether I should have Scudded or not… with the benefit of hindsight I can say I probably should have.
Have a great Christmas and a happy New Year.
By the way, did you know you can pop your email address below and subscribe so you won’t miss out on any future posts.
