
I have finally made it to a Pride of the Shire’s event, run by the inimitable Si Brand, and what an event it was. Not only was the Banbury rugby club a beautiful venue, but the view over the rugby fields (pitches, courts, rectangles?) on a sunny spring day really made for an amazingly appropriate Shire day. A perfect backdrop for playing rats.
However, this was not a normal event, far from it. In one way or another Mr. Brand managed to put together one of the most challenging events I’ve ever been to. First up, it was a four-game day, that means four lots of thinking. Next was the army size, 1800 points. Definitely not standard, and a limit I found really hard as my general feeling about Ratkin is that the lower the points value the harder it is to get a really solid feeling list together. Consequently, I spent quite a lot of time trying to come up with a something, only to decide I was over thinking it, giving up and then throwing something together last minute which I hated, didn’t test it and then managed to convince myself it was not going to work the moment I had submitted it!
Why did I feel so strongly about it? Lots of reasons, but mainly I just felt it lacked in the killiness department, also no Scud (I feel I have issues). So, what did I end up taking?
The next challenge laid at our feet was that scenarios had to be chosen by the players. Each round we were presented with a pool of three scenarios, some of which were not standard scenarios (to add to it all). Players then rolled off, the lowest got to remove one of the three, leaving the winner to choose between the remaining two. This did mean that different tables were playing different scenarios each round. My approach to this was to aim for the easiest scenario each time around, and it broadly panned out. So, the day commenced.
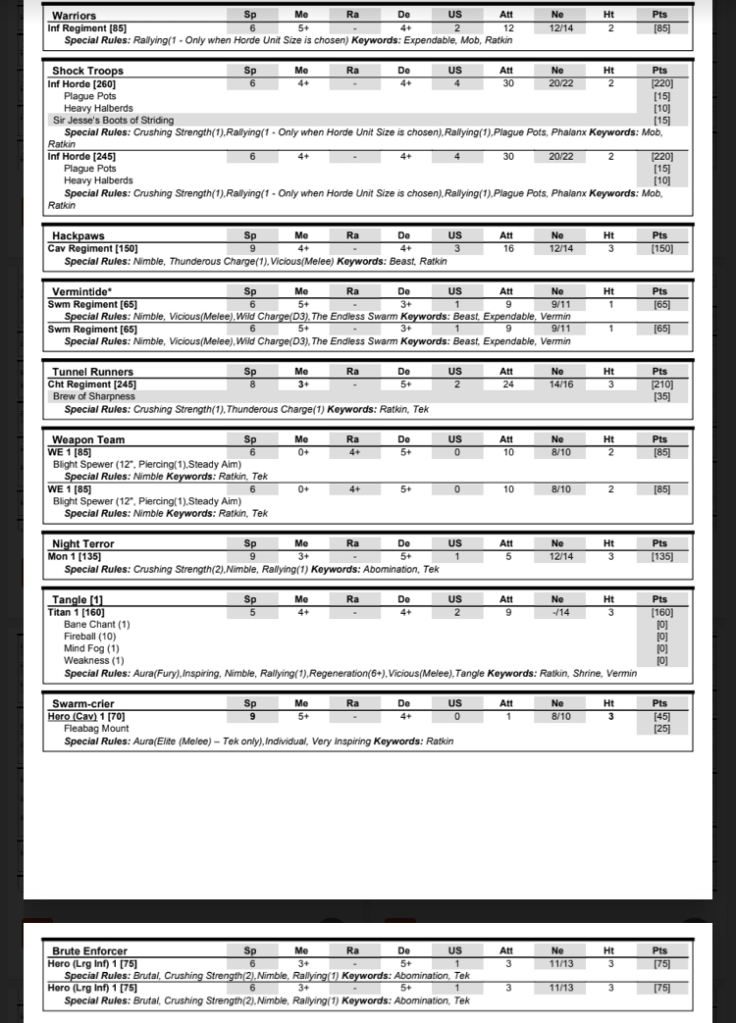
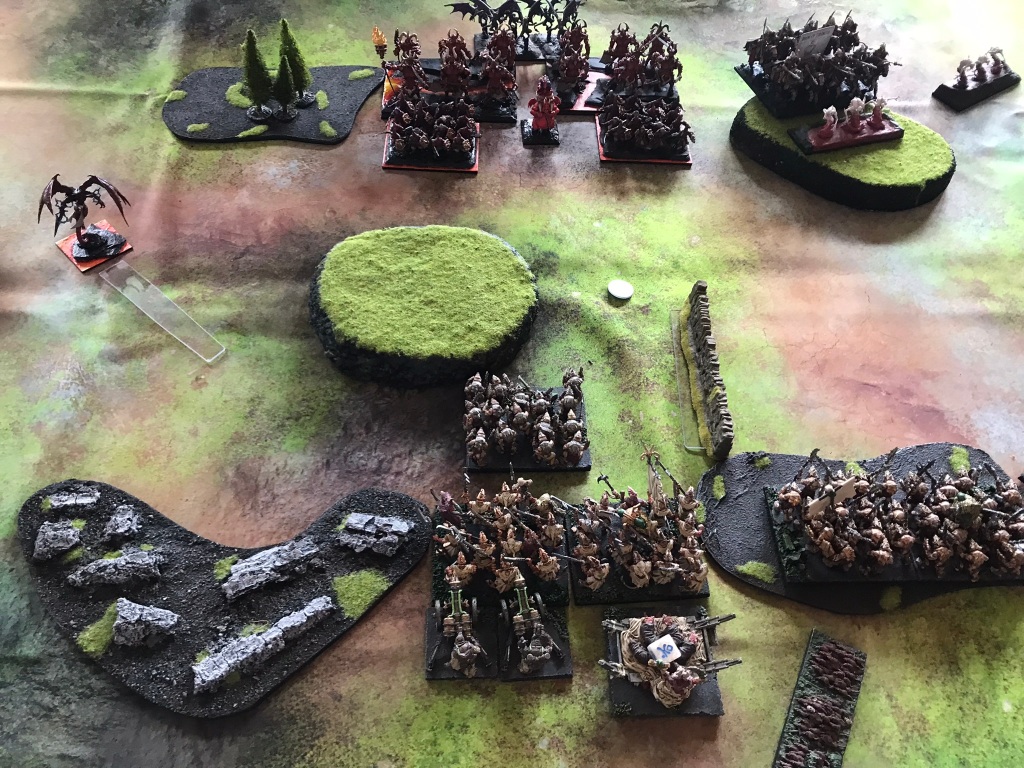
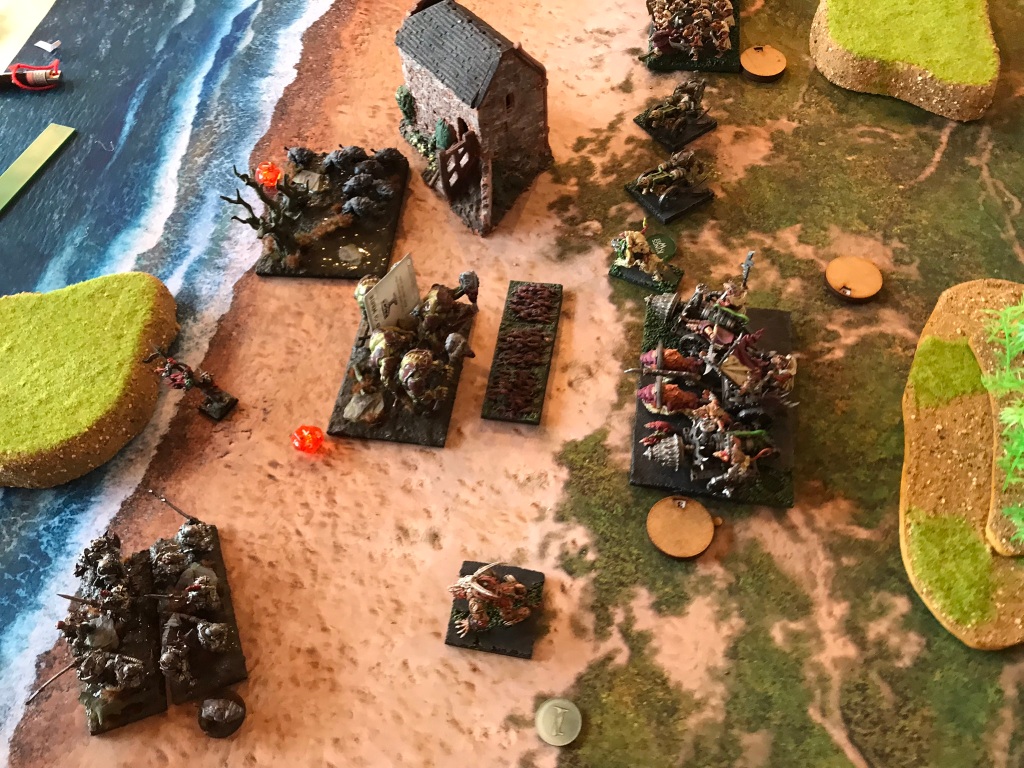
Game 1 vs Varangur, Control
I think it was partly reading this list the night before the event, knowing I would be playing it the next morning, that really removed any confidence I had remaining in my list. With lots of fast-moving threats, stealthy and reliable shooting this was exactly what I didn’t want to see. I knew my chaff would melt like butter in the face of so many solid units leaving my heavy hitters exposed to the nasty northerners.


What didn’t help was that my opponent had a great grasp on her list and that I decided to “try something a bit different”. For “reasons” I decided that rather than put all my fast stuff together to sweep away whatever they ended up facing on one flank and using my pretty cavalry proof shock troops to secure the centre, that I would put the hackpaws and one horde of shock troops on the left flank, facing the night raiders, ravagers and Magnilde, with the other shock troops and the tunnel runners in the centre facing the Sons of Korgaan. My rat warrior regiment went off to the far right of the board and ended up facing the fallen.
I have to admit that things on the right went absolutely swimmingly. The warriors managed to keep the fallen out of the main fight, of course they died, but that was exactly what they were there to do.
I would even go as far to say that things went okay in the centre with the war engine teams chipping away at the Sons of Korgaan and preventing them from simply bulldozing into my central zone. However, part of the plan, and the reason the fallen stayed out of the game was because they were holding one of the right-hand sections, and the draugr were holding the other right-hand section. Both of these things I had accepted as being part of the plan. That meant I needed to hold more than my own central section at the end of the game to win, and this is the part of the plan that fell apart.
Things on the right started to feel uncomfortable from turn two, and swiftly became massively dubious in turn three. The central engagements started off alright. The shooting from the raiders wasn’t ground-breaking, an acceptable exchange of units saw the reavers off. Unfortunately, Magnilde played a blinder. My hackpaws had managed to run up the edge of the left flank in the first two turns and were staring at the flank of the night raiders. I was expecting them to get charged by Magnilda and thought that they would keep her busy until the end of turn three, although I was expecting them to be waivered. When Magnilda managed a mere four wounds on them things were looking good. Unfortunately, she then rolled the ten required to take them off the board. To make matter worse, in turn three she charged the shock troops and rolled a double six on the nerve test, shutting down one of my hammer units for a crucial turn.


All this meant that by turn four most of my units on the left had gone and the shock troop horde was not long for the world. With the units in the centre unable to lend a hand the raiders finished off the shock troops and claimed the flank in turns five and six.
All in all, this was (in the main) a game that started out as a close fought game against an opponent who knew exactly what she was doing, until everything fell apart in the rat lines. In retrospect, in addition to my initial positioning of units not being quite right, I also realise that I should have probably not chosen to fight on the side of the table that had a building dividing up the area where the majority of the fighting was going to take place. Although I’m not sure how much of an impact it really had, it definitely made it harder for the units in the centre to provide any real support for the beleaguered units on the left.
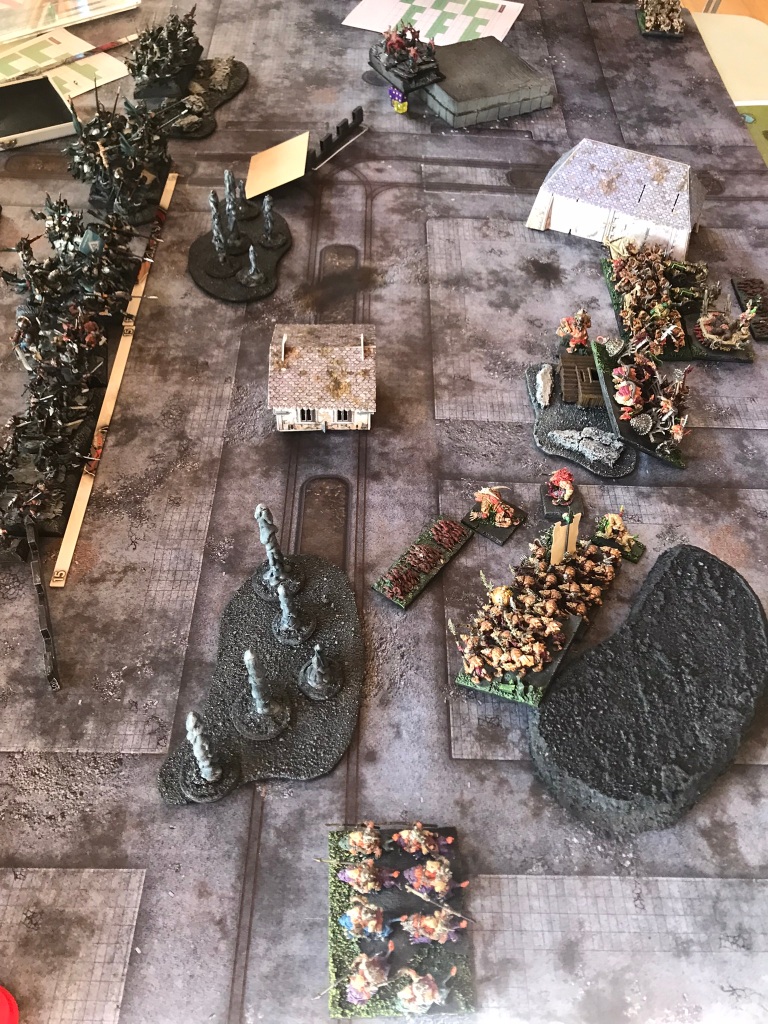
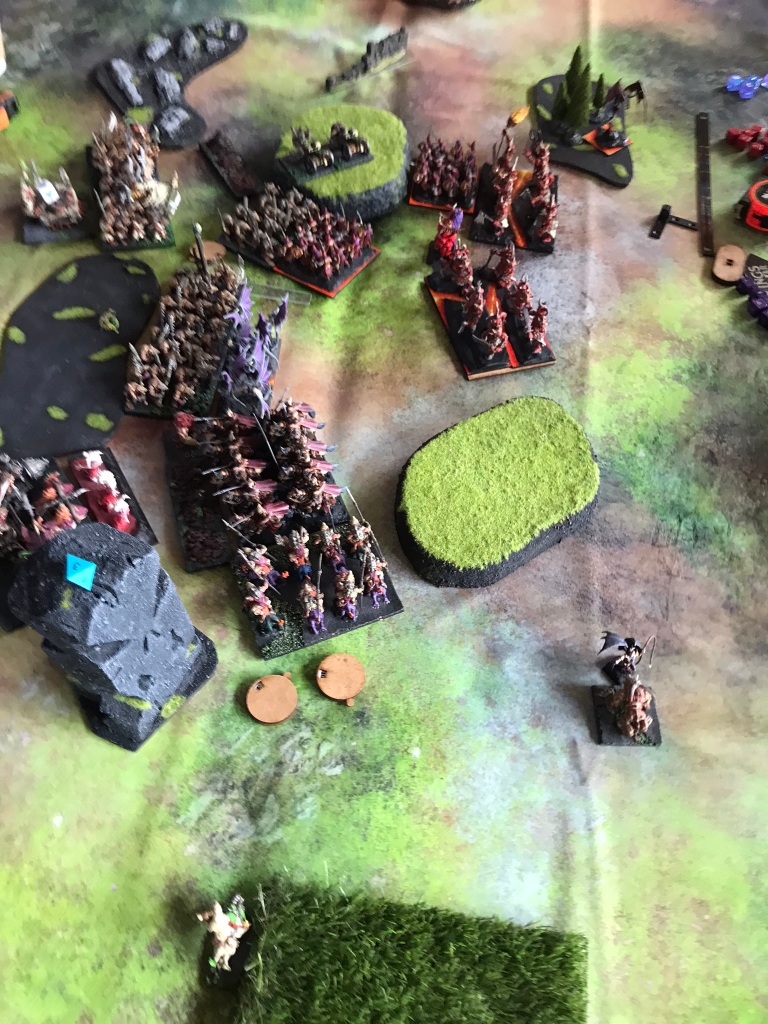
Game 2 vs Forces of the Abyss, Kill/Eliminate
With one army full of killy horribleness out the way, it was onto the next. It’s been a while since I last played the forces of the abyss, and it did not go well. However, this was a different day and a different player.


The scenario we chose was a version of kill where, in addition to scoring points for the amount of the opposition consigned to the dead pile, there were also points to be had for keeping your biggest monster or titan alive. This probably wasn’t the most balanced scenario for me to choose because my opponent’s biggest beastie could fly and shoot seven lightnings bolts, meaning that it could quite easily stay away from me, whilst still chipping damage off my units. My biggest titan, on the other hand, was my tangle, which provides any number of different types of support to the army and so would have to be somewhere near the fighting virtually every turn! I might not have thought this one through.
I returned to my default set up with shock troops and the tangle in the centre and the faster elements on the right flank, won first turn and pressed forward. My opponent matched my set up with molochs and ghouls in the centre and abyssal horsemen and tortured souls on my right.
As fortune would have it my hackpaws and night terror managed to get a cheeky charge against a lone regiment of tortured souls on the end of his line. The regiment was out of sight of the units next to it (with the exception of the seductress), making it an excellent opportunity to take a unit off the board and get access to the abyssal flanks. The rat riders made short work of the tortured souls and turned to stare aggressively at the horsemen.
This forced my opponent’s hand, and he sent the remaining tortured souls, the horsemen and gargoyles forward to block up my right flank, however a double one by the horsemen as they tried to drive of some vermintide created a bit of a blockage within my own ranks that prevented multi charges that would reliably kill anything. Fortunately, the hackpaws, who had survived a half-hearted savaging by the succubus managed to get a flank charge into the horsemen, but without their thunderous charge they failed to kill the horsemen as well.


I was starting to worry the right flank might become a bit of a tar pit, which I wasn’t set up to survive. One of the moloch hordes charged into the hackpaws and deleted them. In return, the night terror charged them in the front and a brute enforcer managed to get a flank on them at the same time. Normally I wouldn’t have seen this as anything other than a holding tactic against the formidable creatures, however, they had sustained wounds from shooting the previous turn that they hadn’t regenerated and the swarm crier was able to manoeuvre into a position where he could lend his elite aura to the fight which meant all eleven crushing two attacks landed, before the enforcer’s brutal was taken into account. I do think this particular combo is one that’s worth watching out for on the battlefield as it punches surprisingly hard now thanks to the elite aura.
The molochs went down, which inspired the vermintide facing the abyssal horsemen to do just enough damage to drive them off the table. Suddenly the right flank was looking very empty (if you weren’t looking for rats that is). The centre had been largely uneventful up until this point. The two bodies of infantry had crept towards each other and exchanged a handful of uneventful shots, but things were about to change – in ways that neither I nor my opponent could have realised.
Just as we finished the fourth turn the rats were slightly ahead due to kills, and then the round clock for the event went off and the whole room had to down dice. I think it’s fair to say that my opponent and I had something of a relaxed game. A clock issue early on had led to us abandoning it, and I think it’s fair to say we weren’t exactly playing the most super competitive game of our lives. In some ways it was a shame we didn’t get any further as it had been a really enjoyable and relaxed game, and the tide was very much turning in the rat’s direction. All this meant the rats scraped a win based on kills.
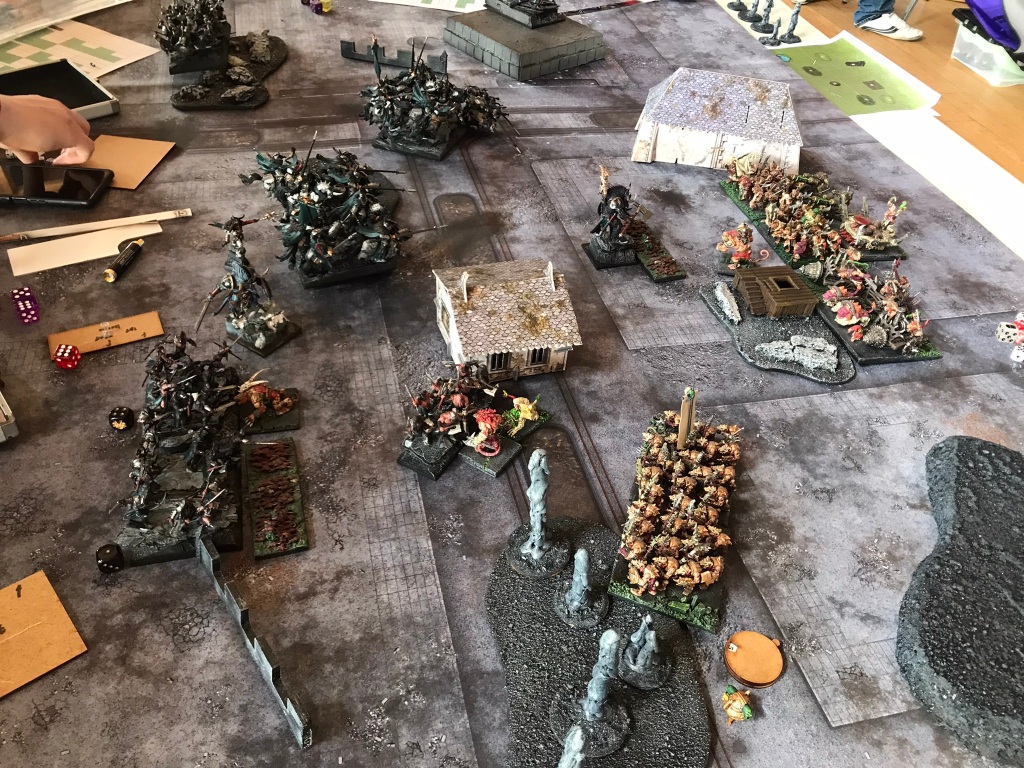
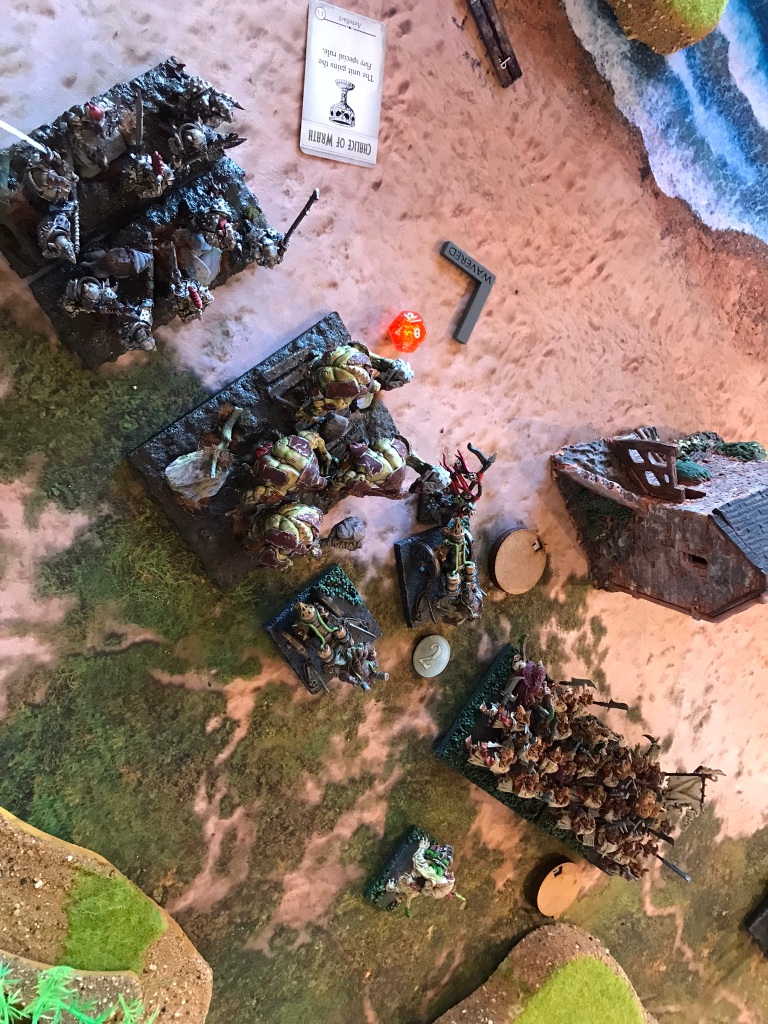
Game 3 vs Halflings, Hold the Line
It’s great to see halflings on the table again. They really are a great army, super characterful and, at times, surprisingly nasty.


I reverted to type, following my success in the previous game. The fast stuff went on the right with the hordes of shock troops and war engine teams in the centre. I also threw my warrior regiment as far out to the left as I possibly could to see if they would go for the distraction. My opponent responded by spreading his line across the board. There were wild runners at the far ends of the line, lancers on my left, spears and balloons in the centre and poachers, more spears and the Pride of the Shires on the right.
I moved forward on the right as quickly as I could, keen to shut down the shooting, as halfling shots tend to add up pretty quickly. In the centre I hung back, not excited about having to deal with the balloons and wondering if there was a scenario in which I didn’t have to feed a shock troop horde to them.
As expected, the shooting from the poachers, iron beast and wild runners on the right almost immediately took its toll and waivered the night terror, who I had been hoping to charge into one of the shooting units in the next turn to shut them down. In the centre the halflings moved forward very carefully, positioning the harvester and spearspike horde in such a way that they could not be reached by the war engine teams in the next turn.
Unfortunately for the halfling’s their careful positioning was for nothing as my opponent forgot to measure the distances between the guns and his balloons. Fortunately for me my dice did their job and by the end of the second turn the balloons were little more than distant memories. With this threat removed the rats could push forward.
Second turn charges into the regiment of spearspikes and the wild runners on the right saw the spearspikes removed by the tunnel runners and the mounted archers waivered. In return the iron beast charged the tunnel runners, but only managed a handful of wounds. The stand off in the centre continued as the wild lancers made their way through the woods to threaten the centre-most horde of shock troops.
Turn three saw the halfling right flank dissolve. The iron beast went down to the tunnel runners and a brute enforcer, the wild runners routed to the hackpaws, and suddenly the poachers were surrounded. In the centre a vermintide regiment delayed the wild lancers whilst the rest of the rats prepared to charge in the next turn. There was little the halflings could do now. With the tunnel runners positioned to flank charge the poachers in the next turn they fought the fights they were in and did their best to prepare for what was to come.


In turn four the poachers fell, and the shock troop hordes charged the wild lancers and spearspikes, starting to wear them down. The harvester managed to take out the tangle but ended up locked in a fruitless battle with vermintide for the rest of the game. In turns five and six the rats removed the spearspikes and wild lancers, positioning to take all three of the scoring zones for the second rat win of the day.
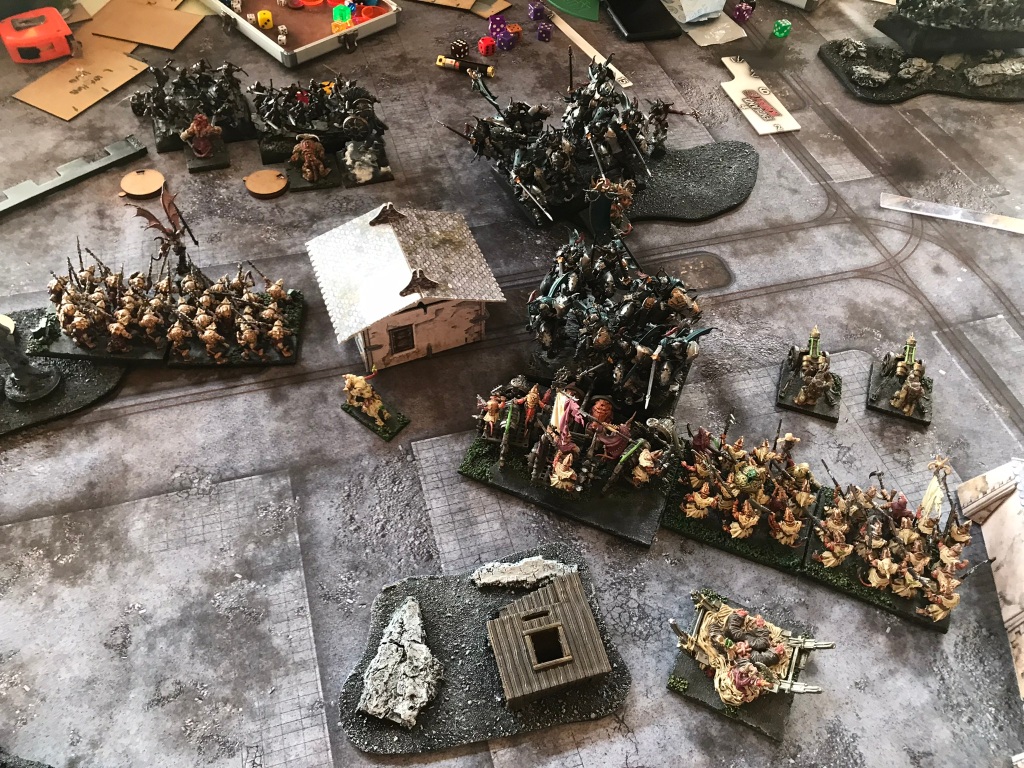
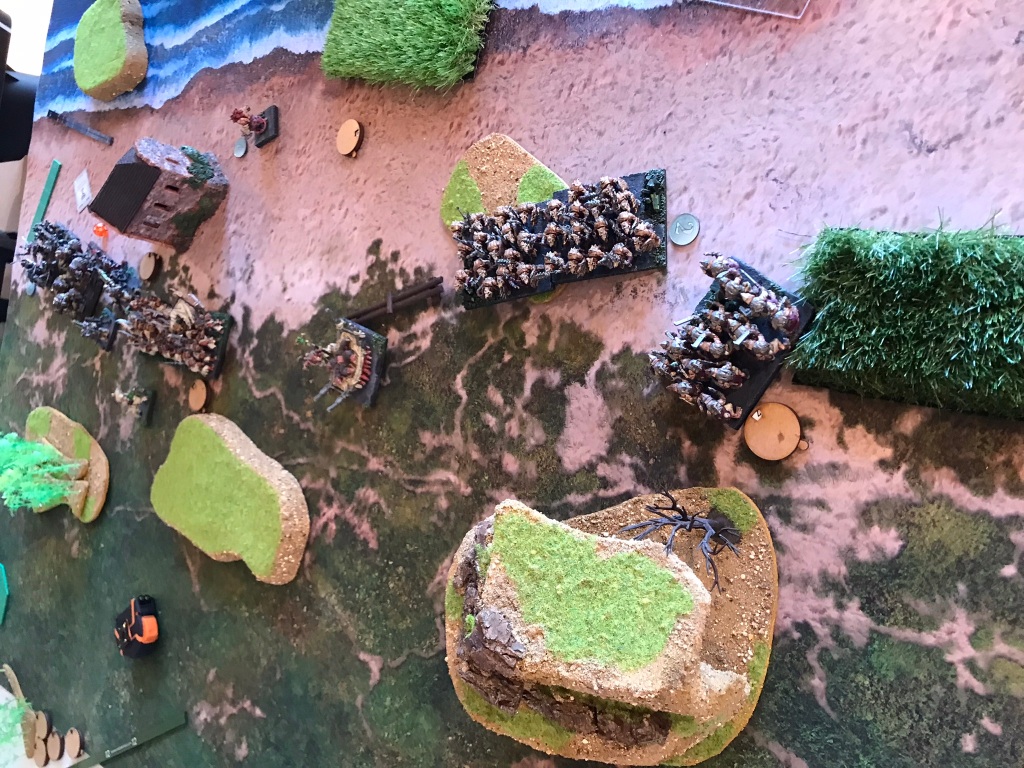
Game 4 vs Goblins, Smoke and Mirrors
So, we came to the final match up of the day against goblins. This was a very beautiful army that had absolutely no shooting and no Groany Snark, which was a bit of a turn up for the books. That being said the presence of the dreaded bangstick formation, a giant and a couple of hordes of trolls made me more than a little nervous. In all the excitement I also forgot which of my tokens I had put where, which made the game immeasurably more difficult.


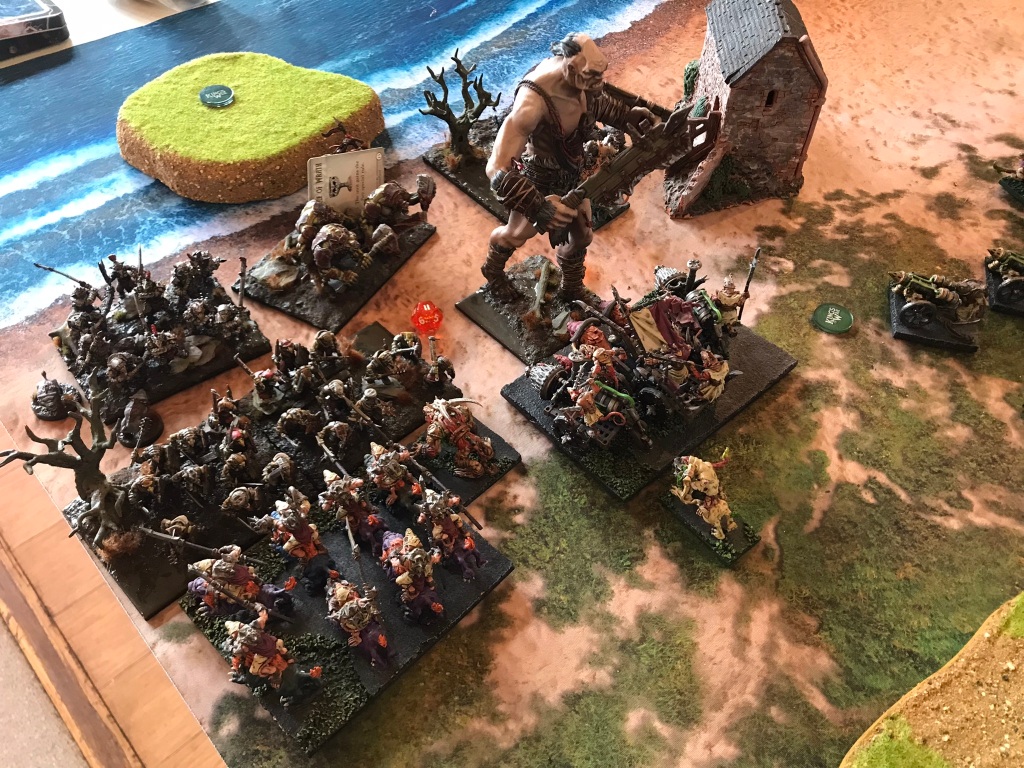
My opponent set up in a way that I really wasn’t expecting, with most of his troops on my left flank, leaving a horde of trolls in the centre with the mawpups, and the fleabag riders on the far right. I maintained my, so far, game winning set up.
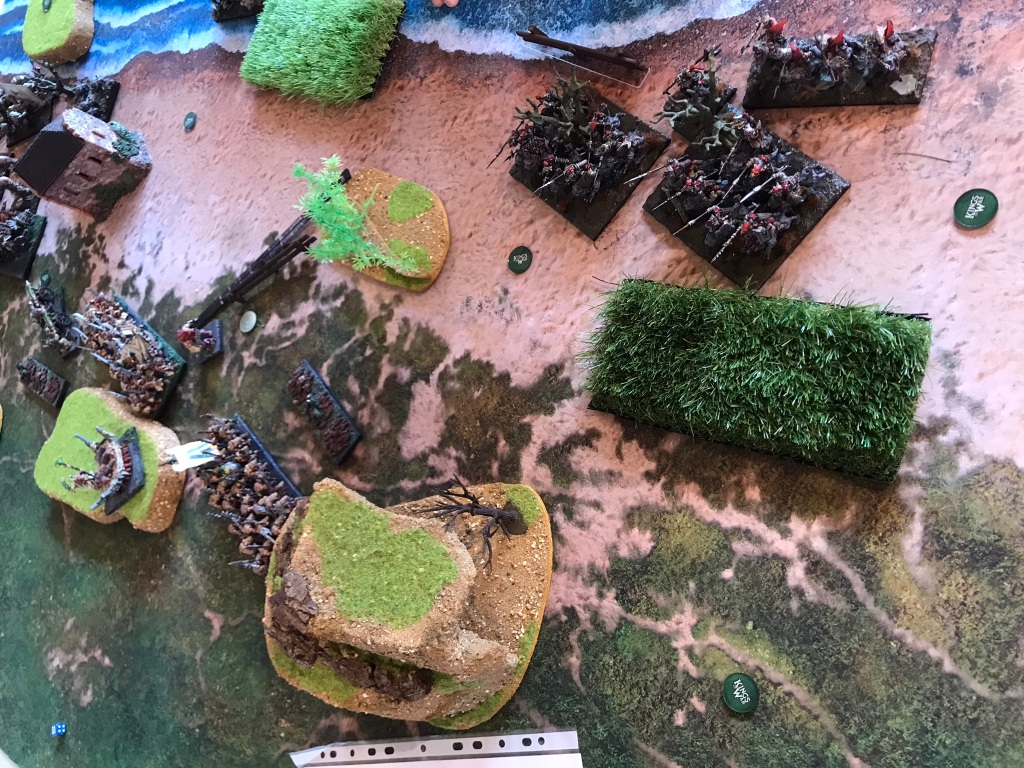
Not surprisingly the goblins on my left started to move up and the fleabags started to make their way towards the centre. I have to admit I have never been so happy to see a giant, as it was the perfect target for my war engine teams who managed to knock off about seven wounds in their first turn of shooting and marked the start of a prolonged grind on that flank. The tunnel runners removed one of the infantry hordes, whilst the hackpaws and night terror started munching on goblins from the other horde. I was in no hurry to see the second horde get destroyed as that would clear the way for the luggits and trolls to join the party, which would have overwhelmed my poor tunnel runners.
Having seen the fate of the first goblin horde the giant took a swing at the tunnel runners, failed to do very much, and was then run down in response. In a tit for tat trade off the trolls and maw pups ate a brute enforcer before the weapons team shot the maw pups off the table. Eventually the second goblin horde died, although they did manage to take down the hackpaws, and suddenly the luggits were in the fight. Frustratingly the tunnel runners failed to kill the trolls and all of a sudden it looked like the tide was turning on that flank.
On the right side of the table the fleabags danced around the shock troops, but the rats wouldn’t give them the satisfaction of a double charge. With superior unit strength the rats began to push forward and claim objectives, the tangle taking one and a brute enforcer heading off towards another. The trolls in the centre did their best to distract the shock troops, but their hearts weren’t in the fight and the elite rat warriors saw them off with relative ease, before side stepping towards an objective worth two points. The shock troops in the centre saw an opportunity to get at one of the bang stick regiments, charging and killing the goblin king, but failing to roll enough to follow through into the goblin cavalry behind him. The riders promptly made their way around the rats to claim the other two-point objective, however a turn seven allowed the shock troops to get a rear charge on the cavalry and claim the objective from them.

The drama on the left continued until the last roll of the dice. The luggits had claimed one objective and the trolls, having butchered the tunnel runners, were doing their best to get at a token, held by shock troops. Unfortunately, the war engine teams stood in their way. The trolls were already carrying some wounds which meant shooting from the guns easily waivered them in each of the remaining turns of the game, meaning that all but one of the objectives remained in the hands of the rats, giving the vermin a third and final victory.
Final thoughts
Well, that went a little better than I originally thought it was going to go, and I ended up really enjoying the list because of all the chaff elements. My war engine teams were undoubtedly the stars of the show, blasting balloons out the sky, seeing off giants and generally making a nuisance of themselves.
Whilst the list ended up being fun to play, I’m not sure I would take it again, with the benefit of hindsight. I’m still not quite sure what I would do instead, but I did feel as though it could have done with a little extra punch. I now find myself in something of a perma-quandary about the pros and cons of long-range shooting versus short range shooting. I believe that ratkin do need some sort of shooting in lists, but each choice feels incredibly nuanced in terms of what it brings to the table. Instinctively I prefer long ranged shooting, because you can start hitting things much earlier in the game, but the weapons teams just always seem to work so hard.
One option I haven’t really tried that much are the clawshots, which generally don’t get seen in the UK much. I have tested out one troop before and was pleasantly surprised with their performance, but feel I need to consider more than just one unit, but we shall see what the future holds.
For now, though all that remains is for me to say a very good evening to you all and send a massive thanks to Si Brand for hosting and all my wonderful opponents for a series of fun and memorable games.
